


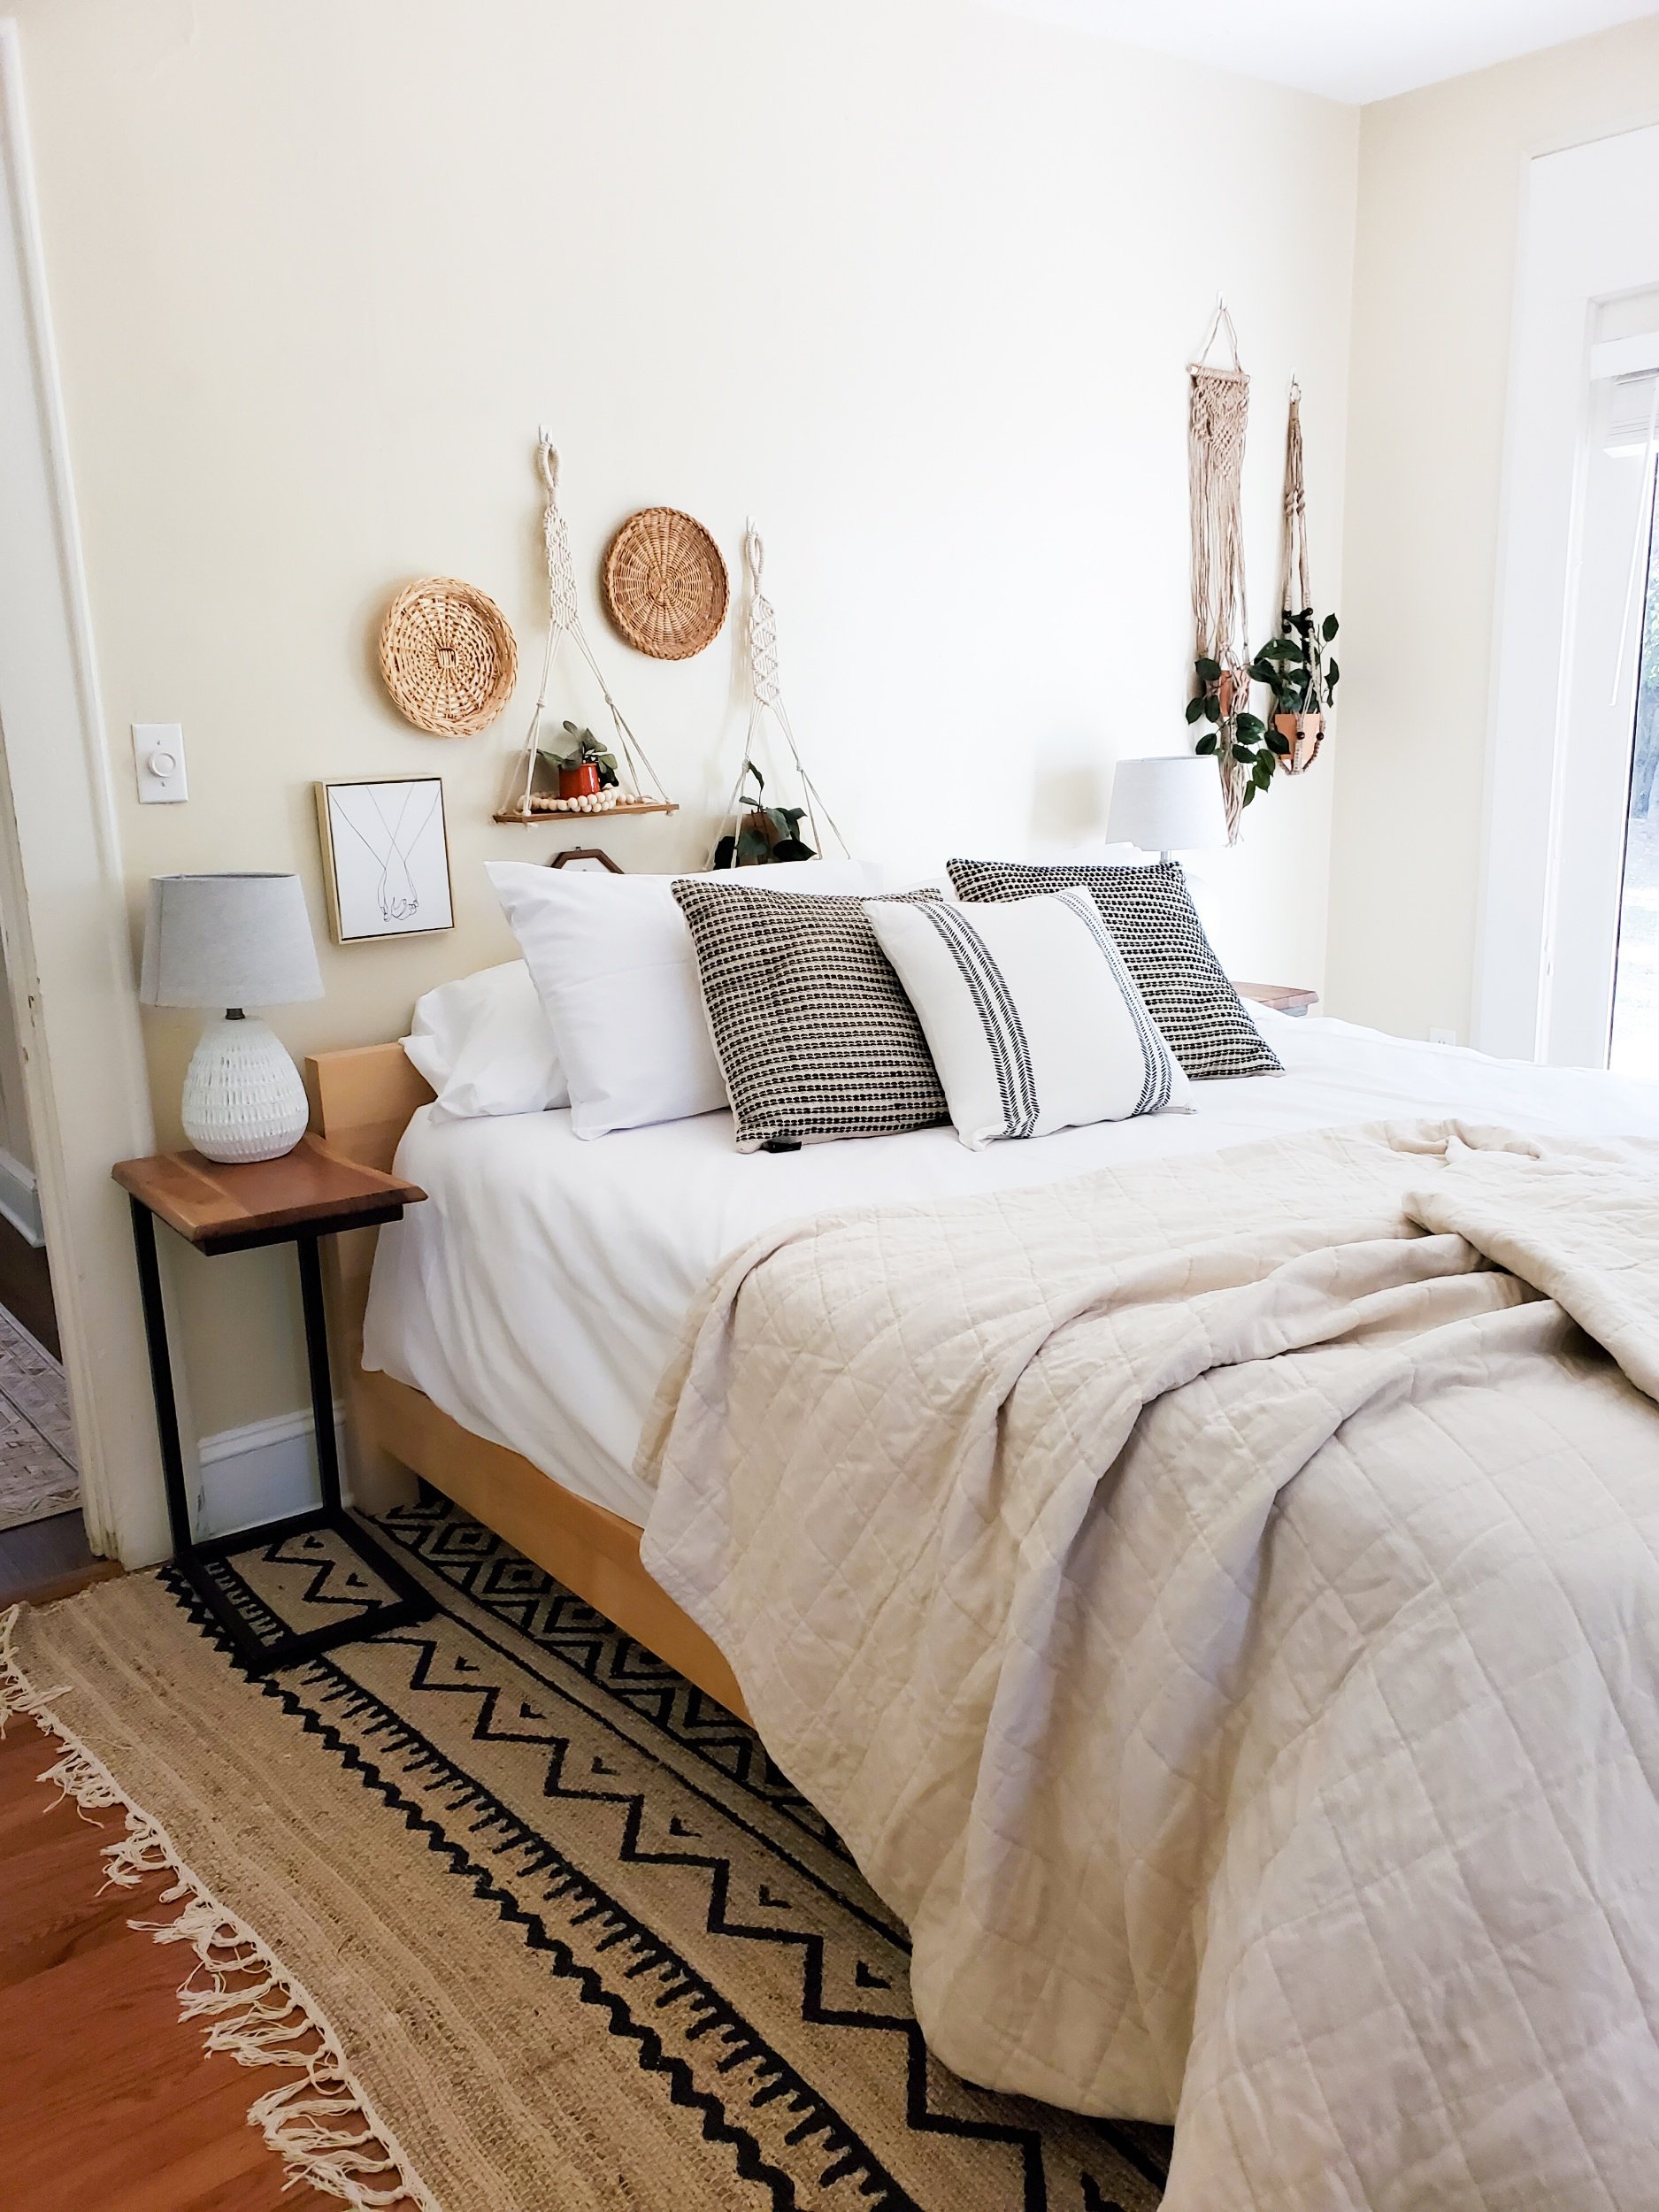
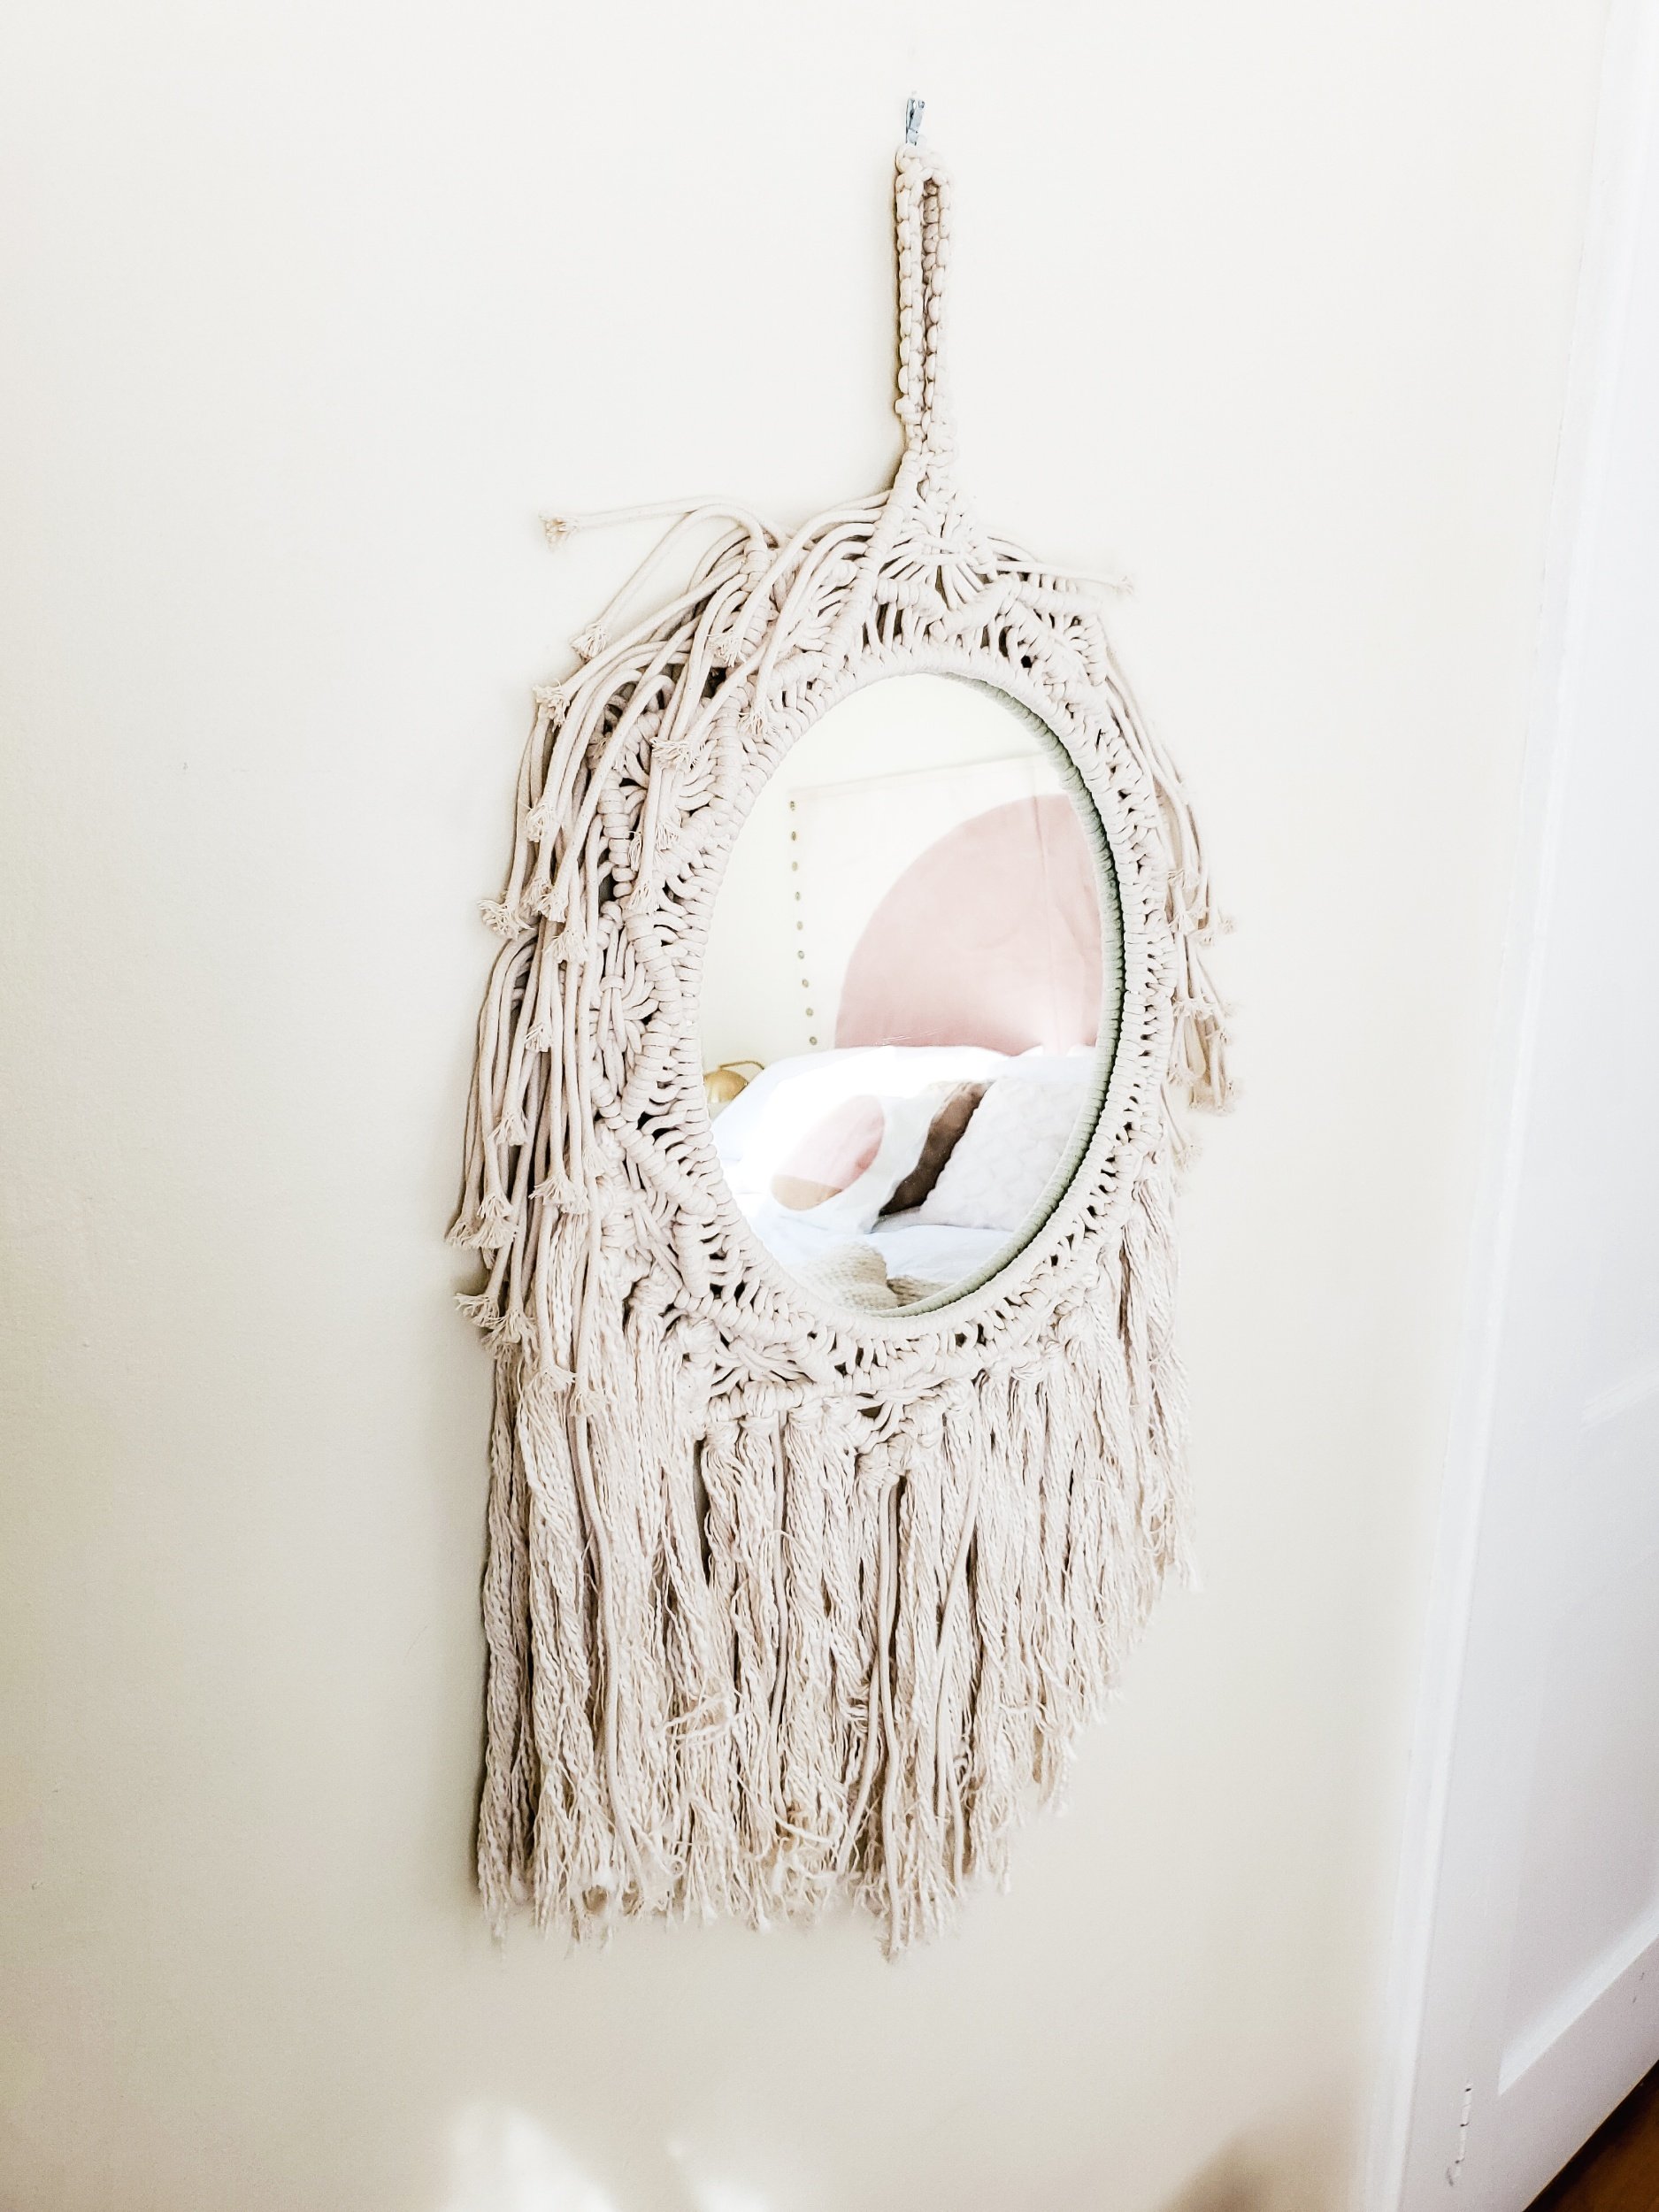
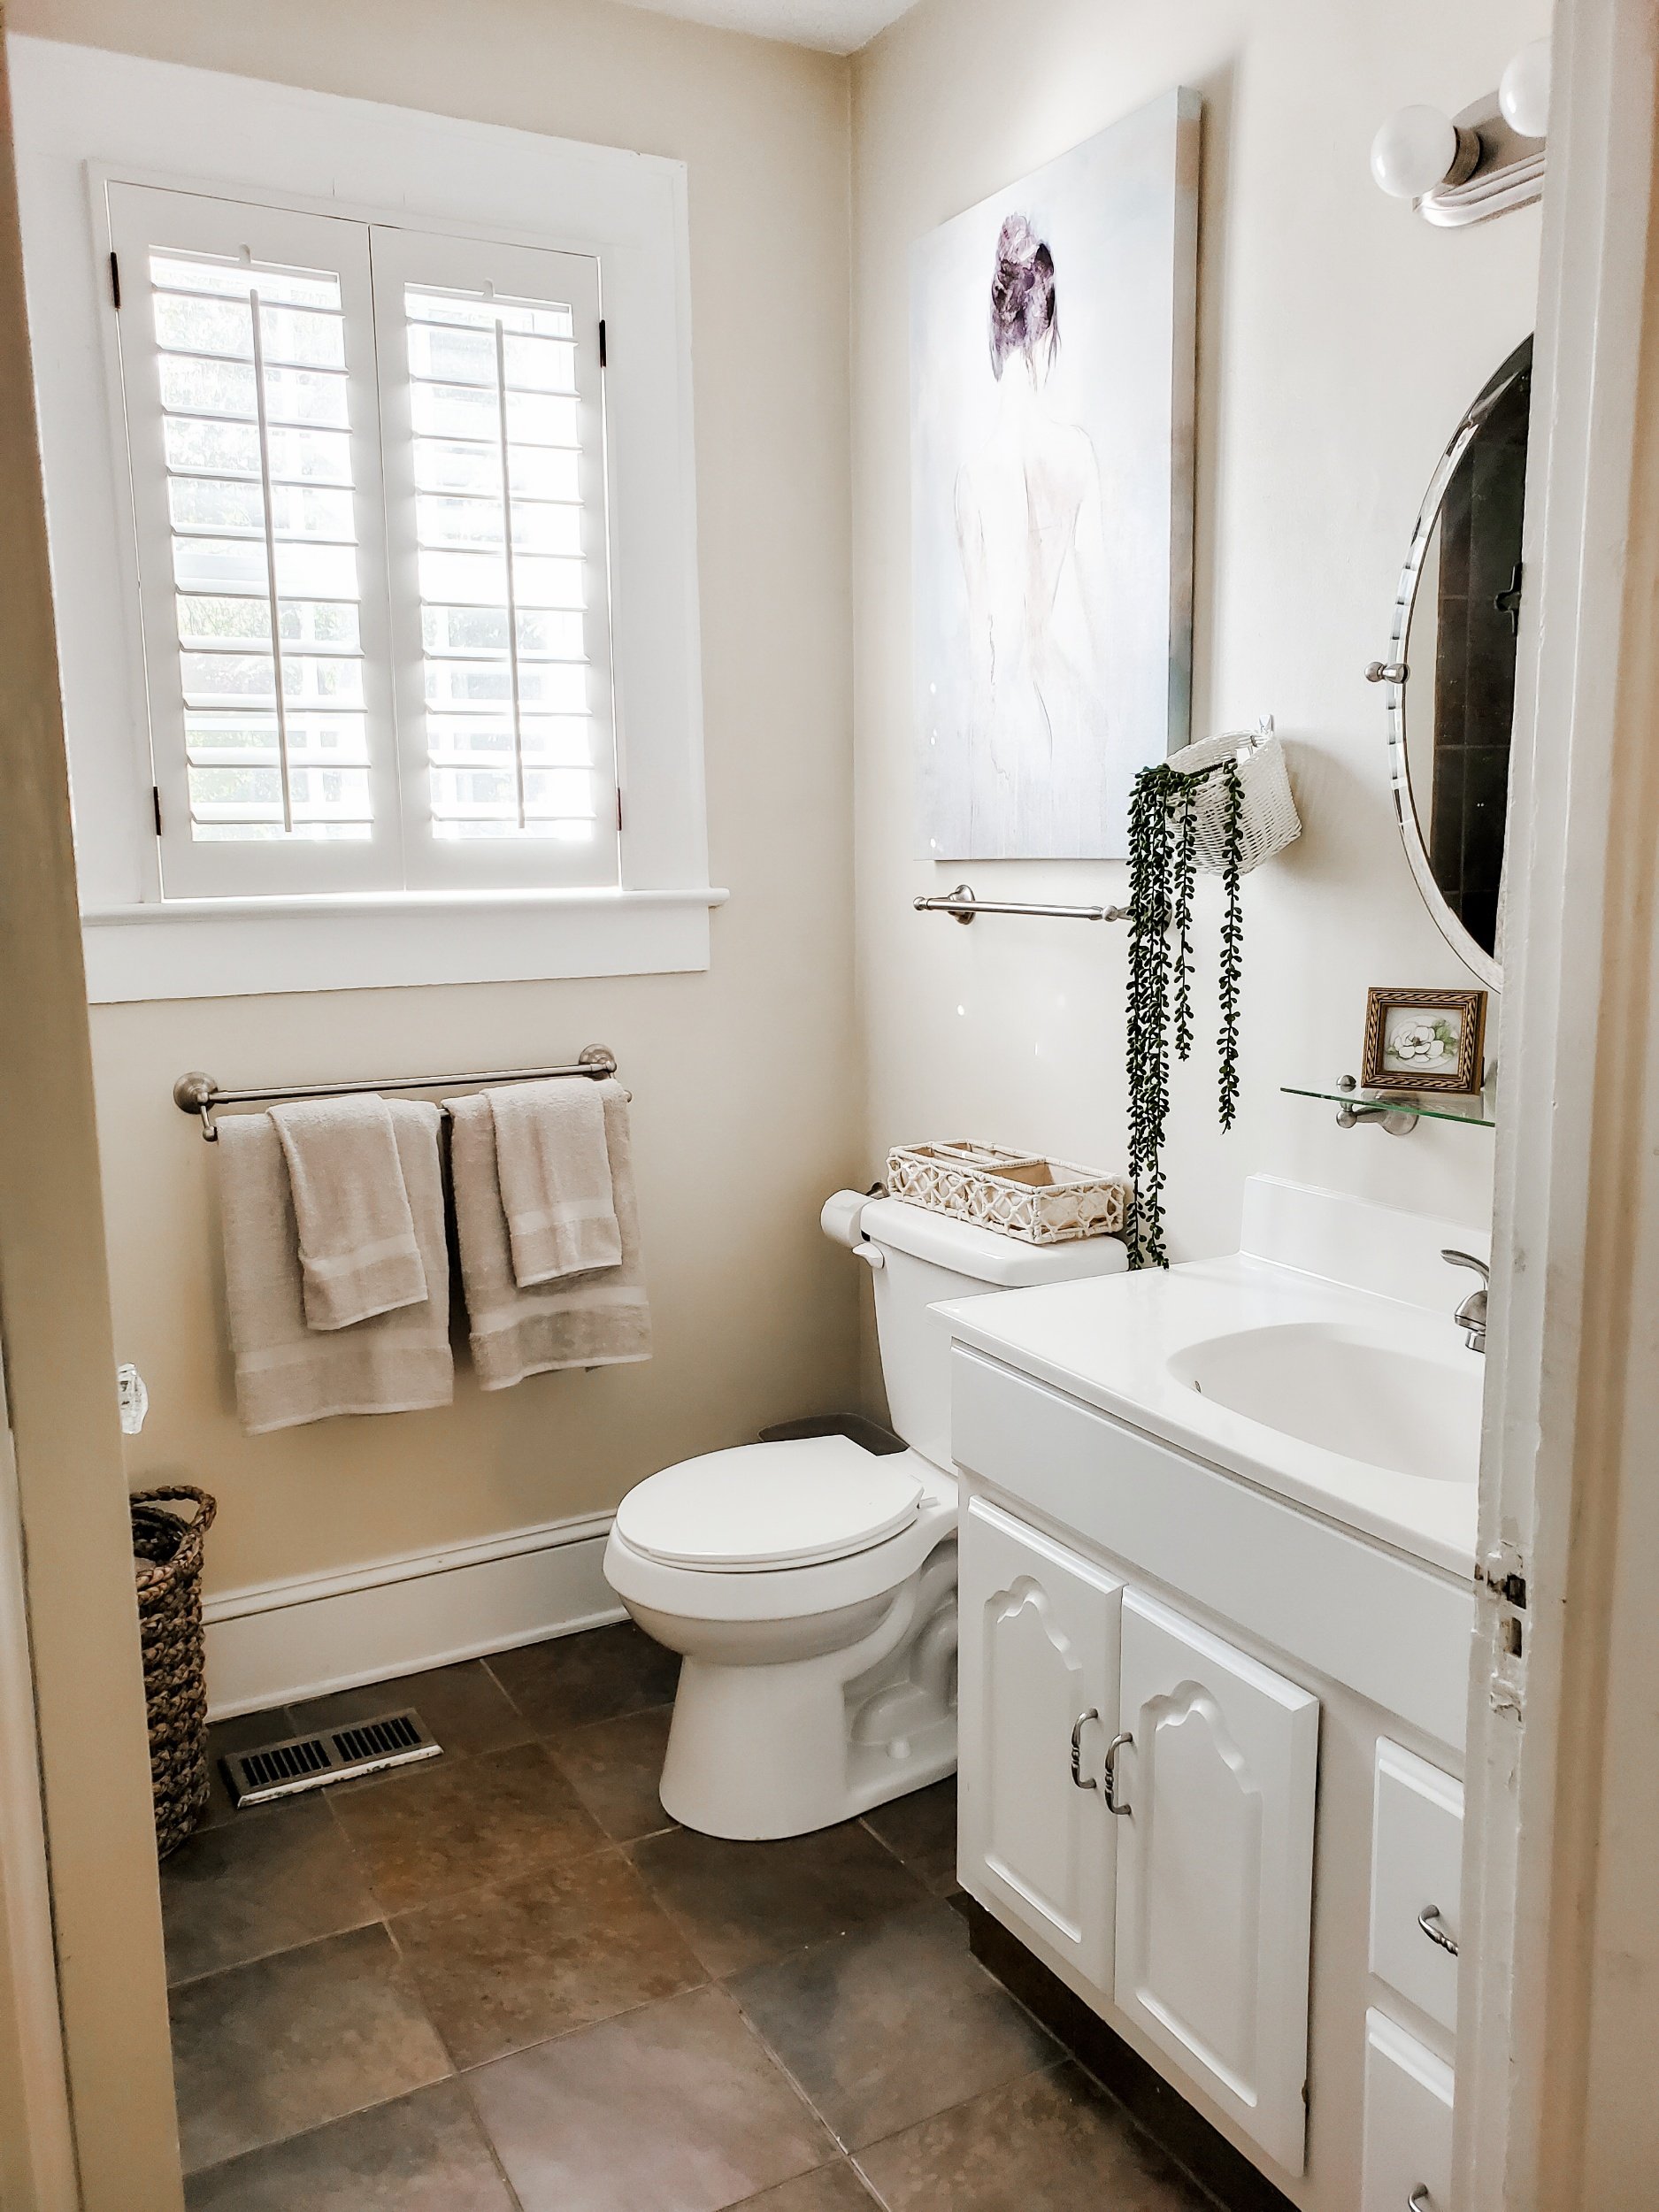
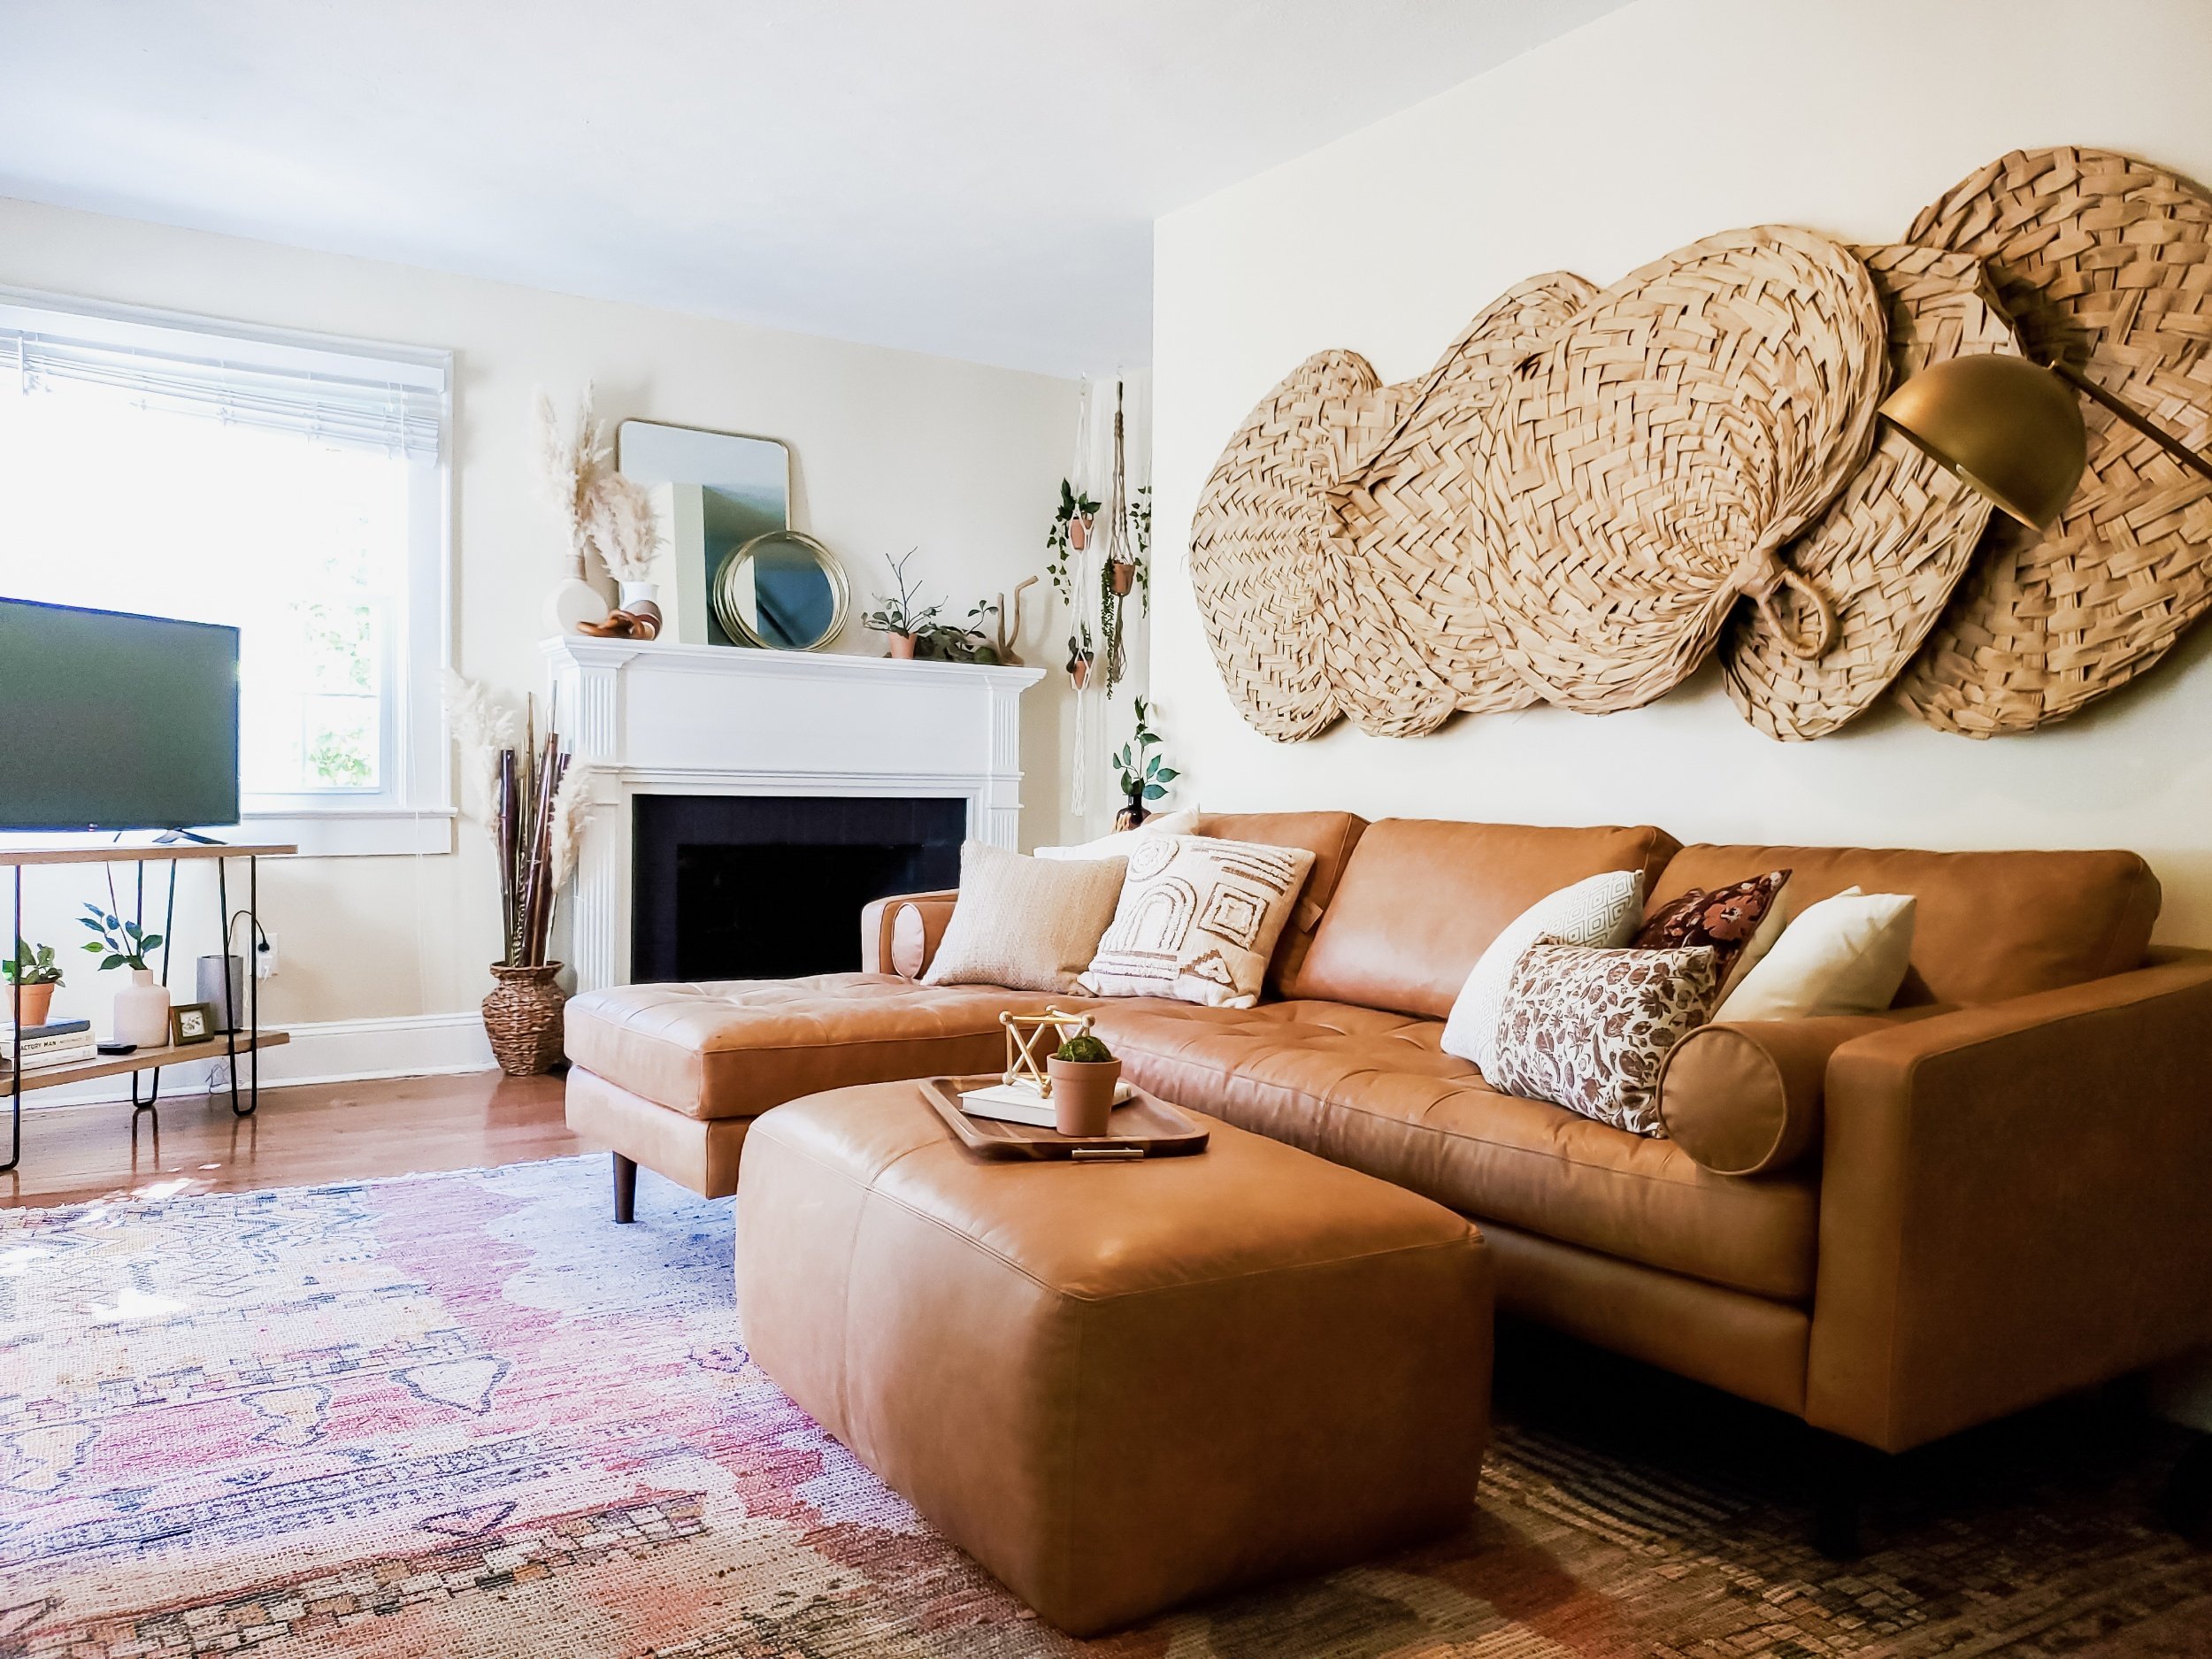
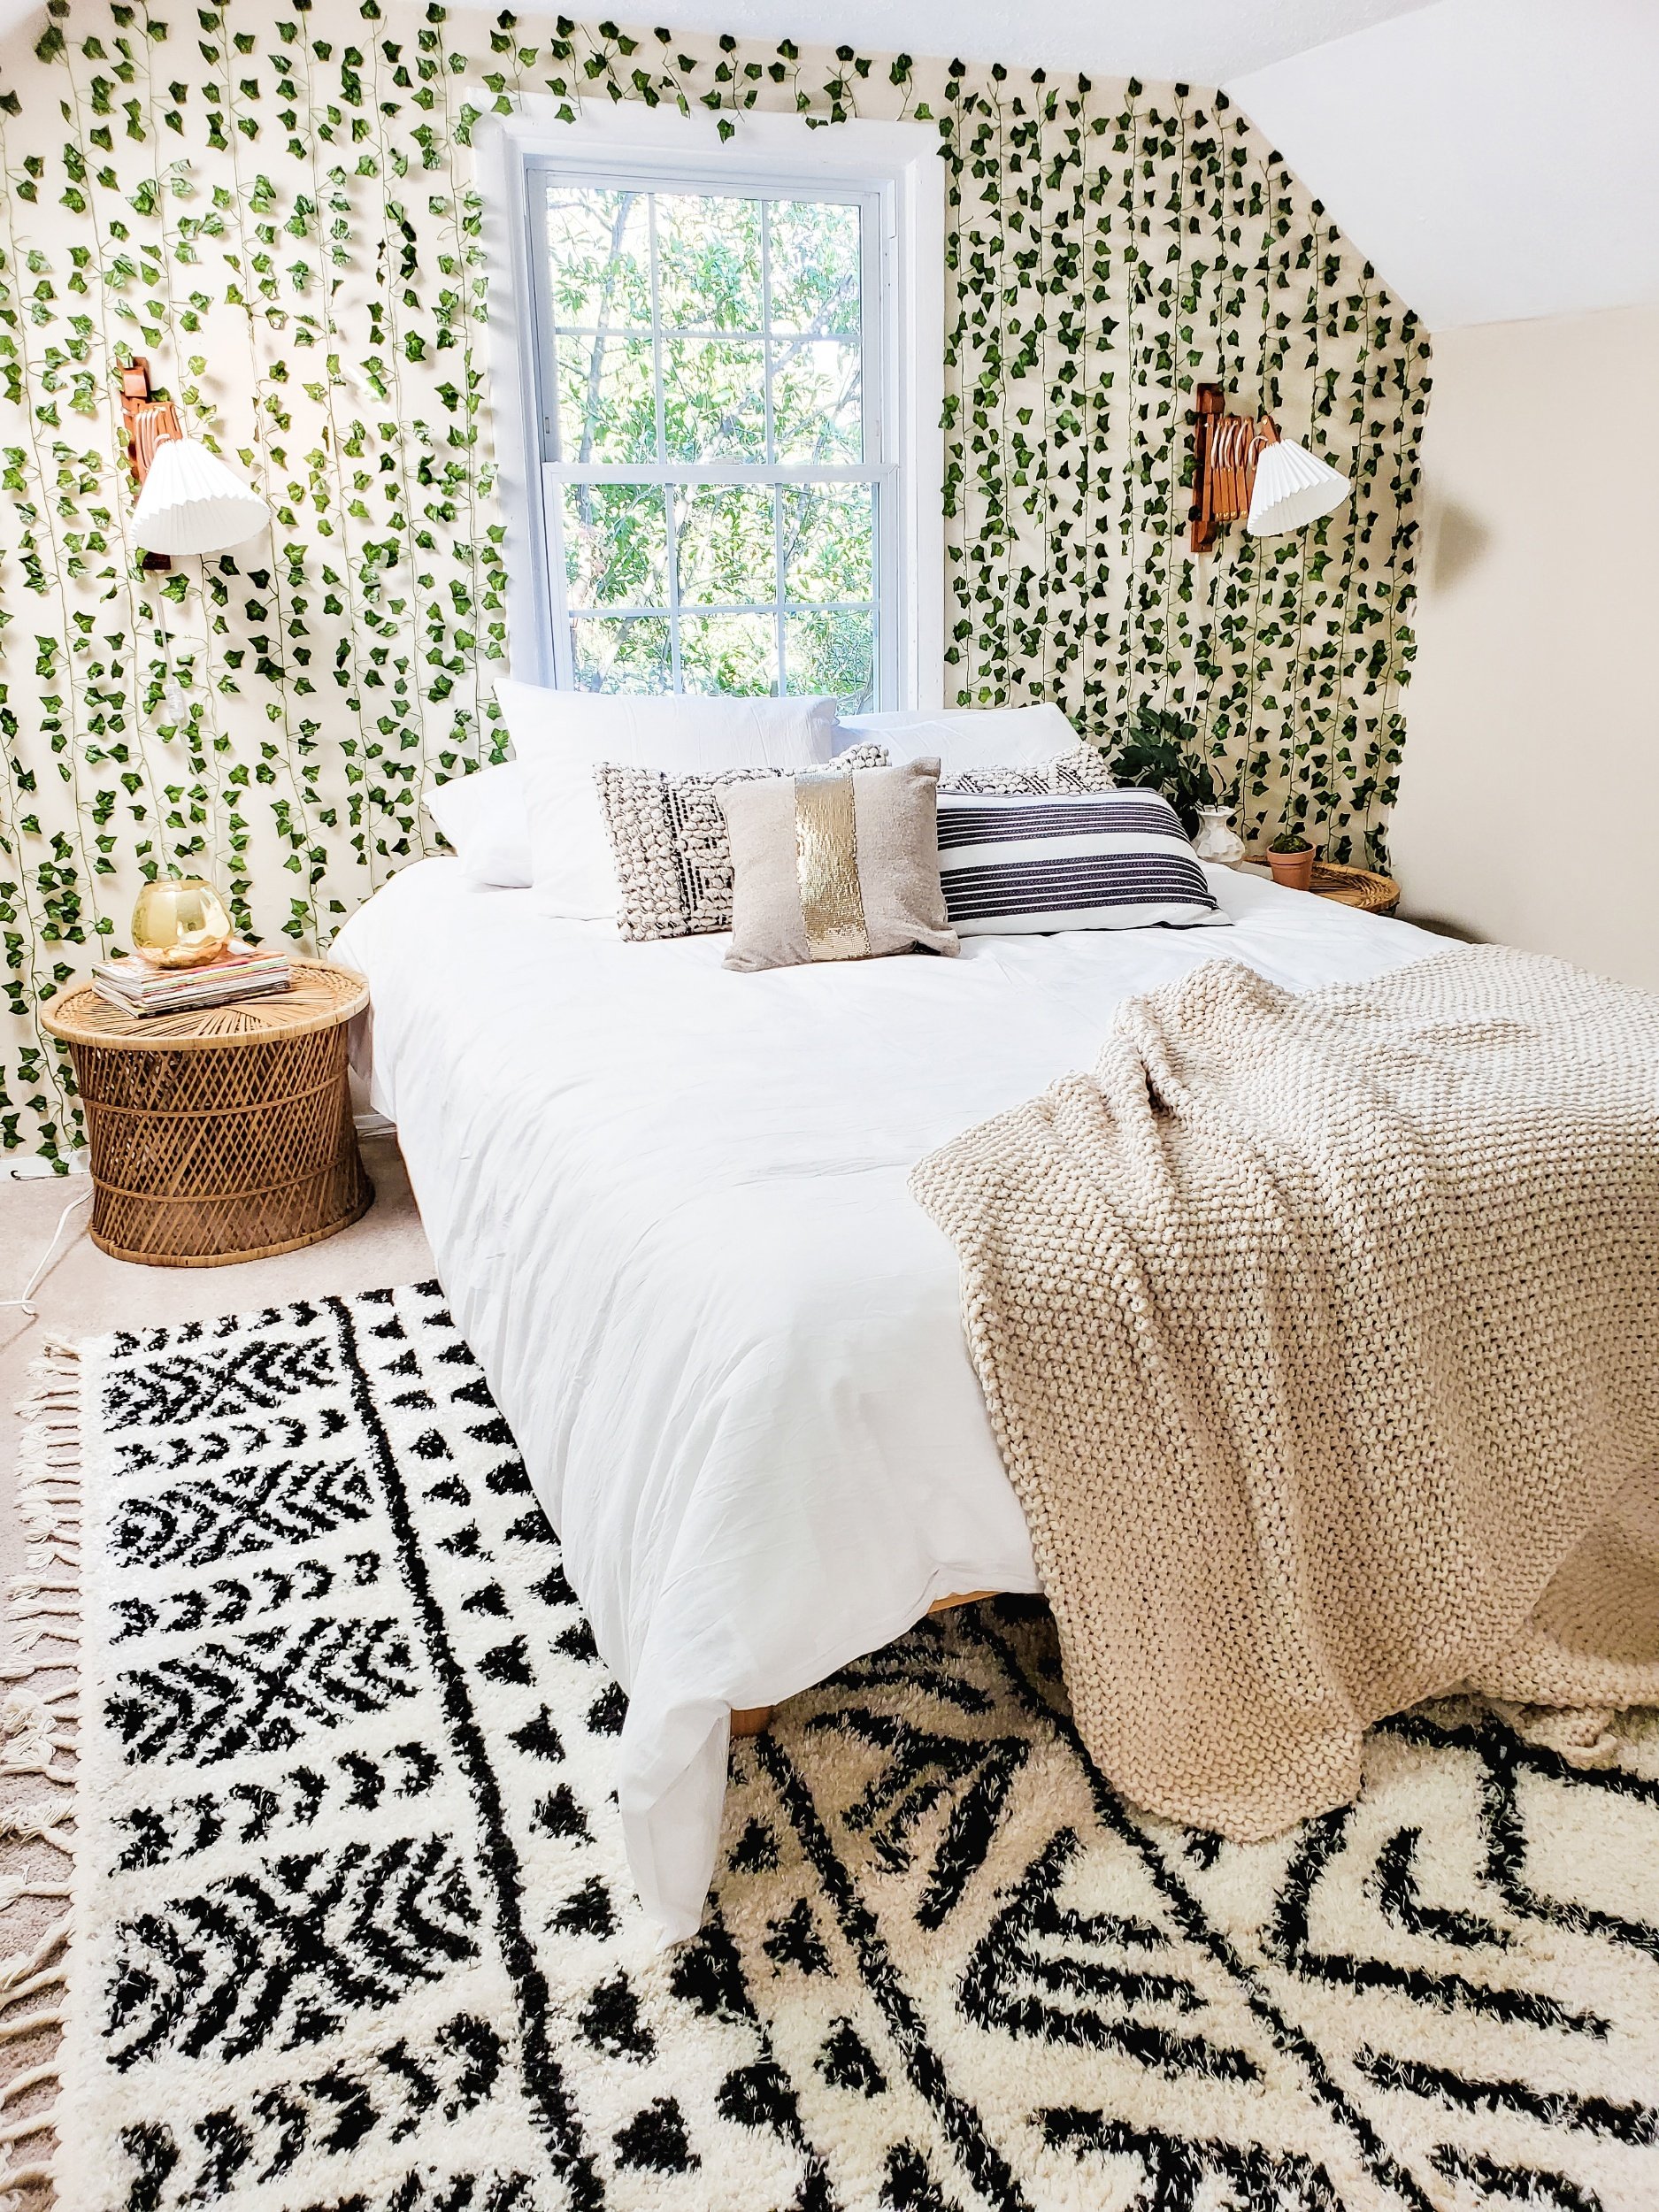
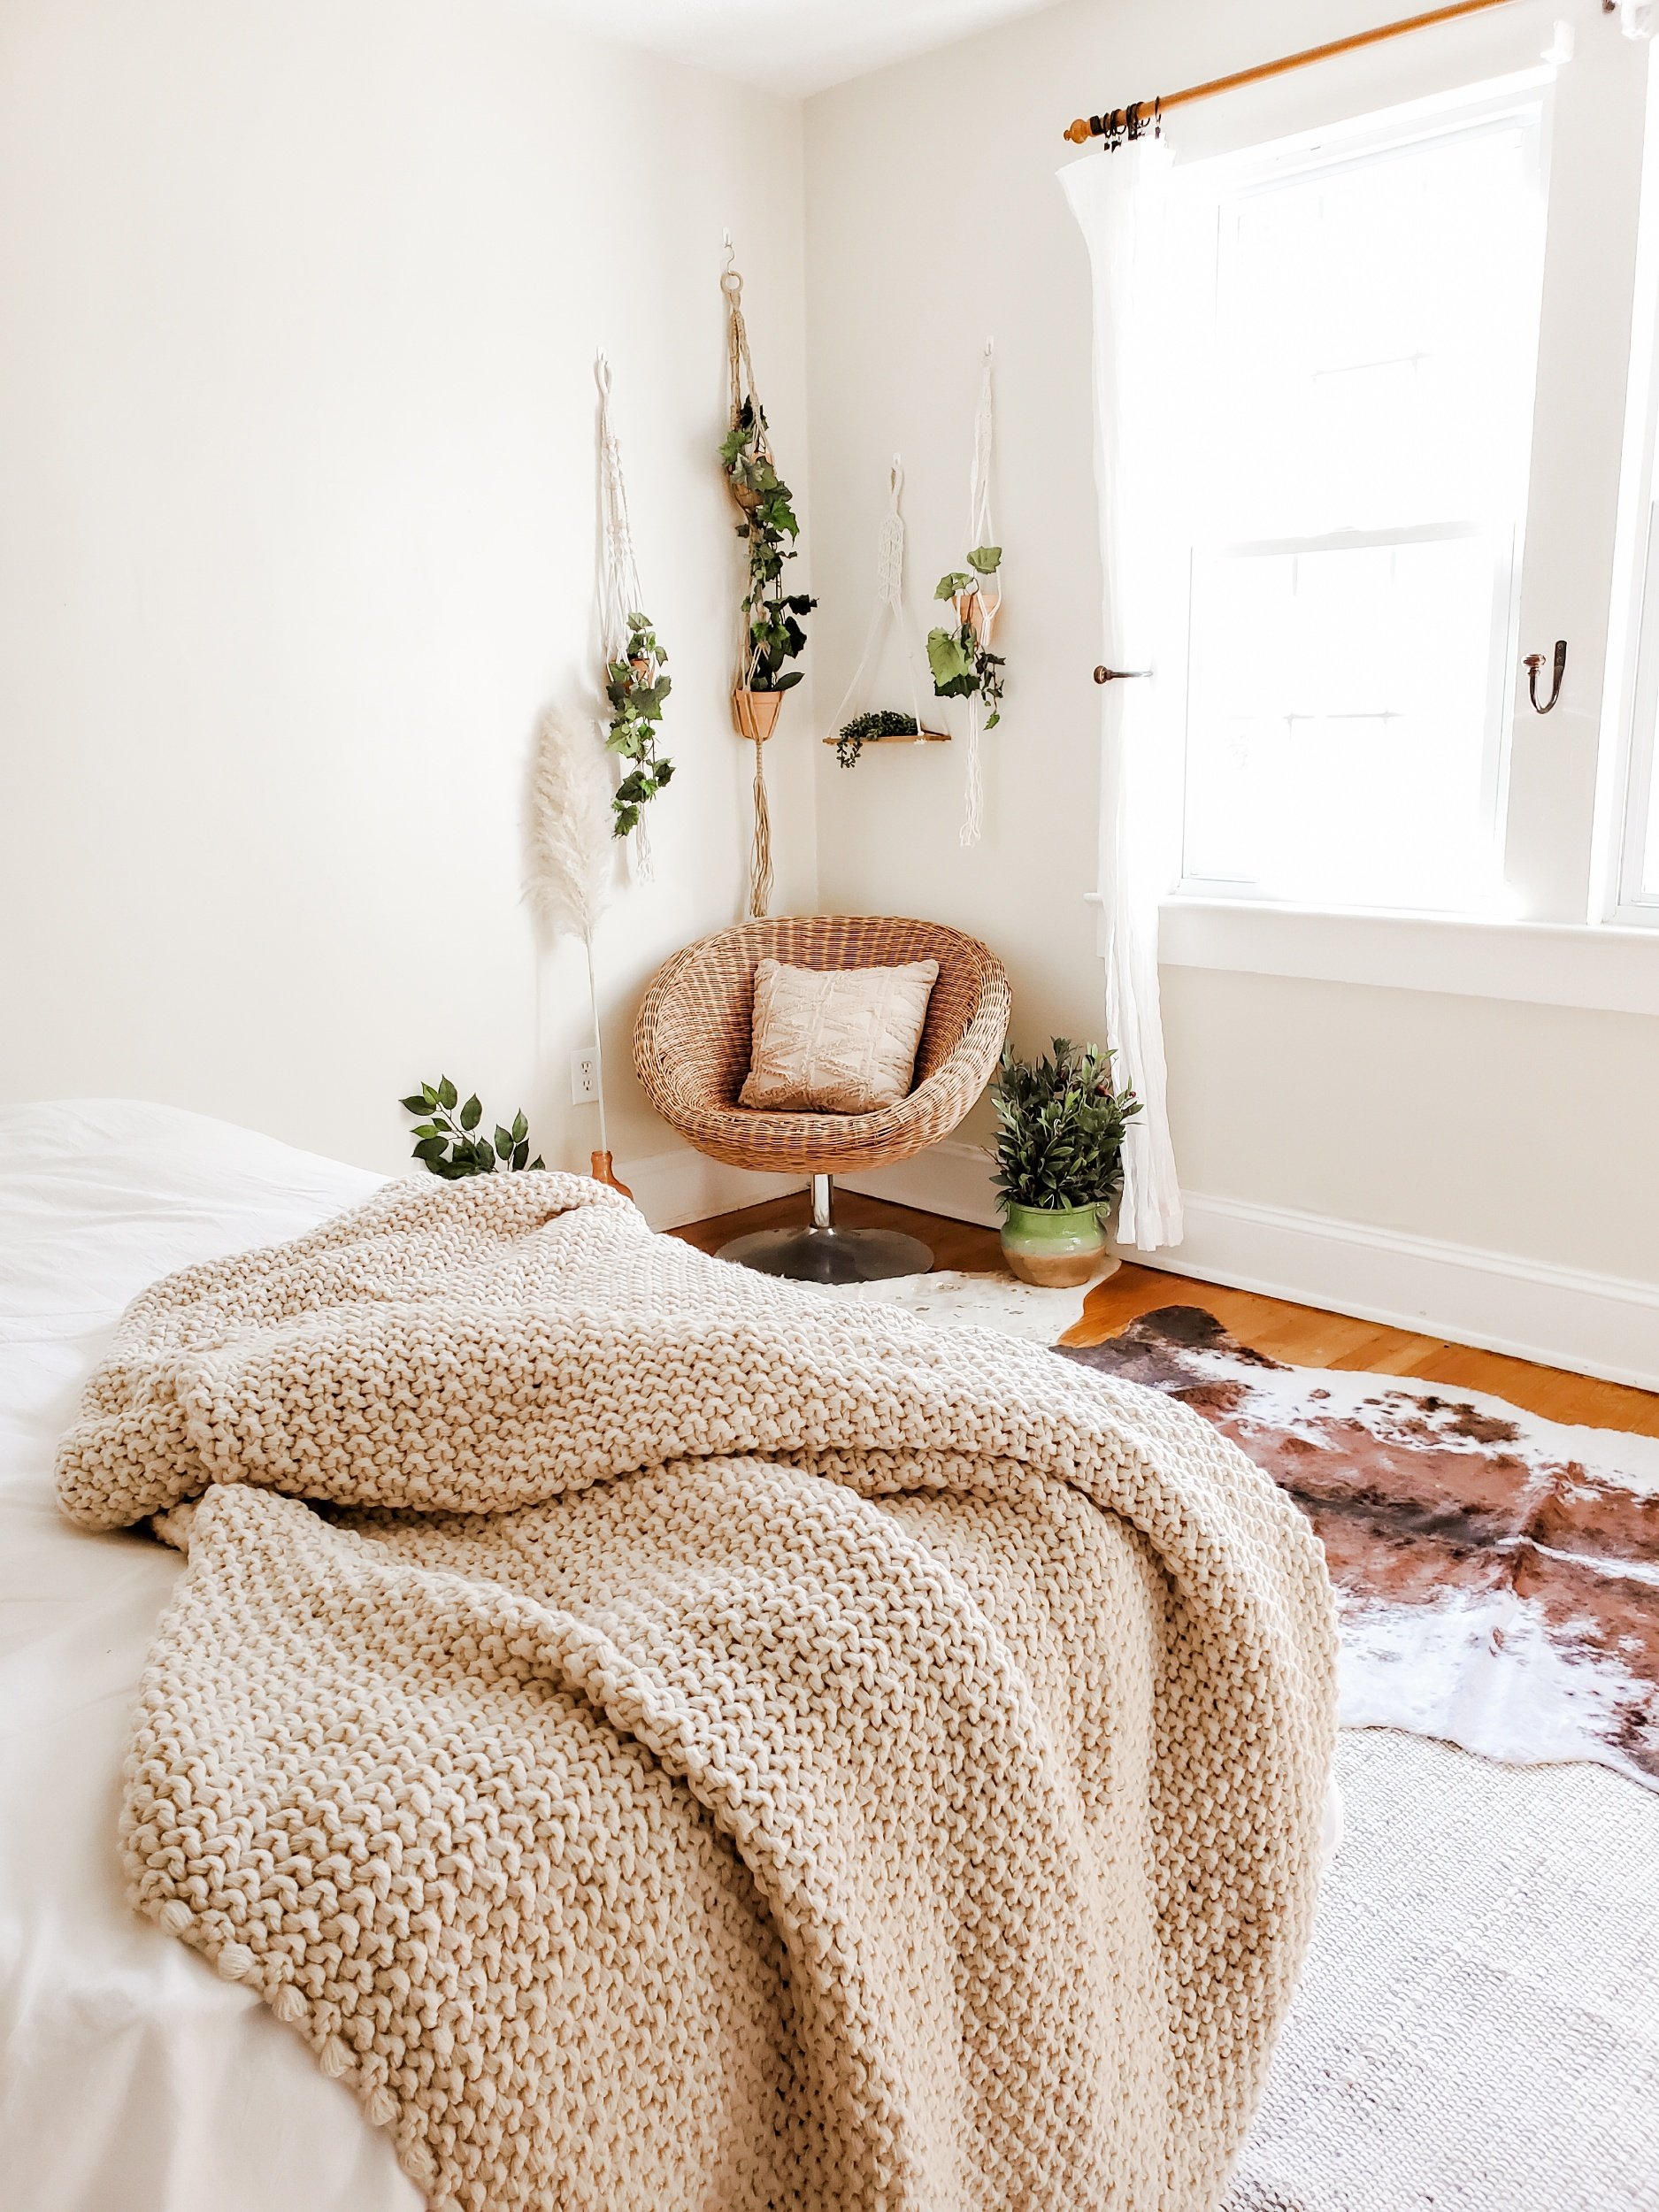
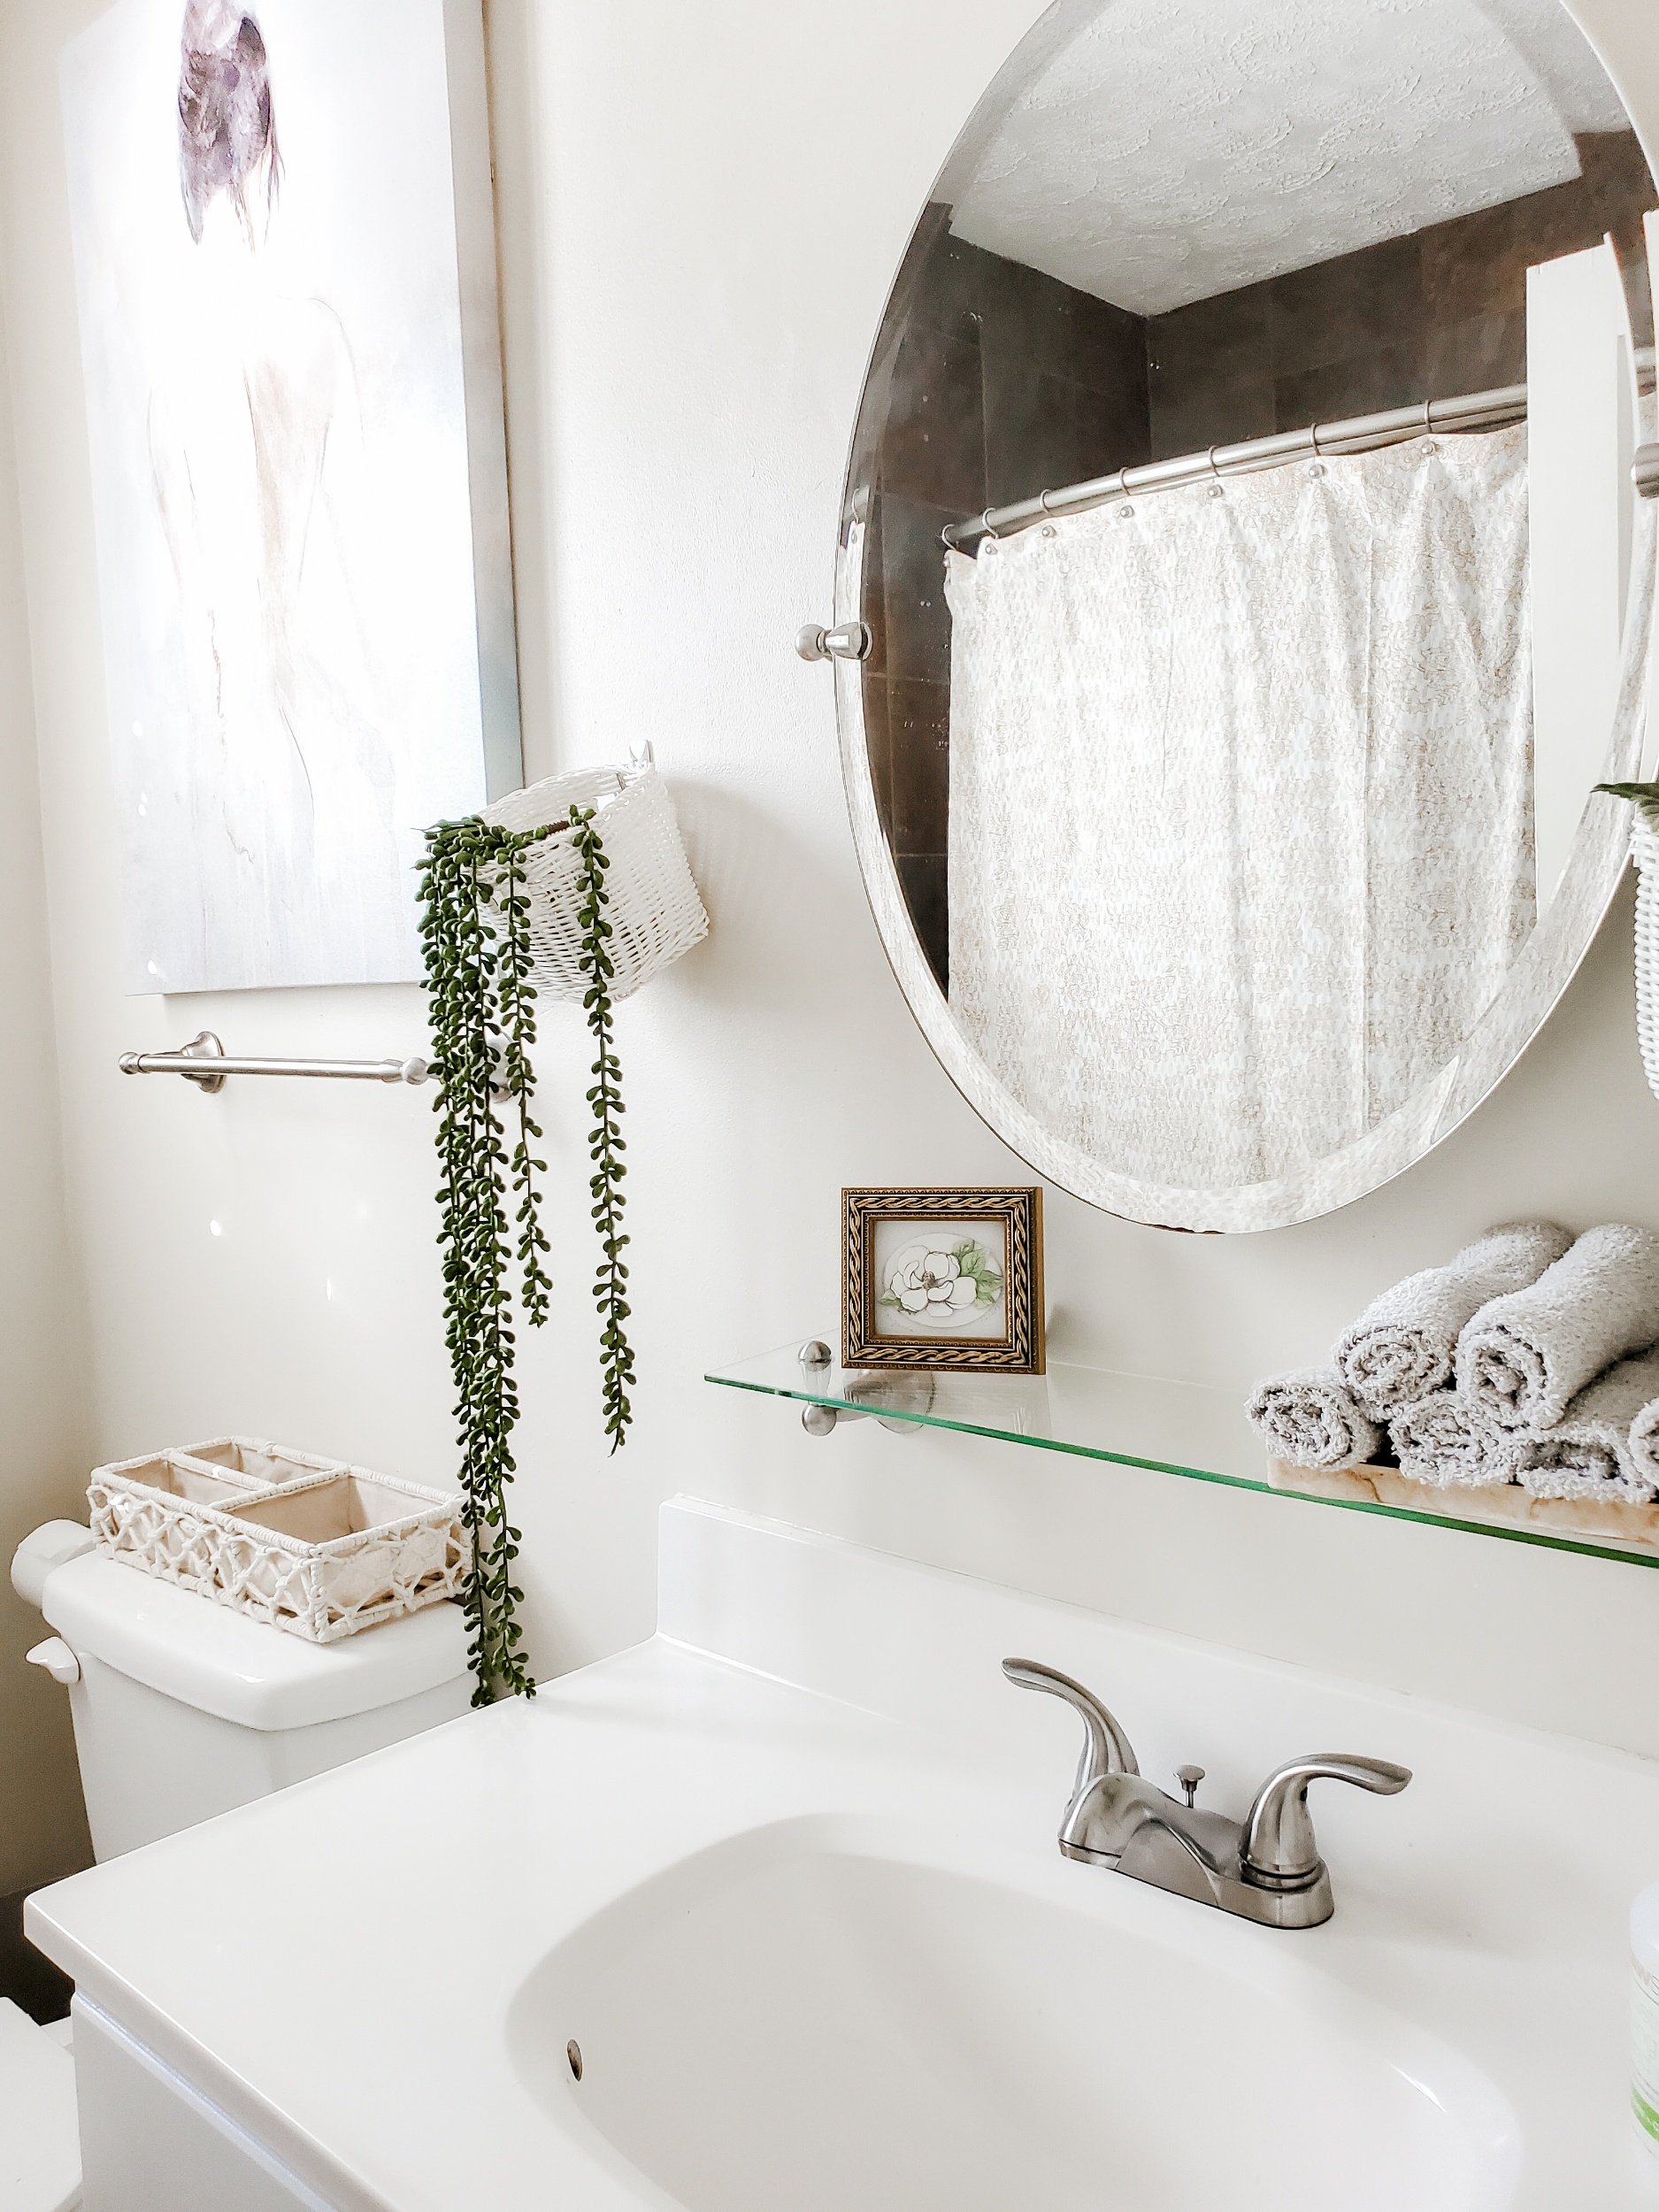
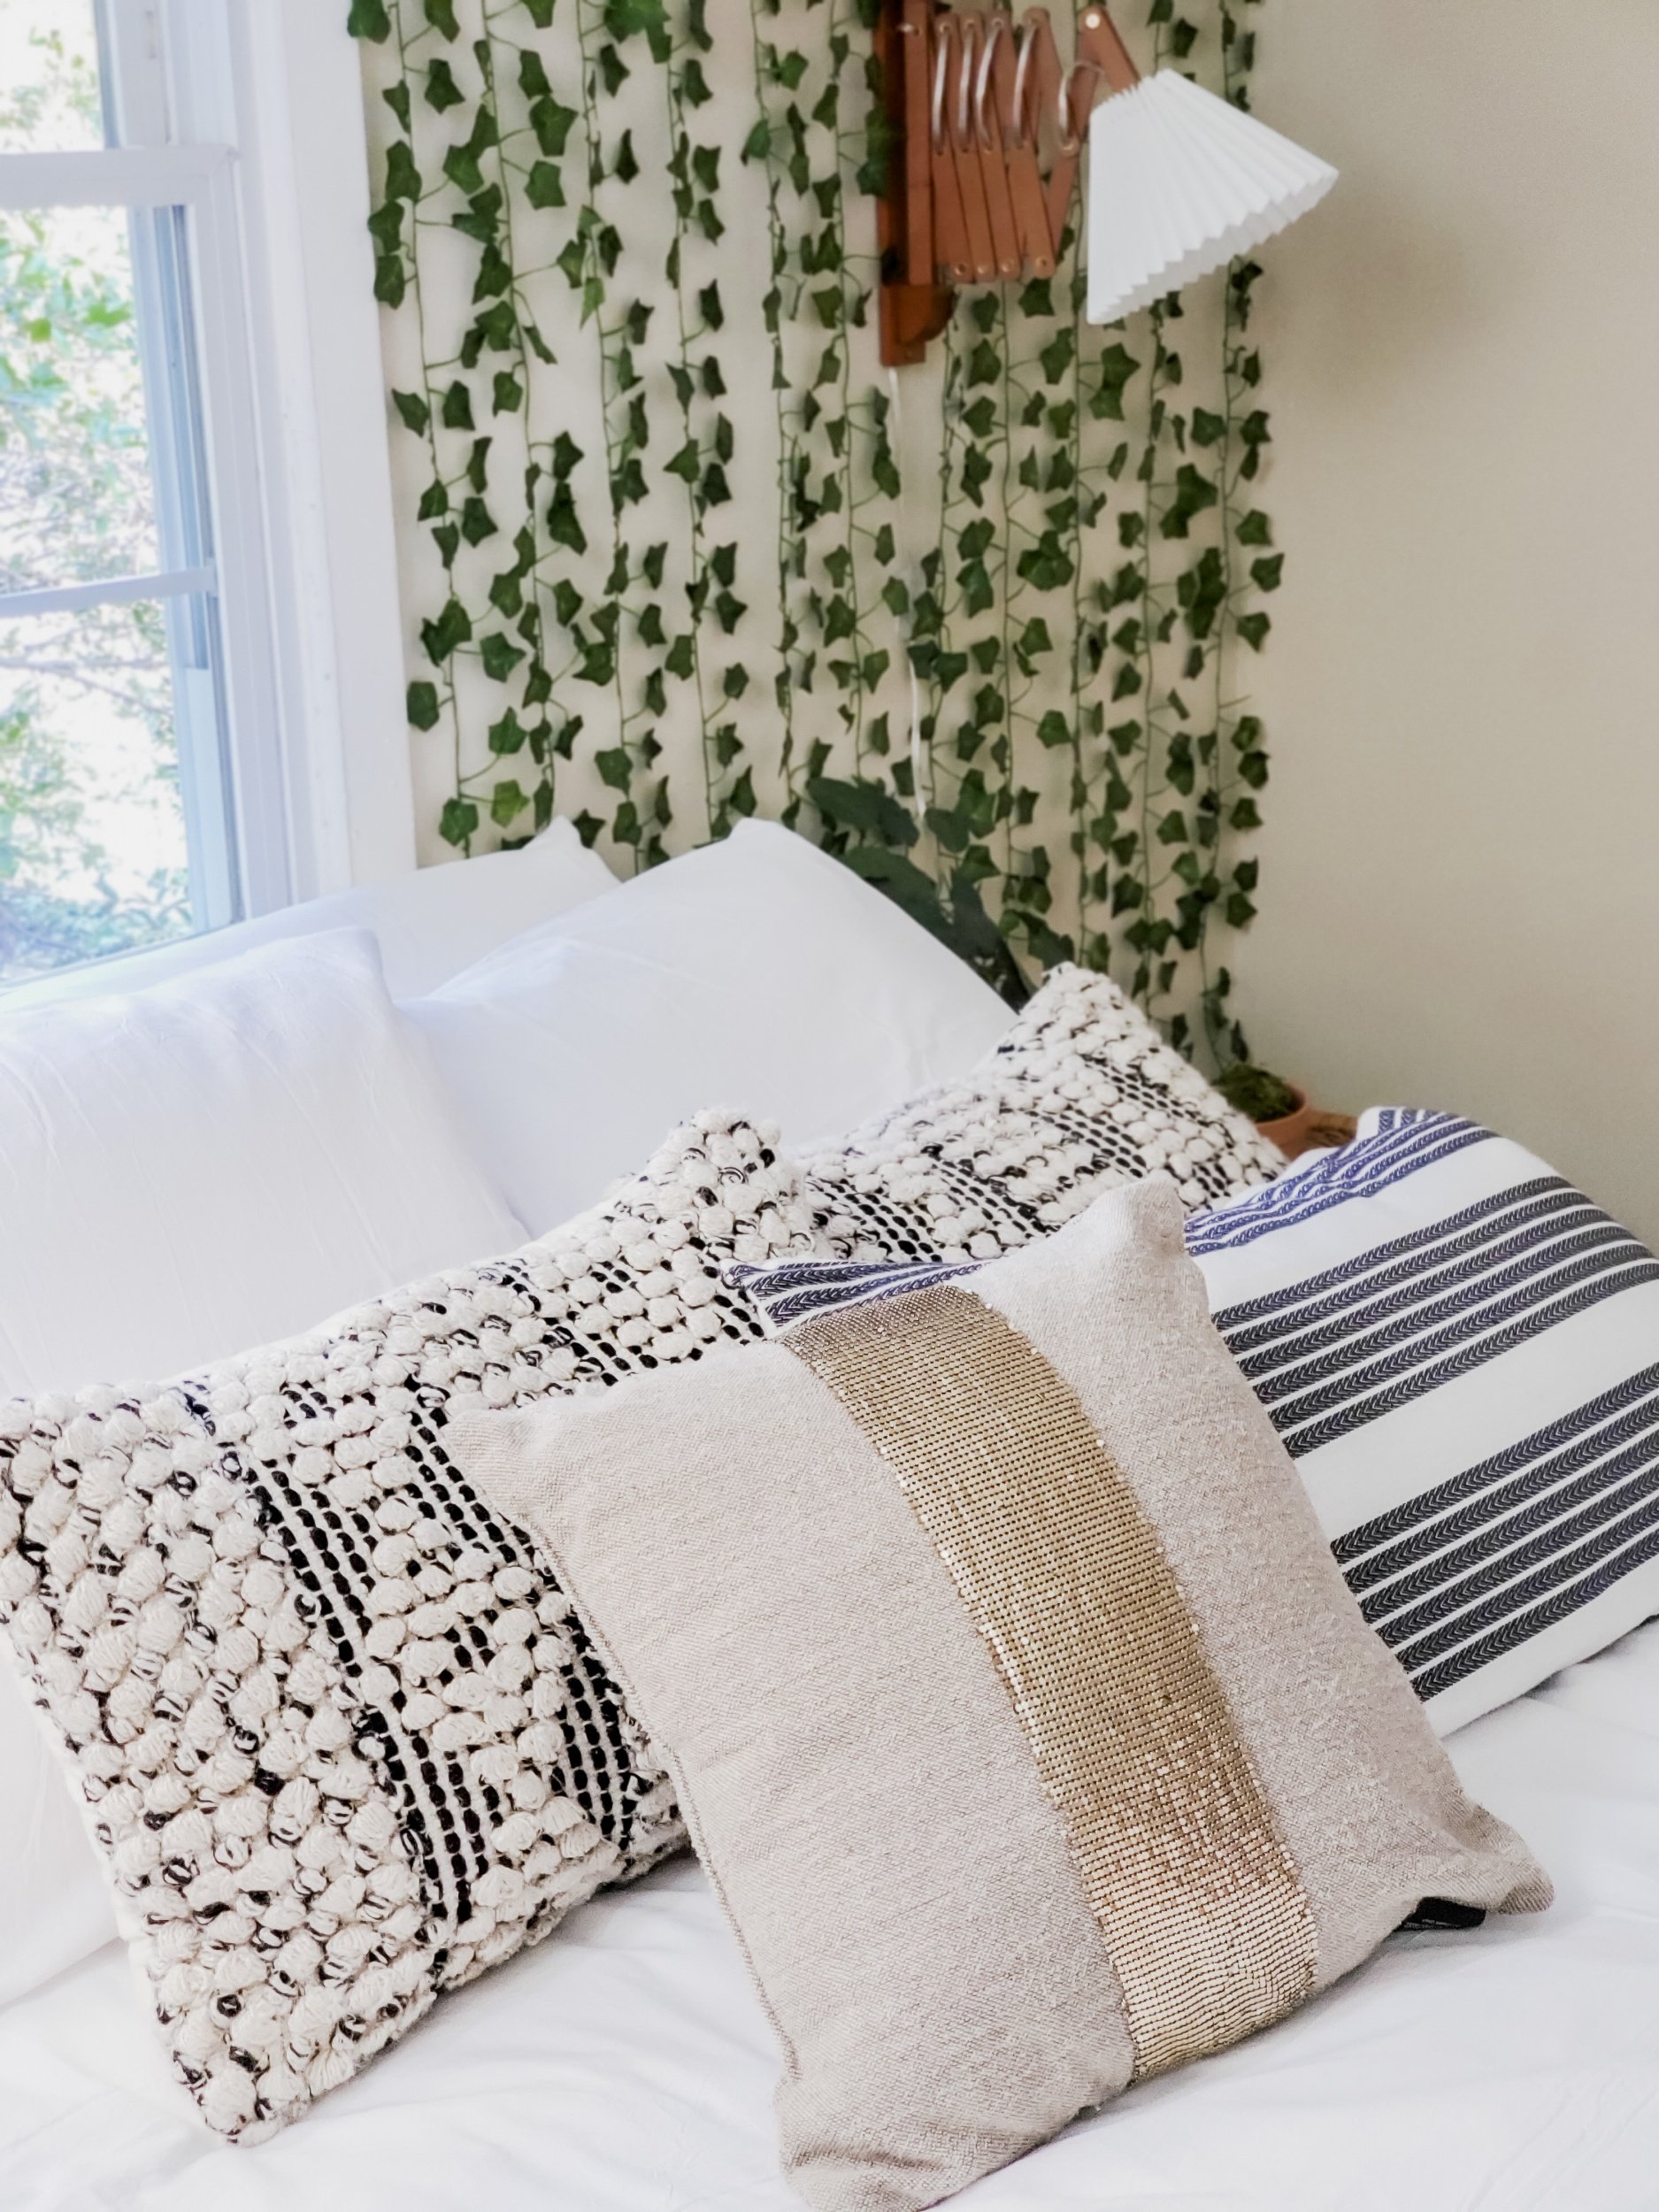
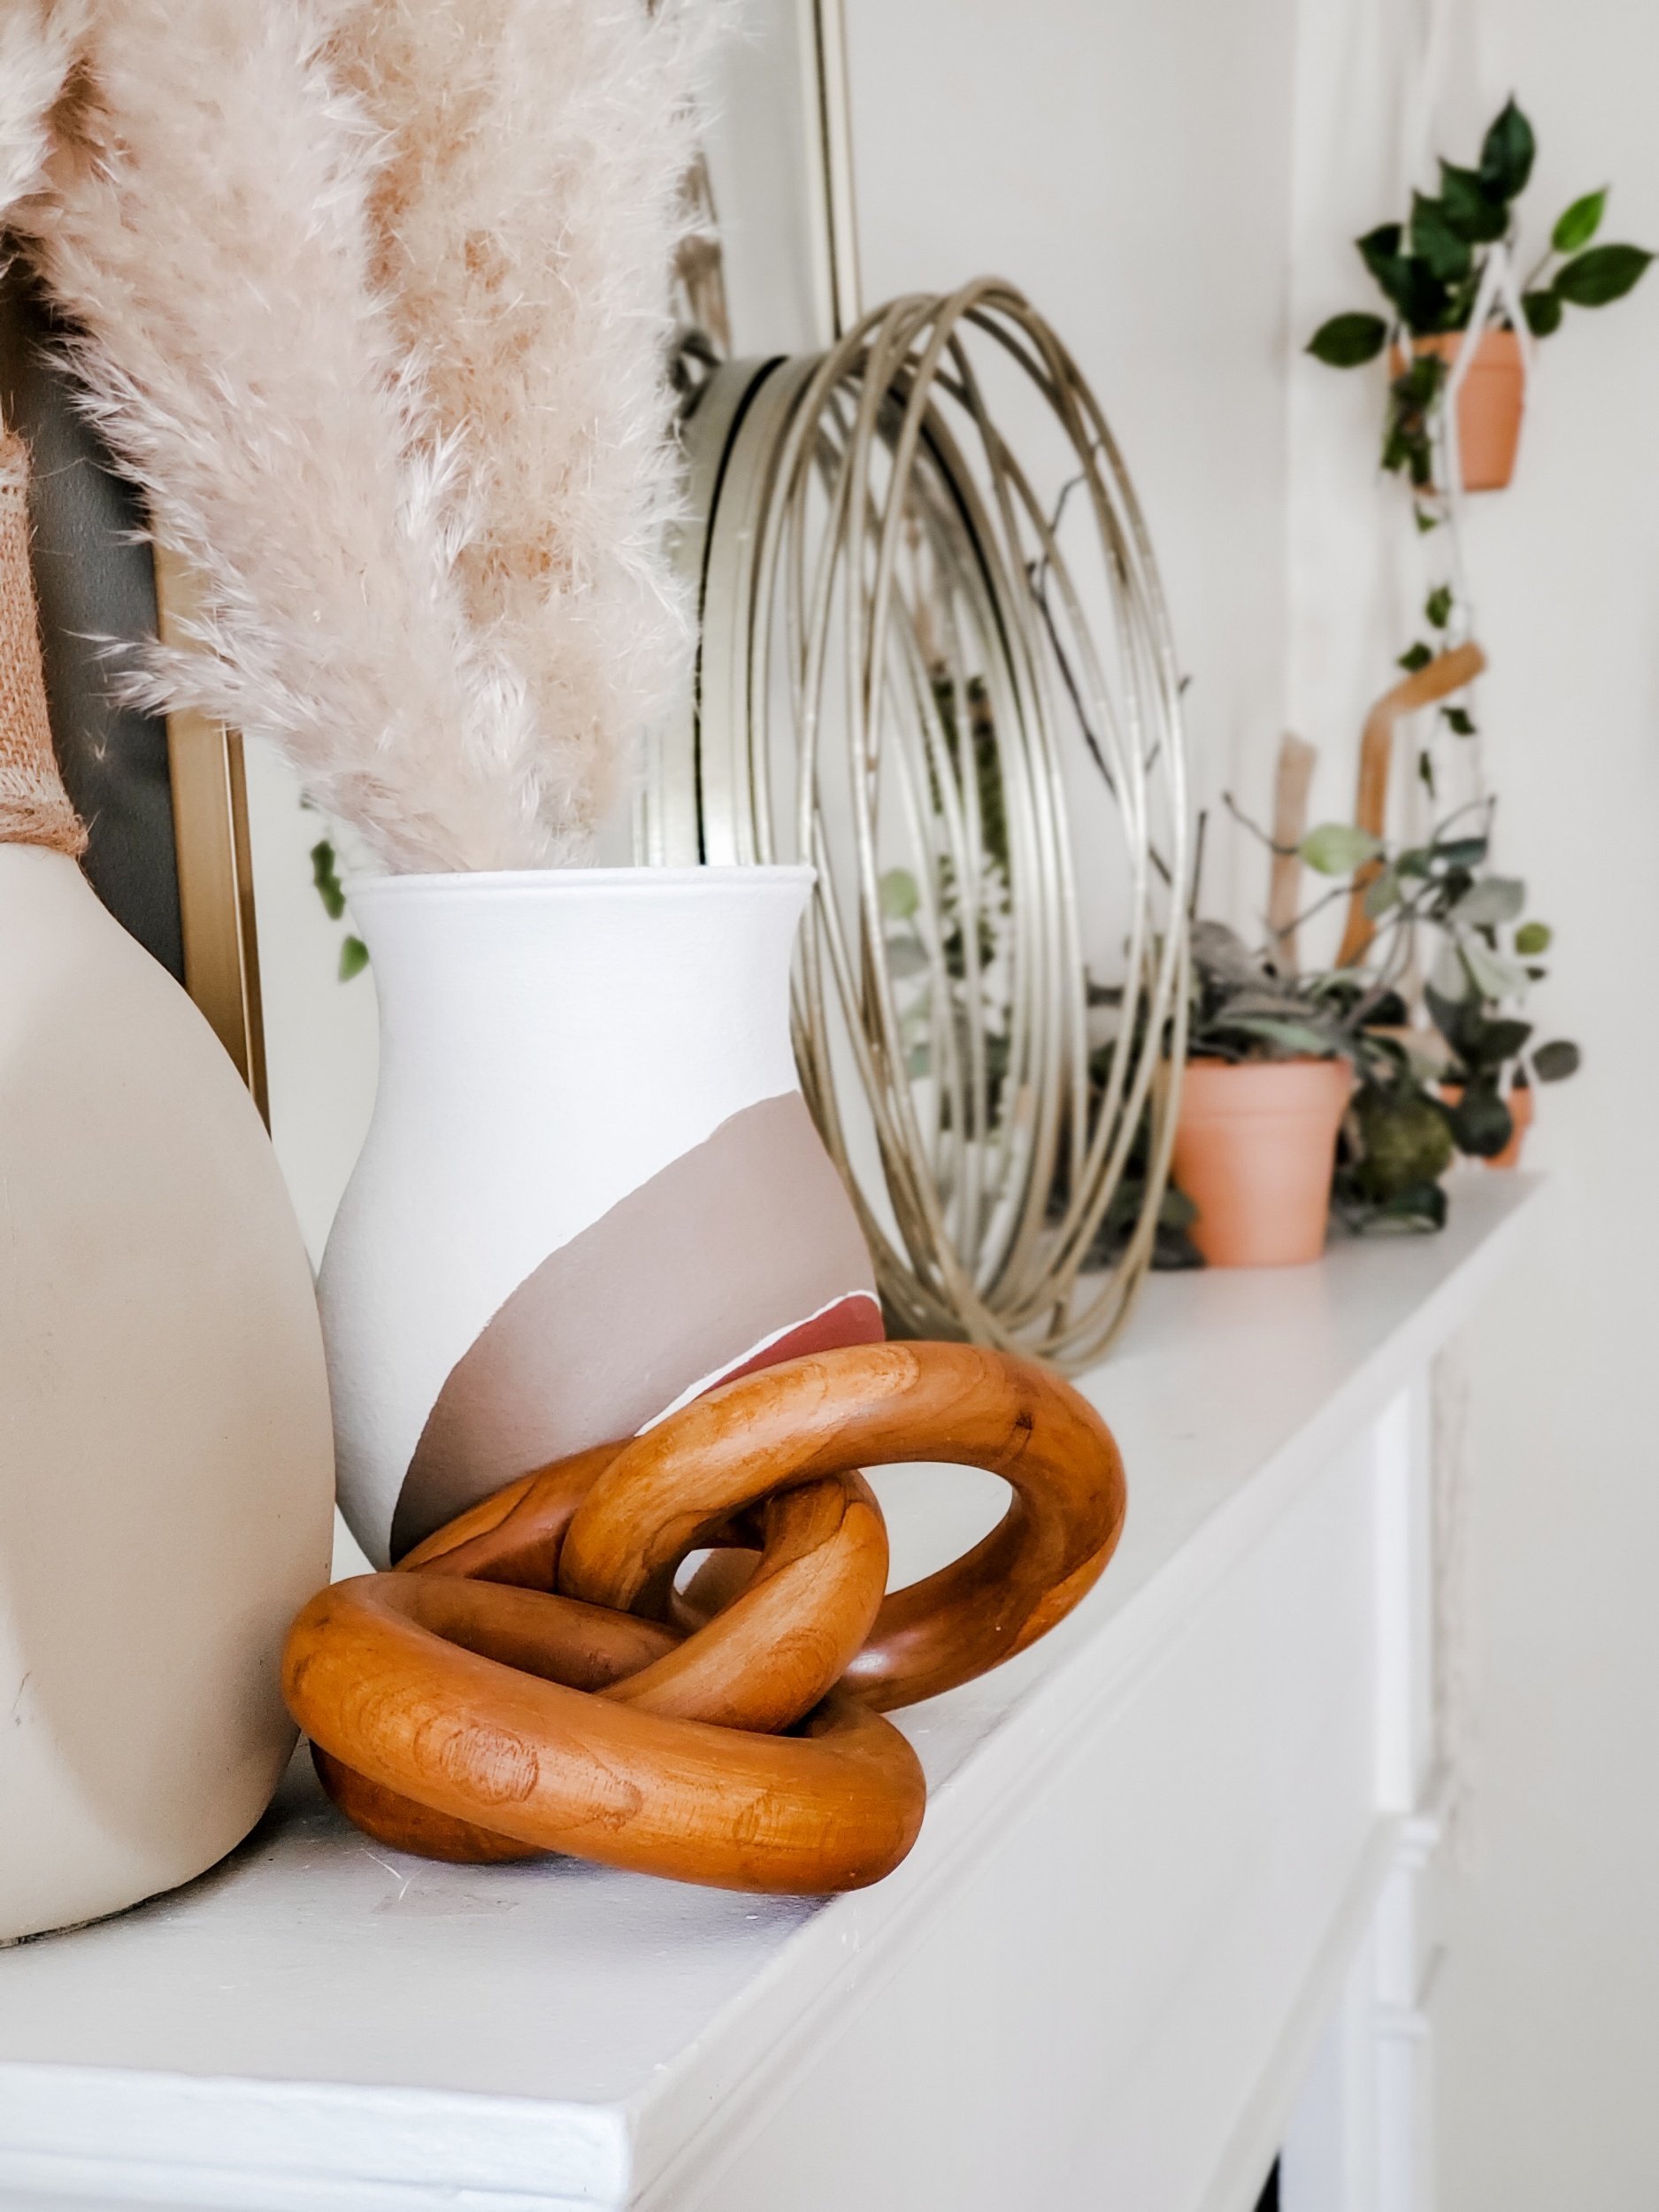
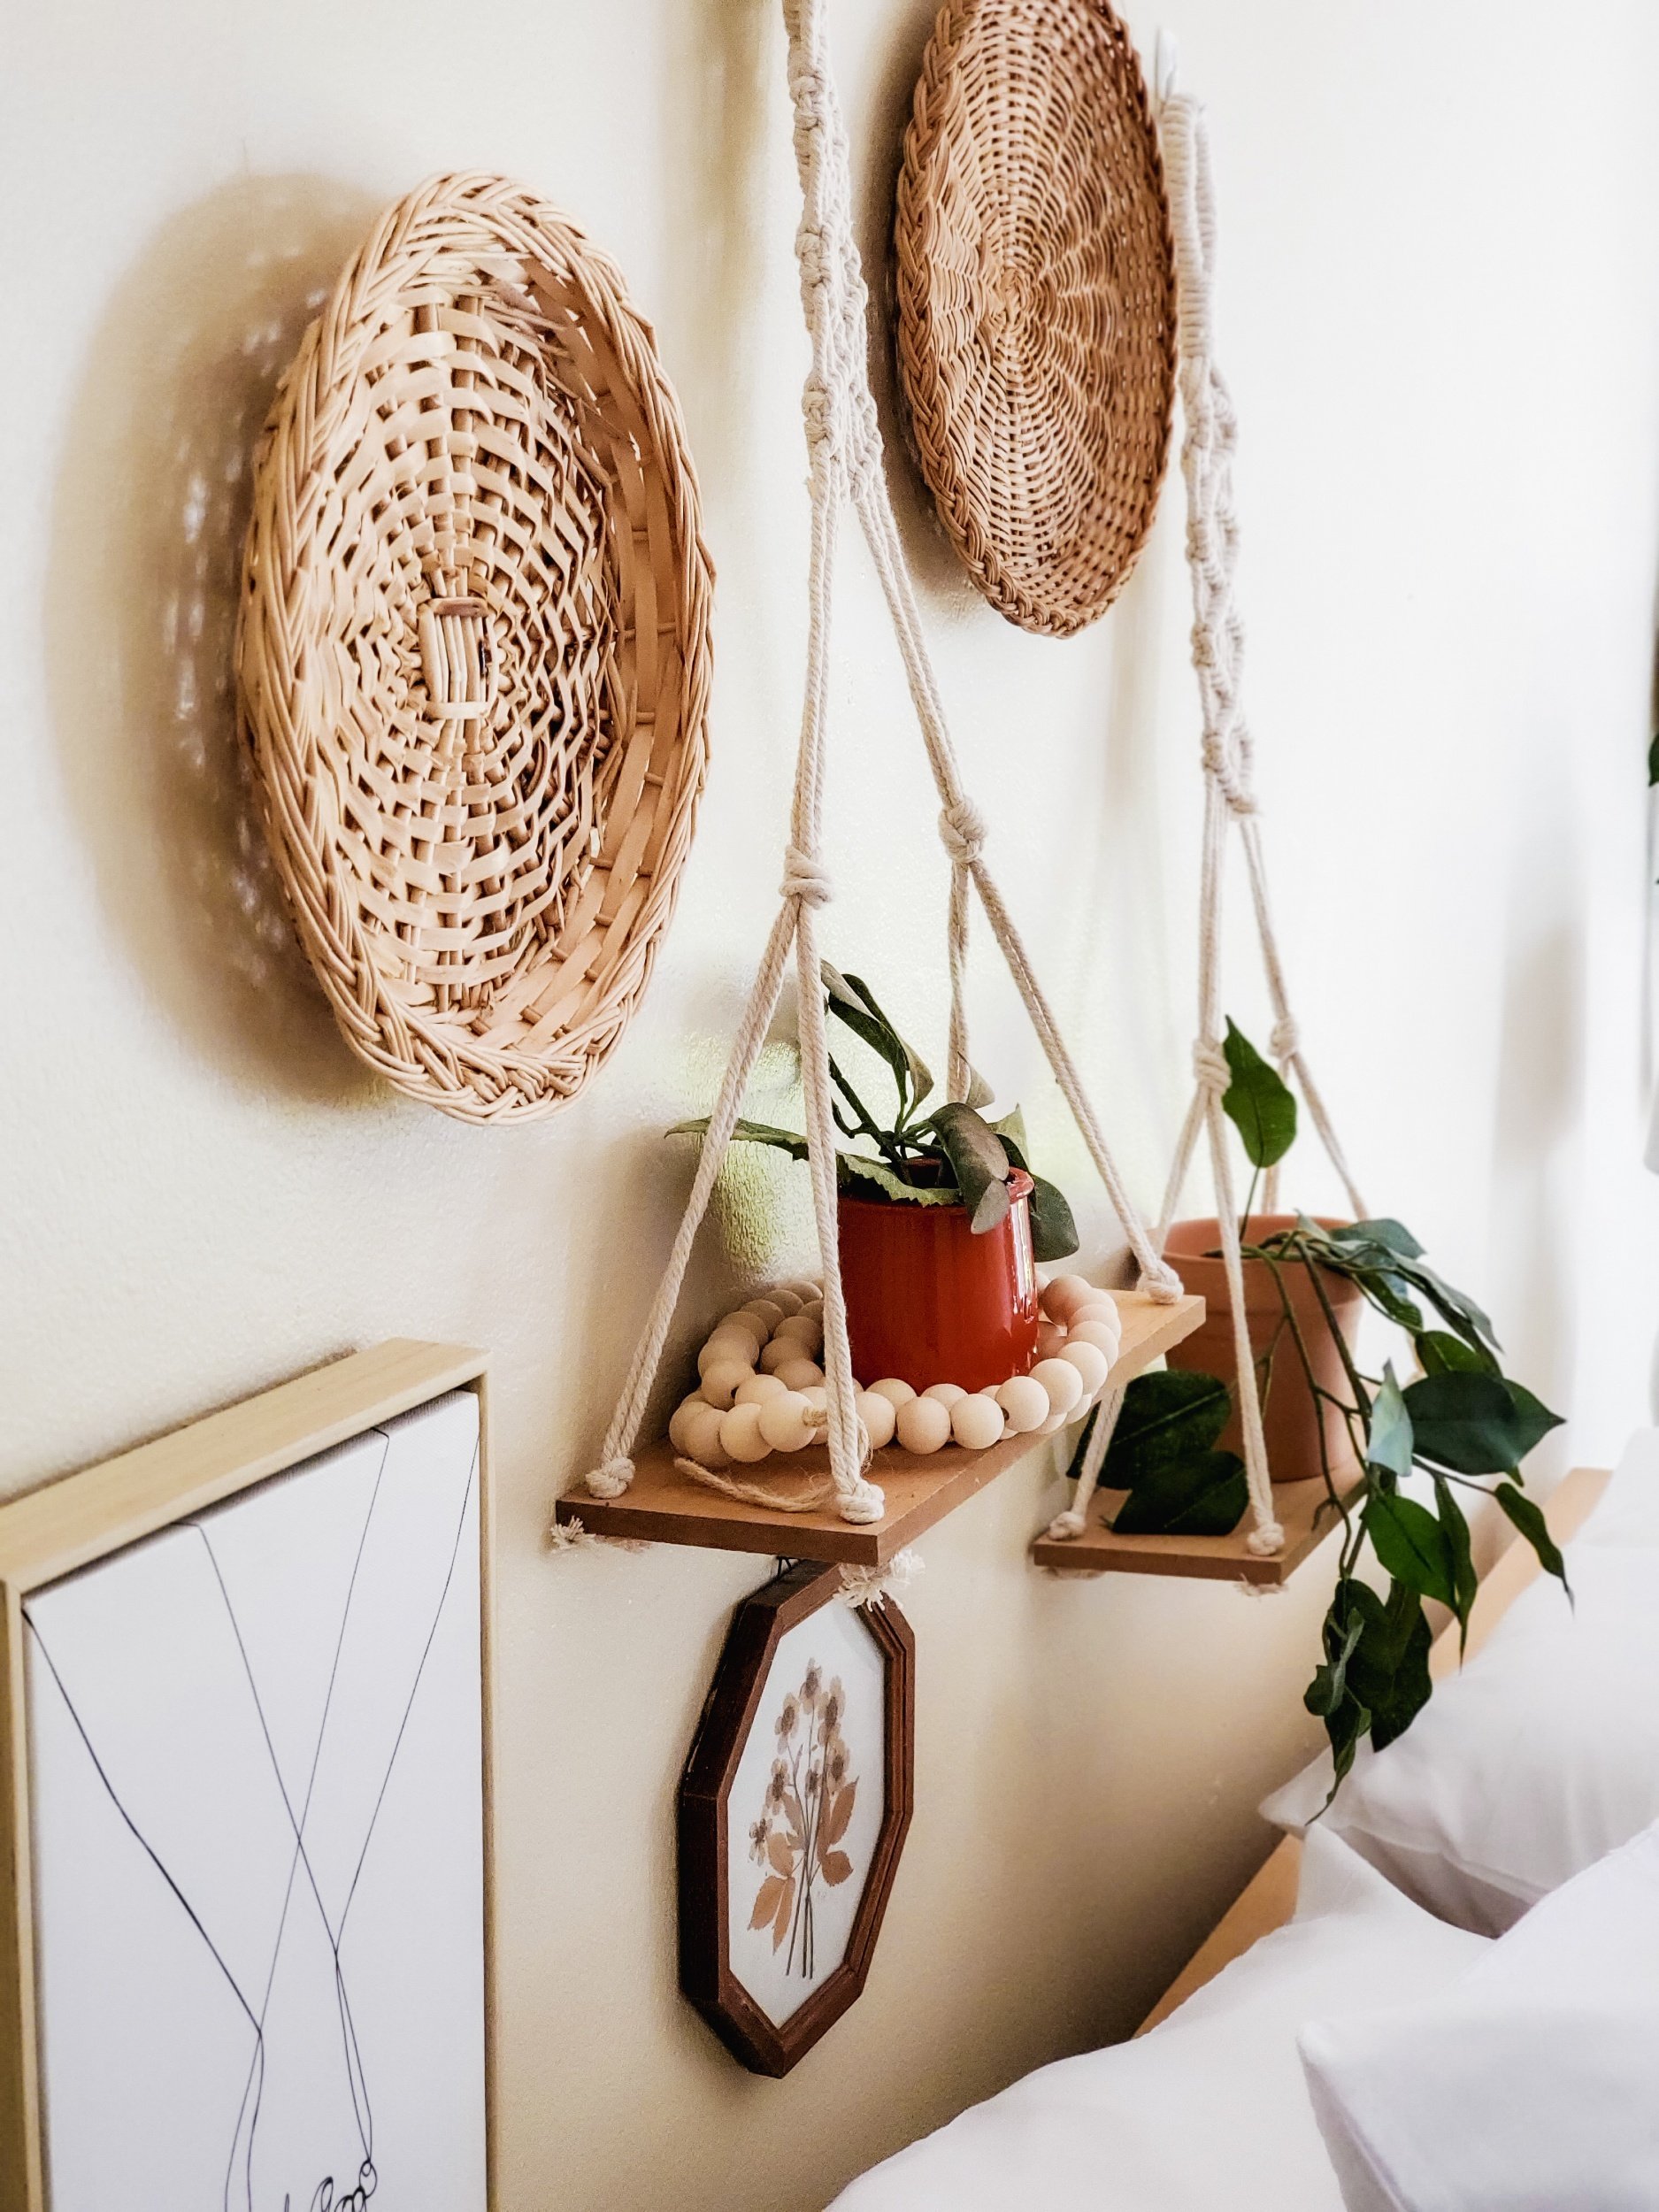
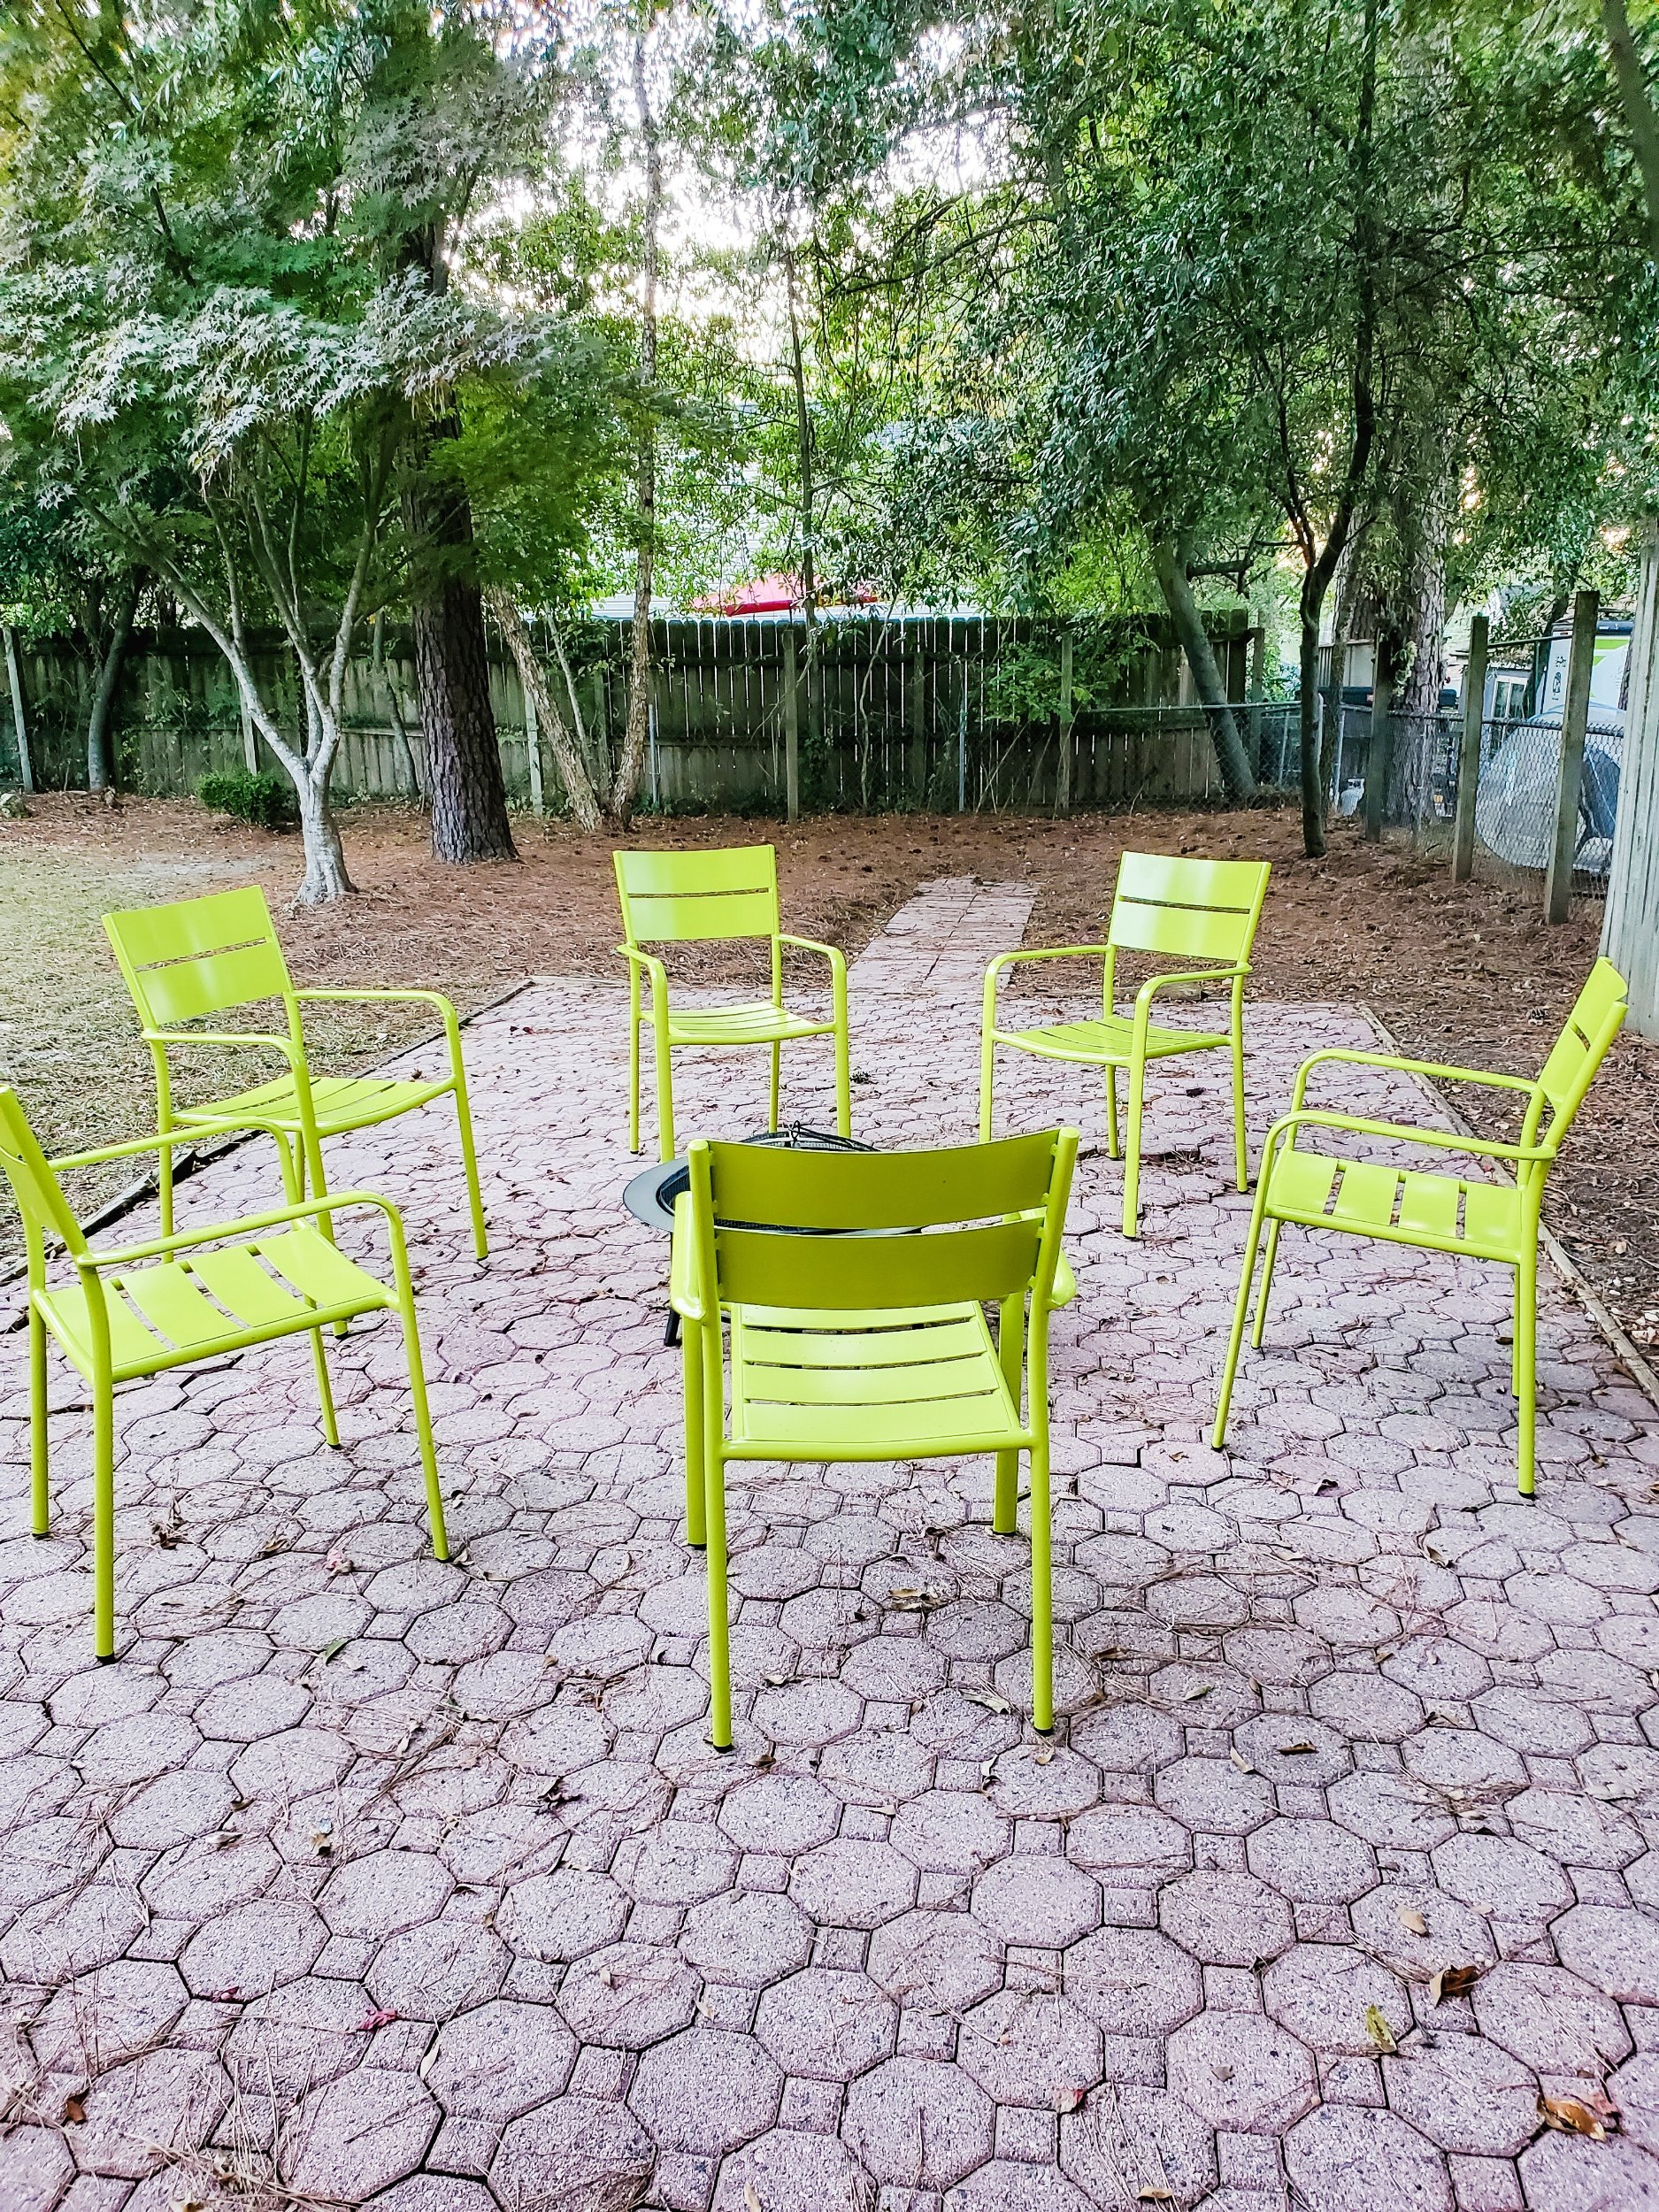
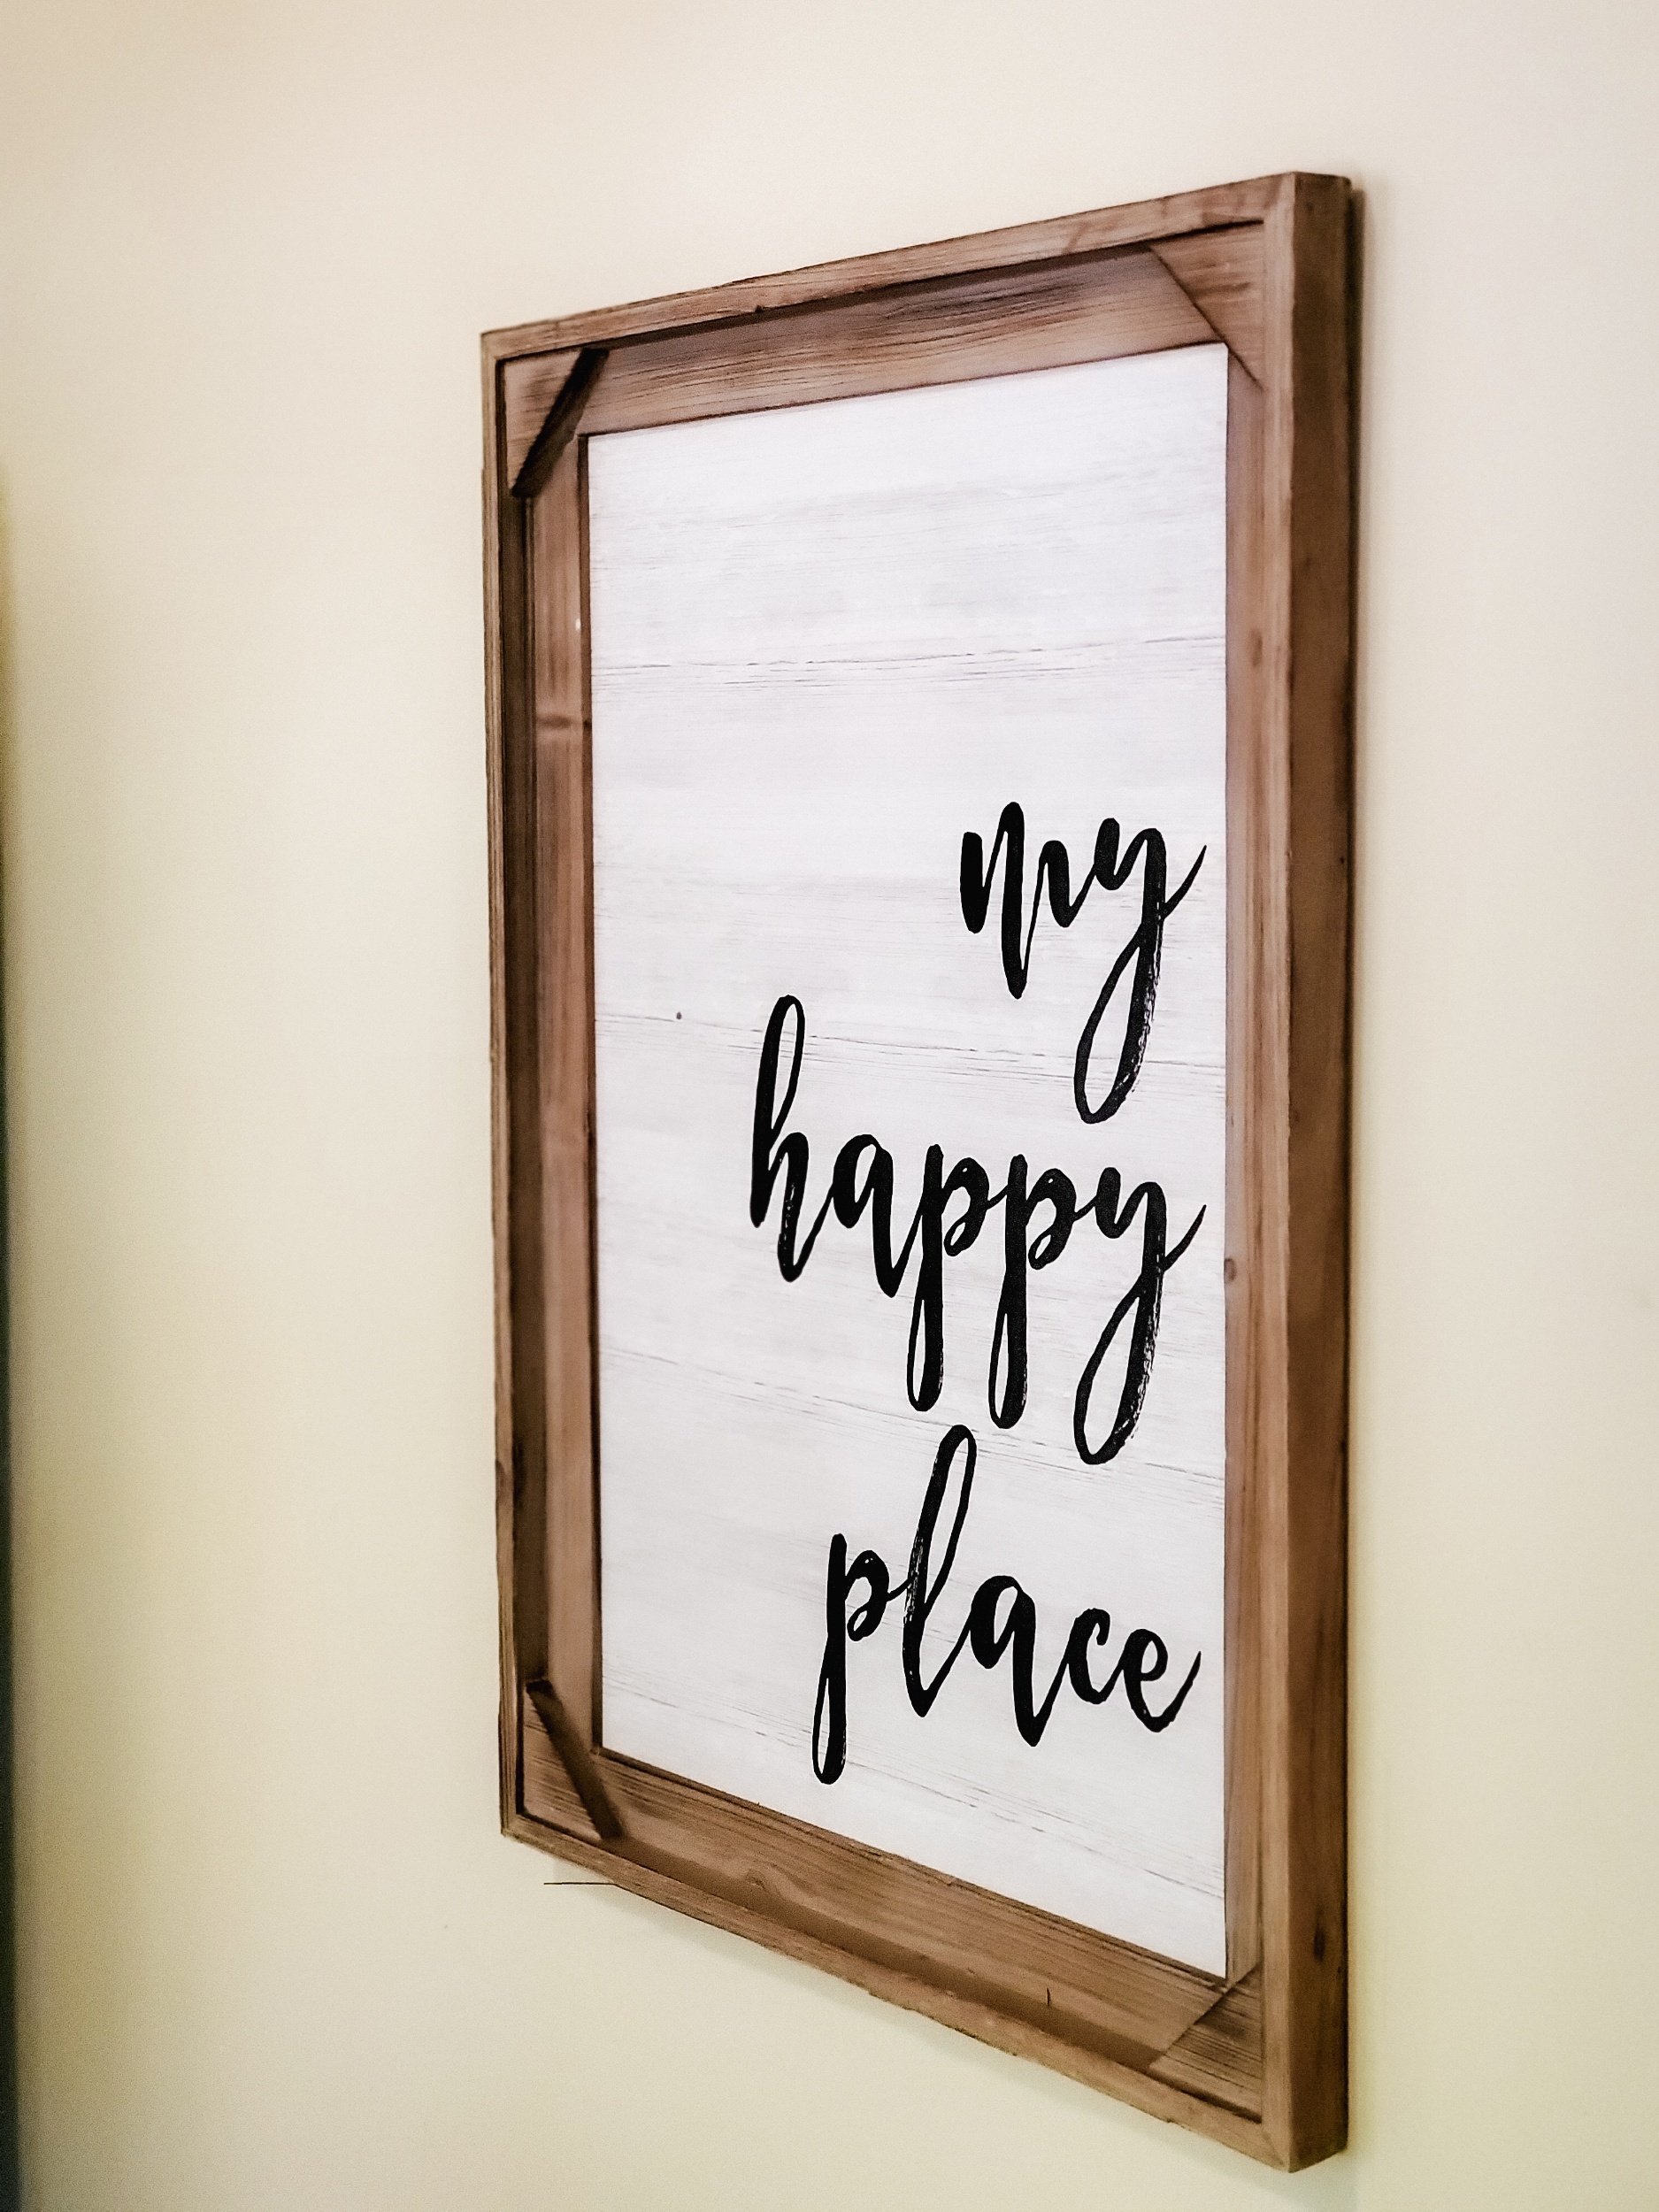
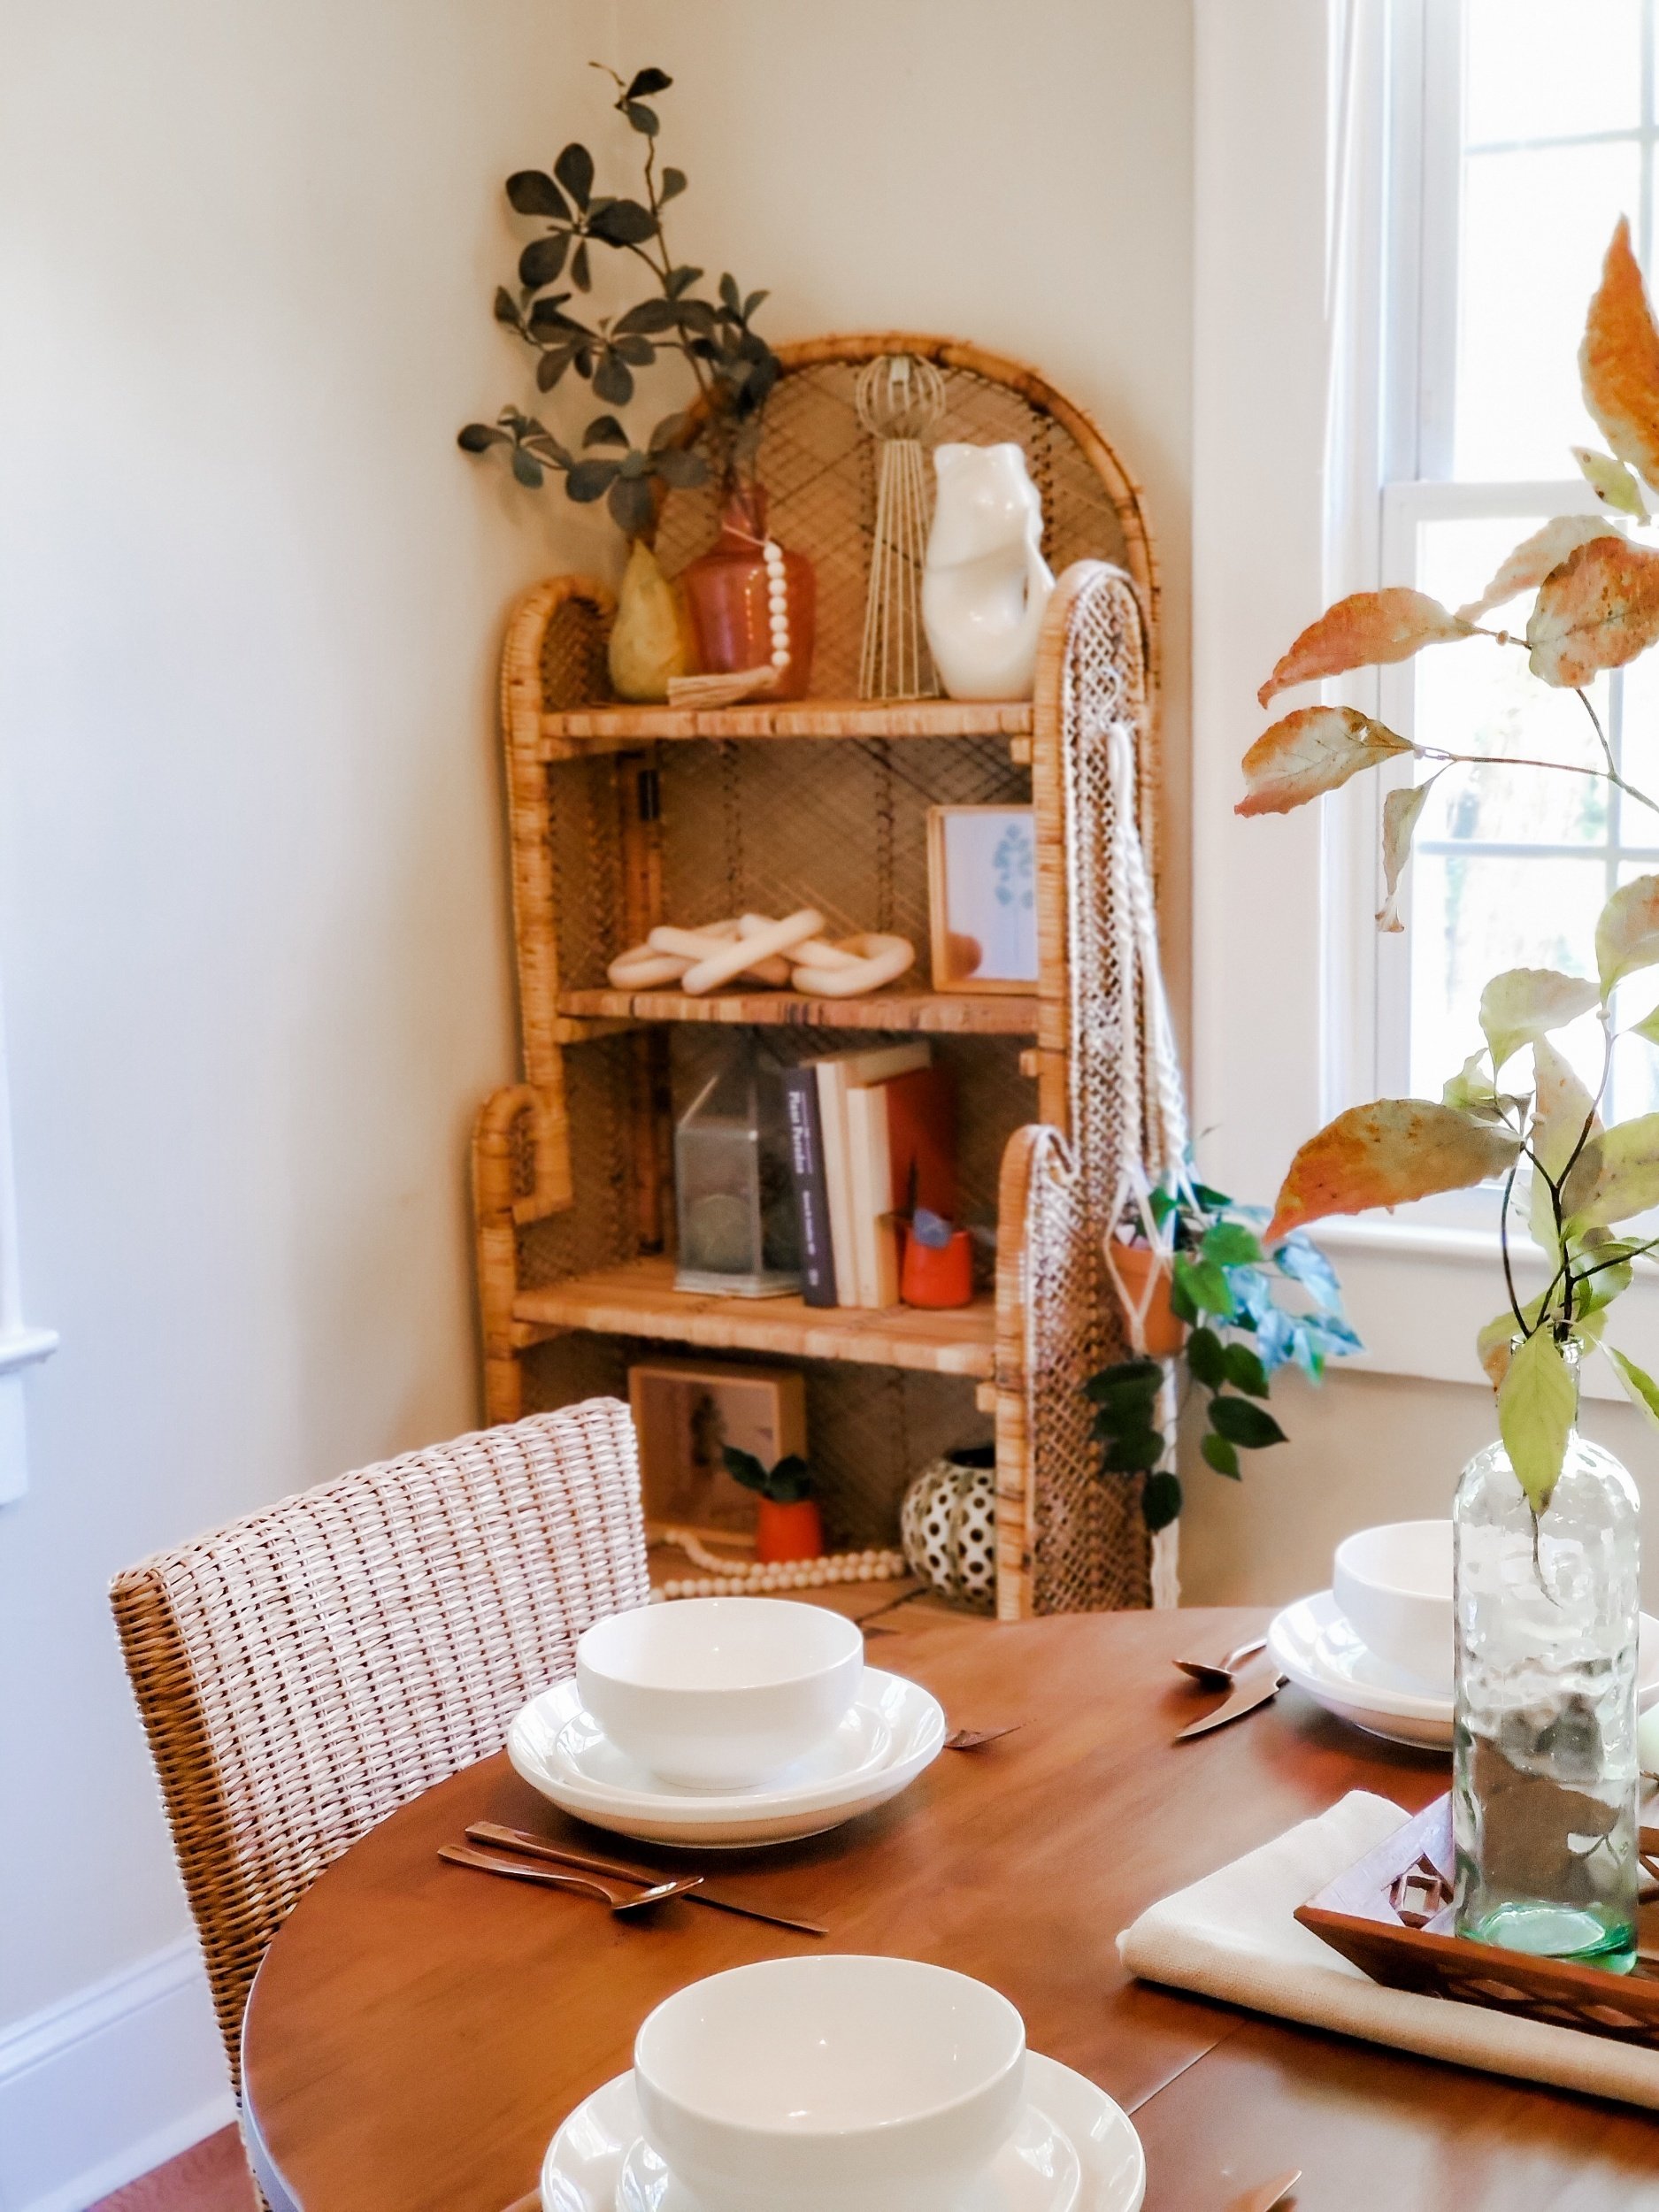
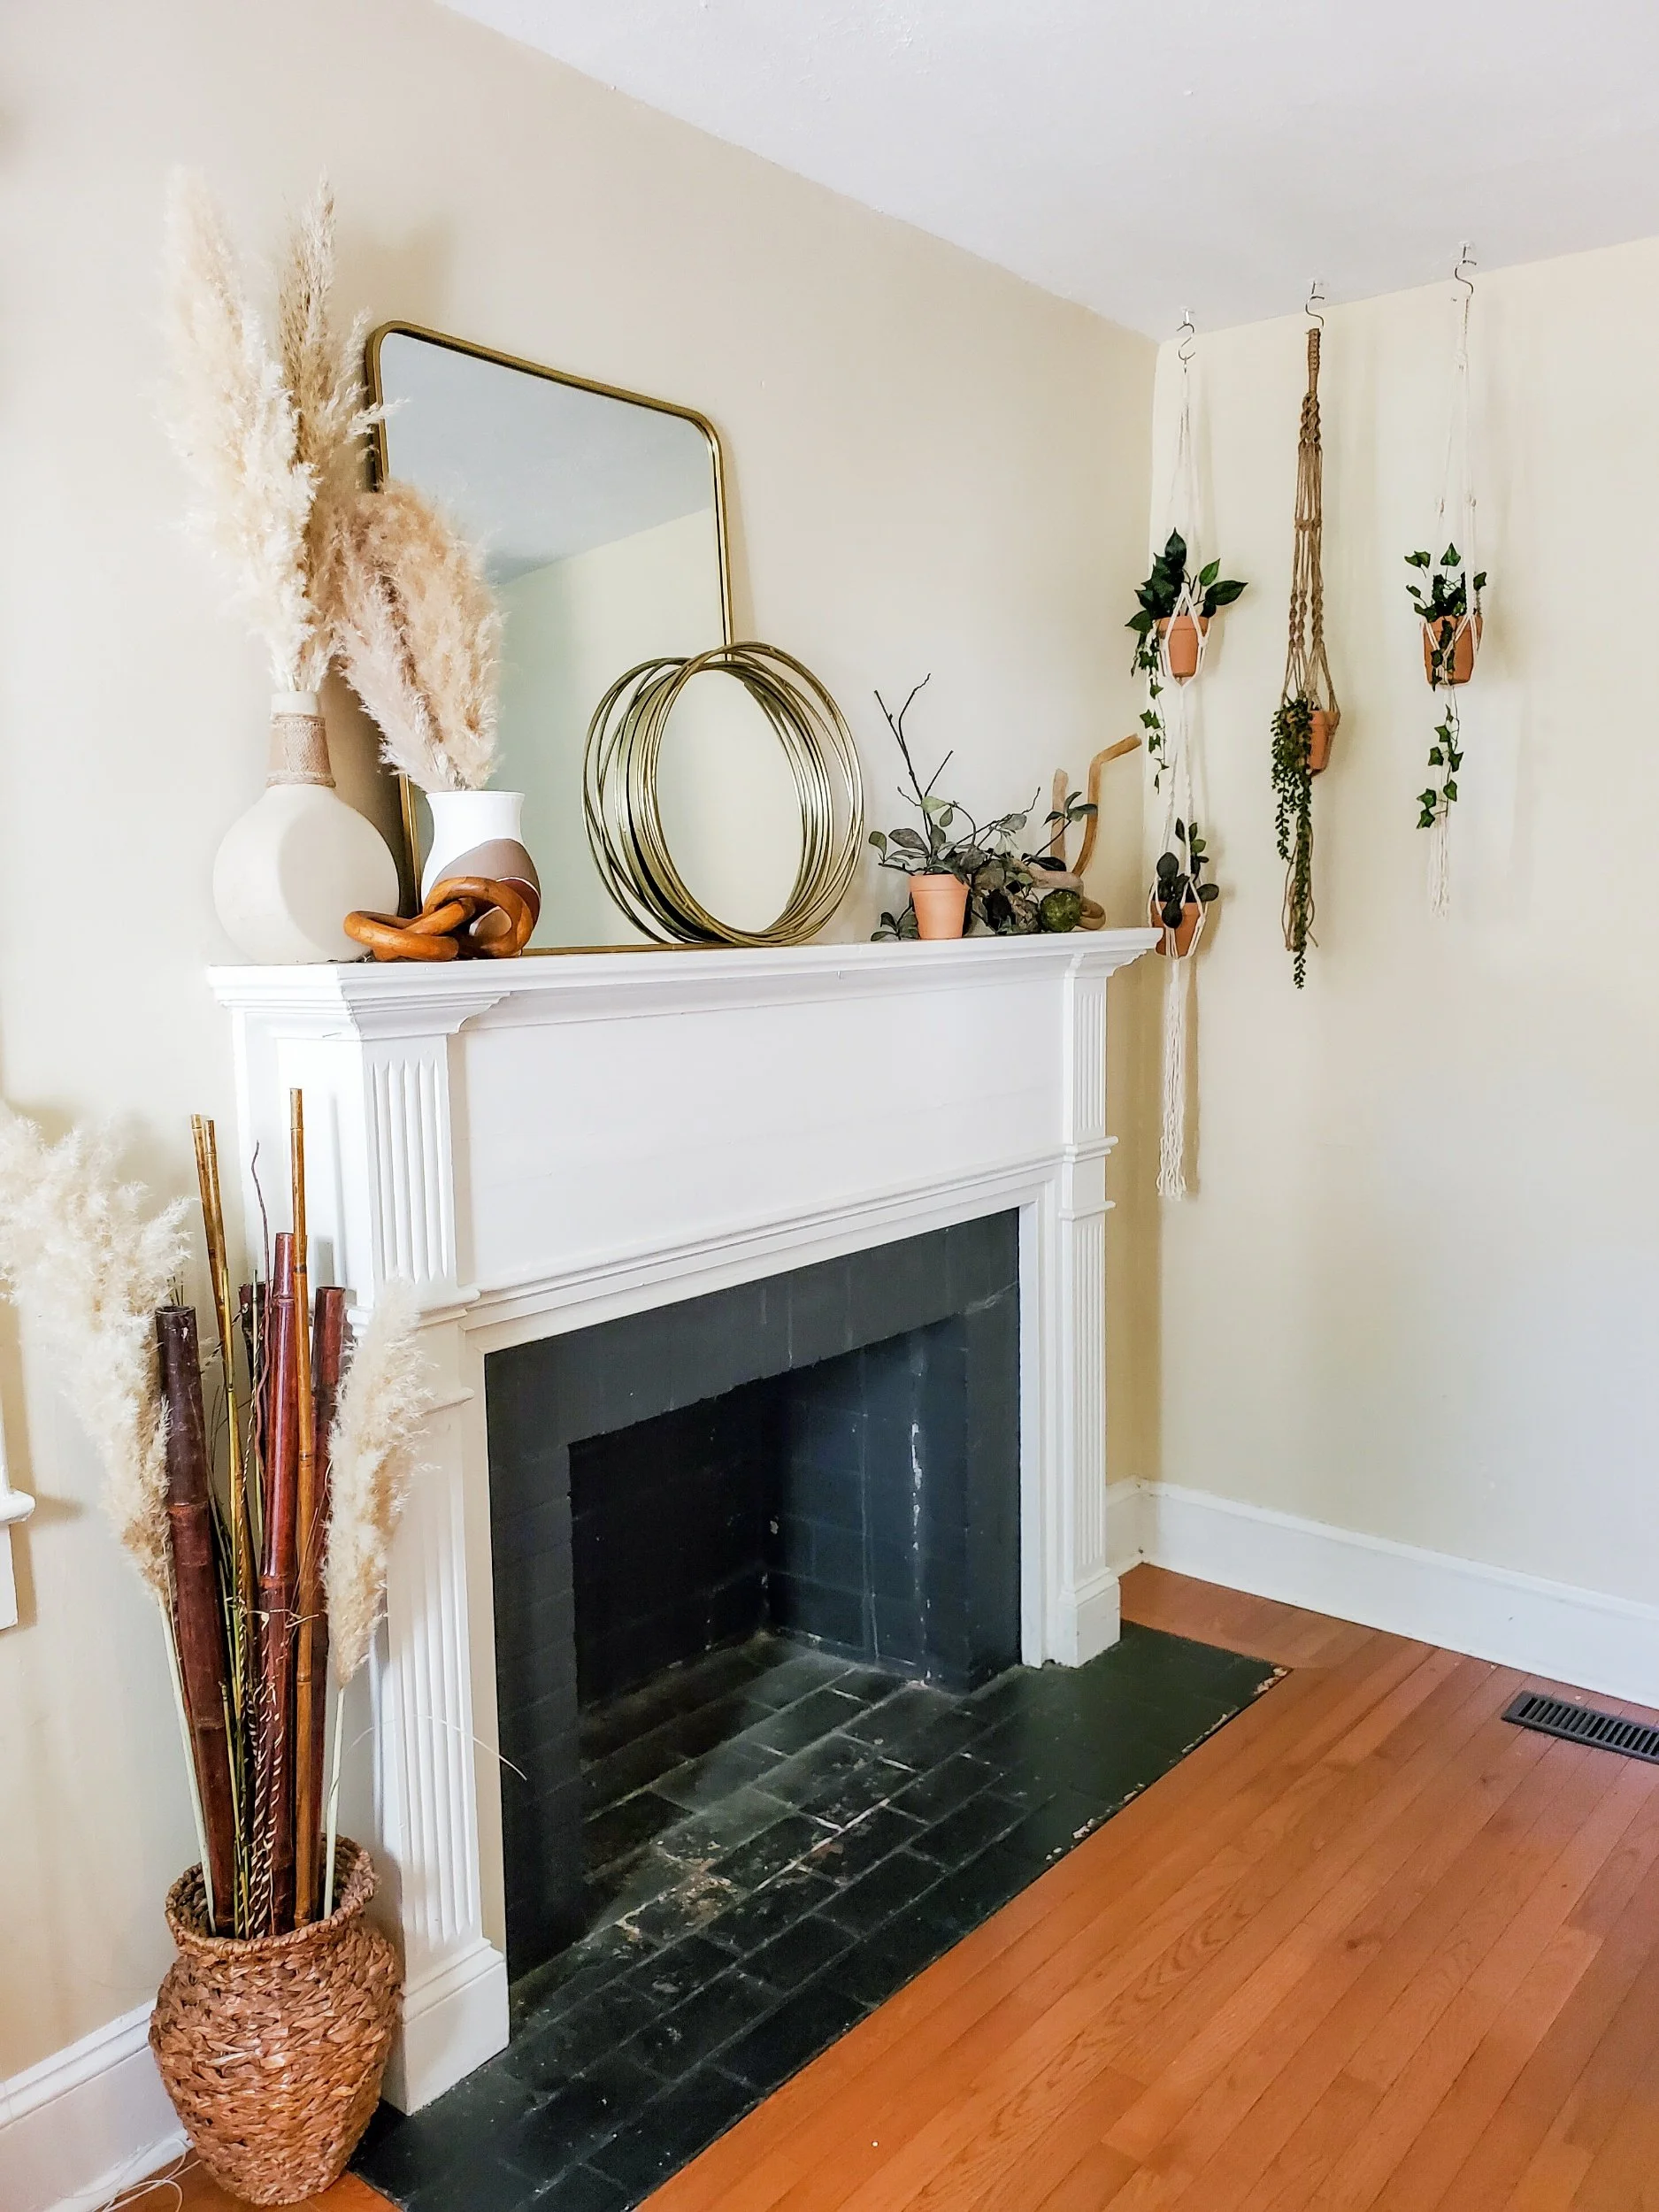
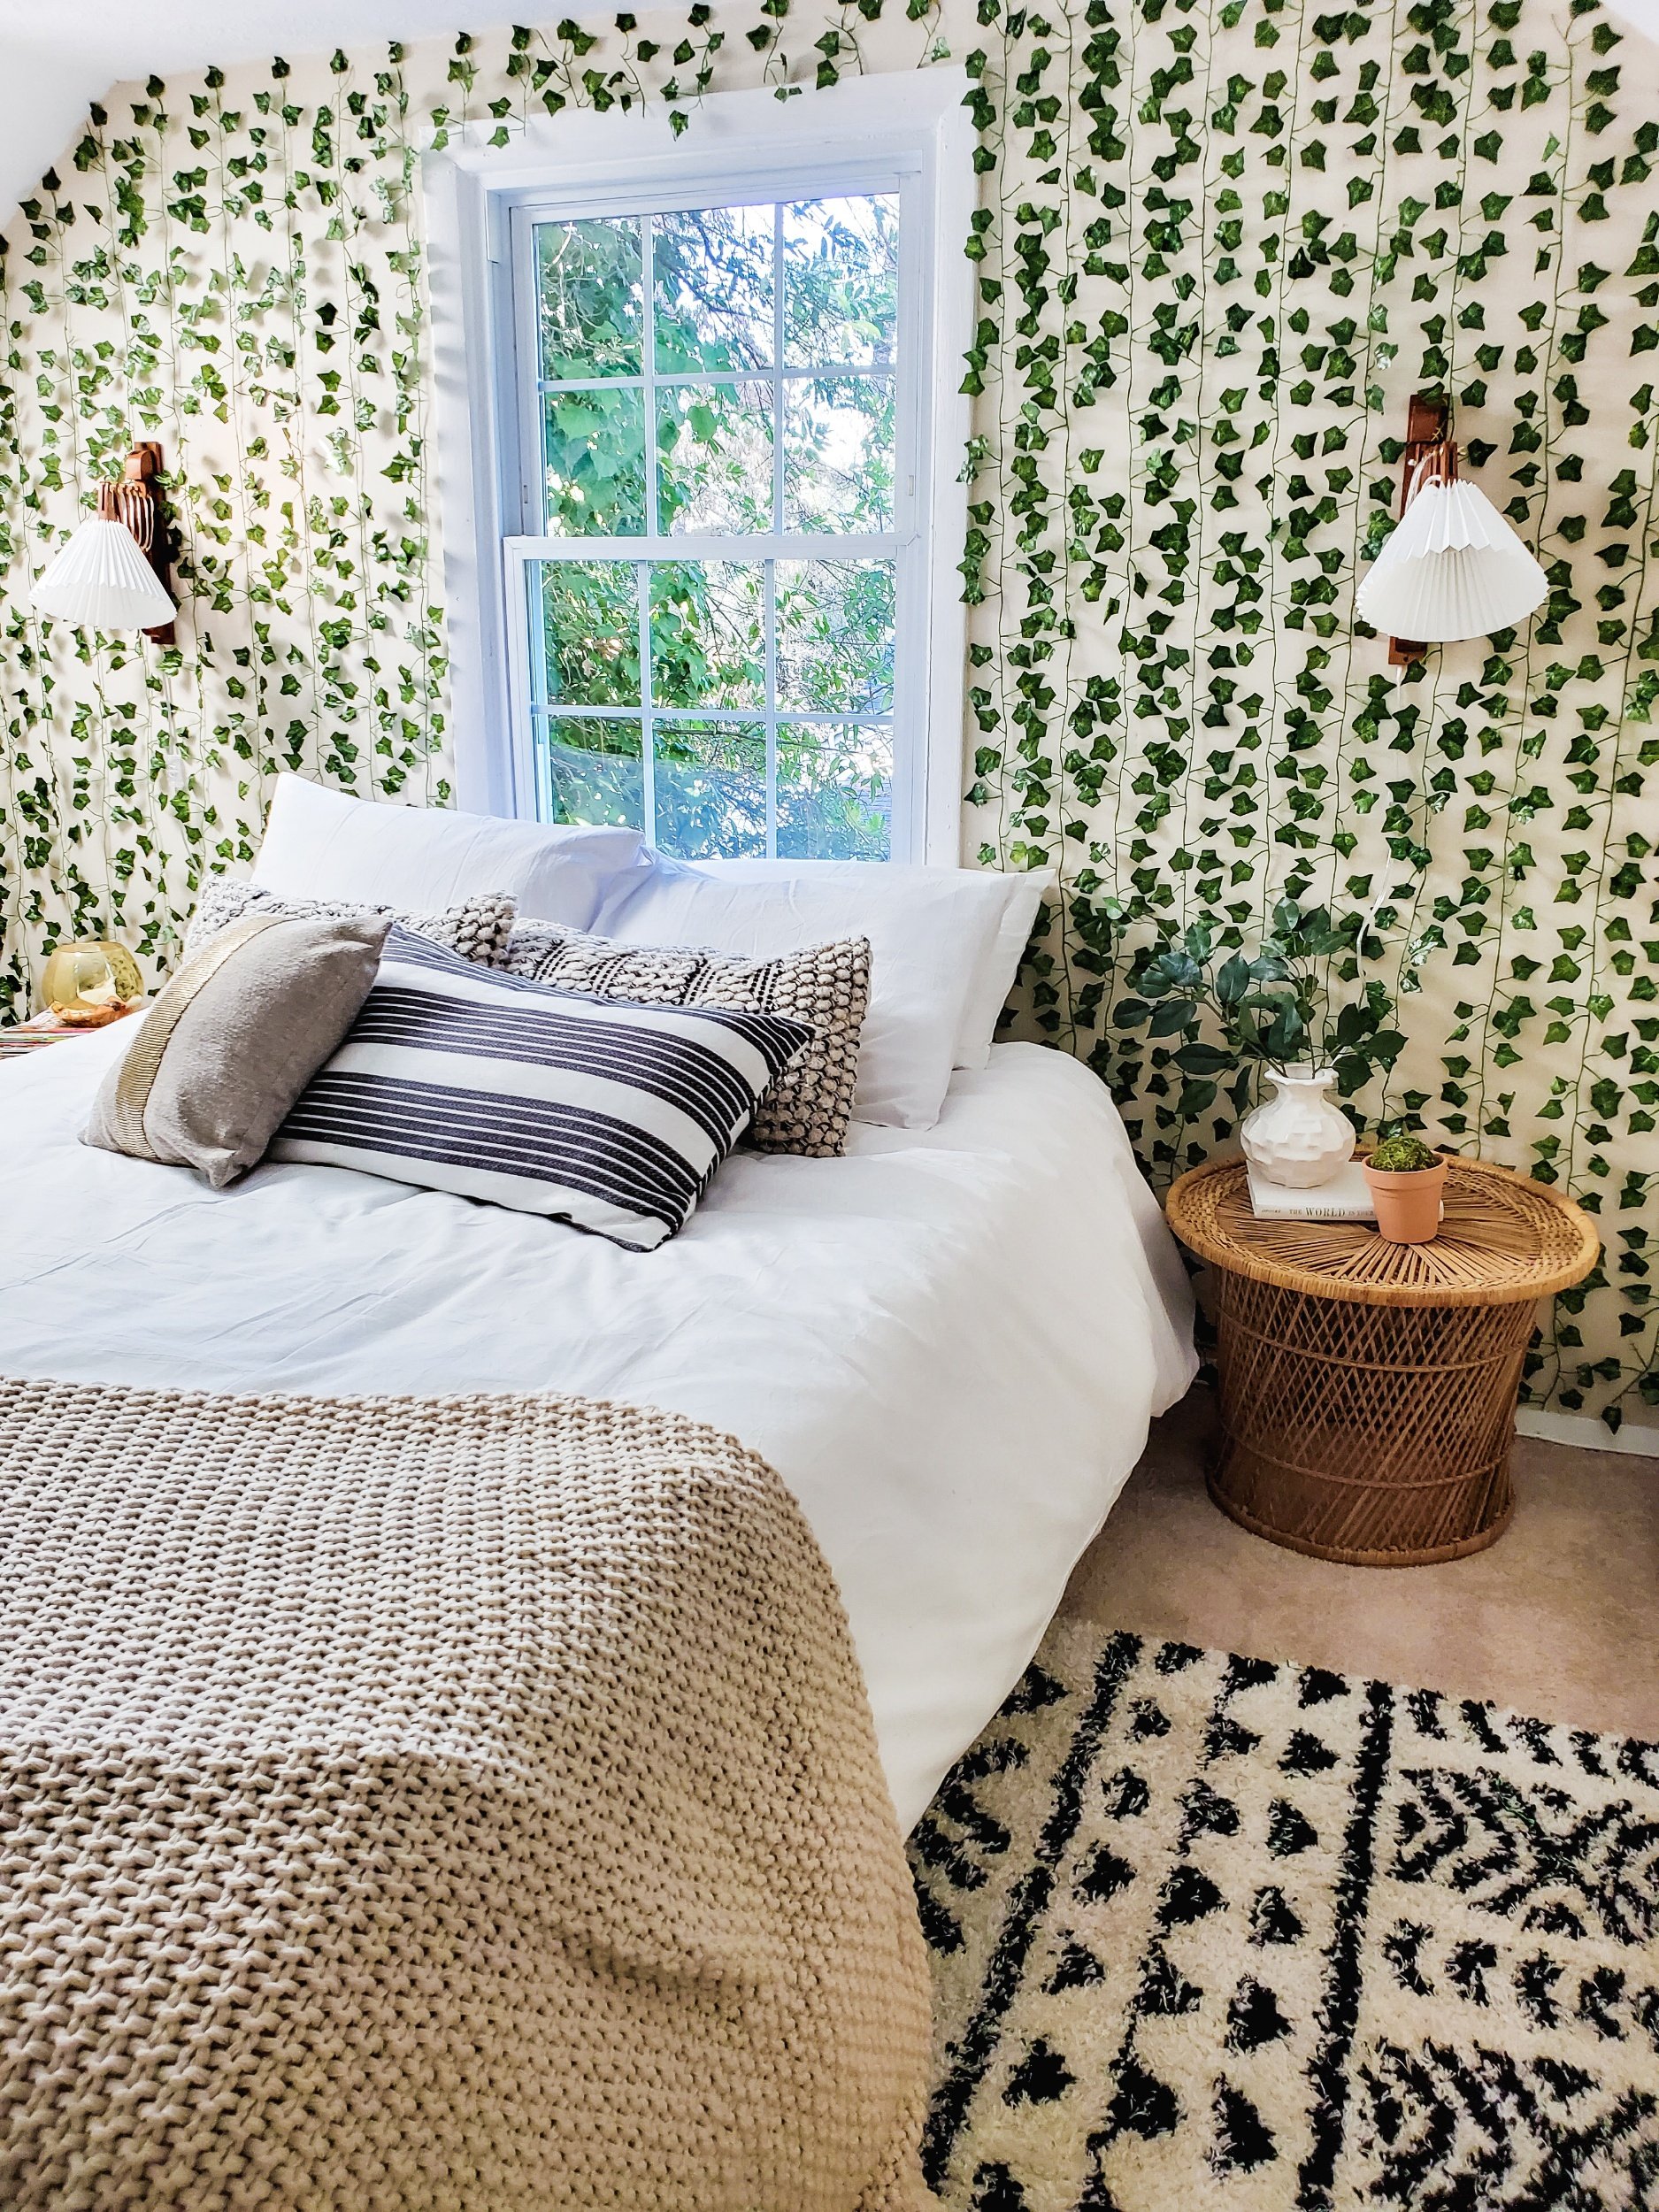
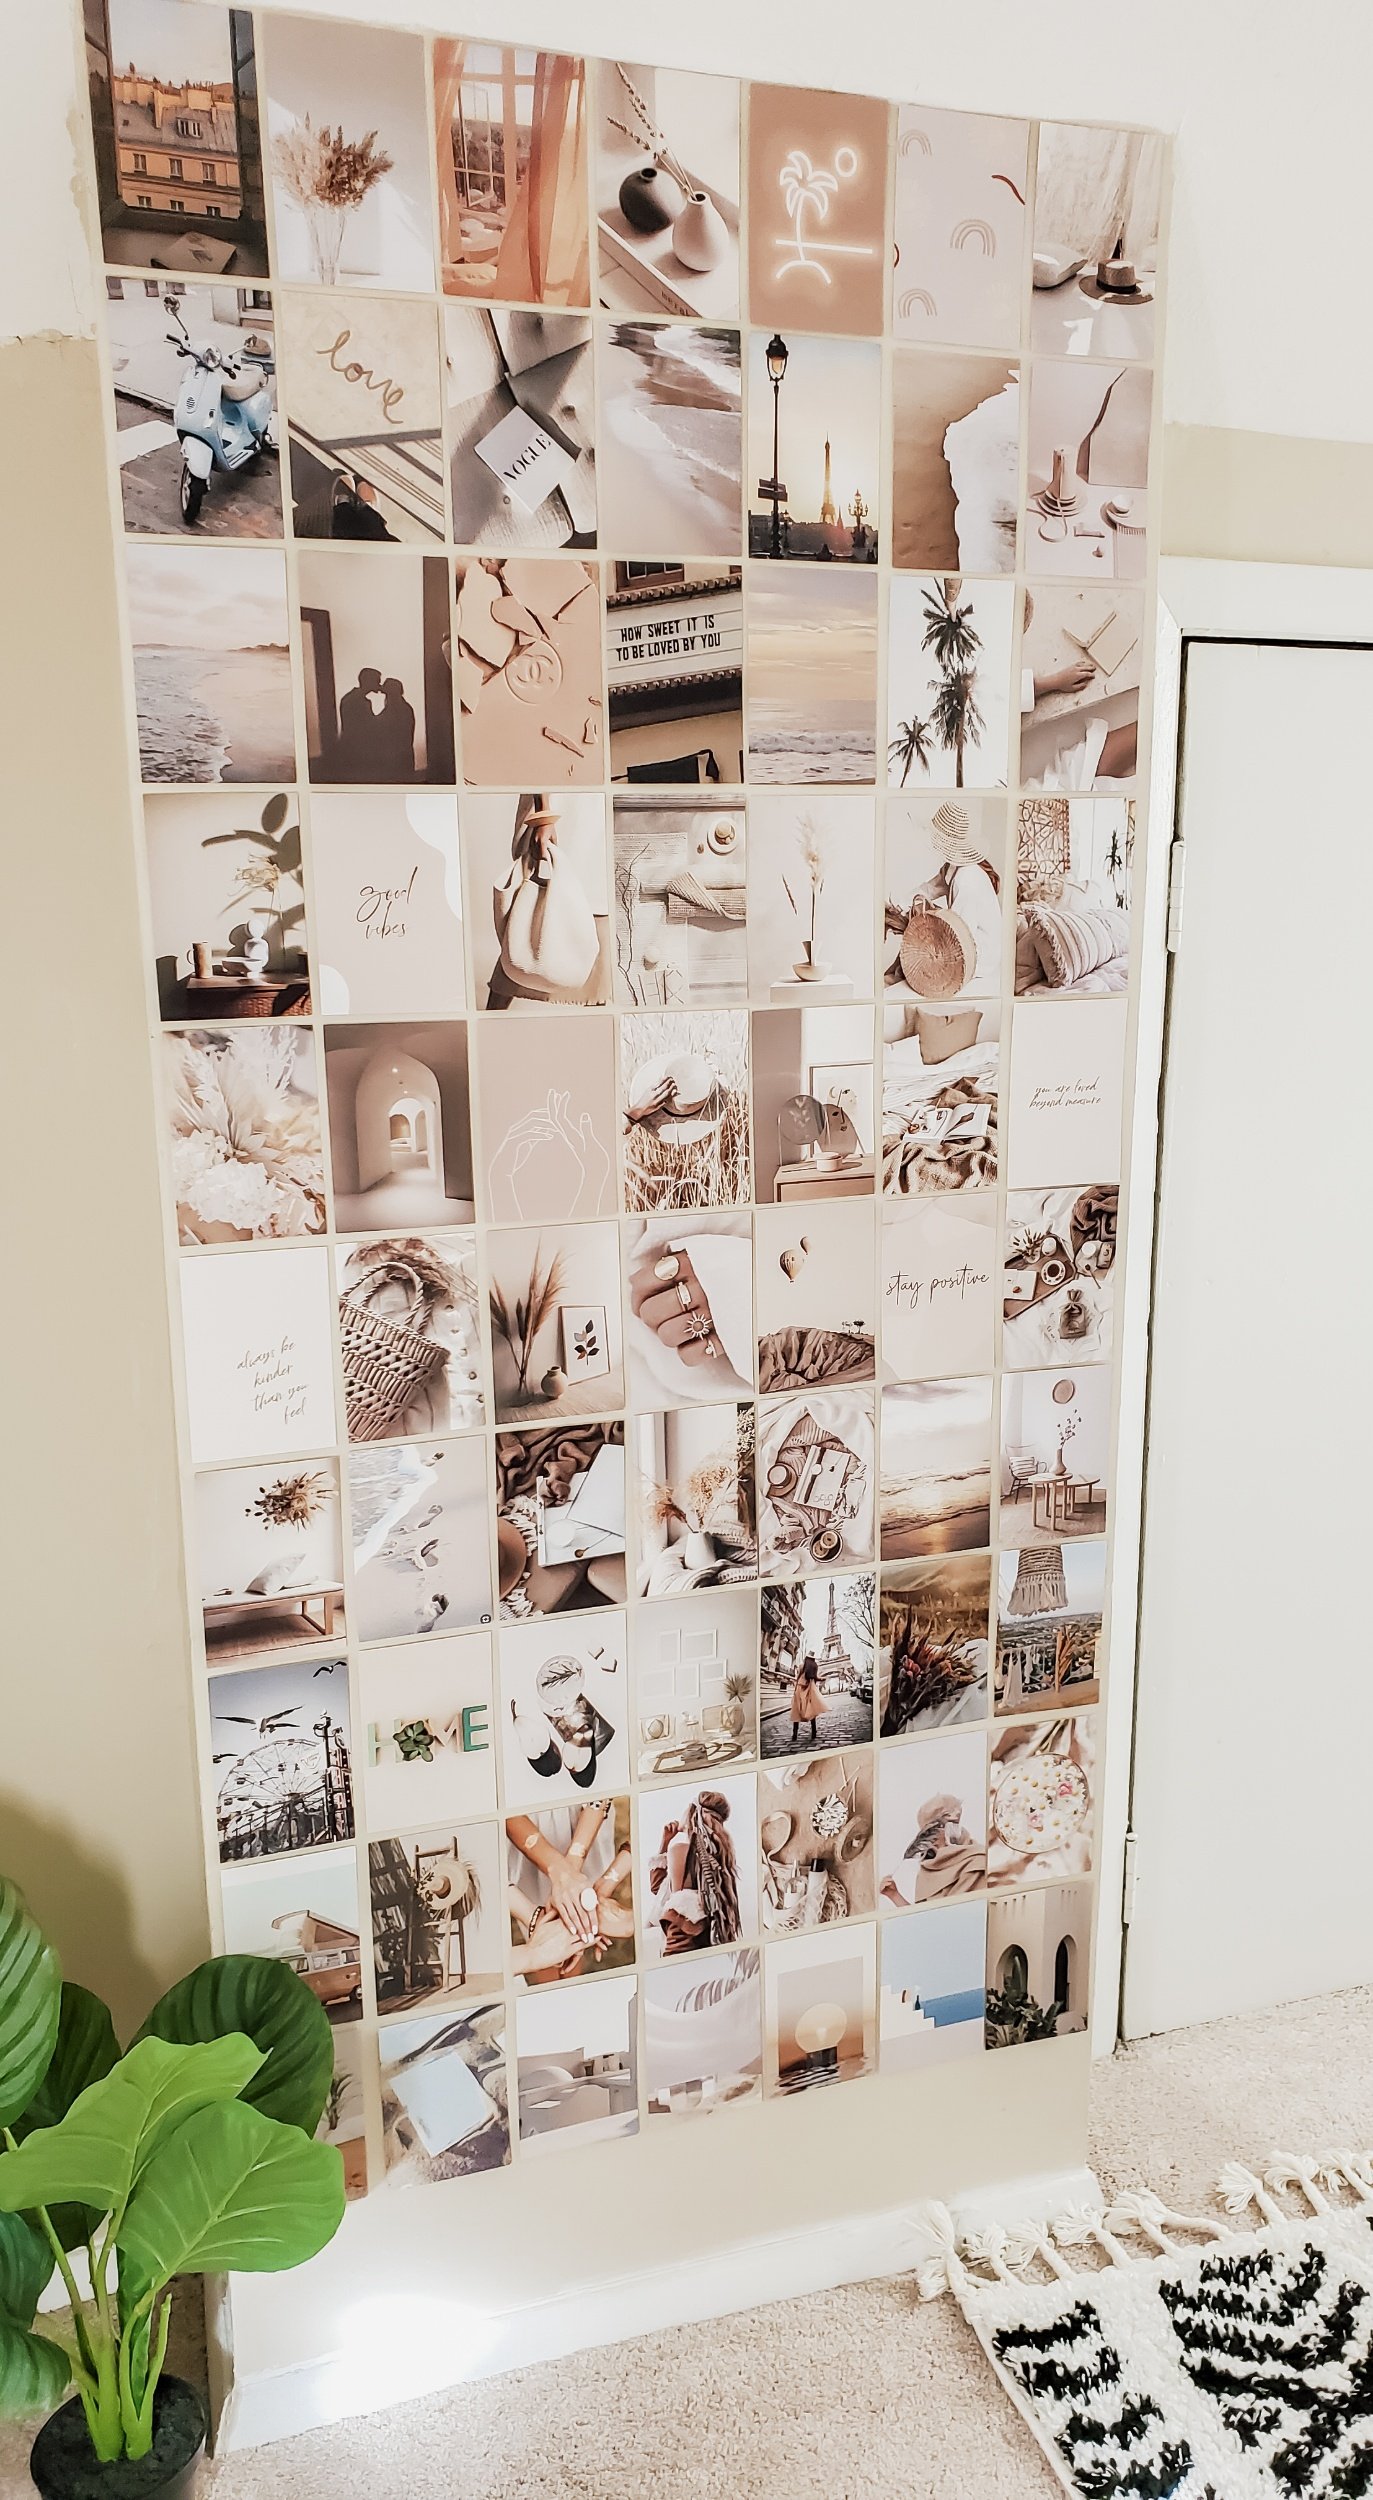
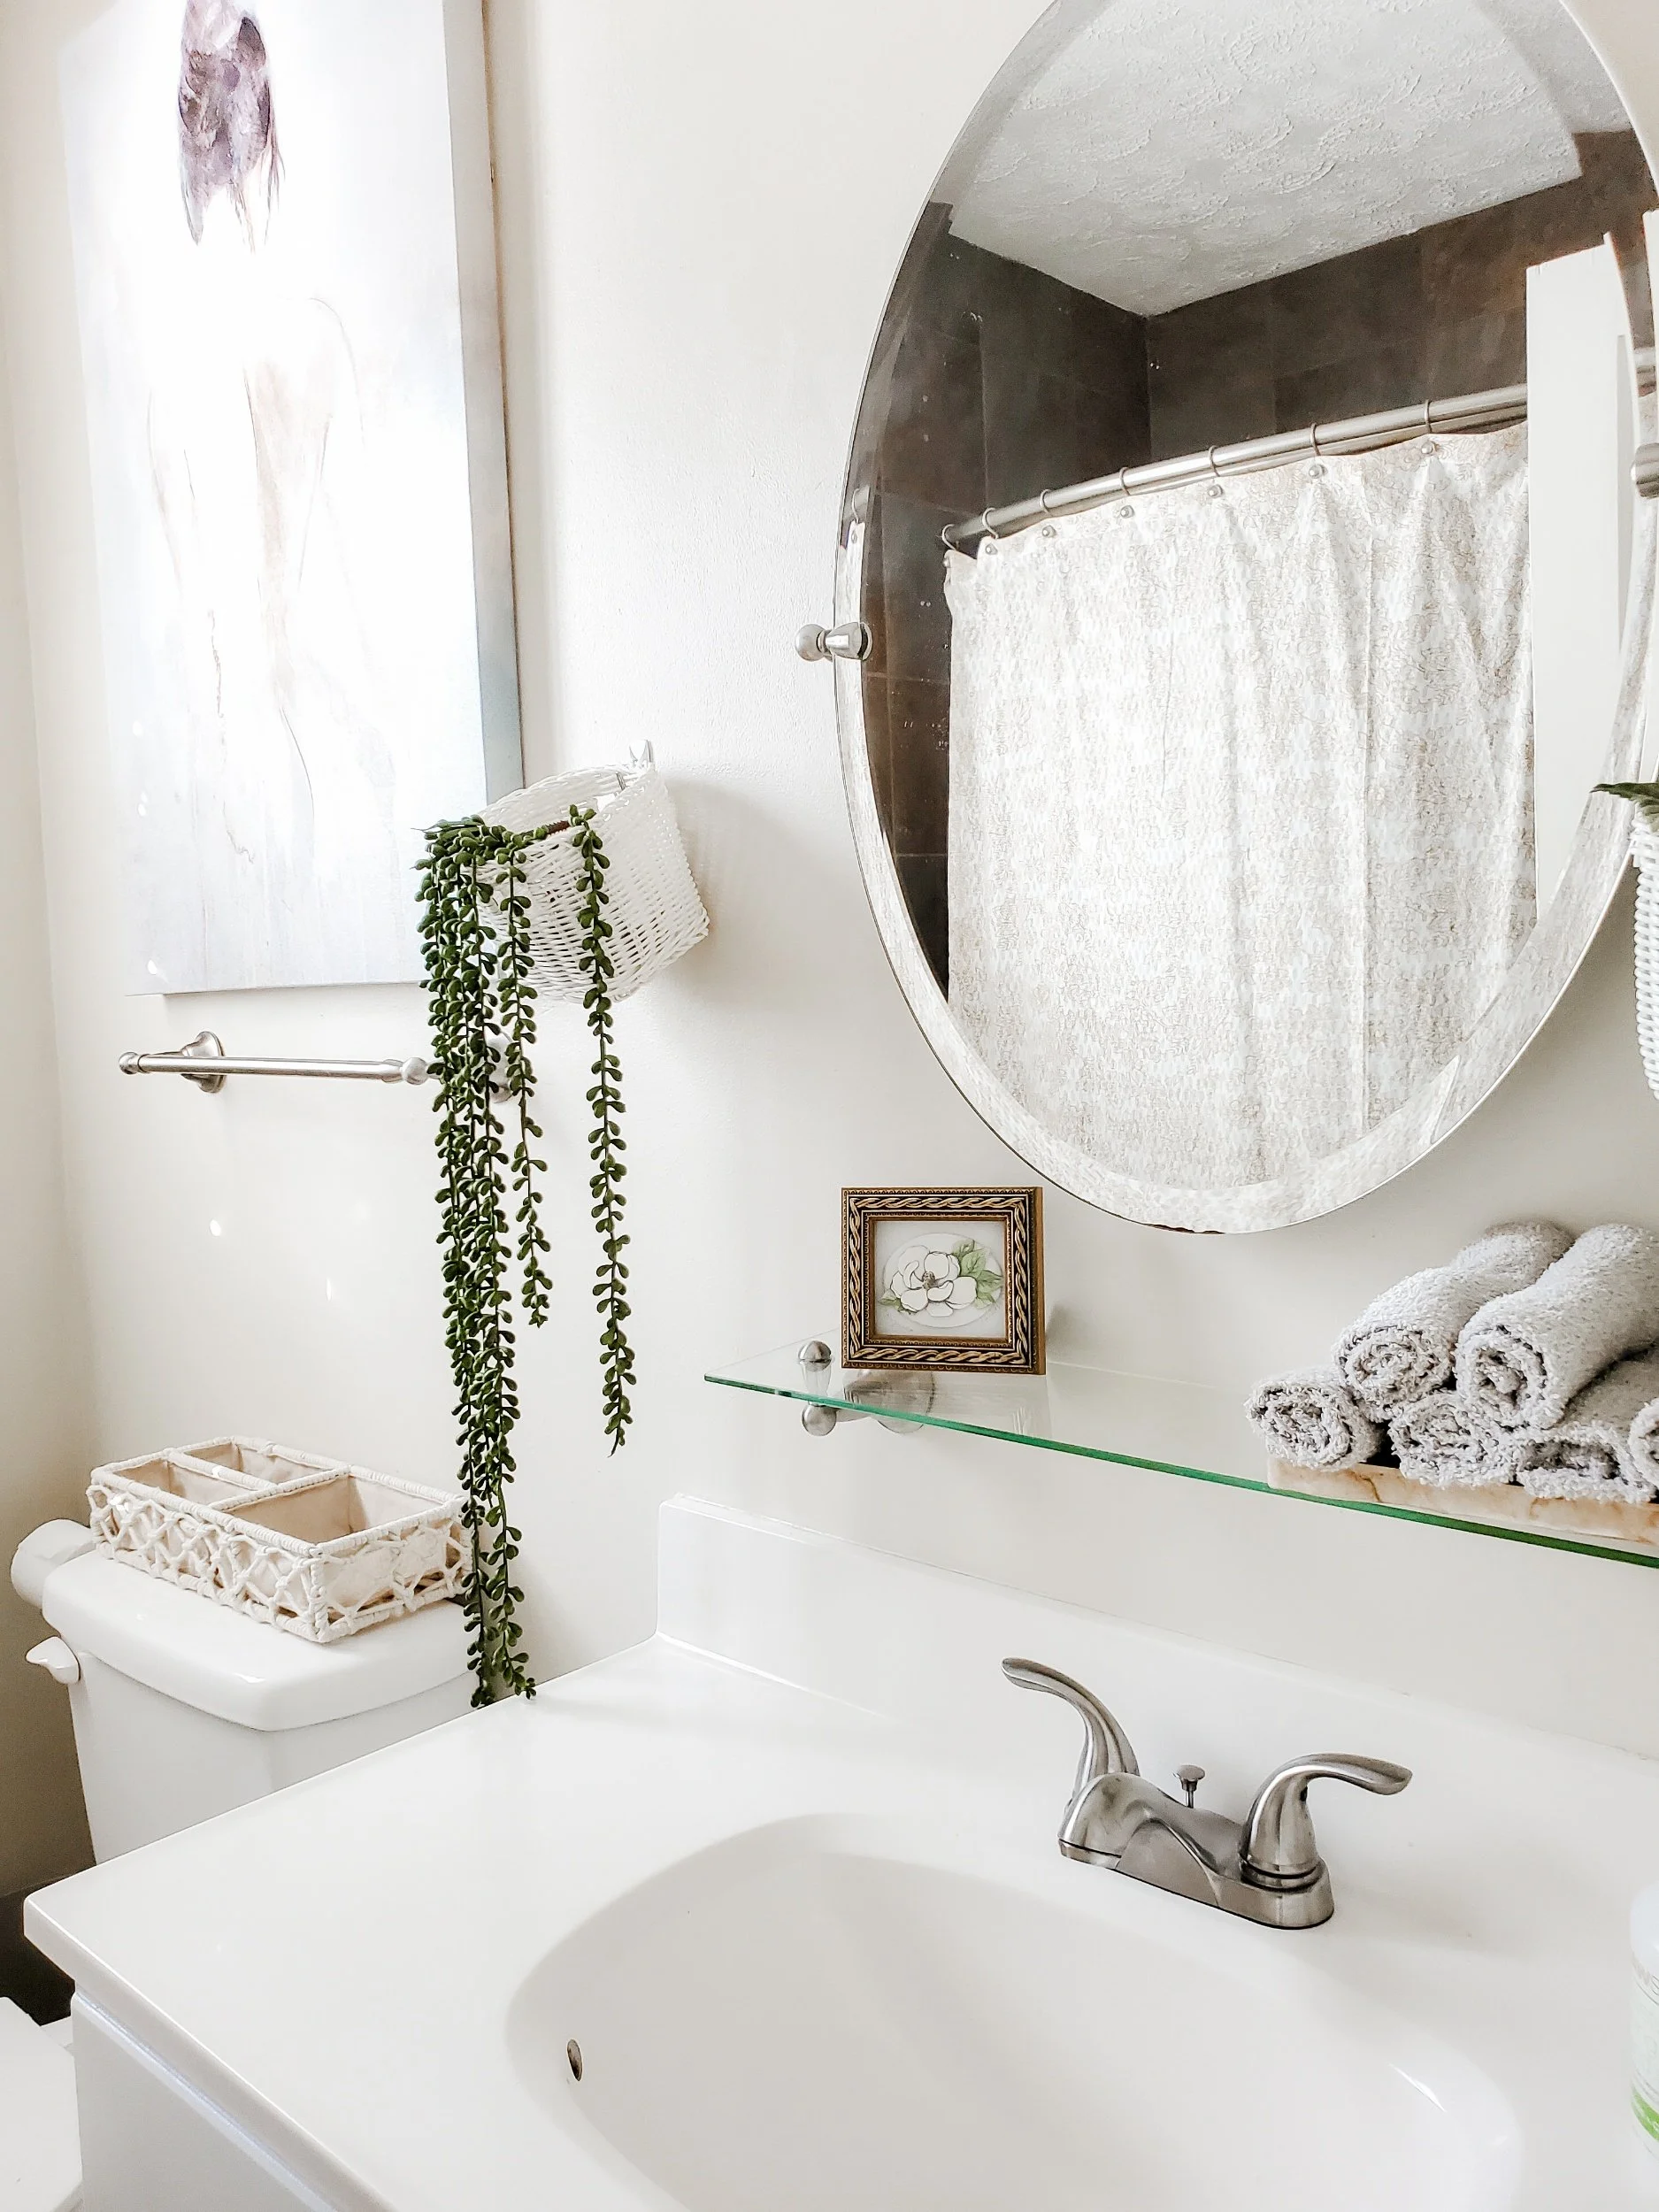
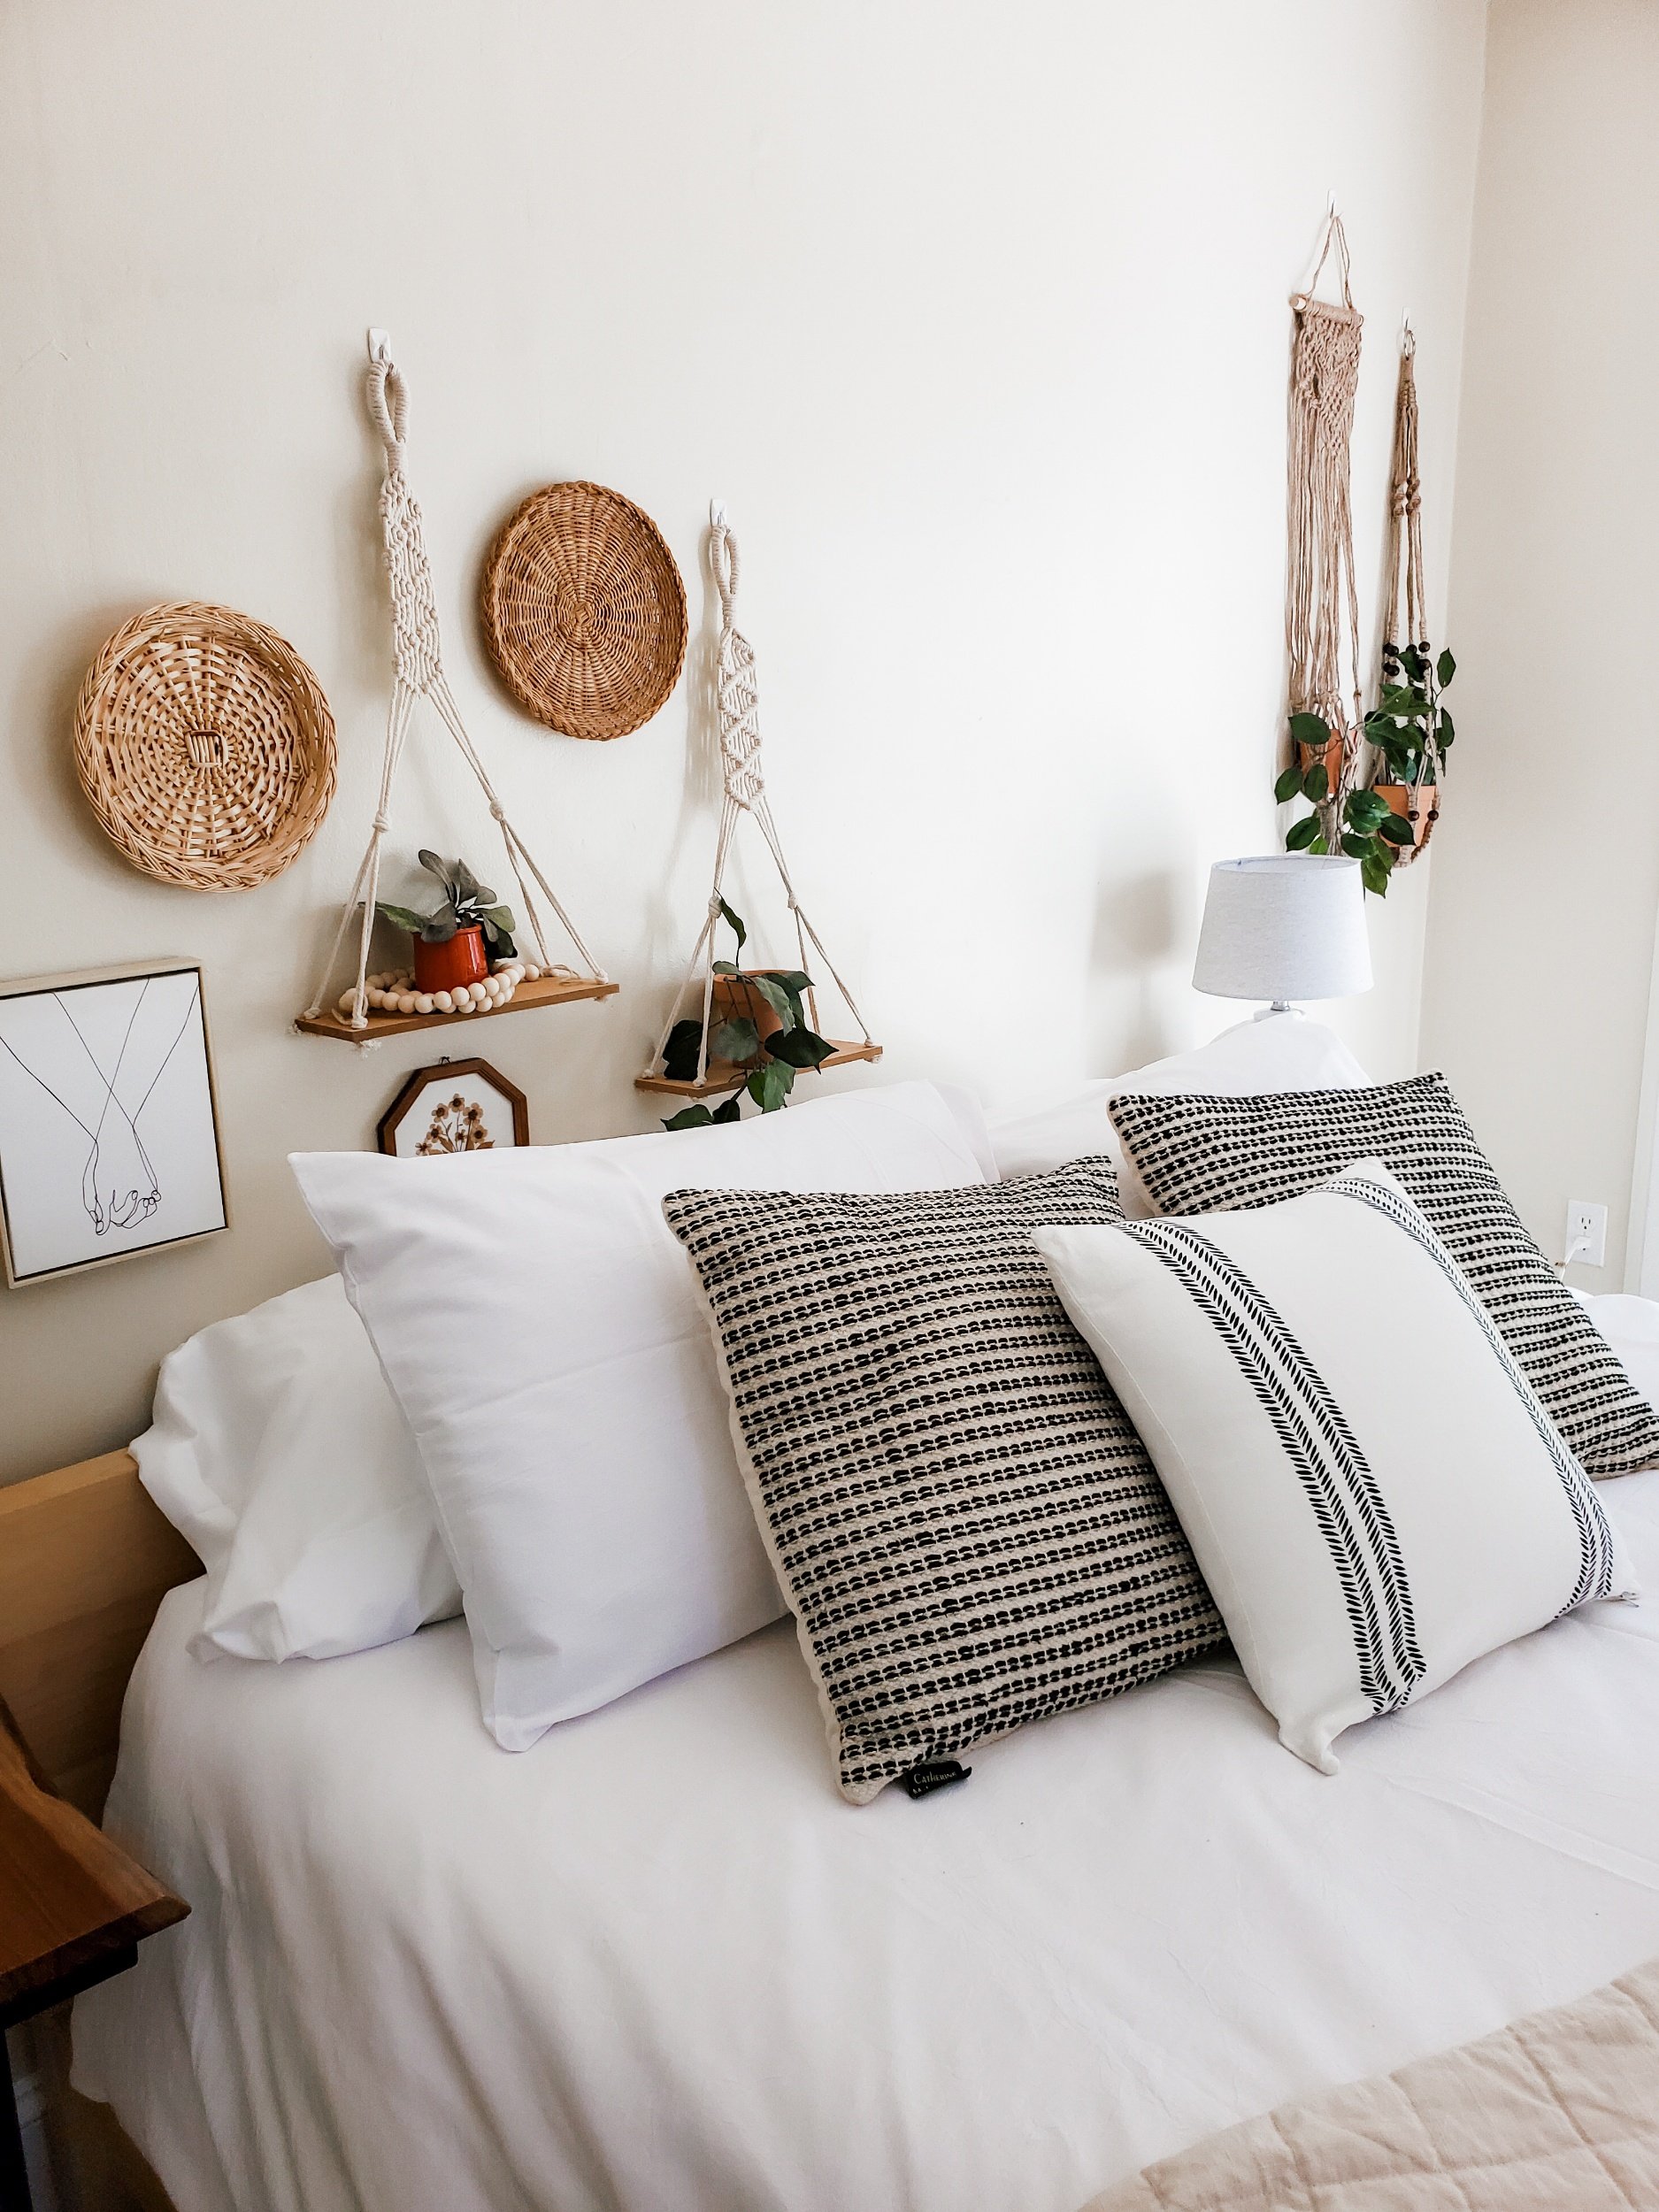
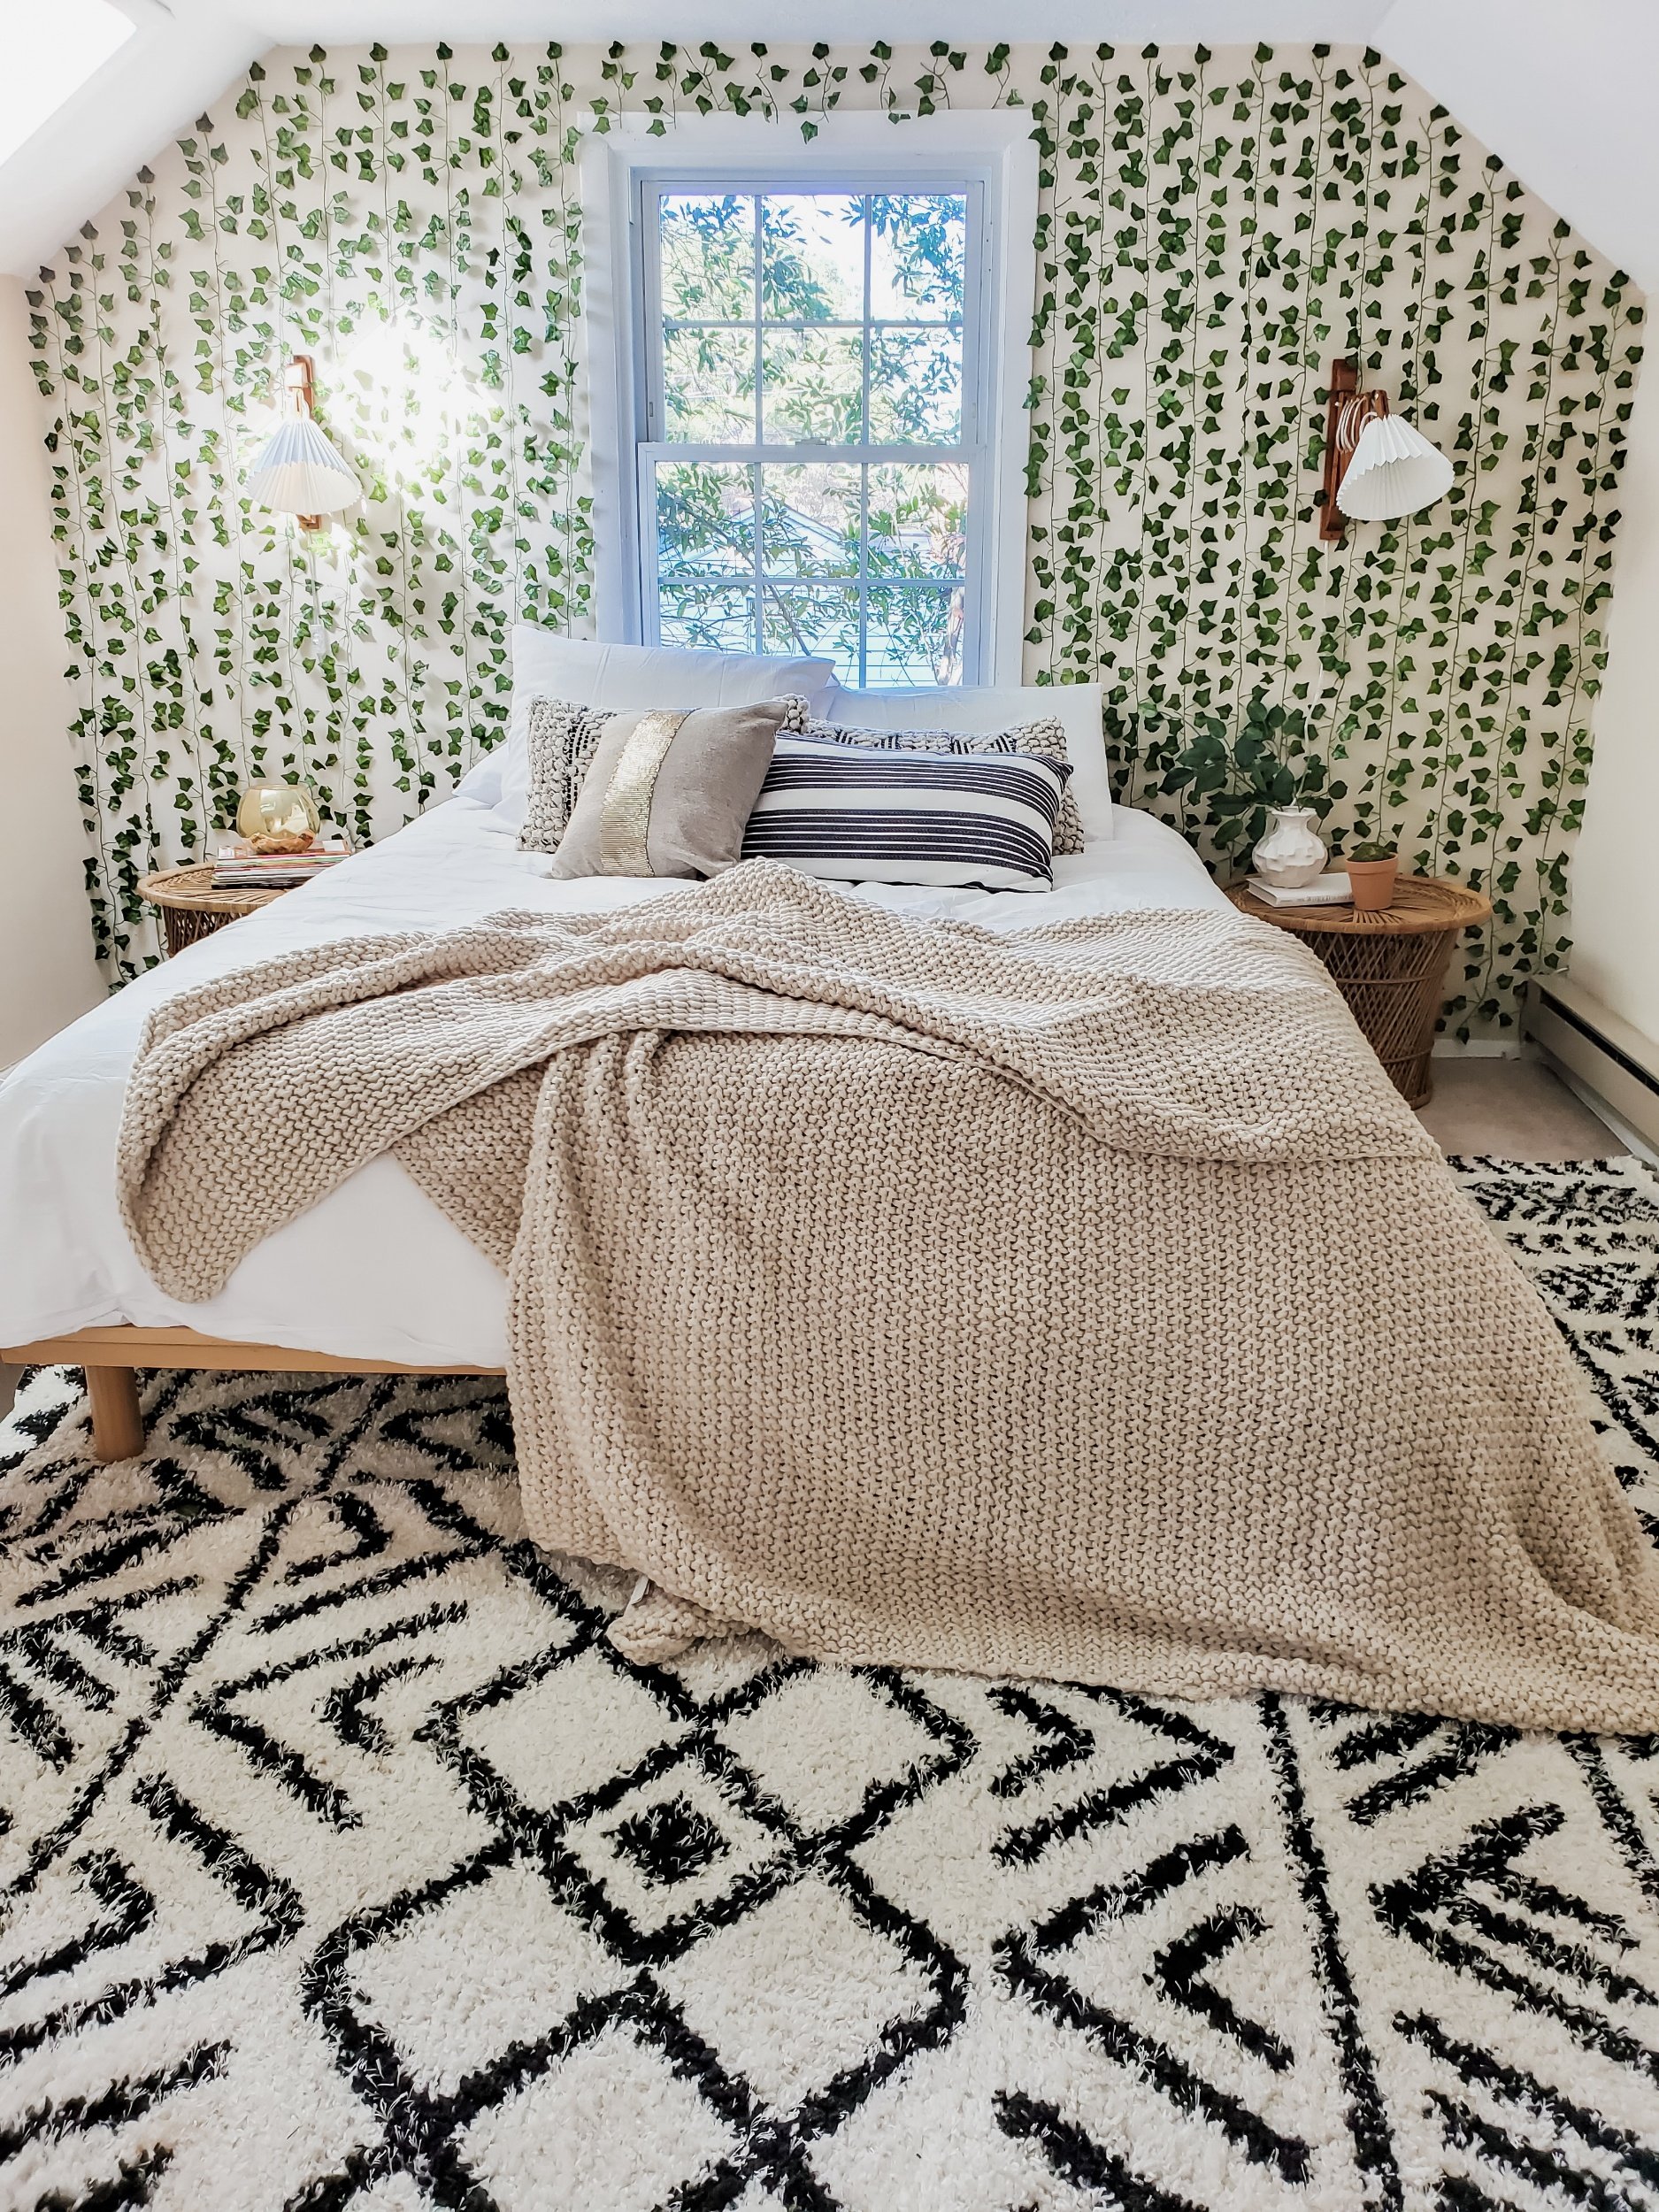
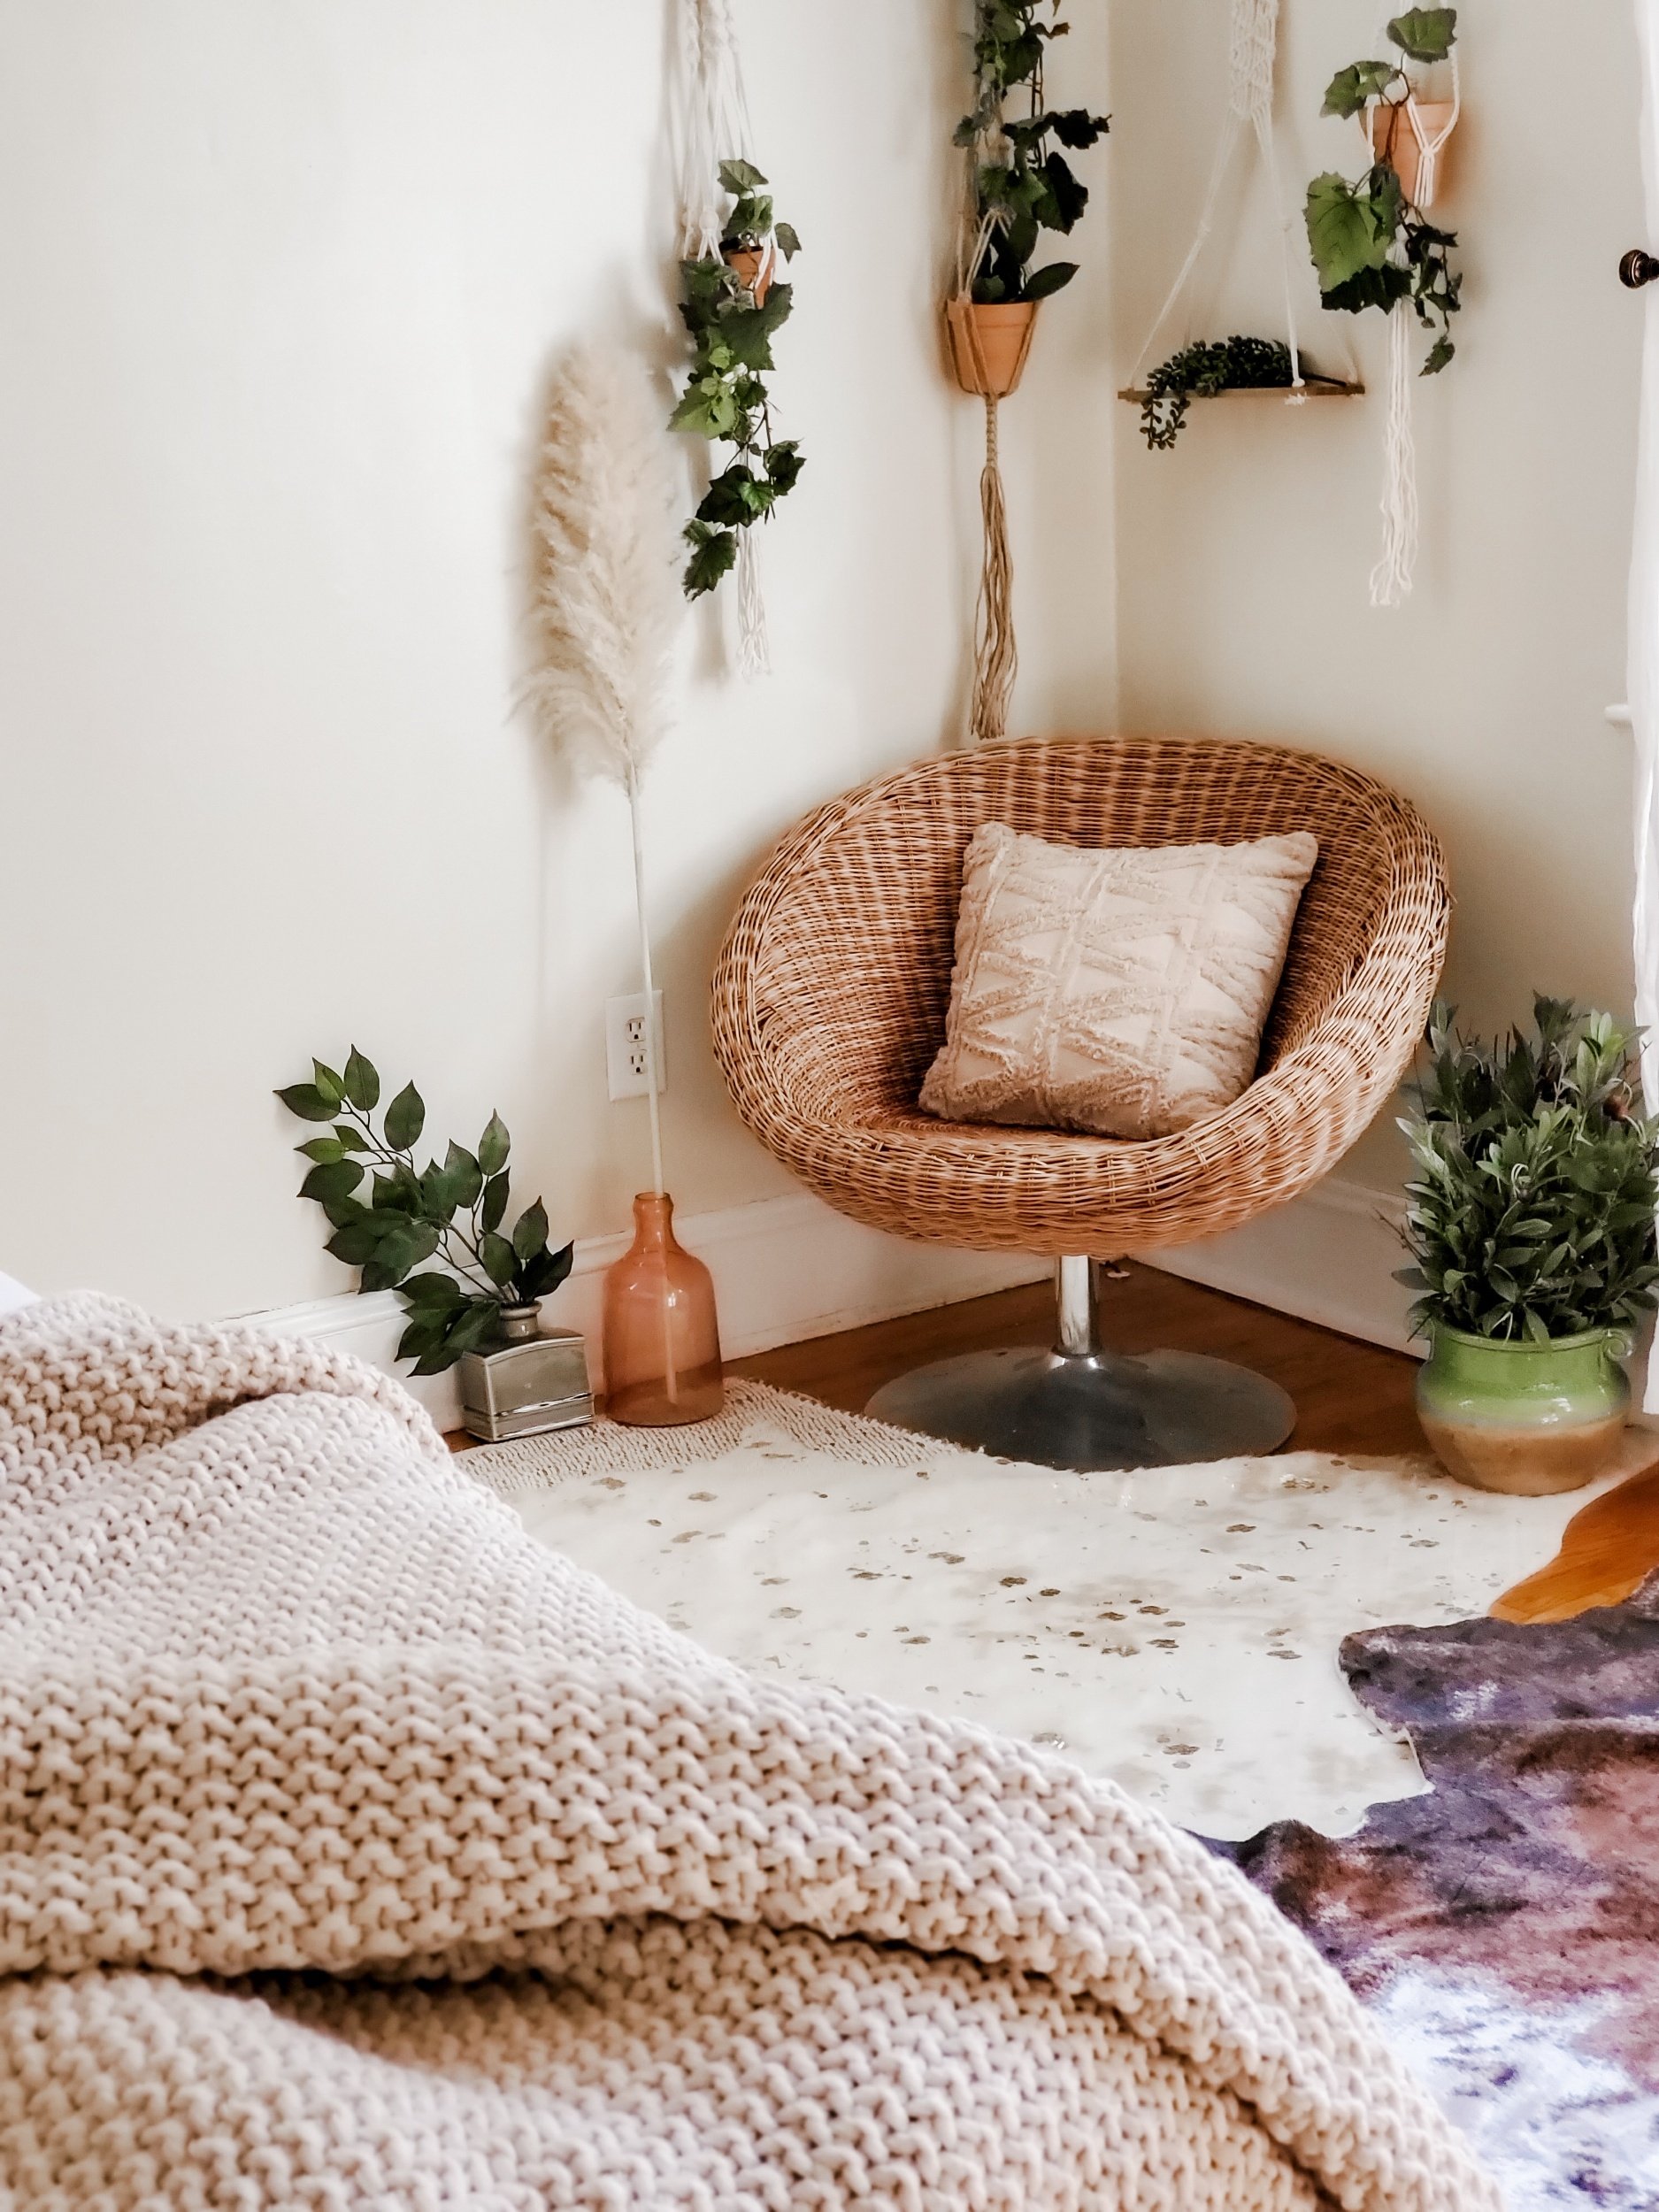
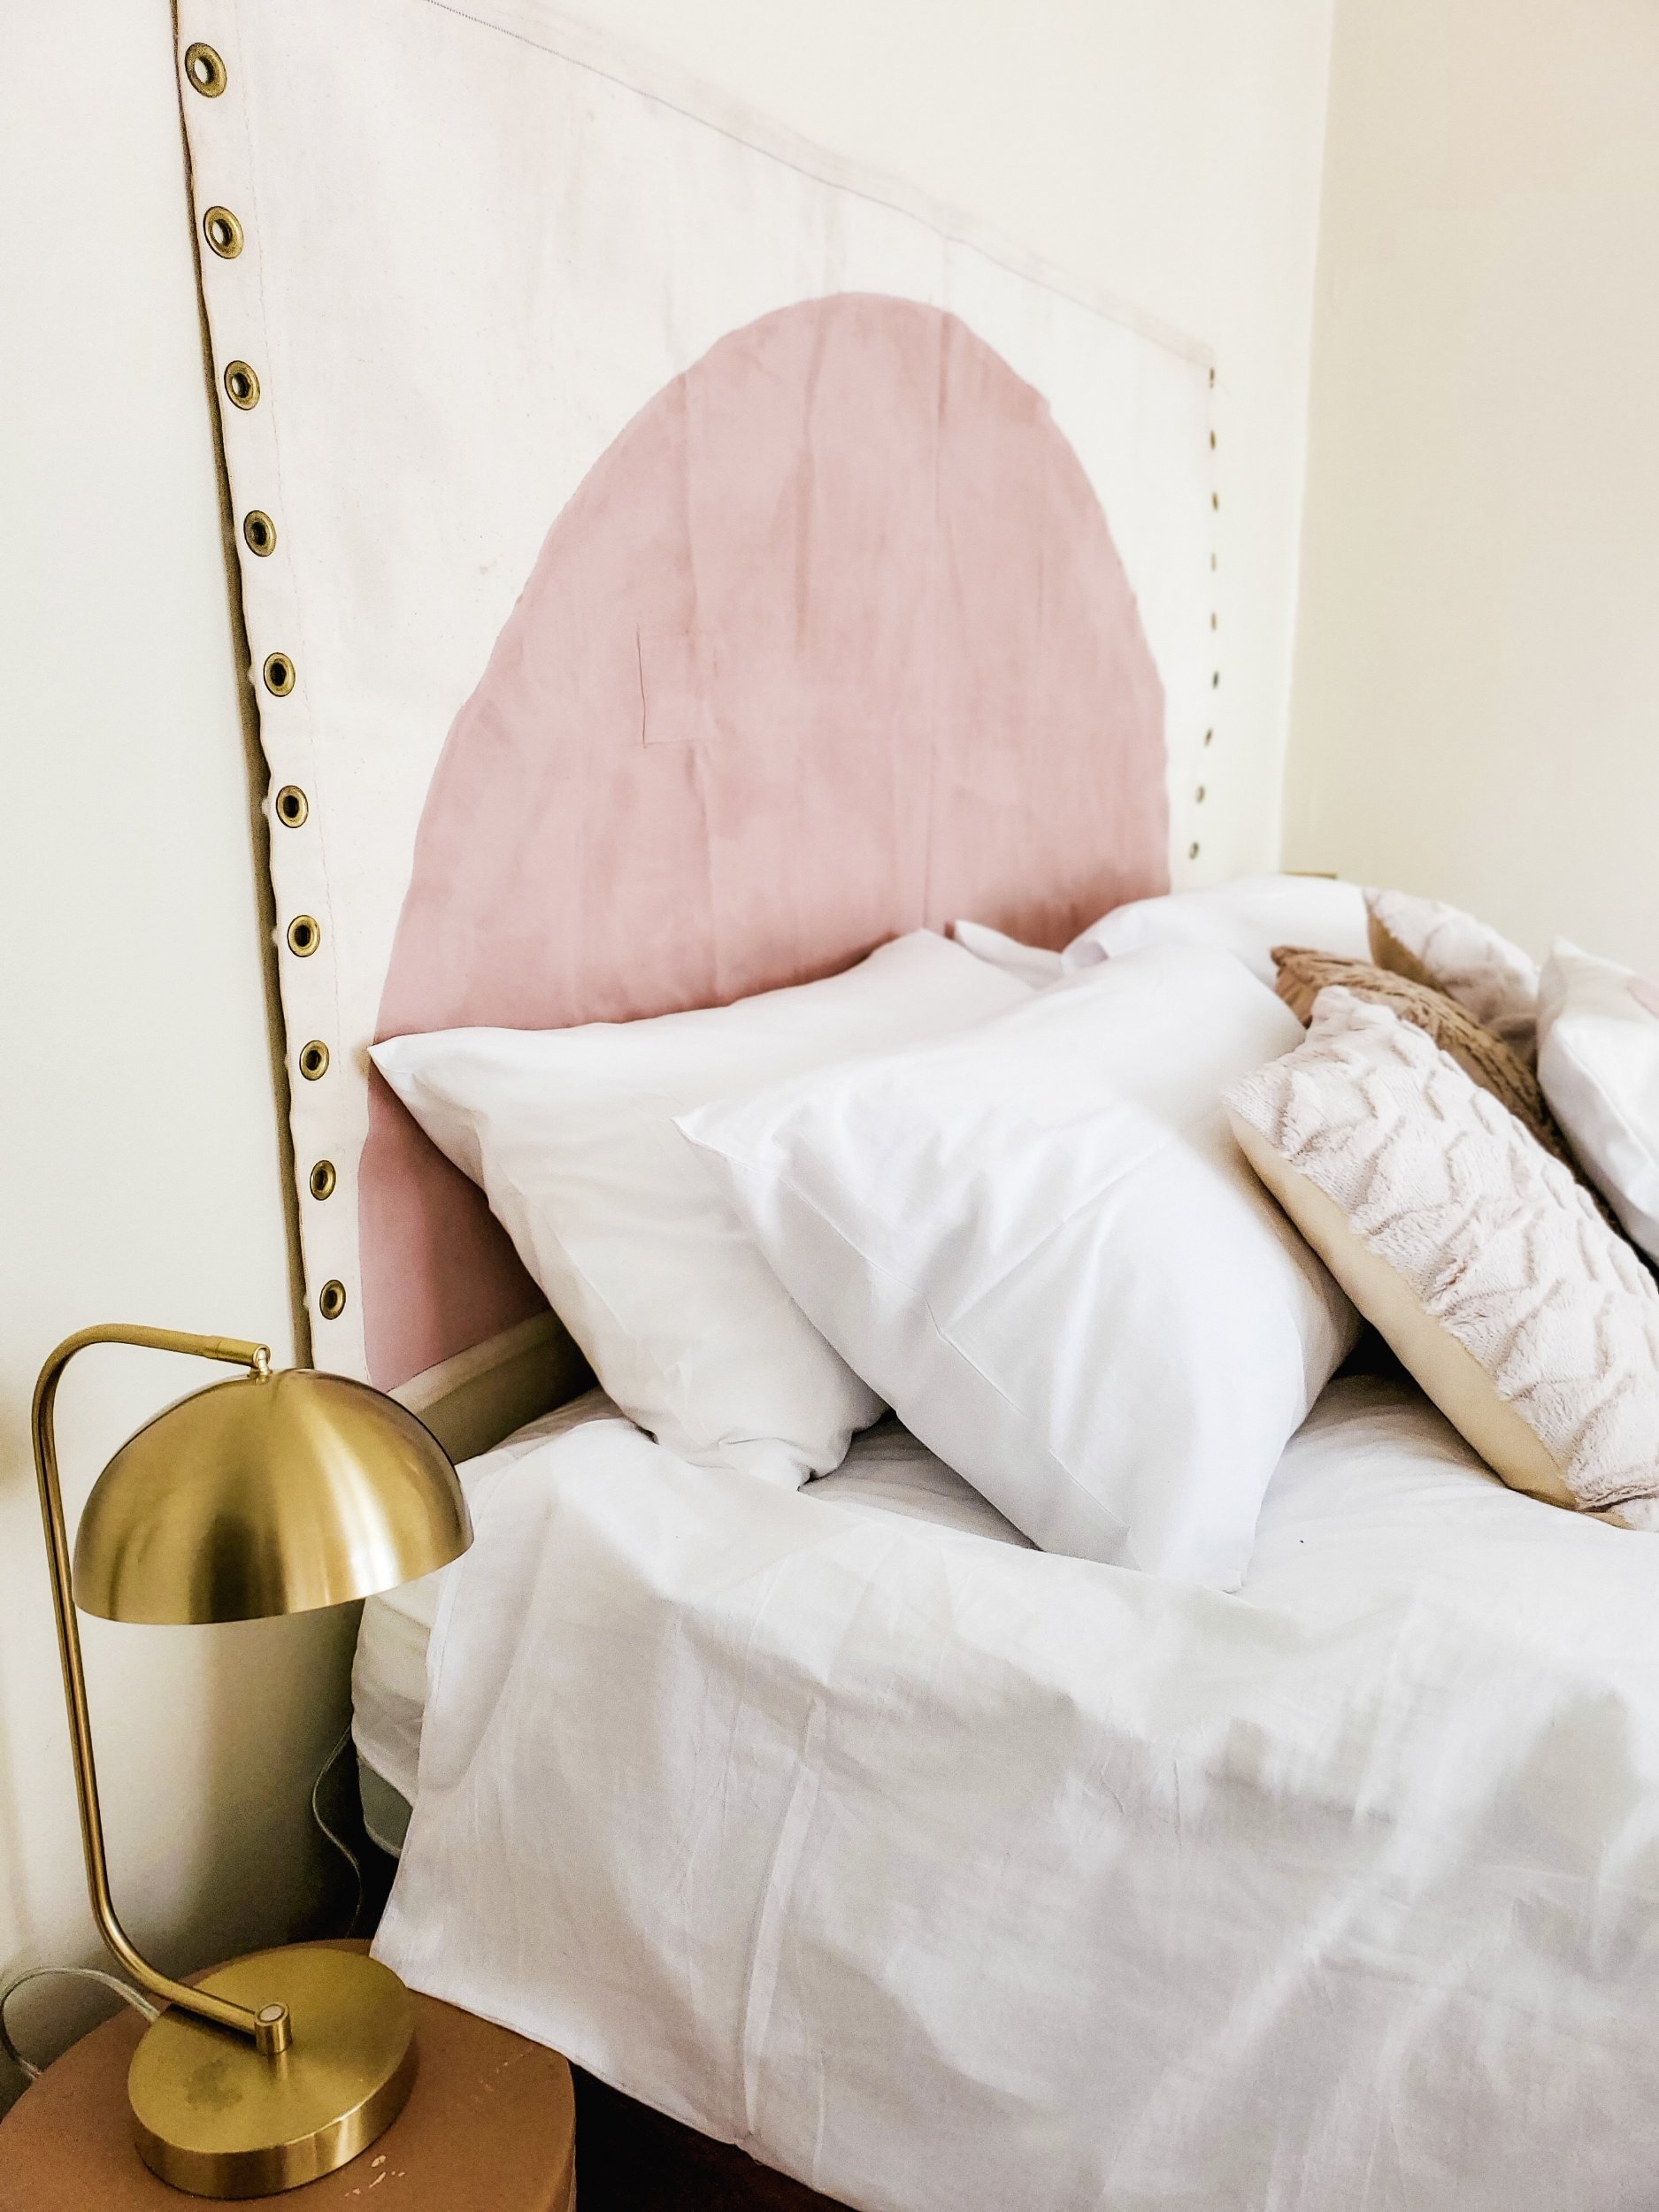
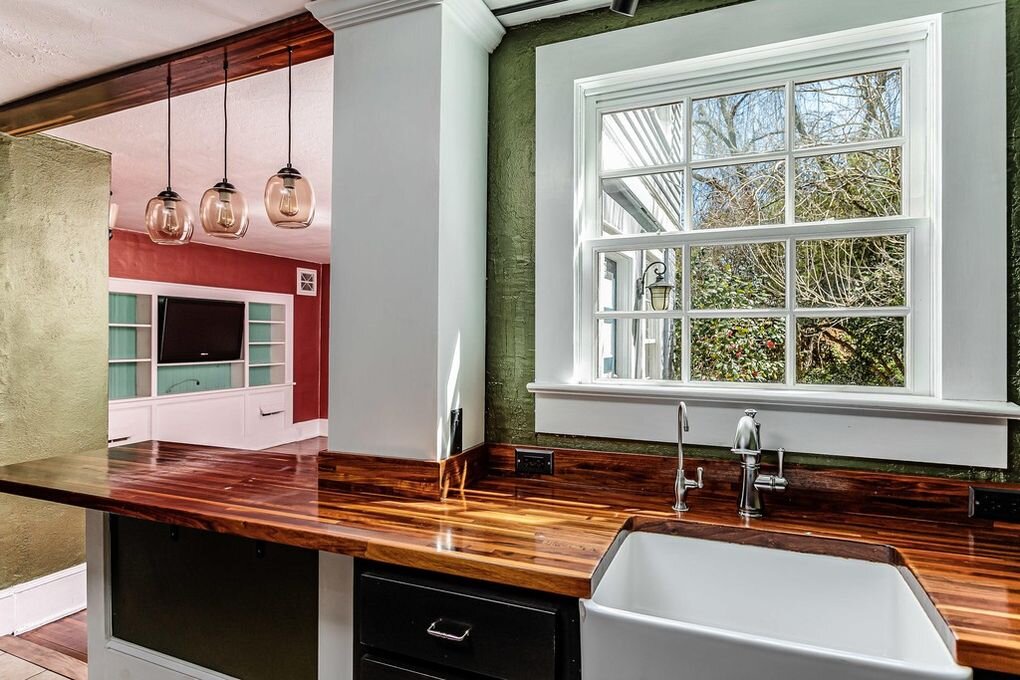
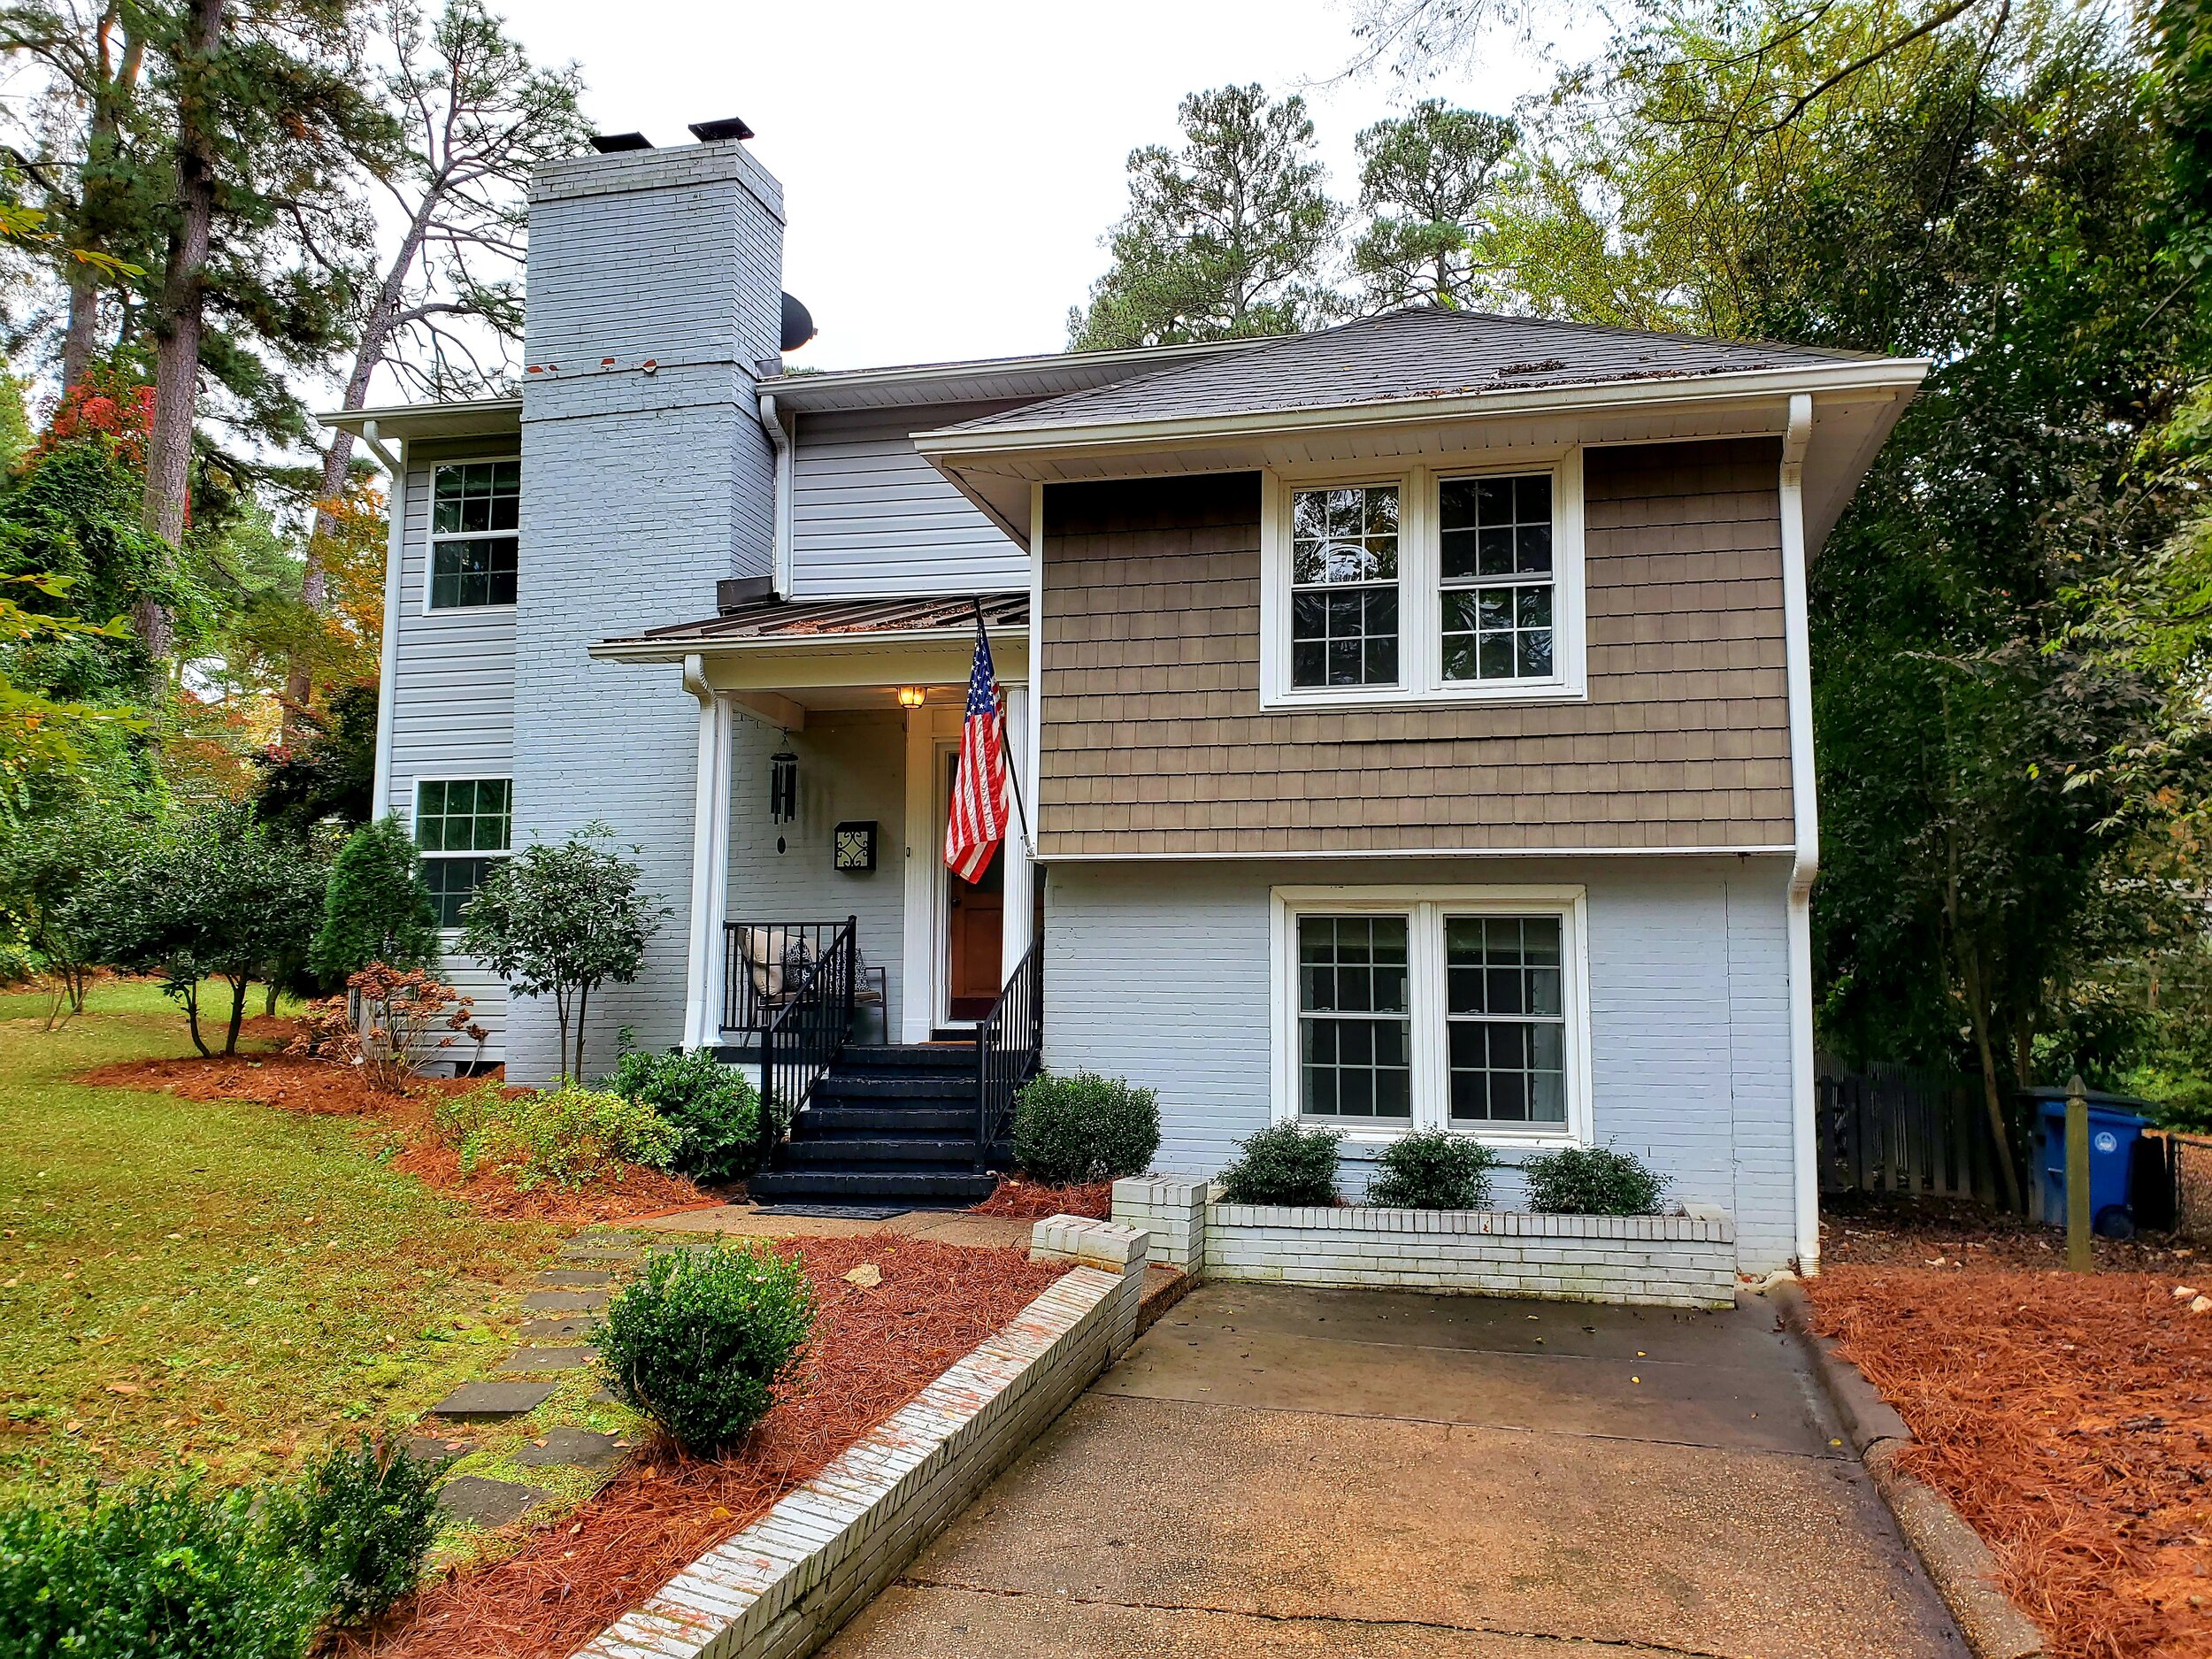
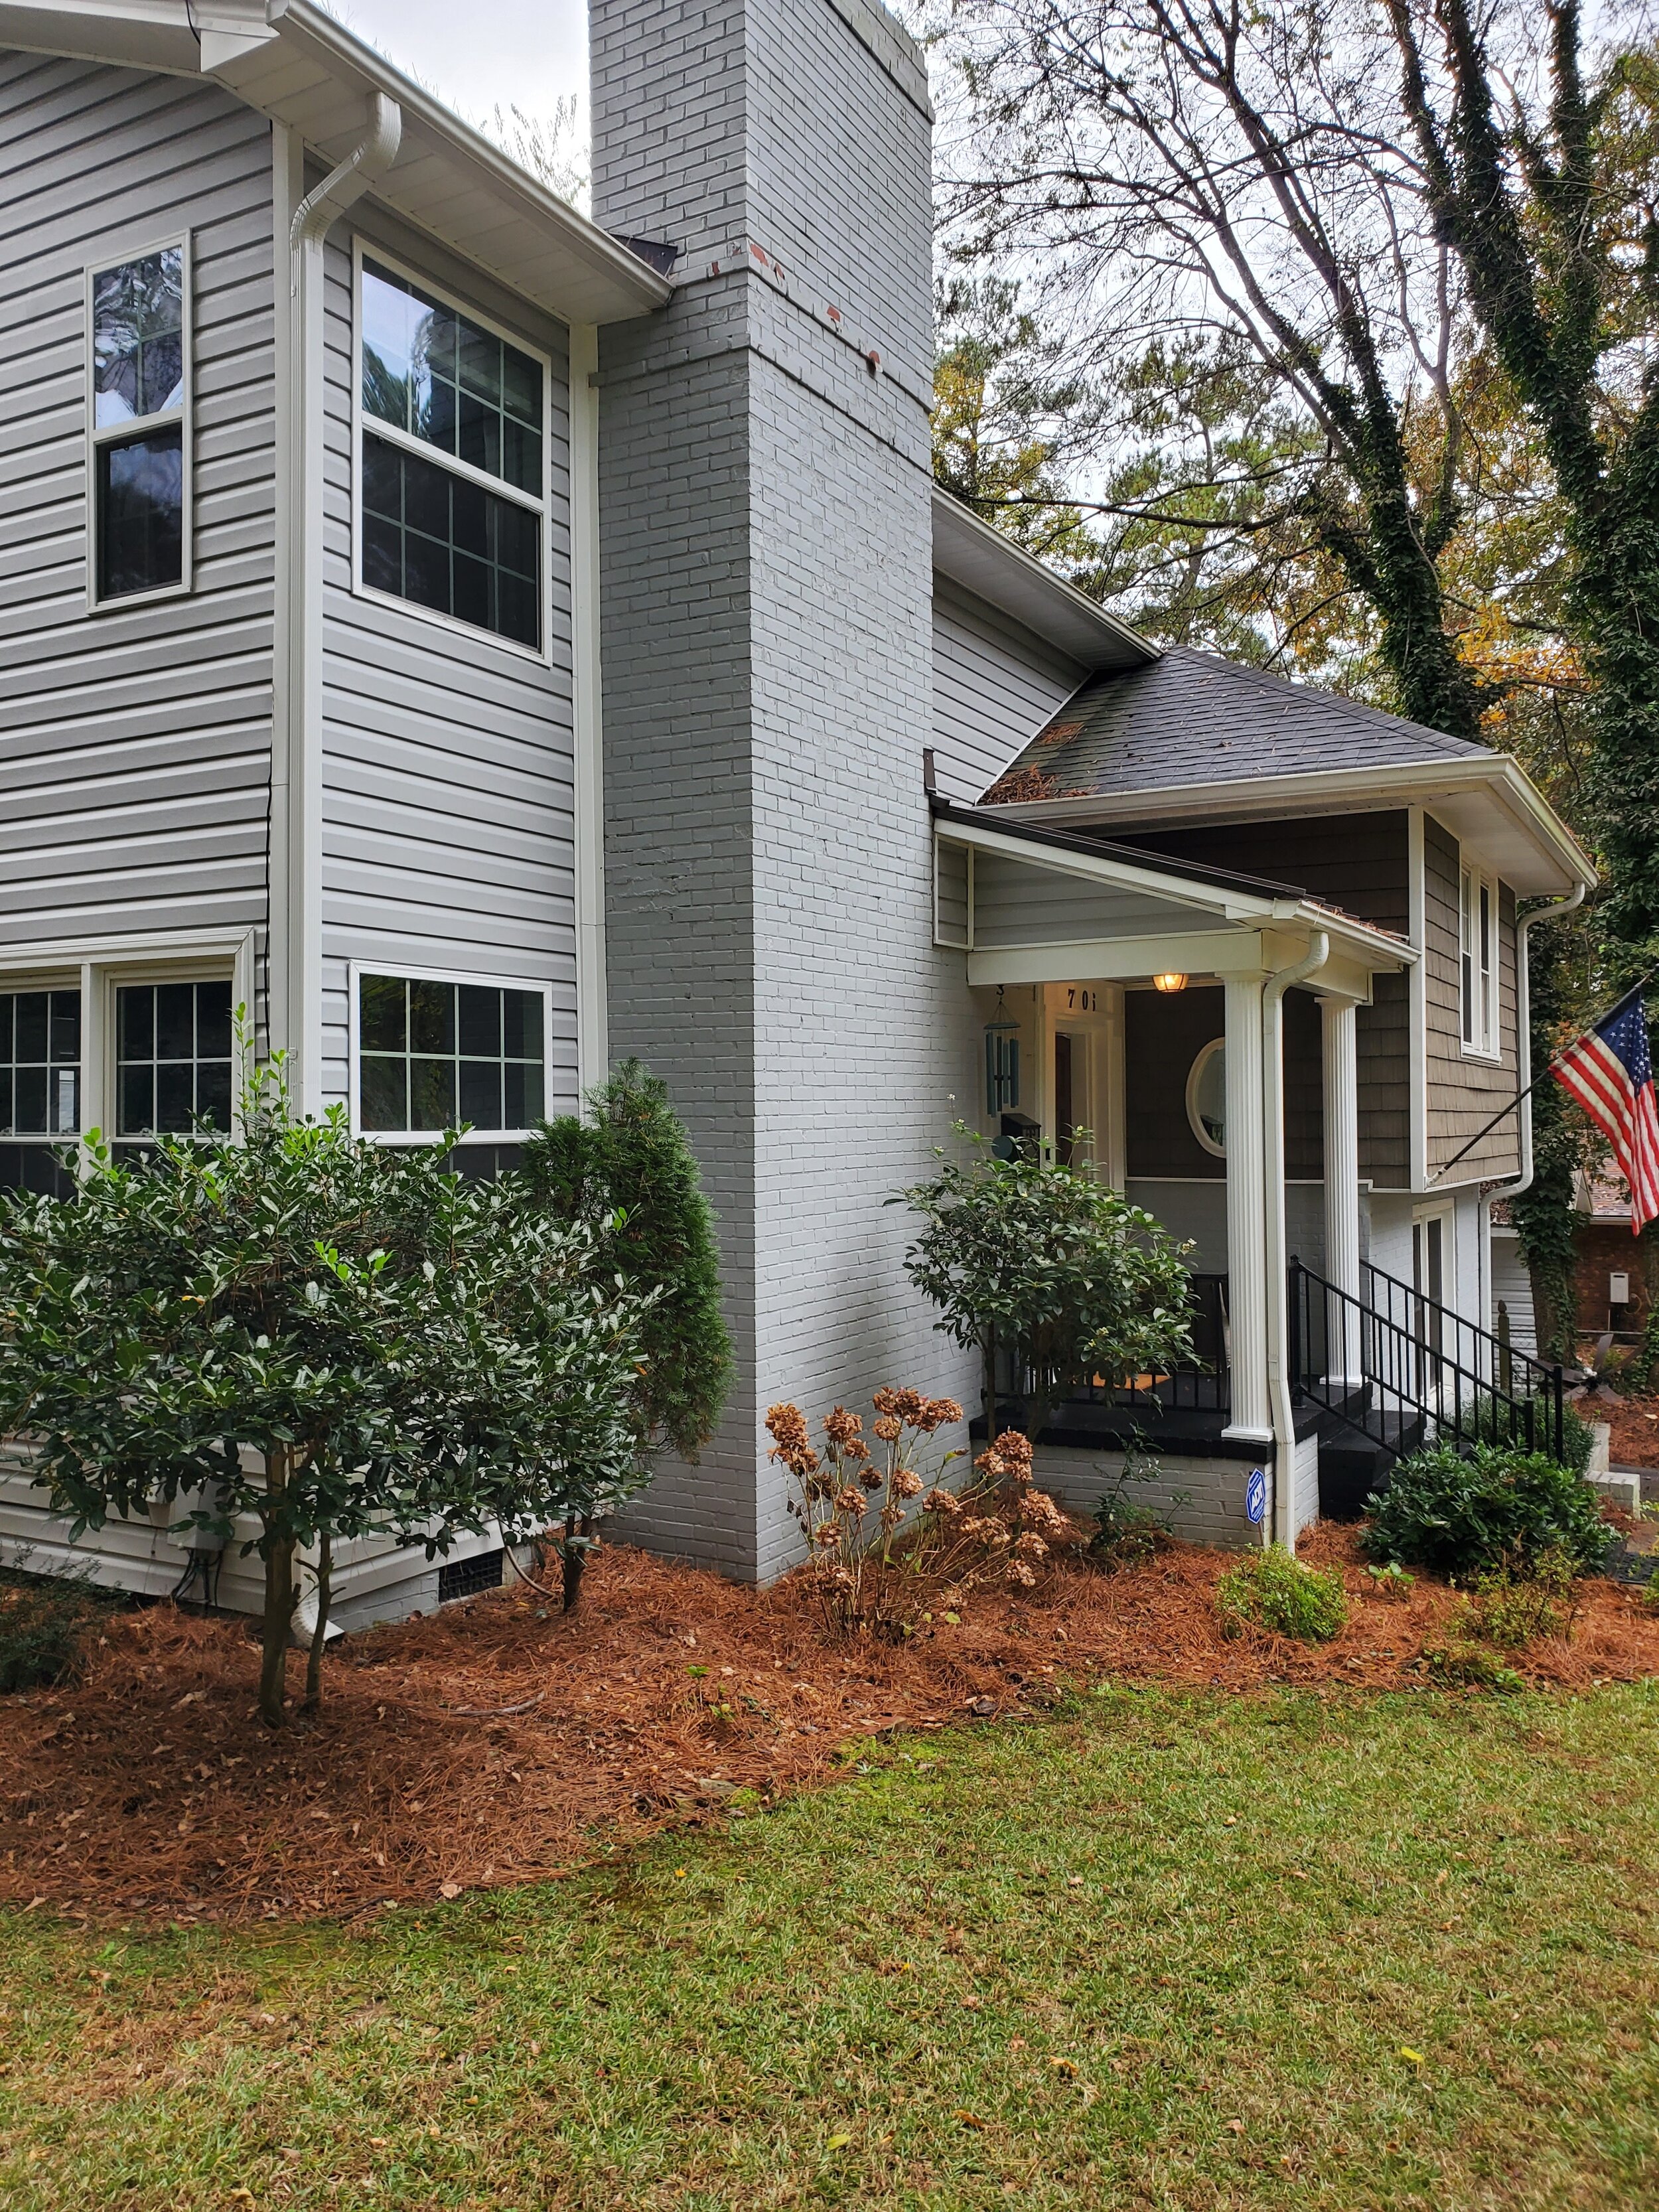
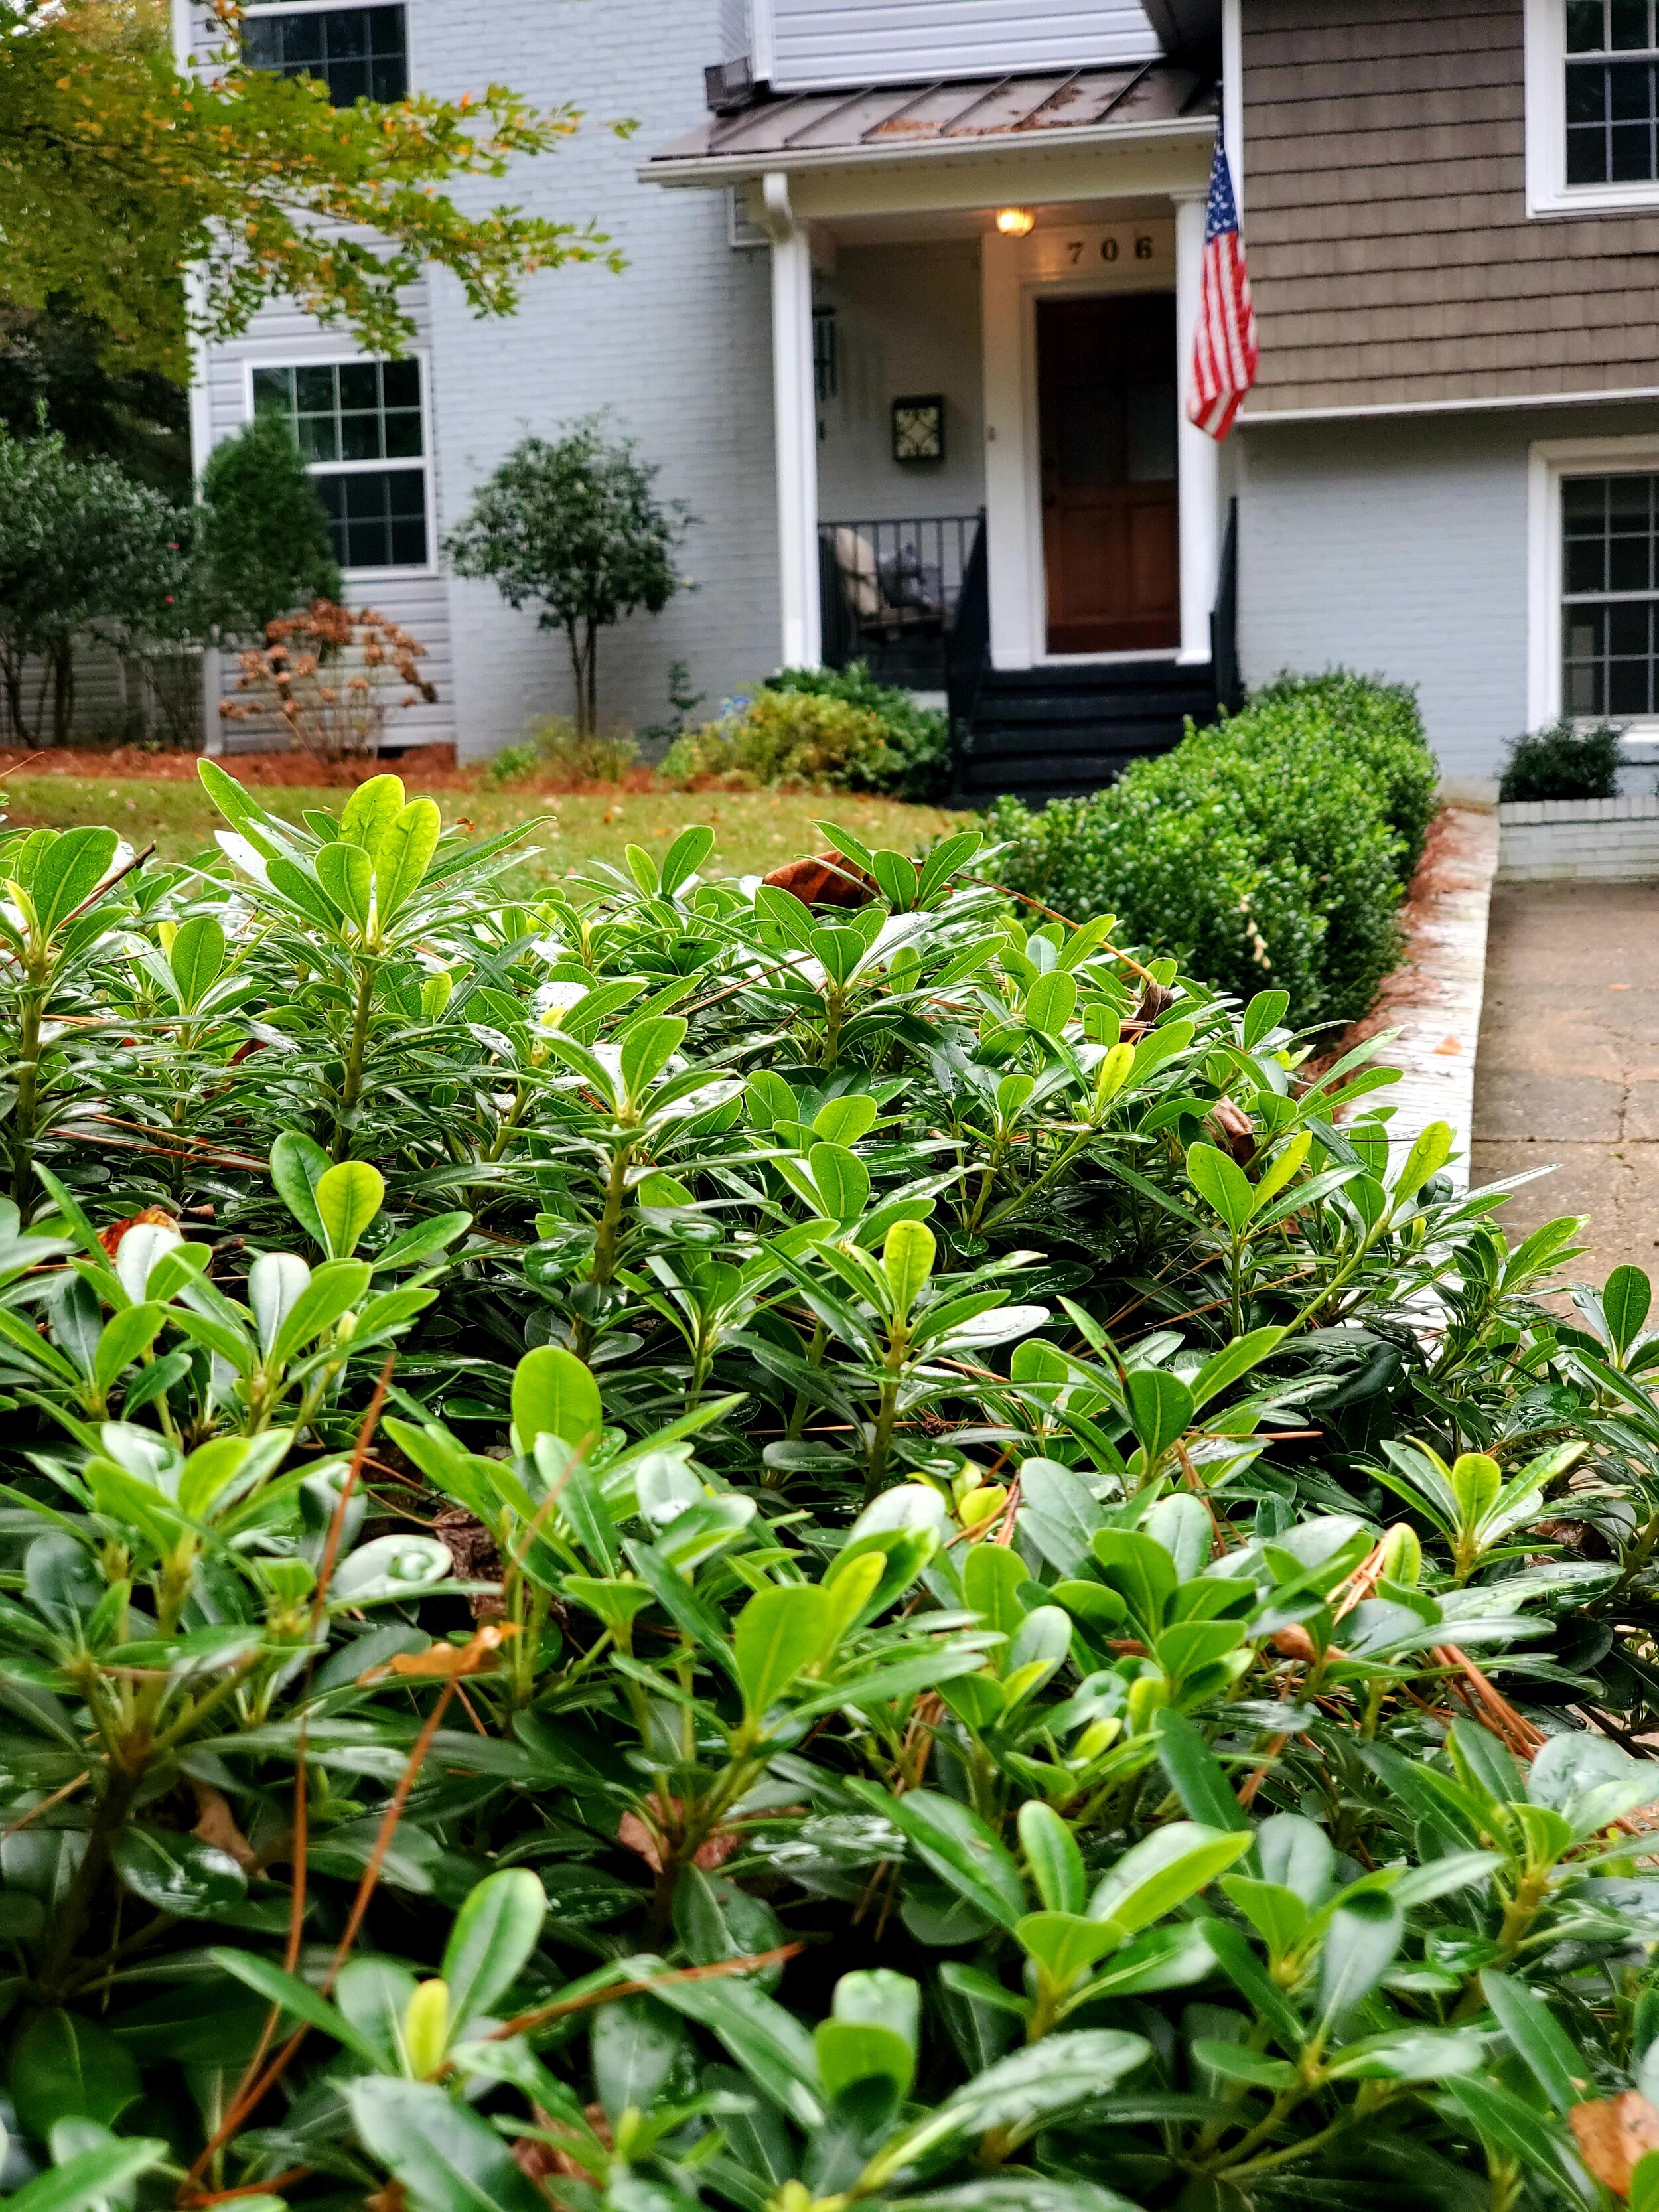
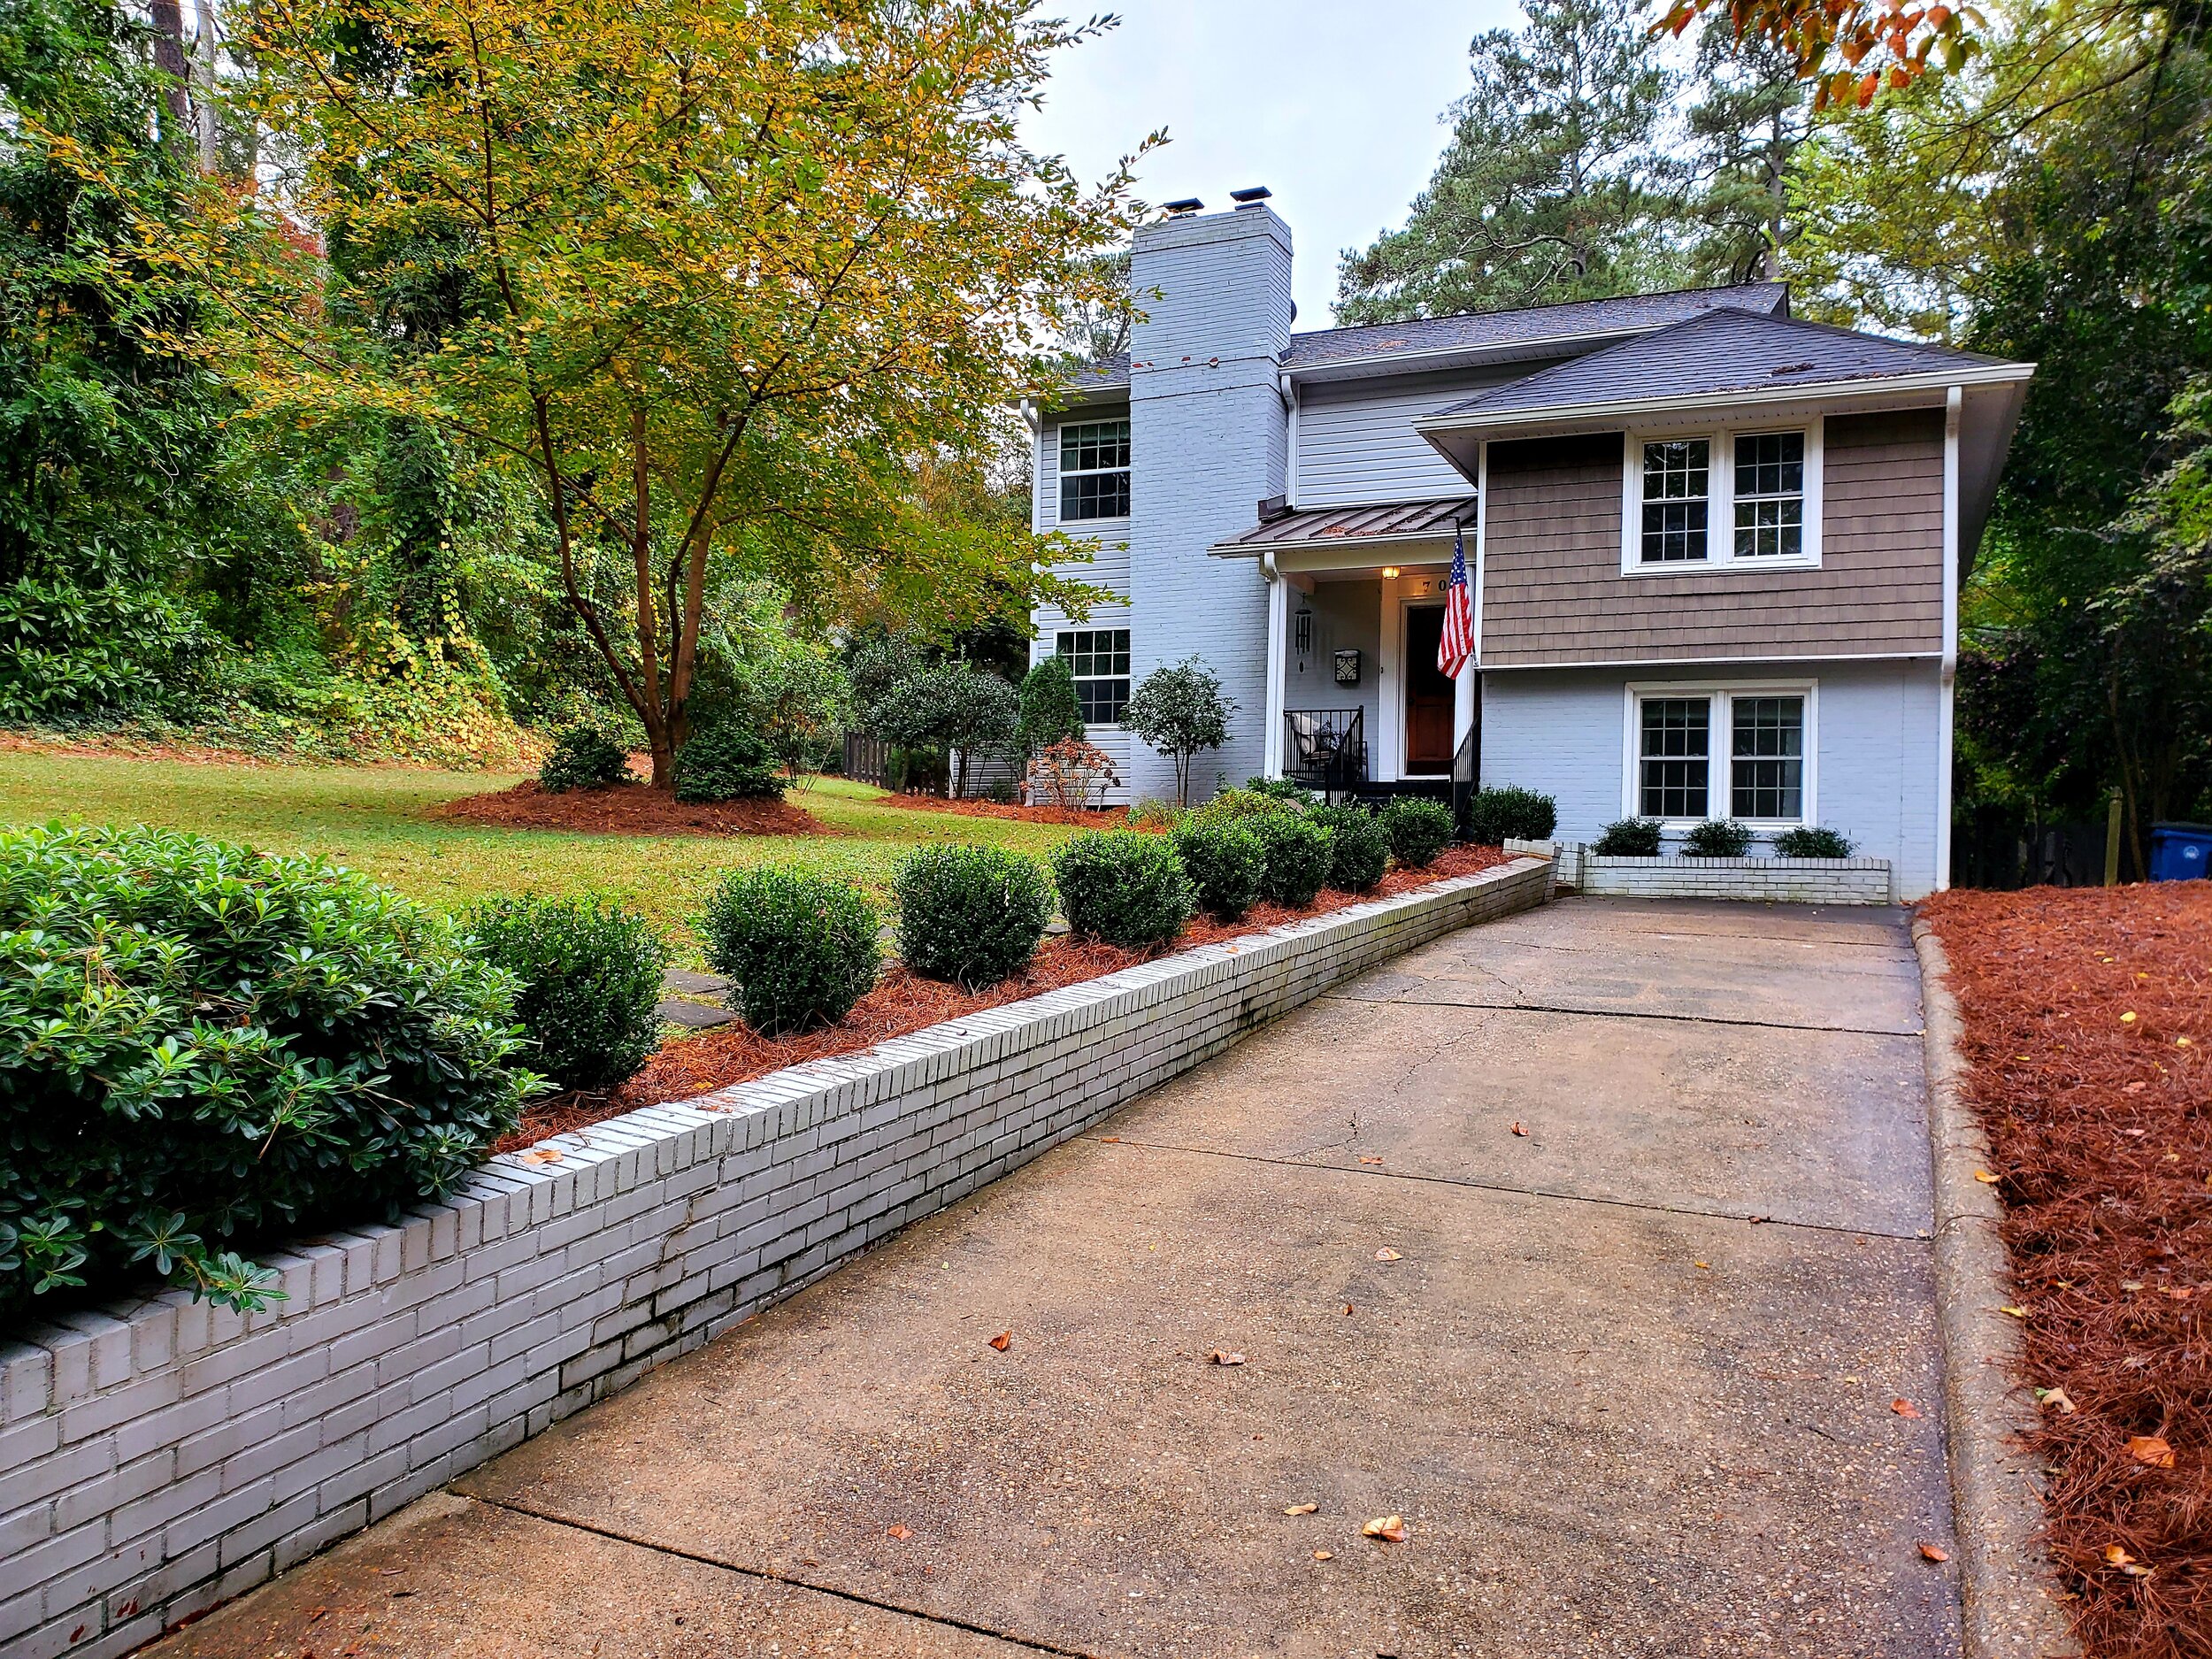
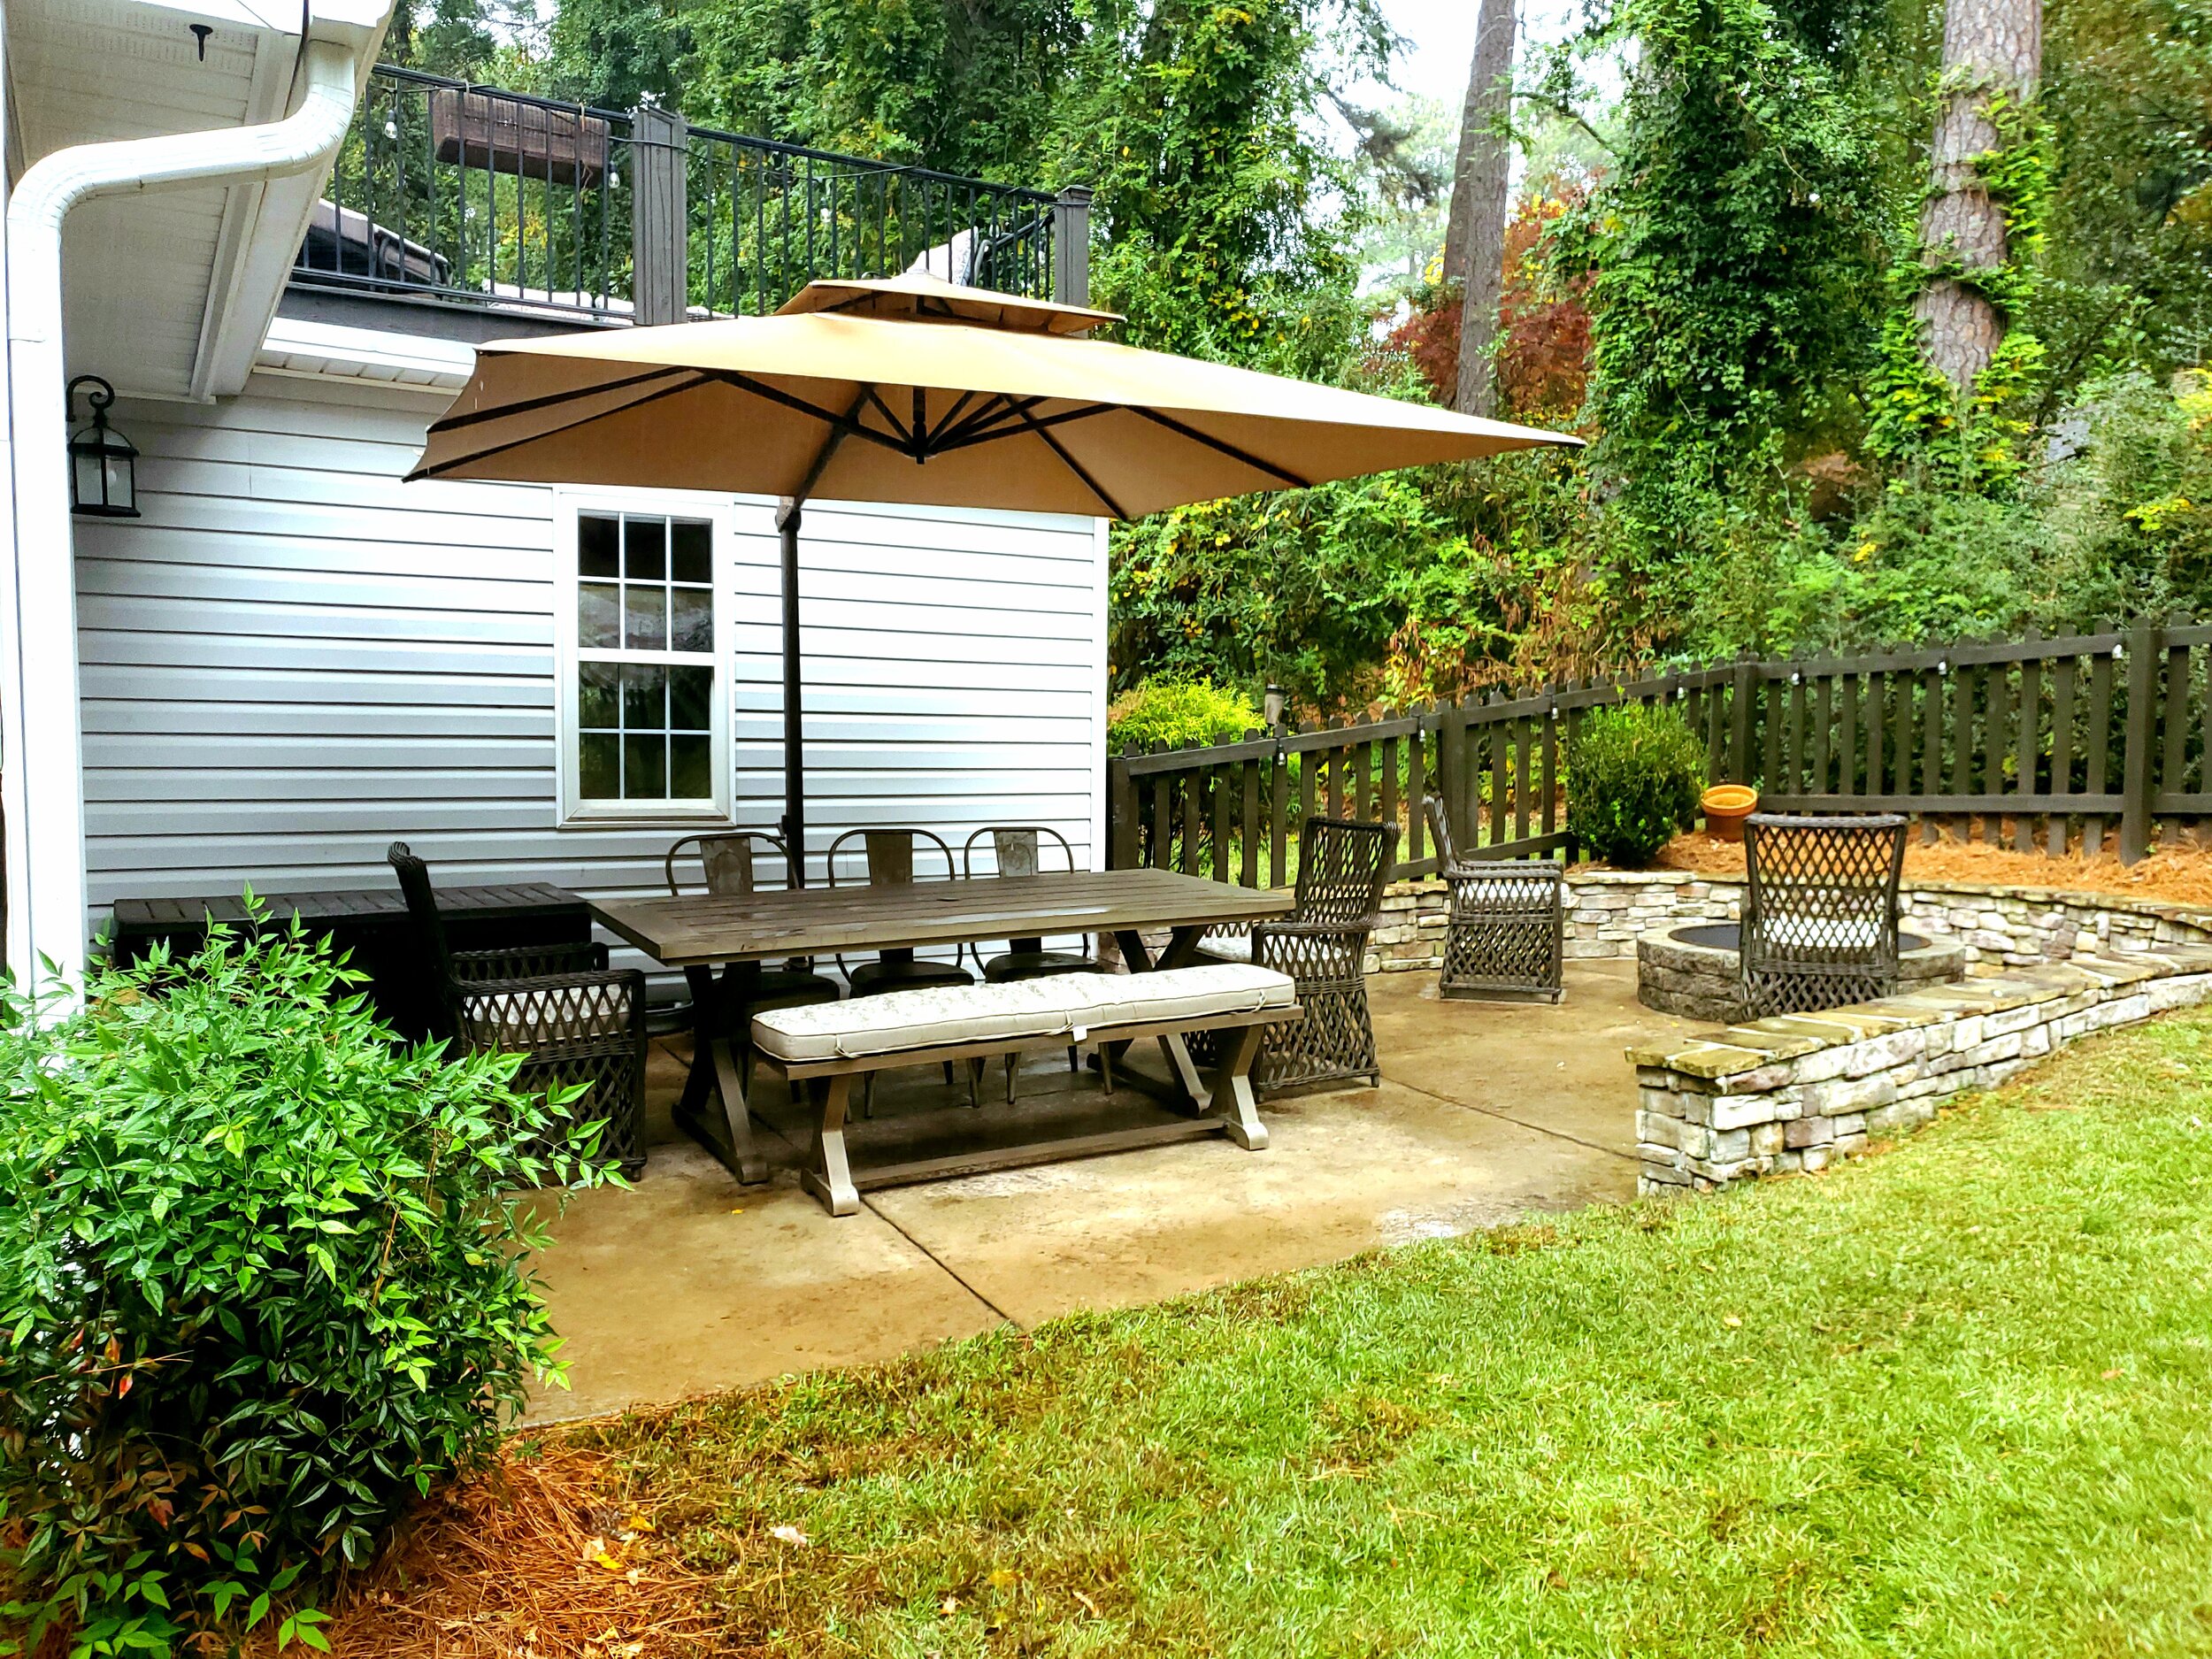
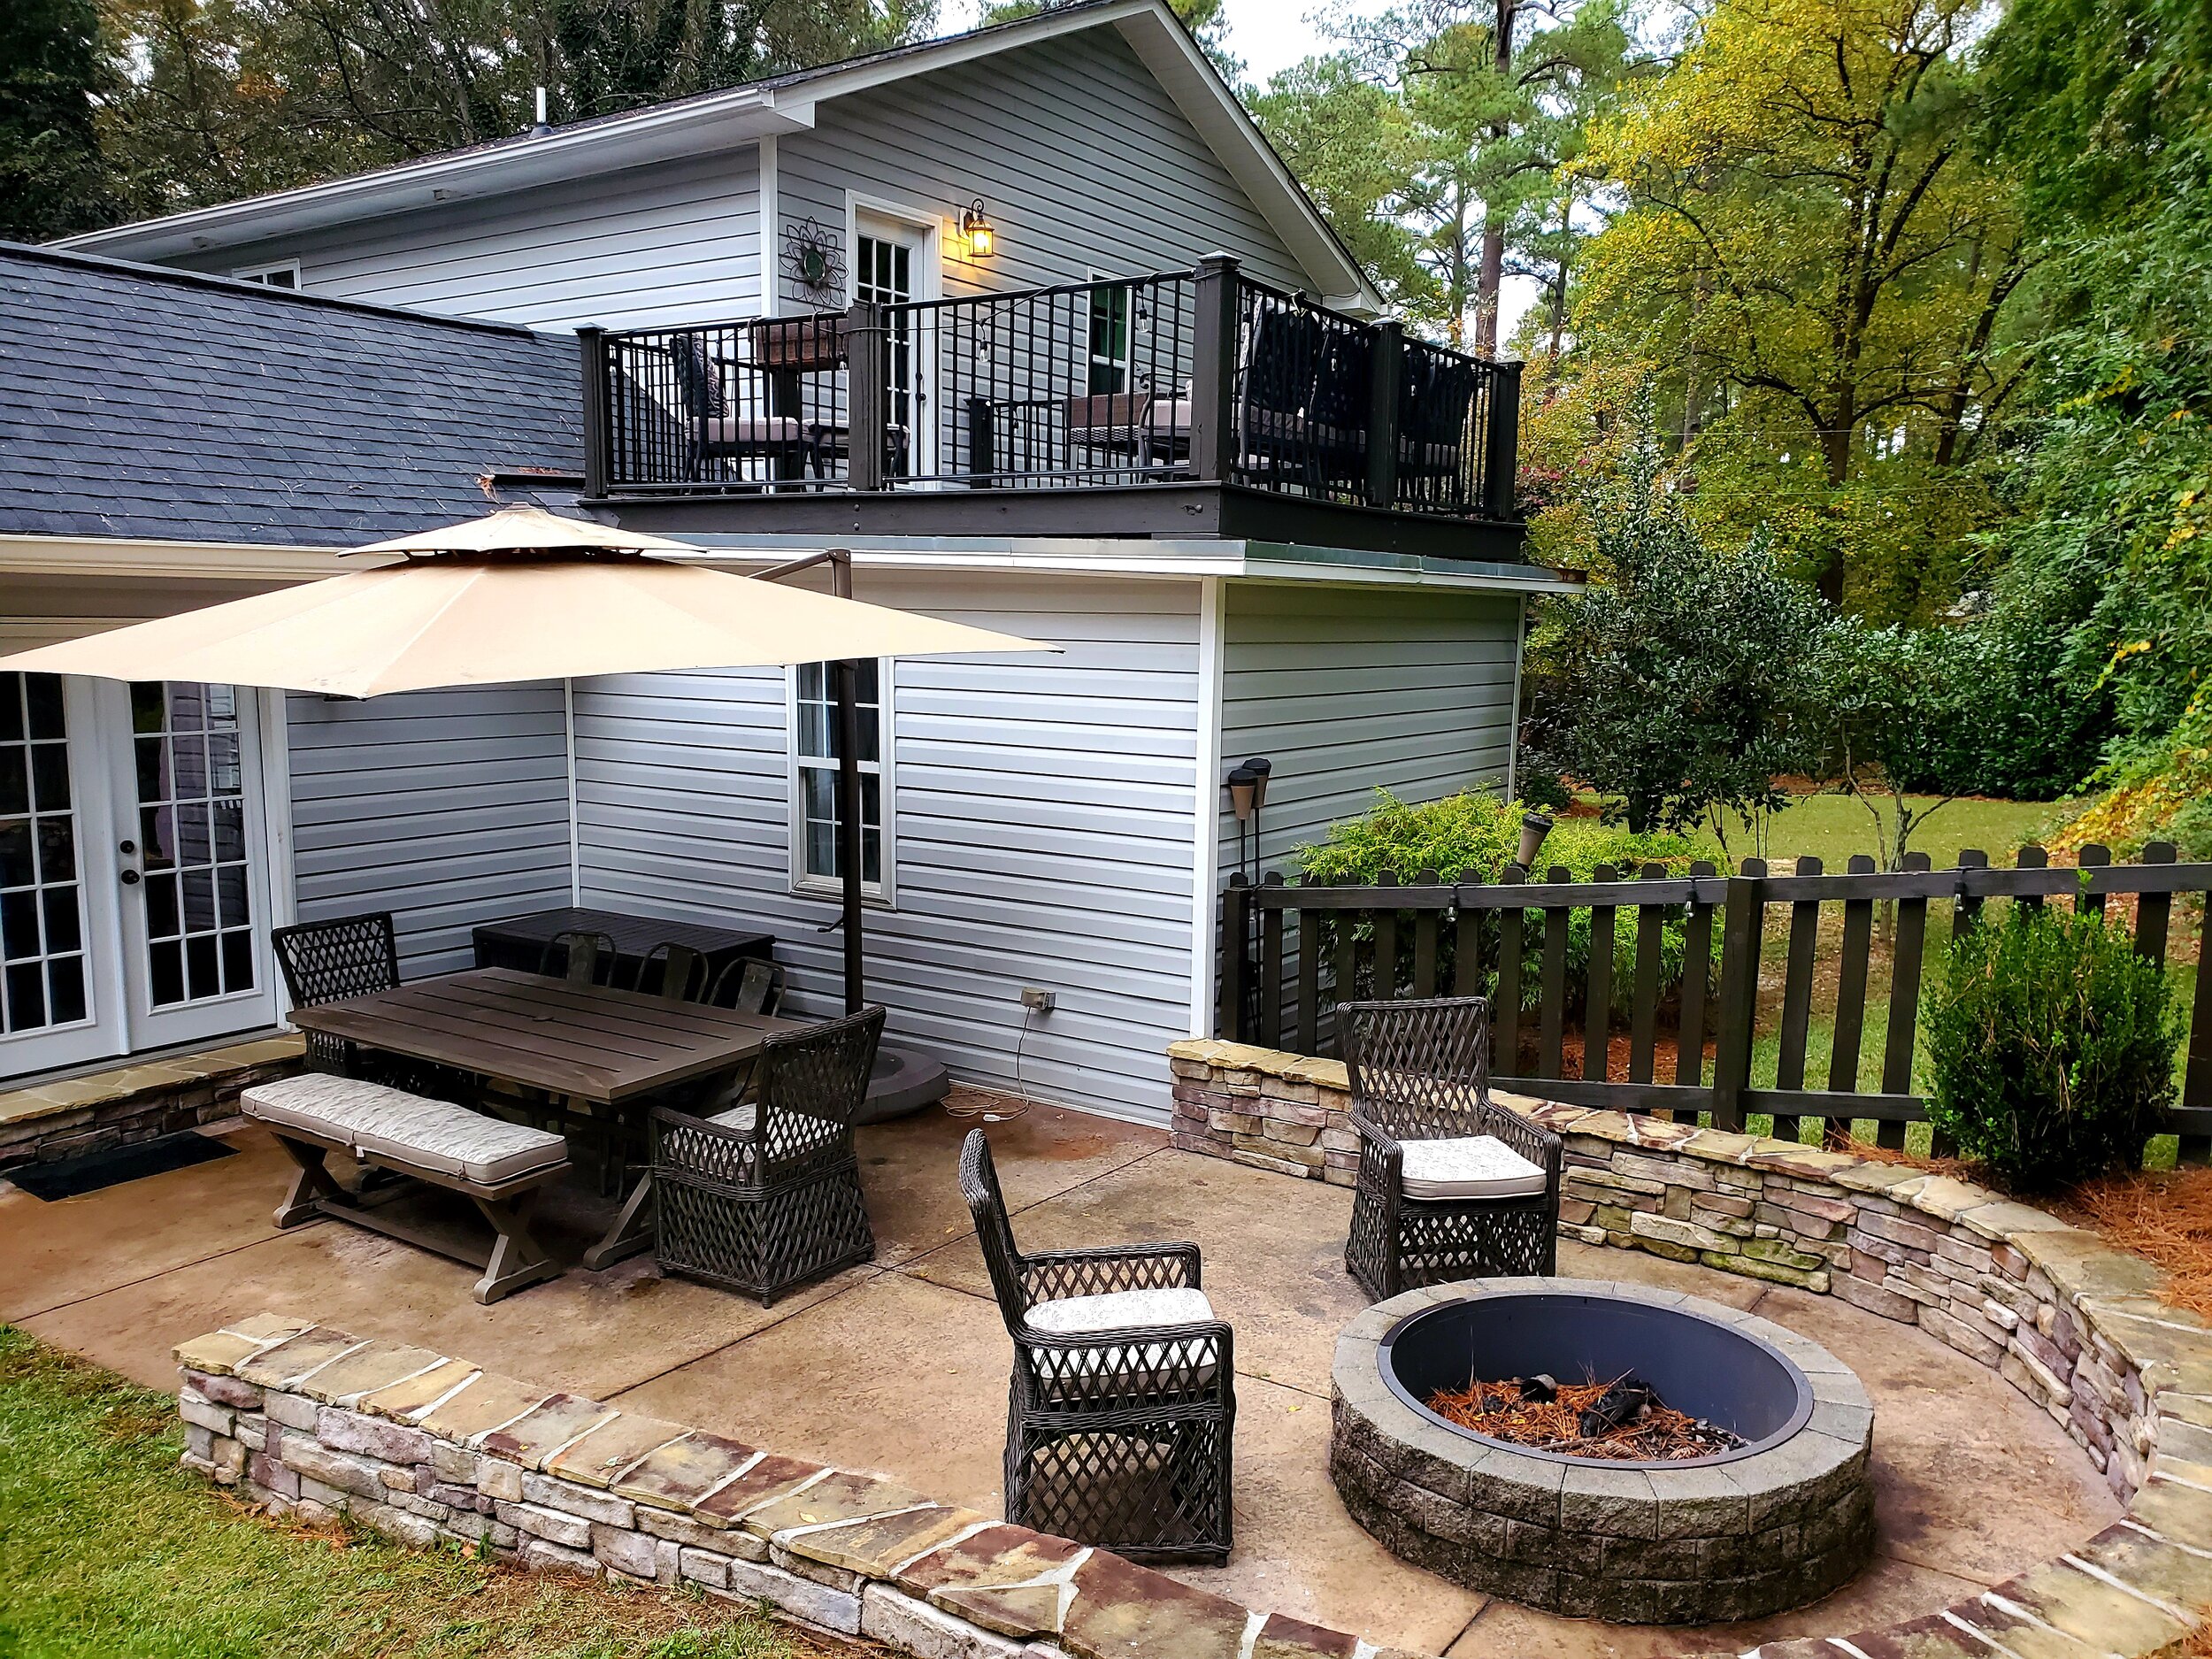
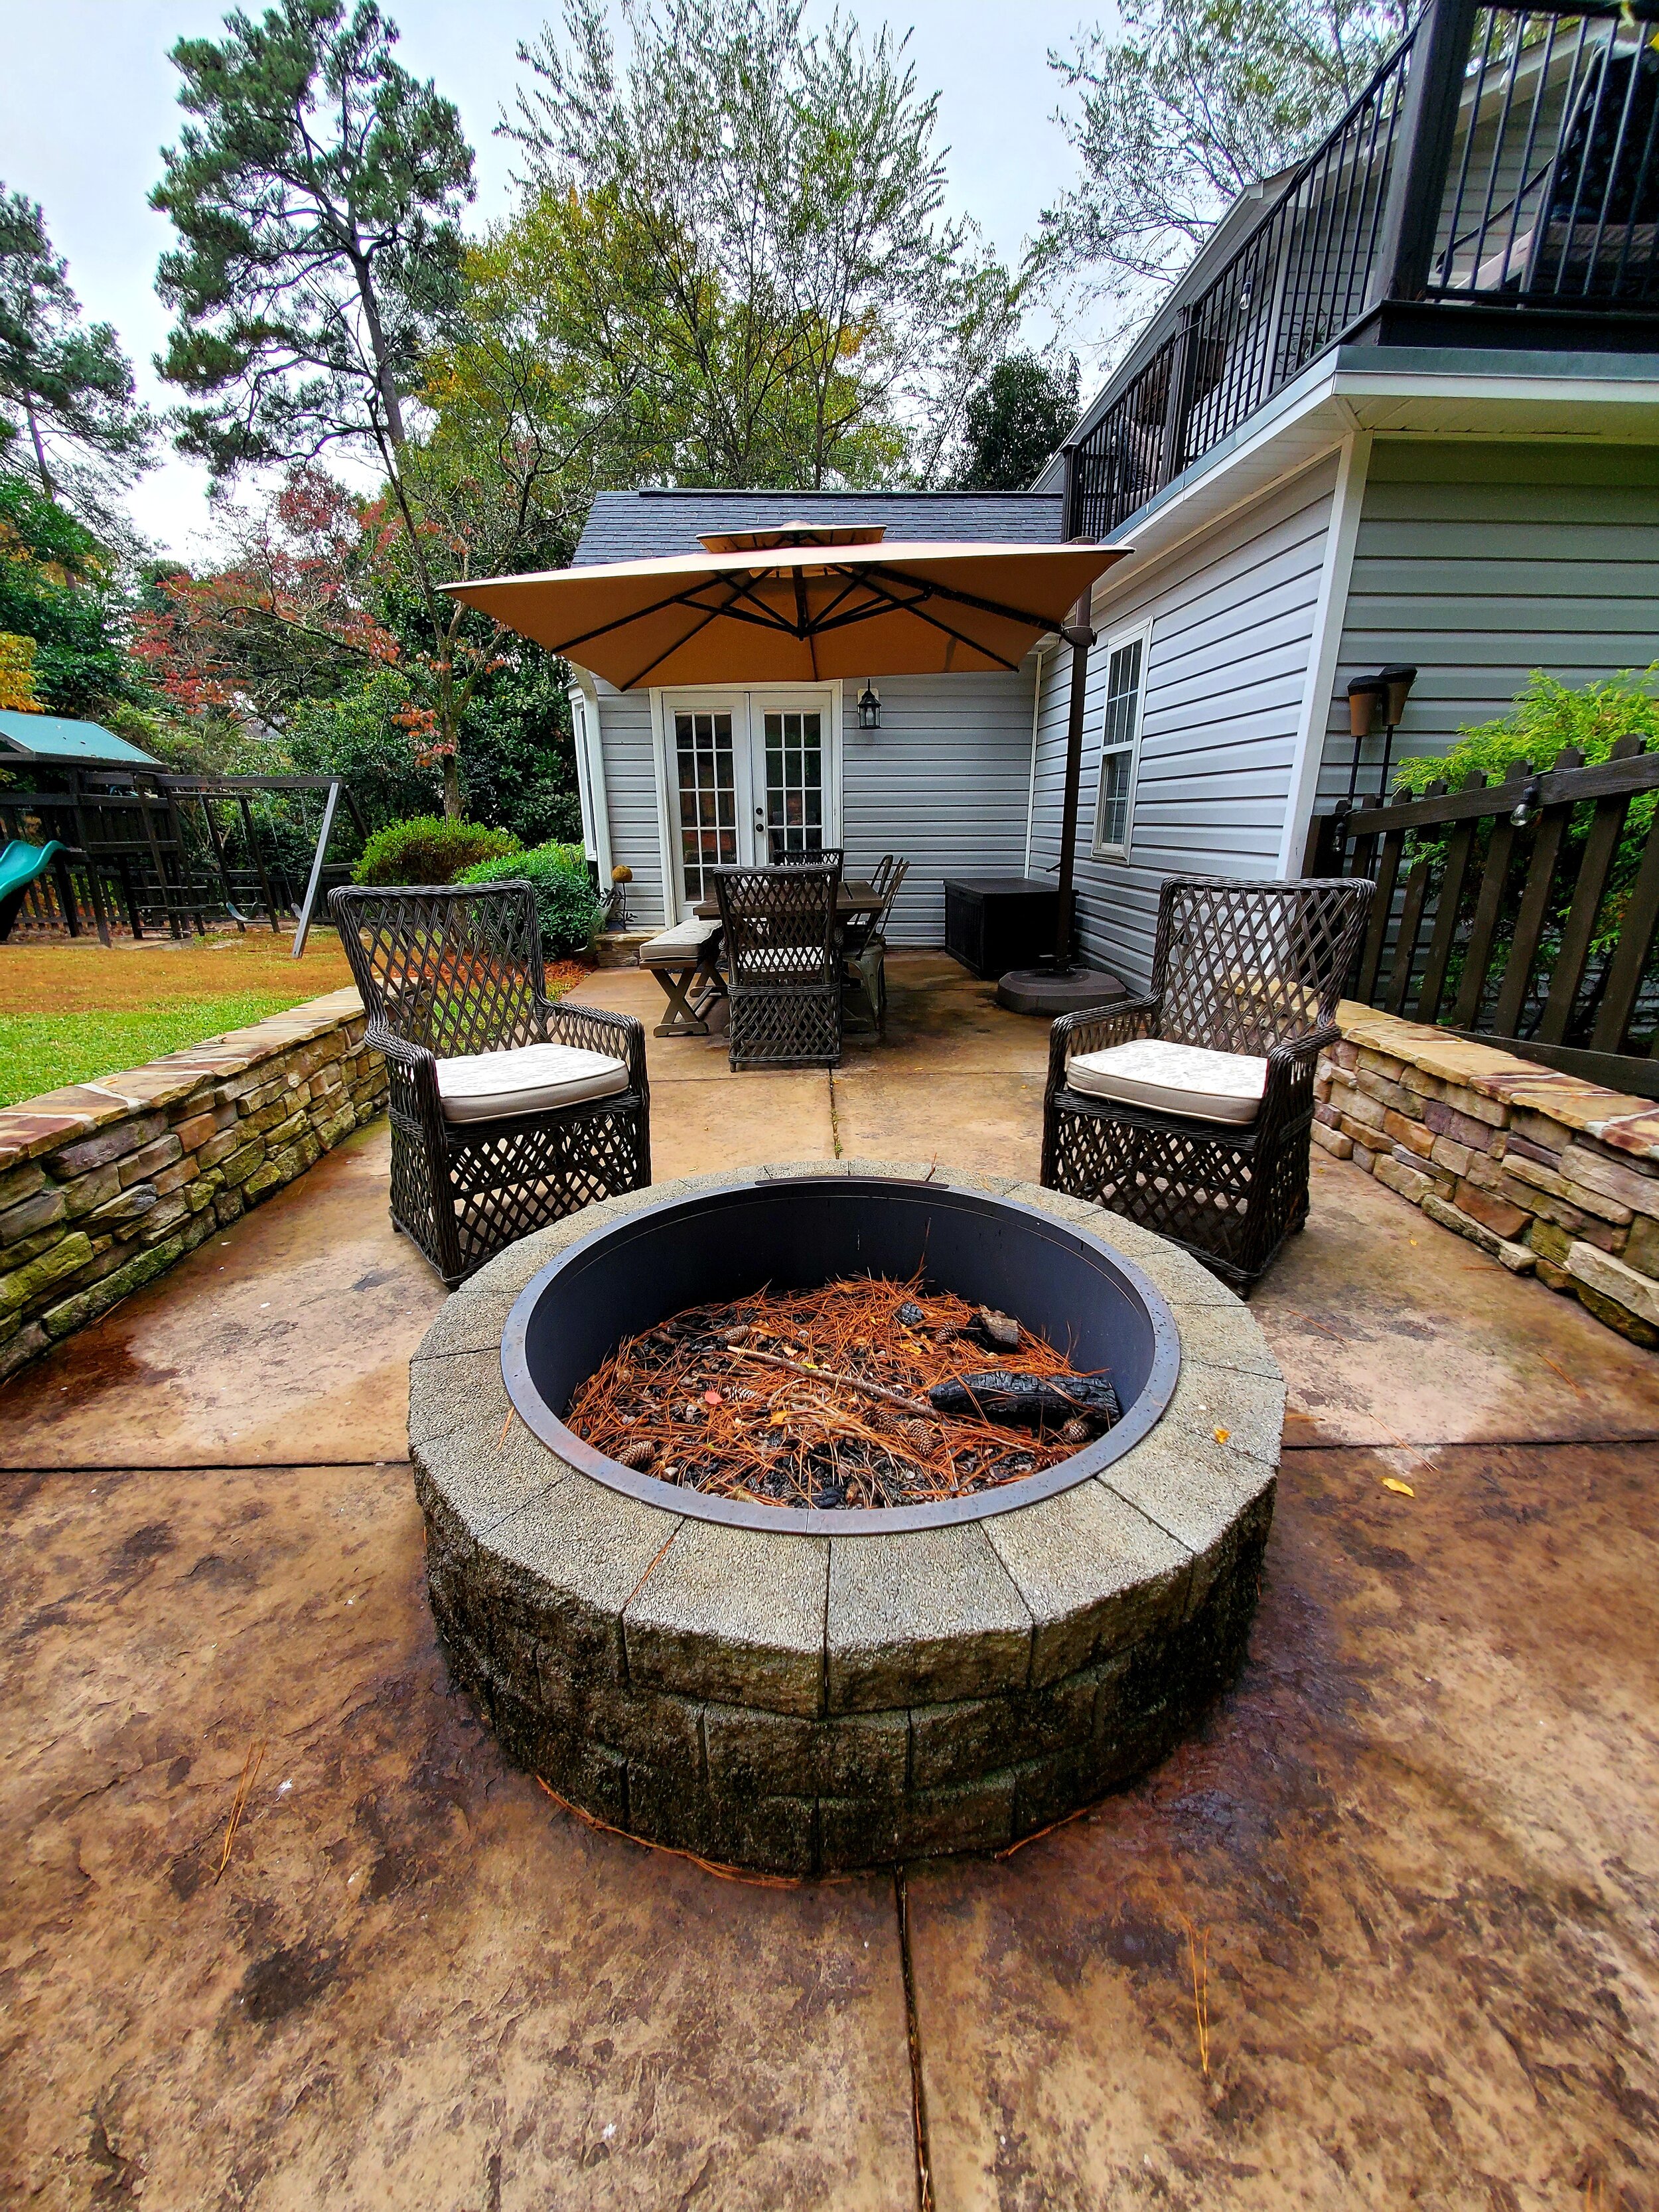
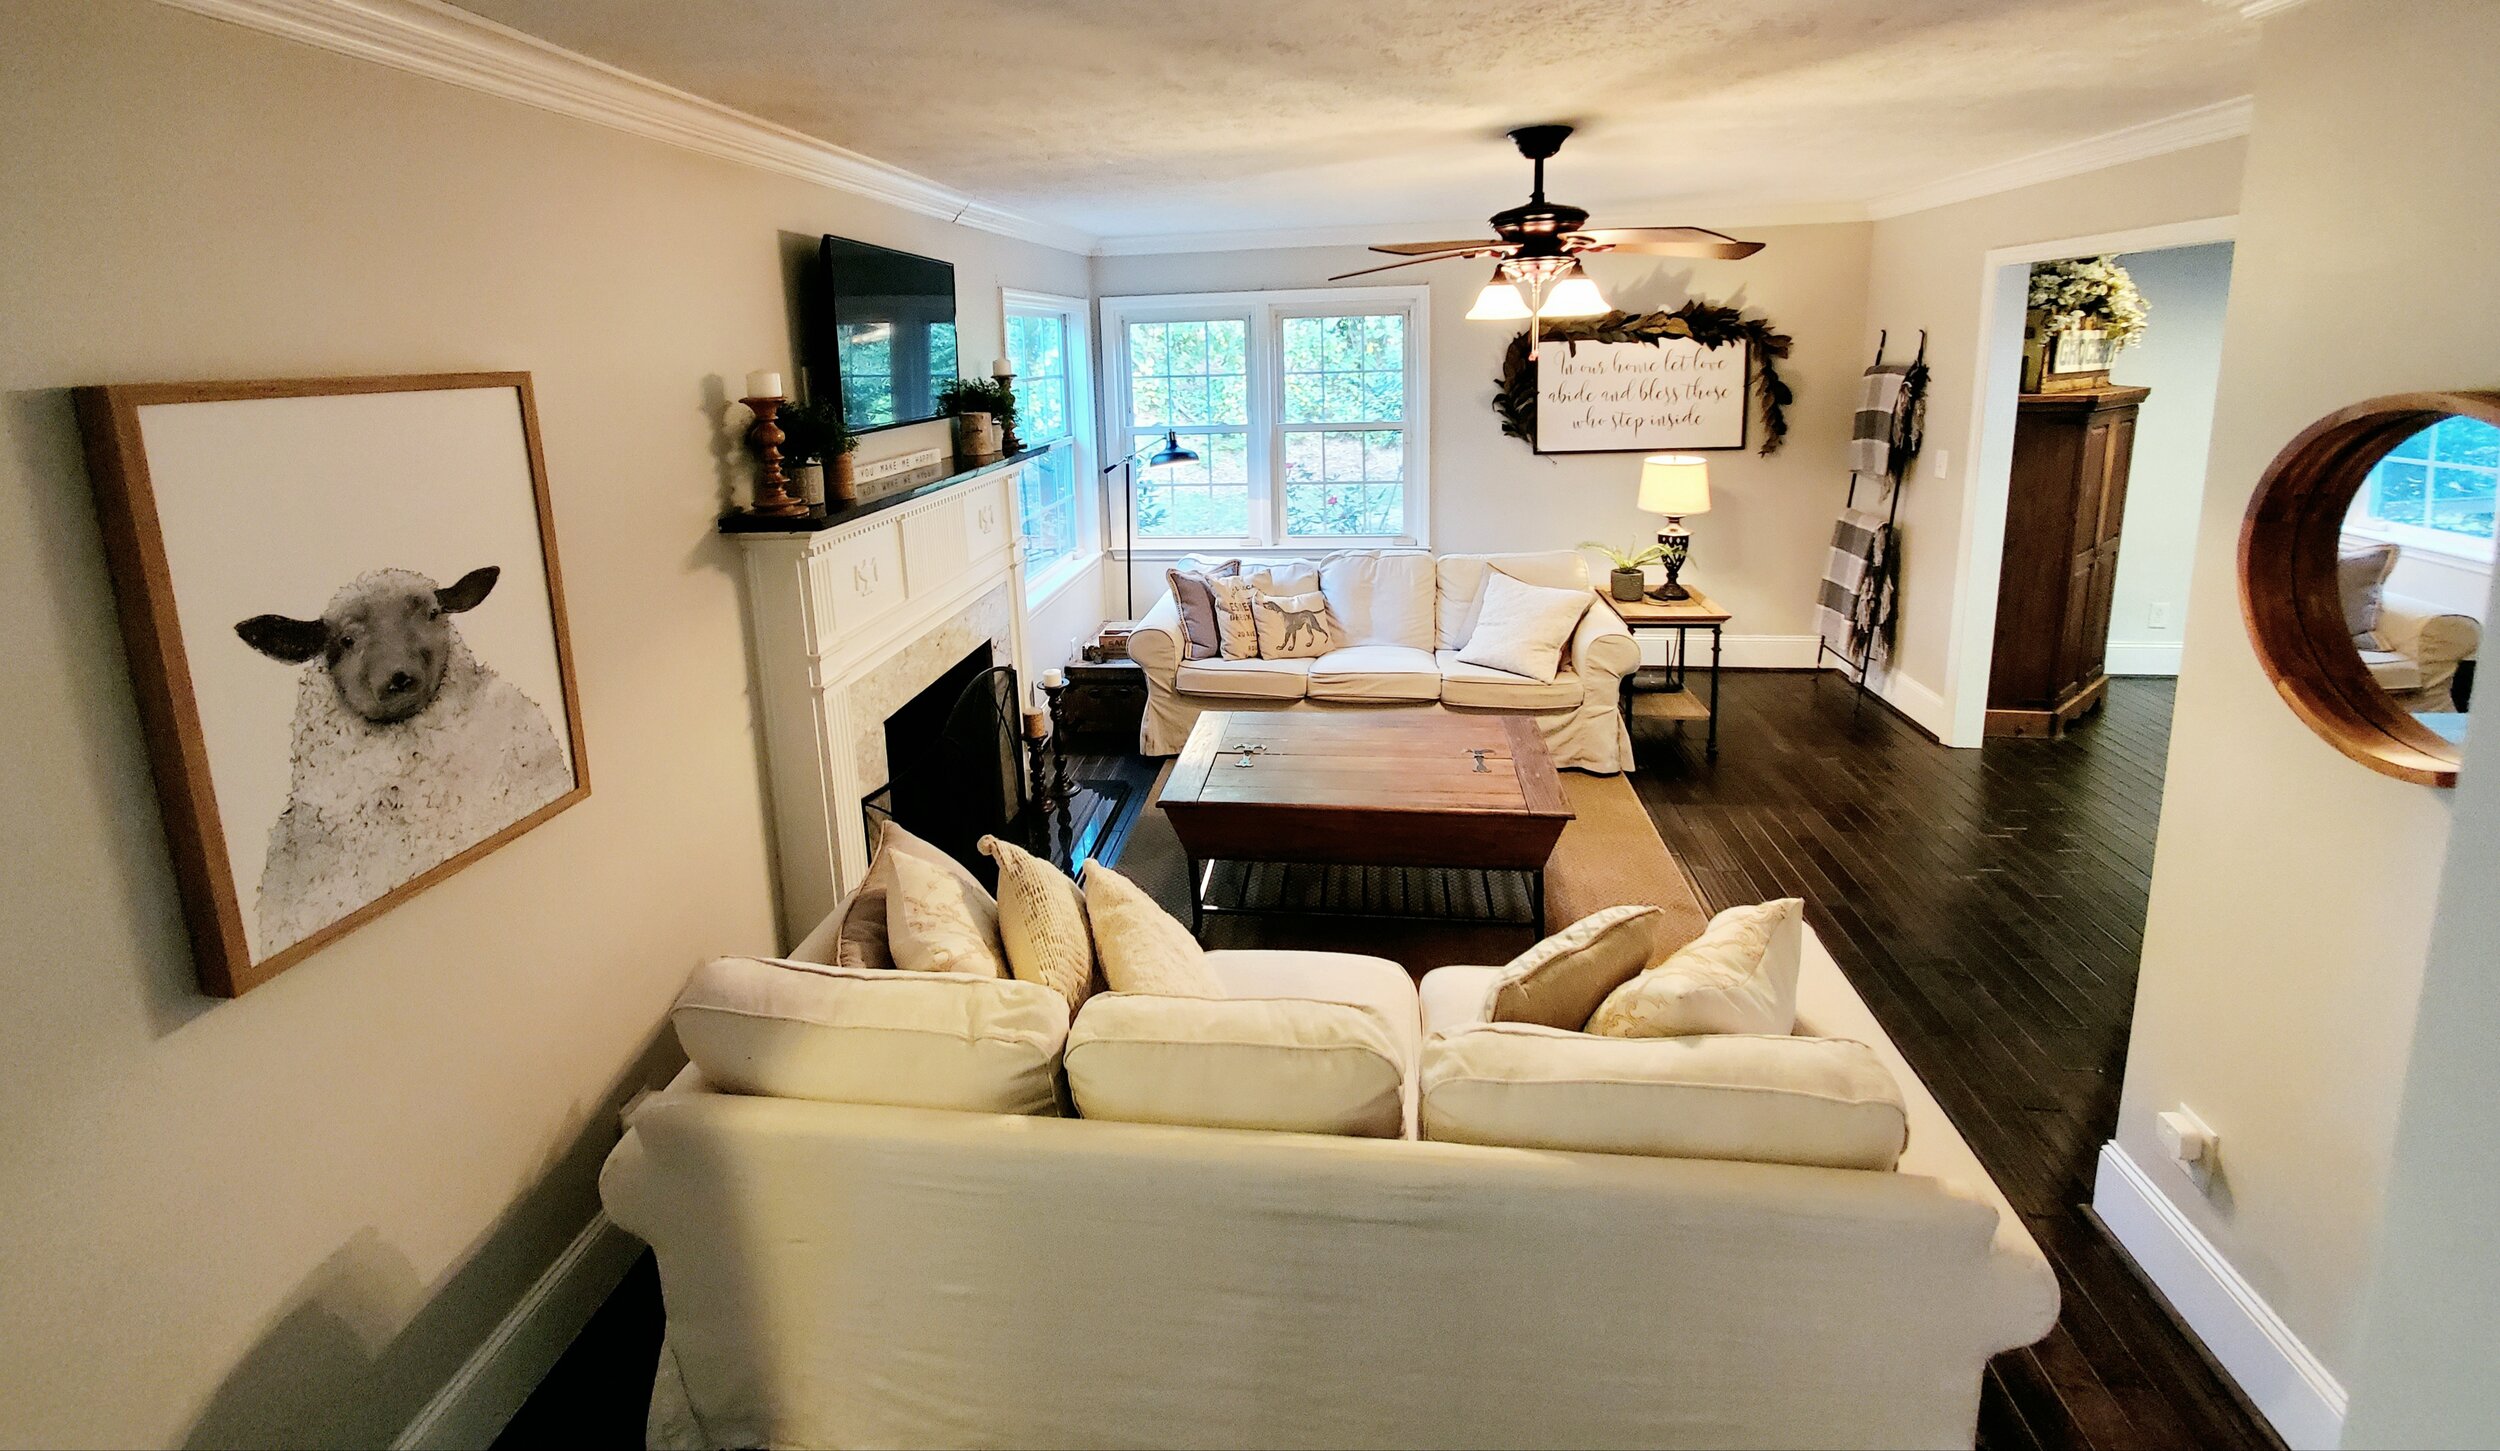
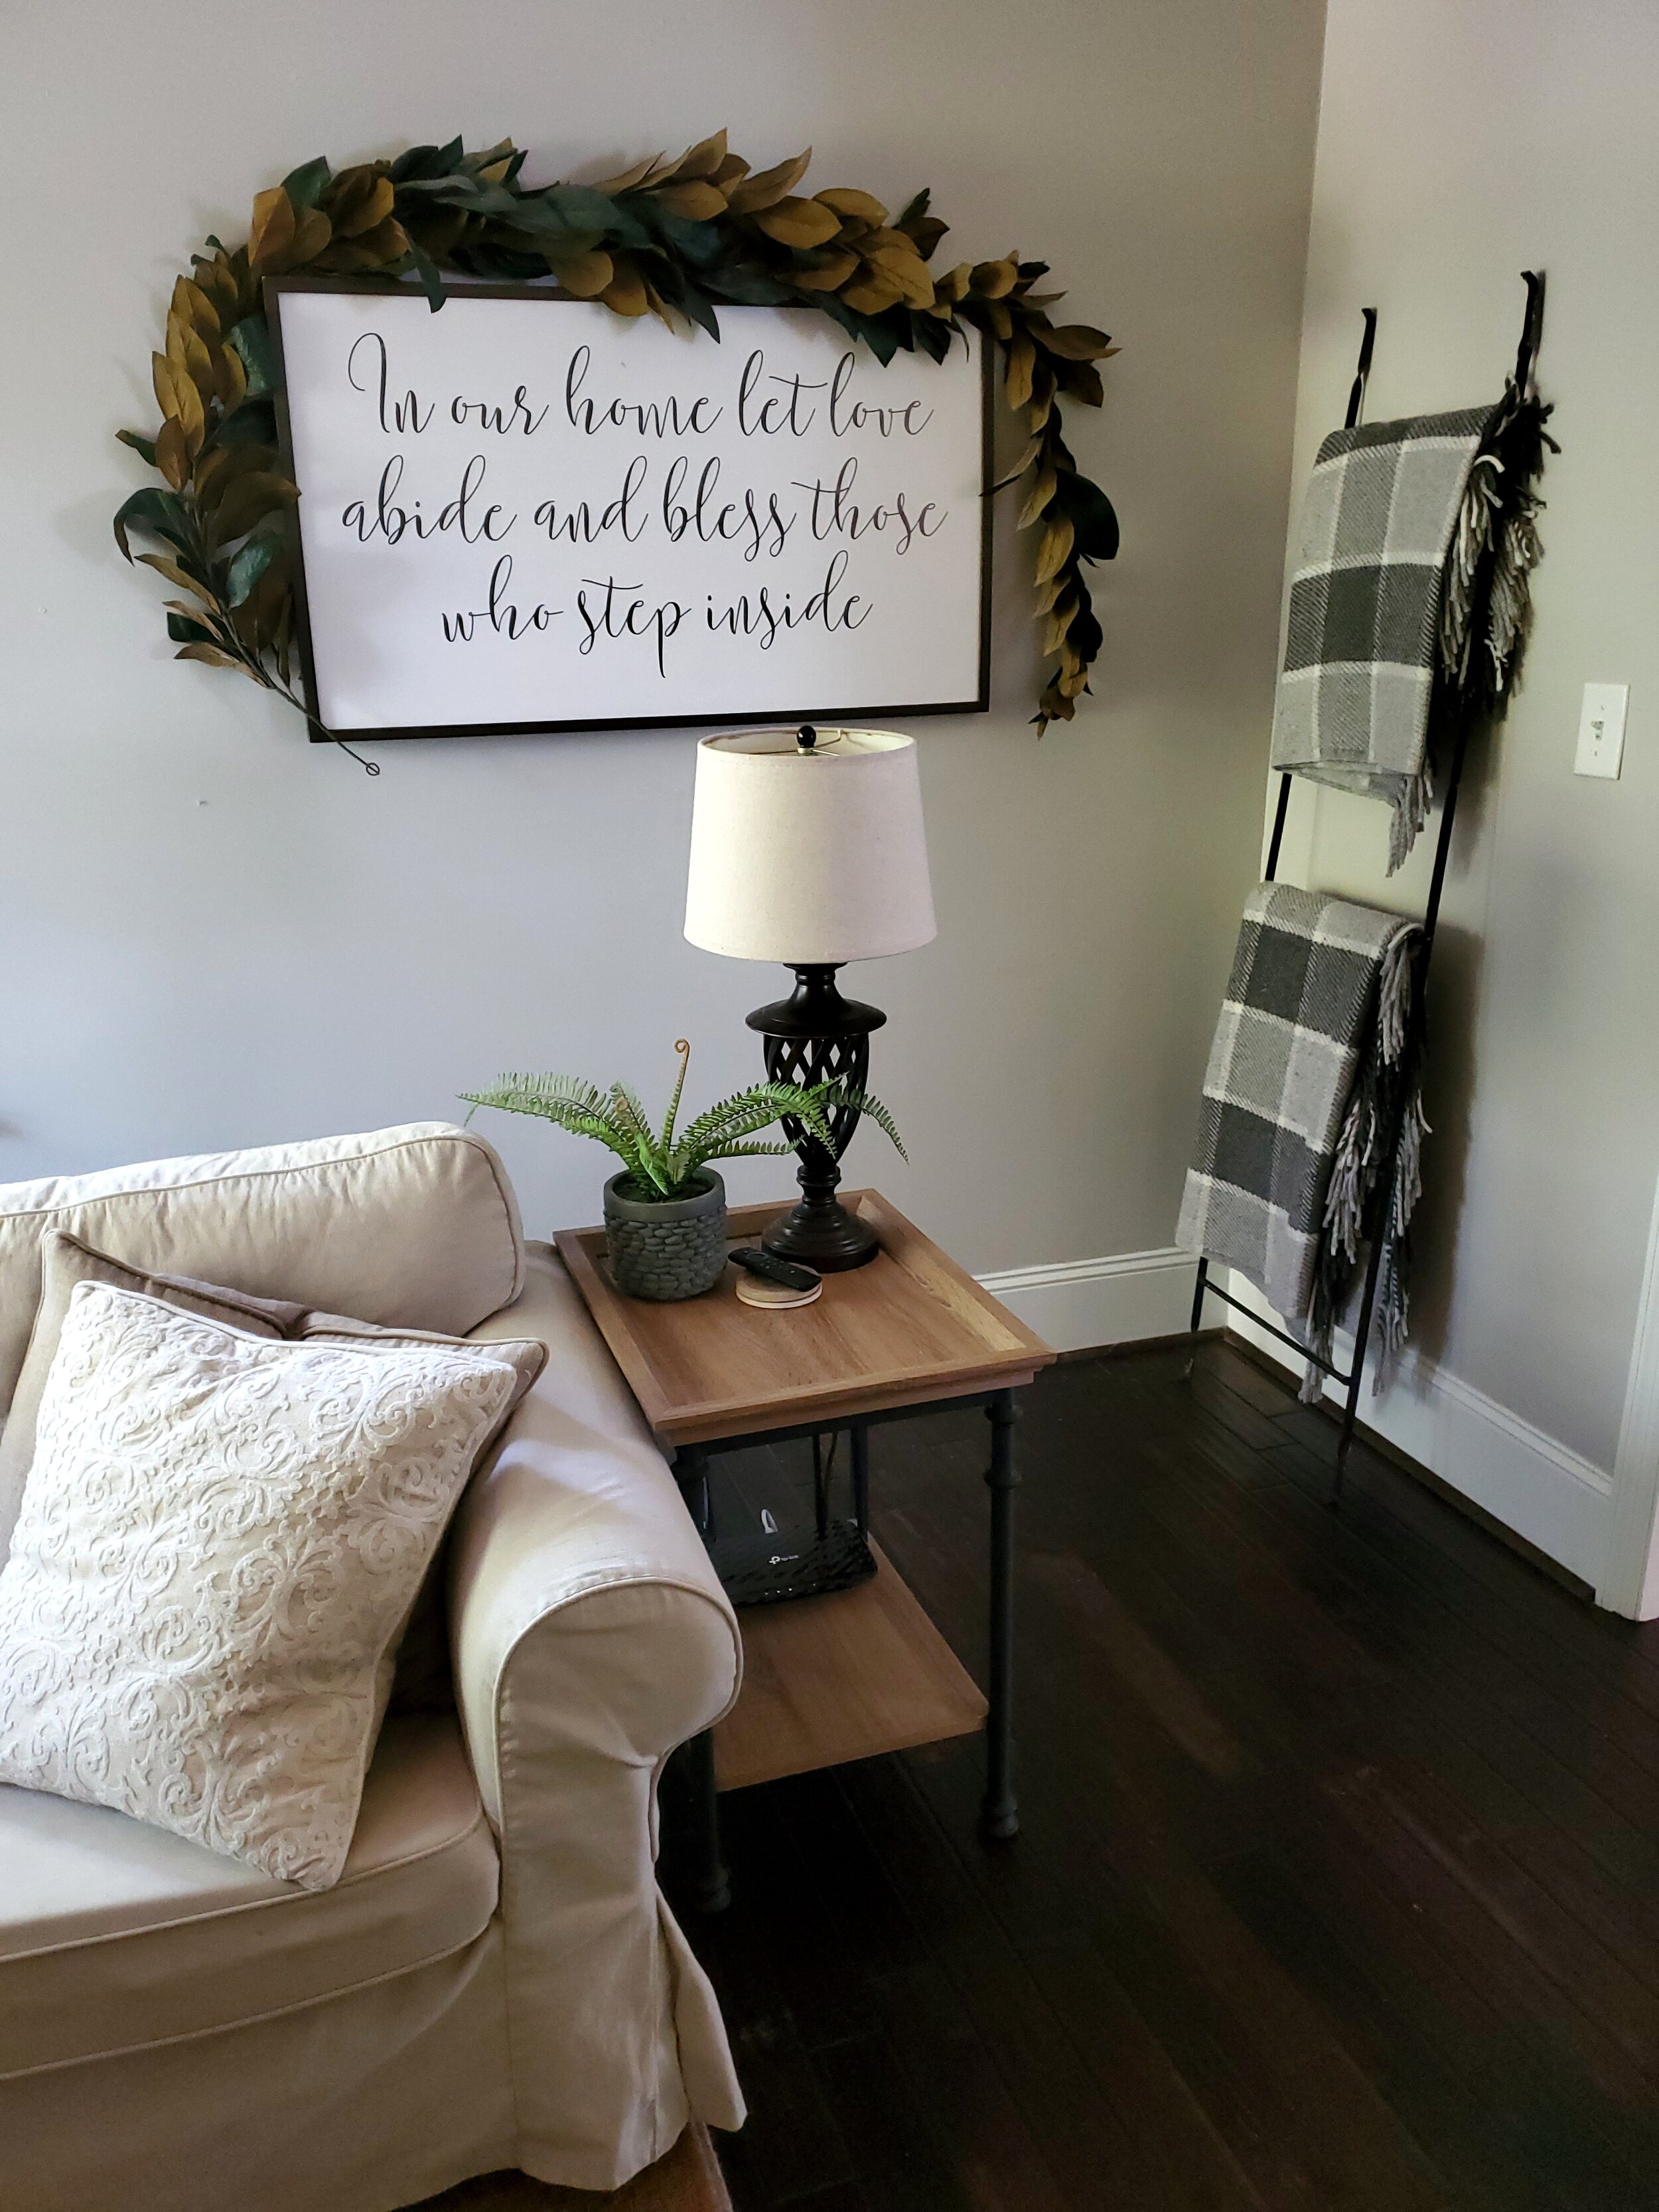
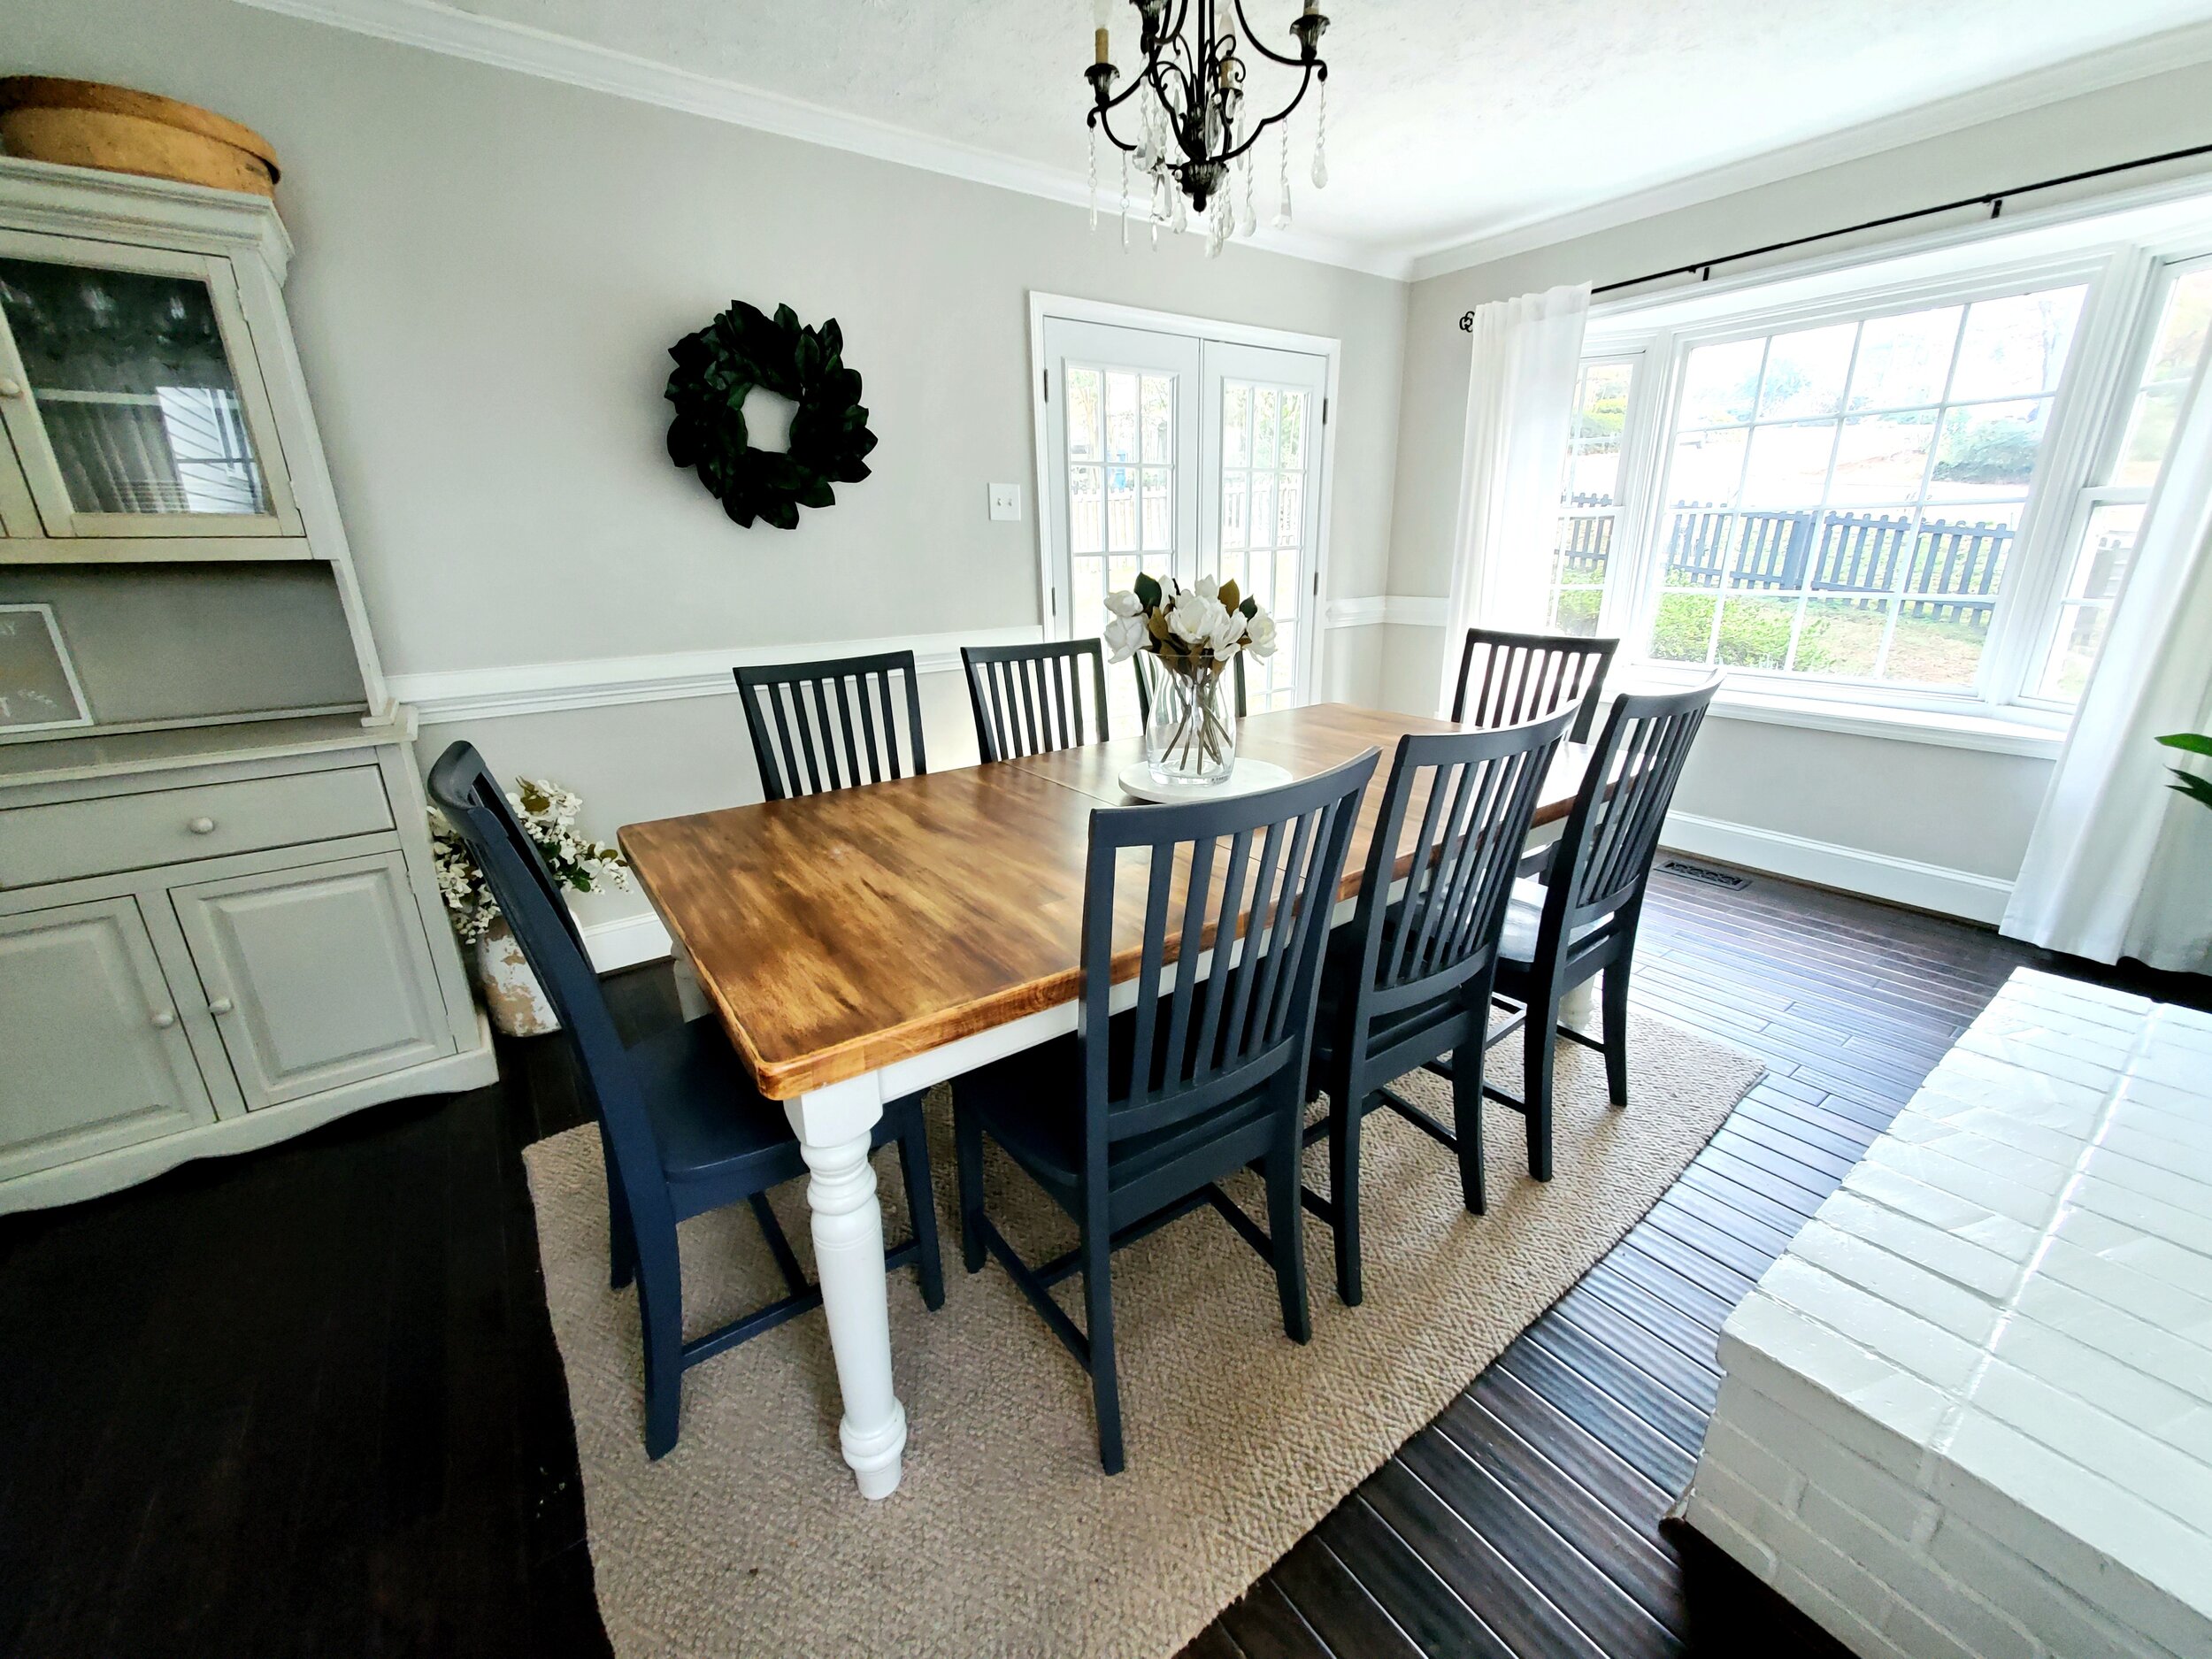
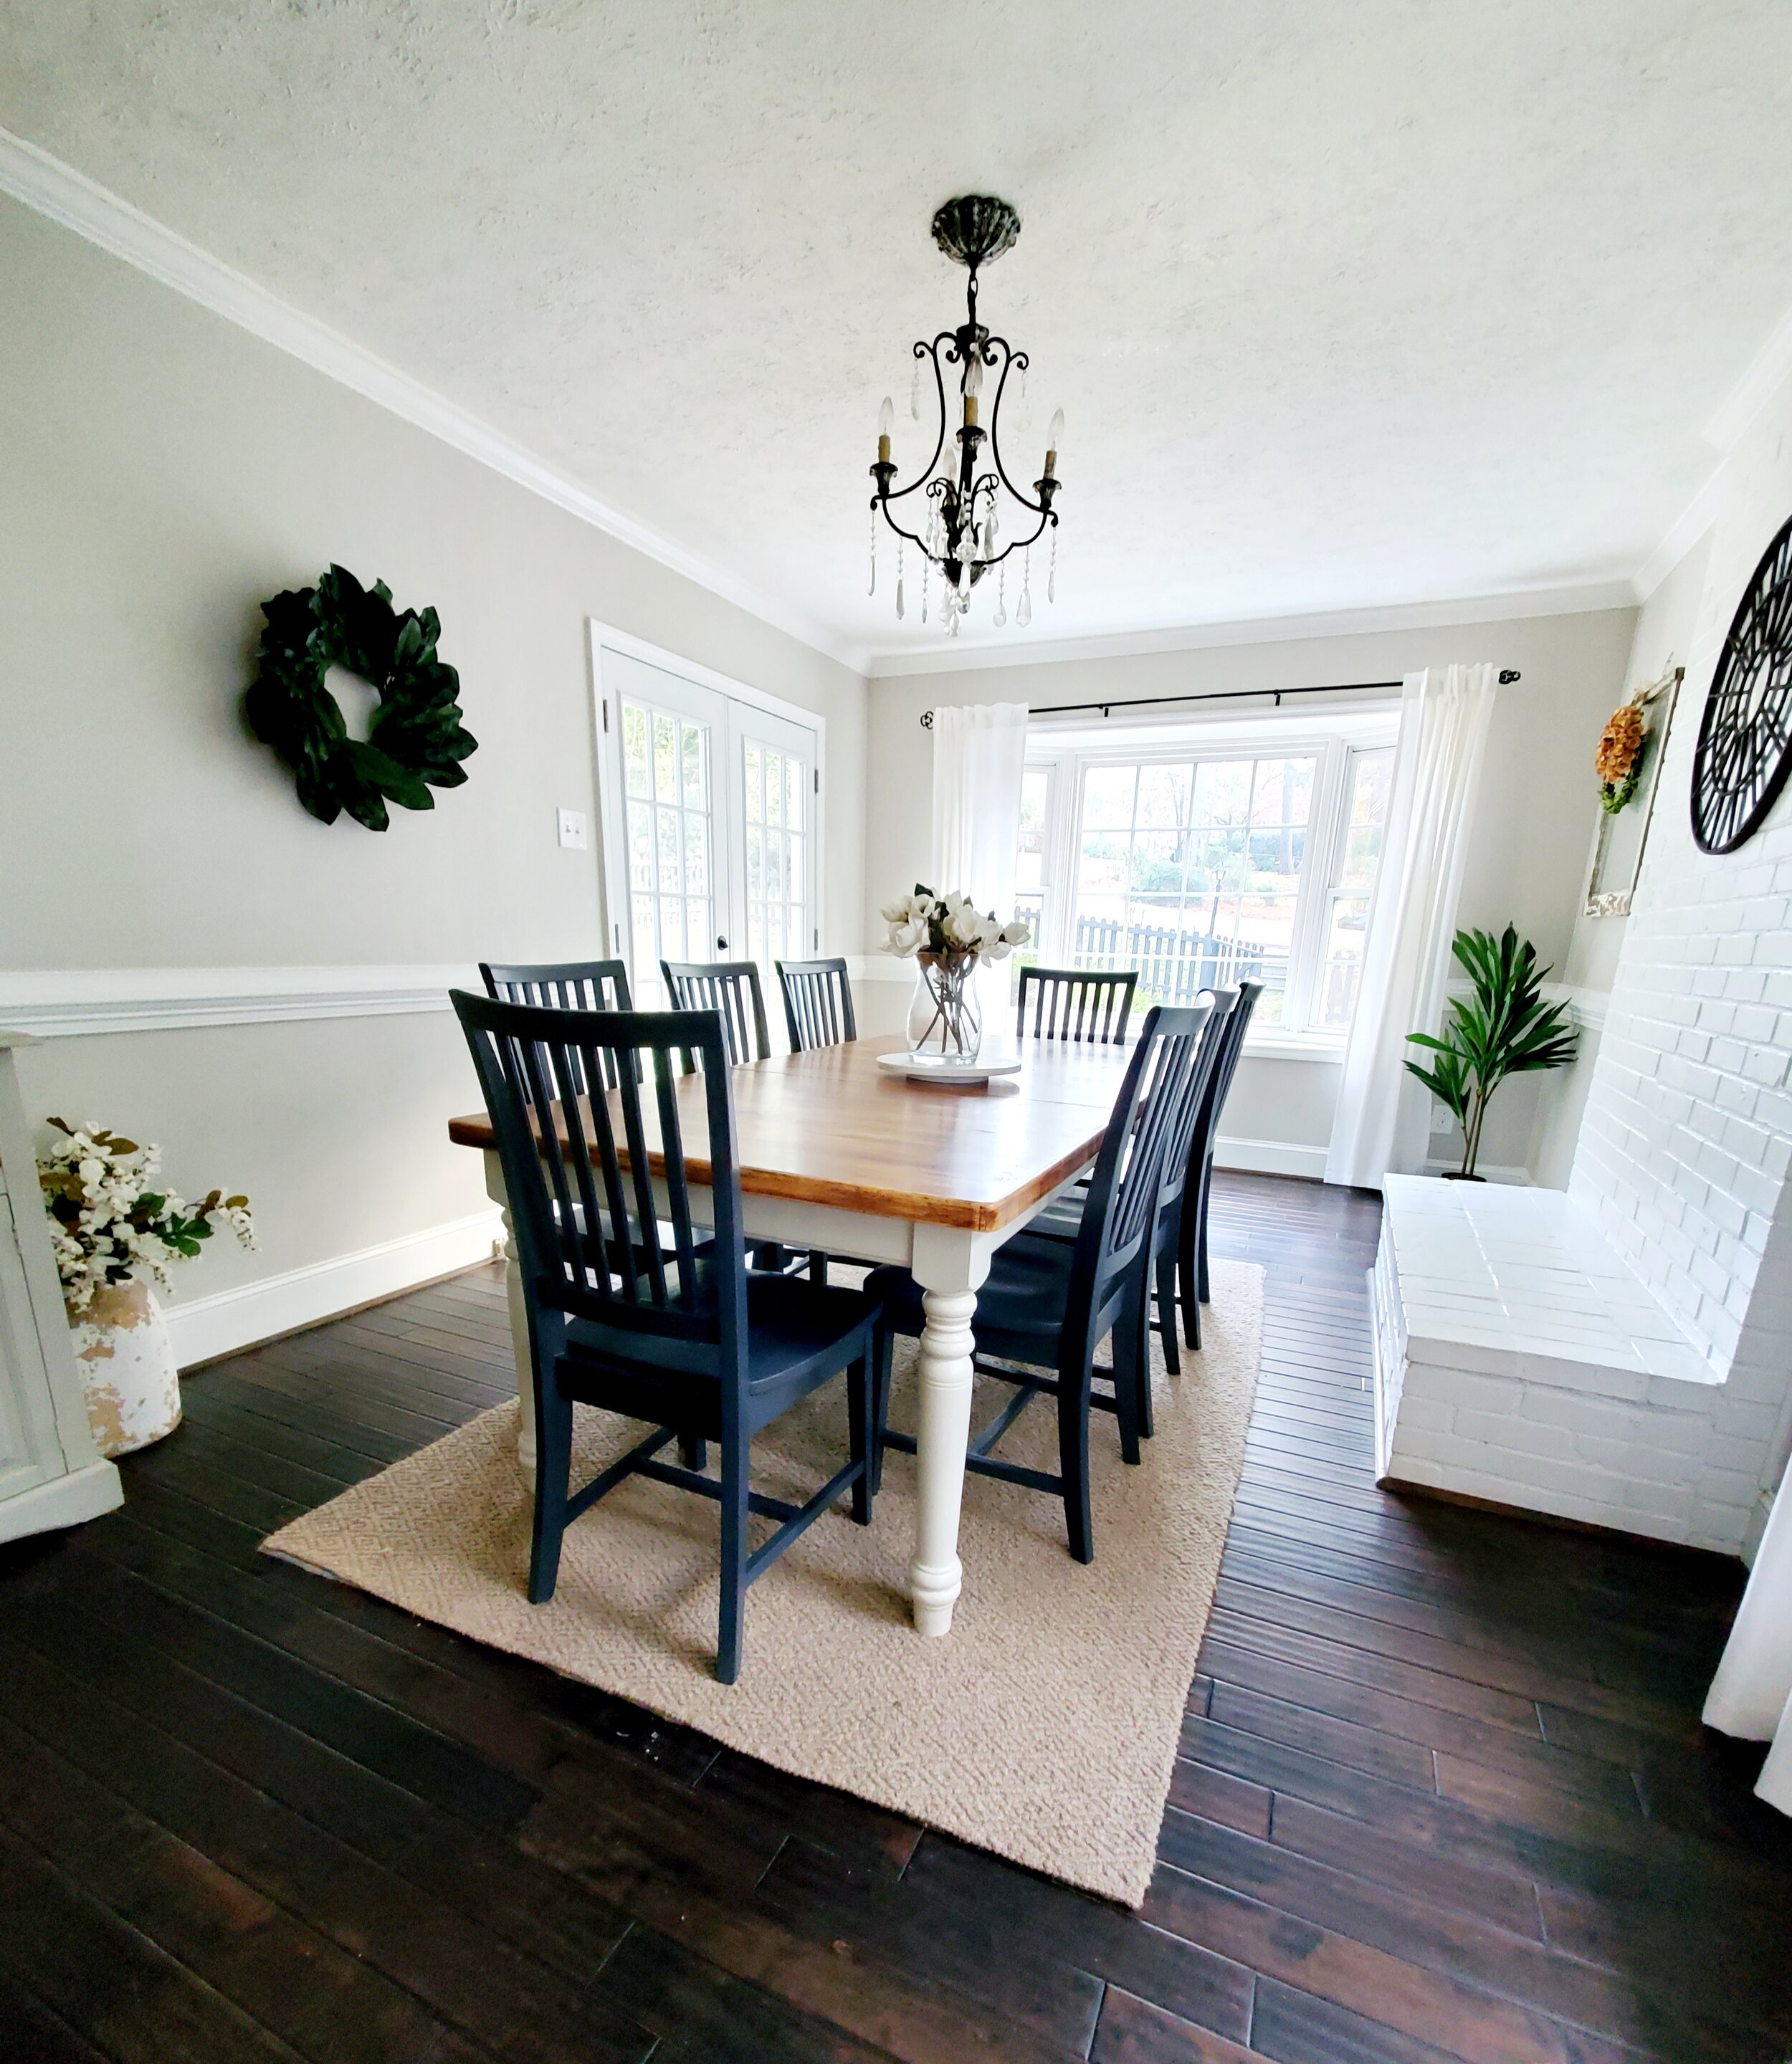
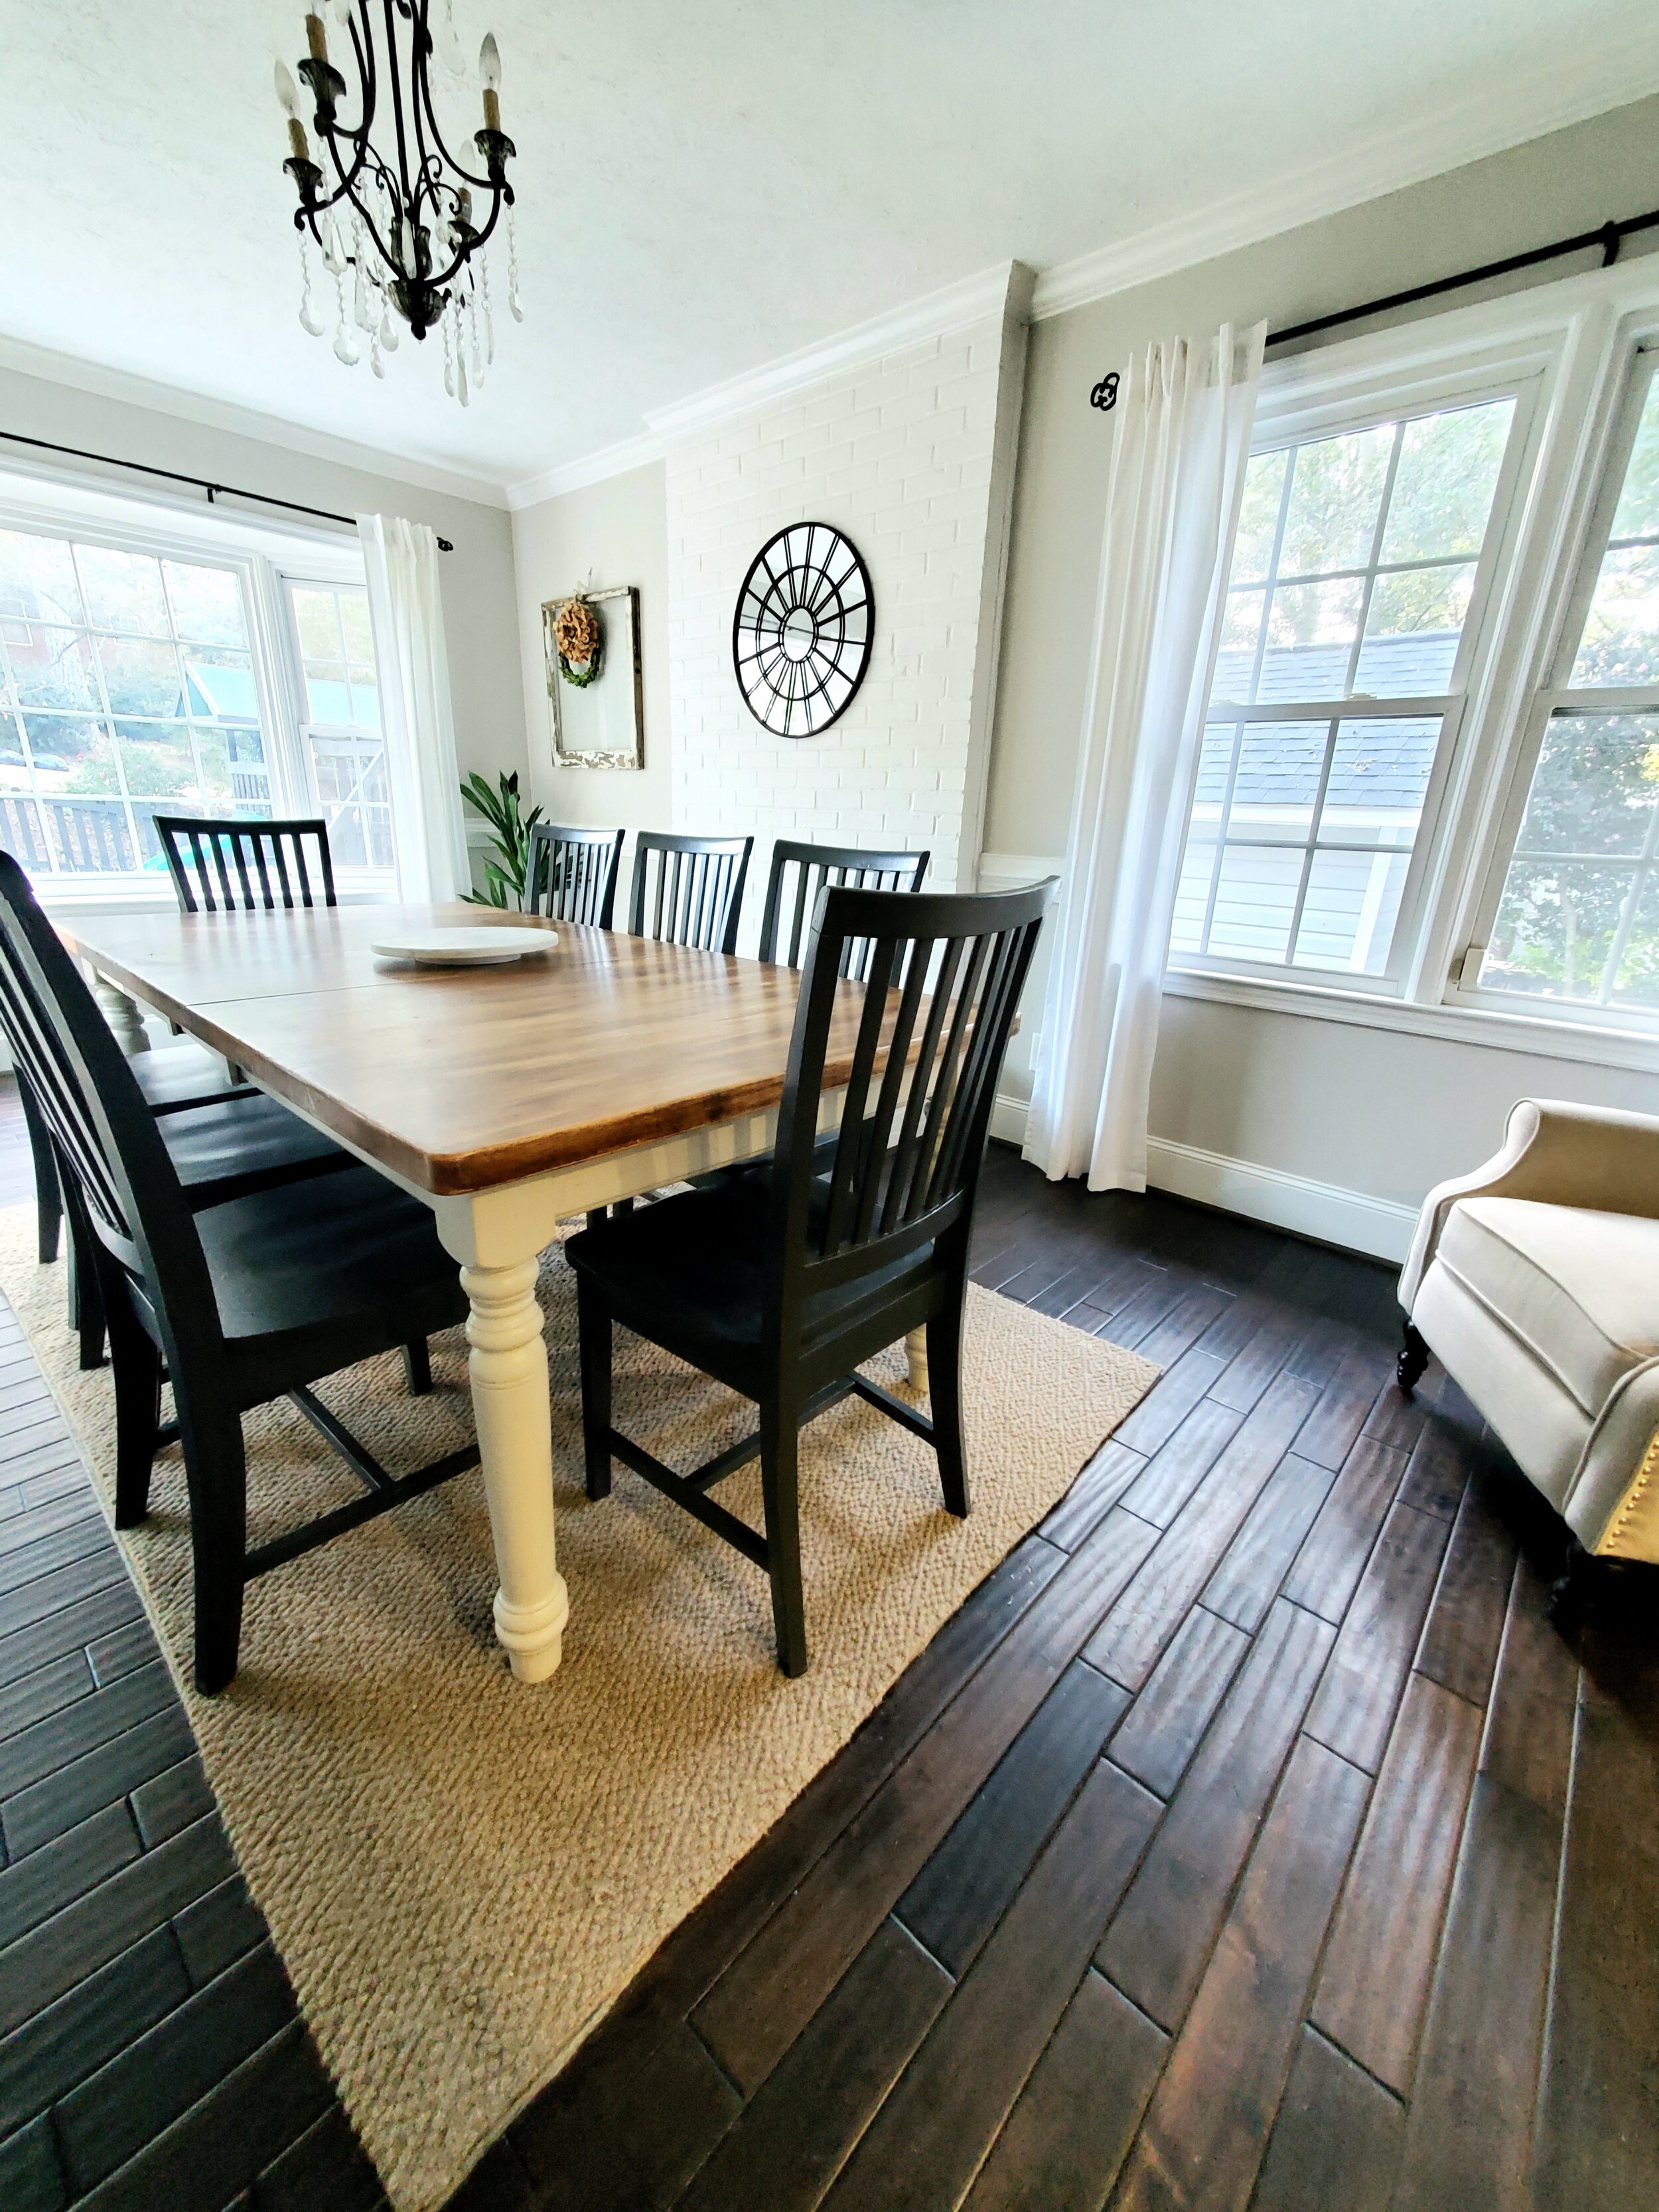
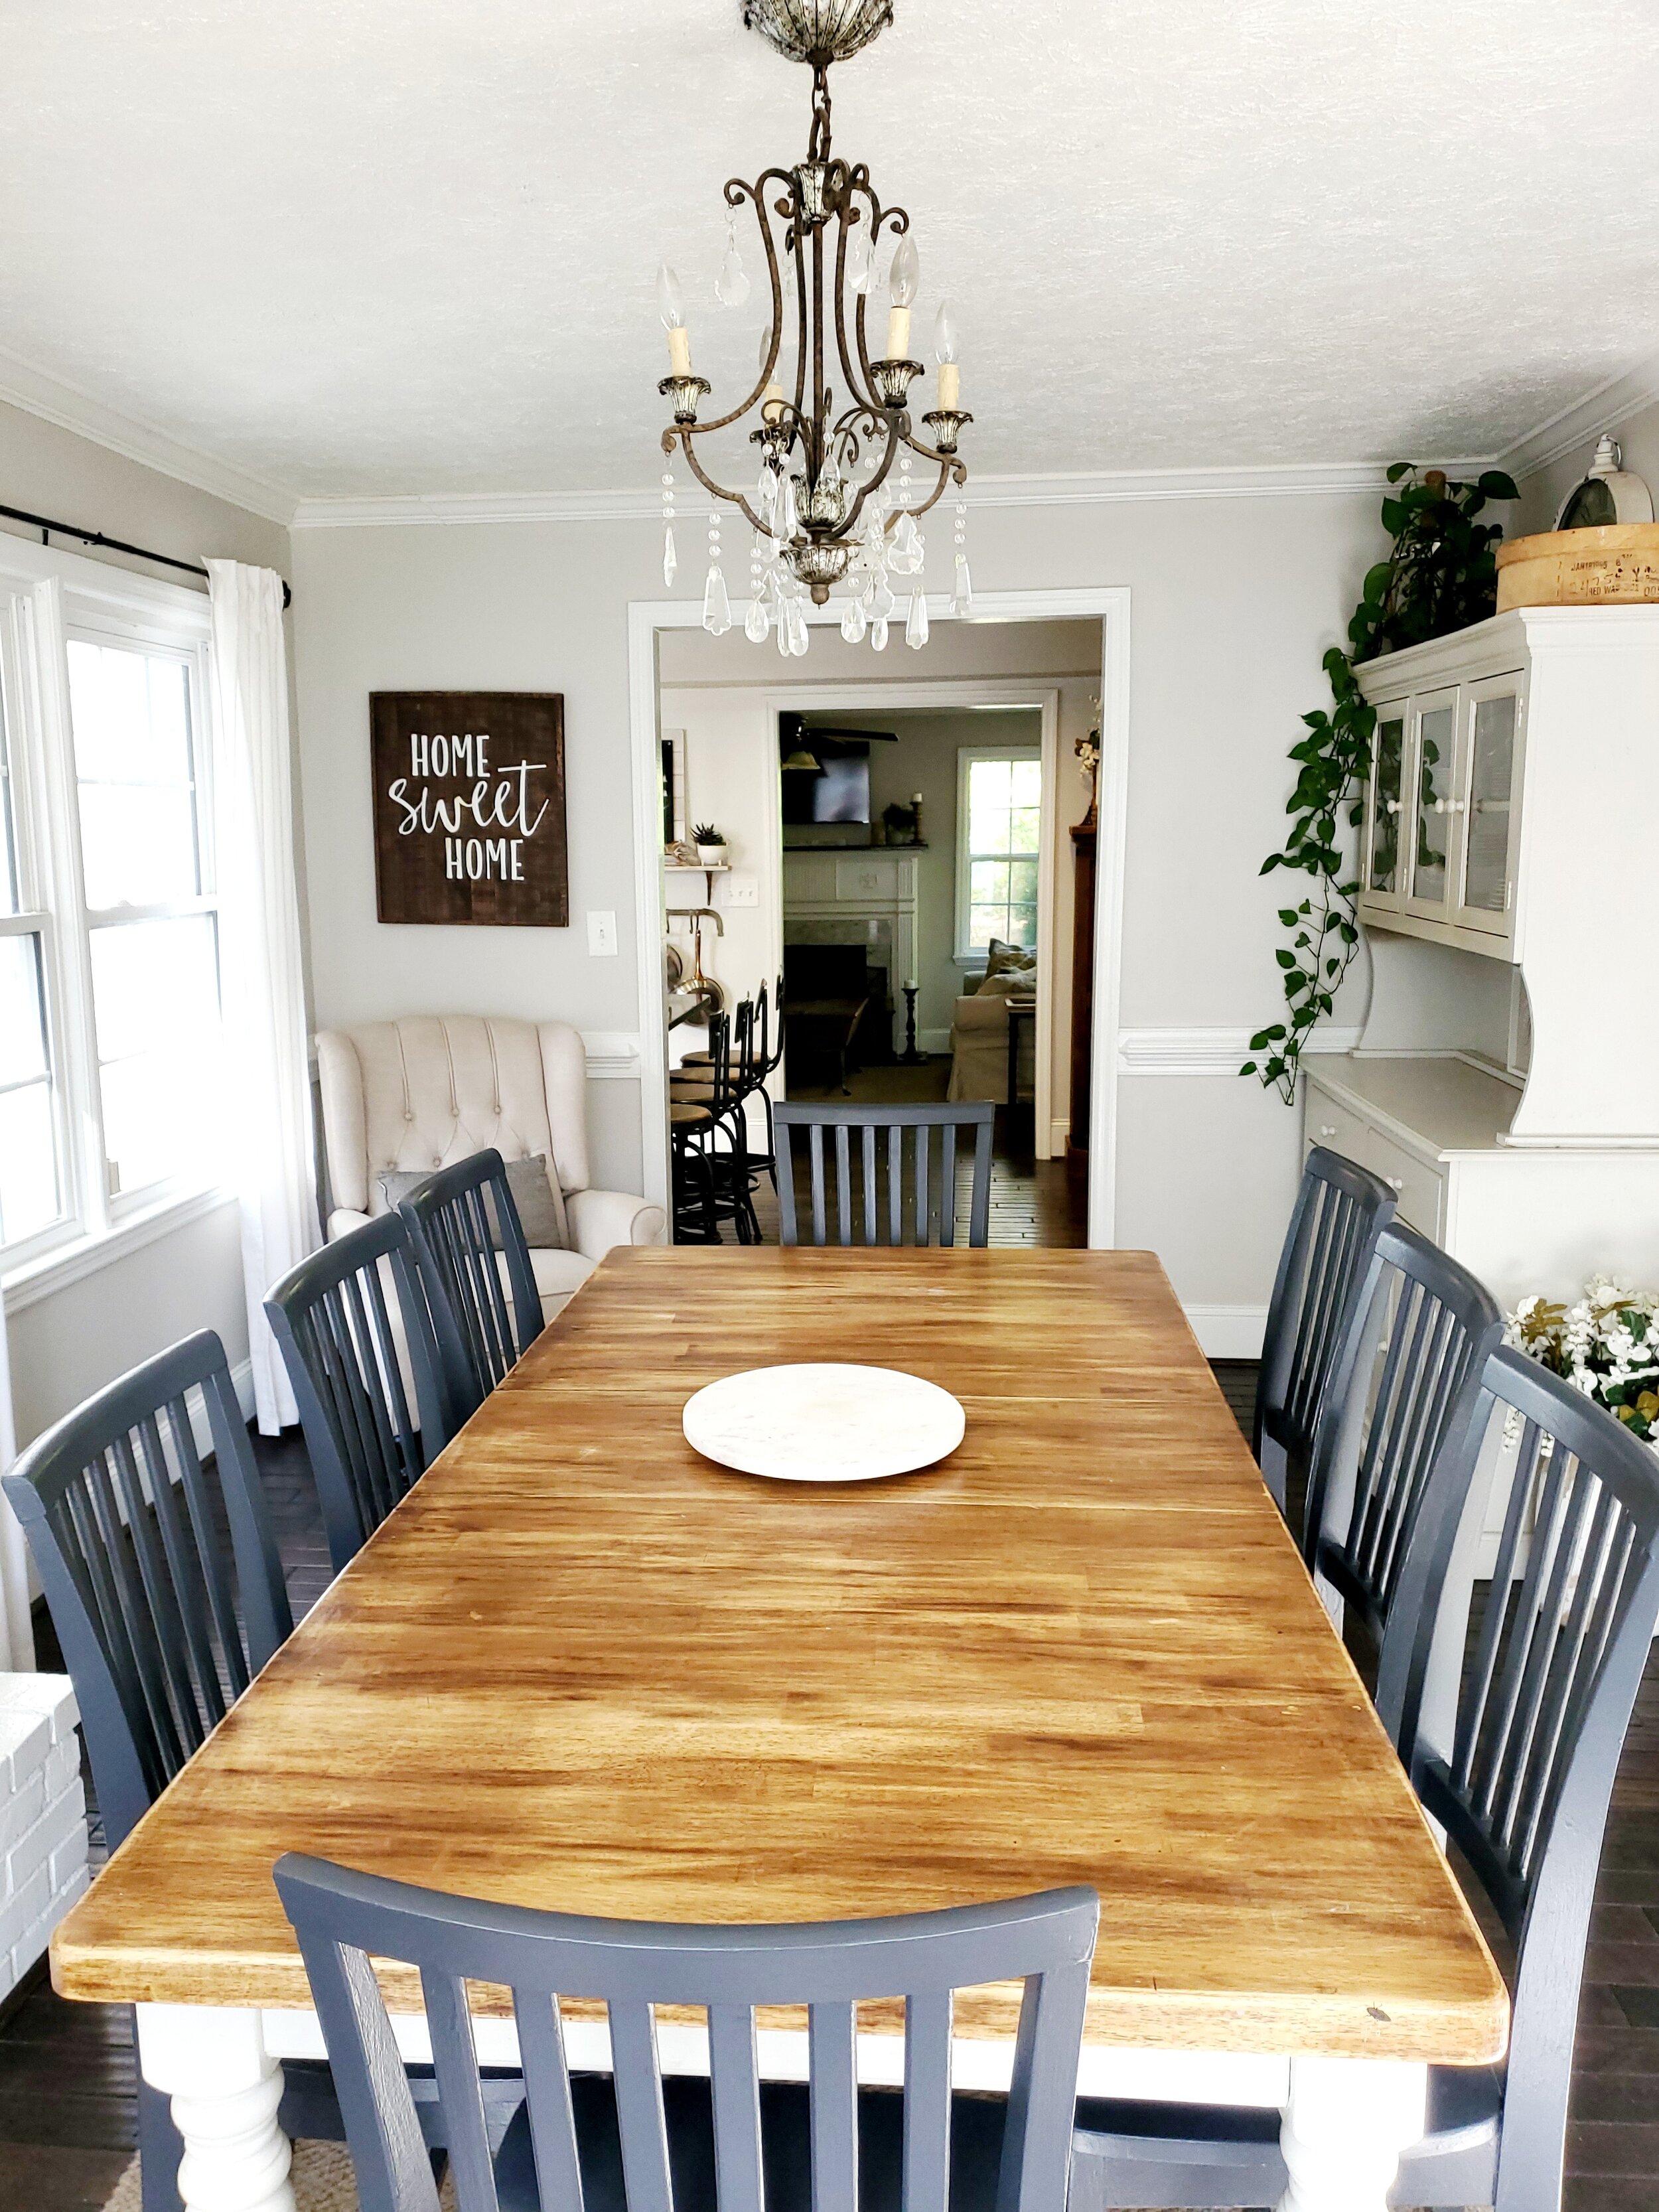
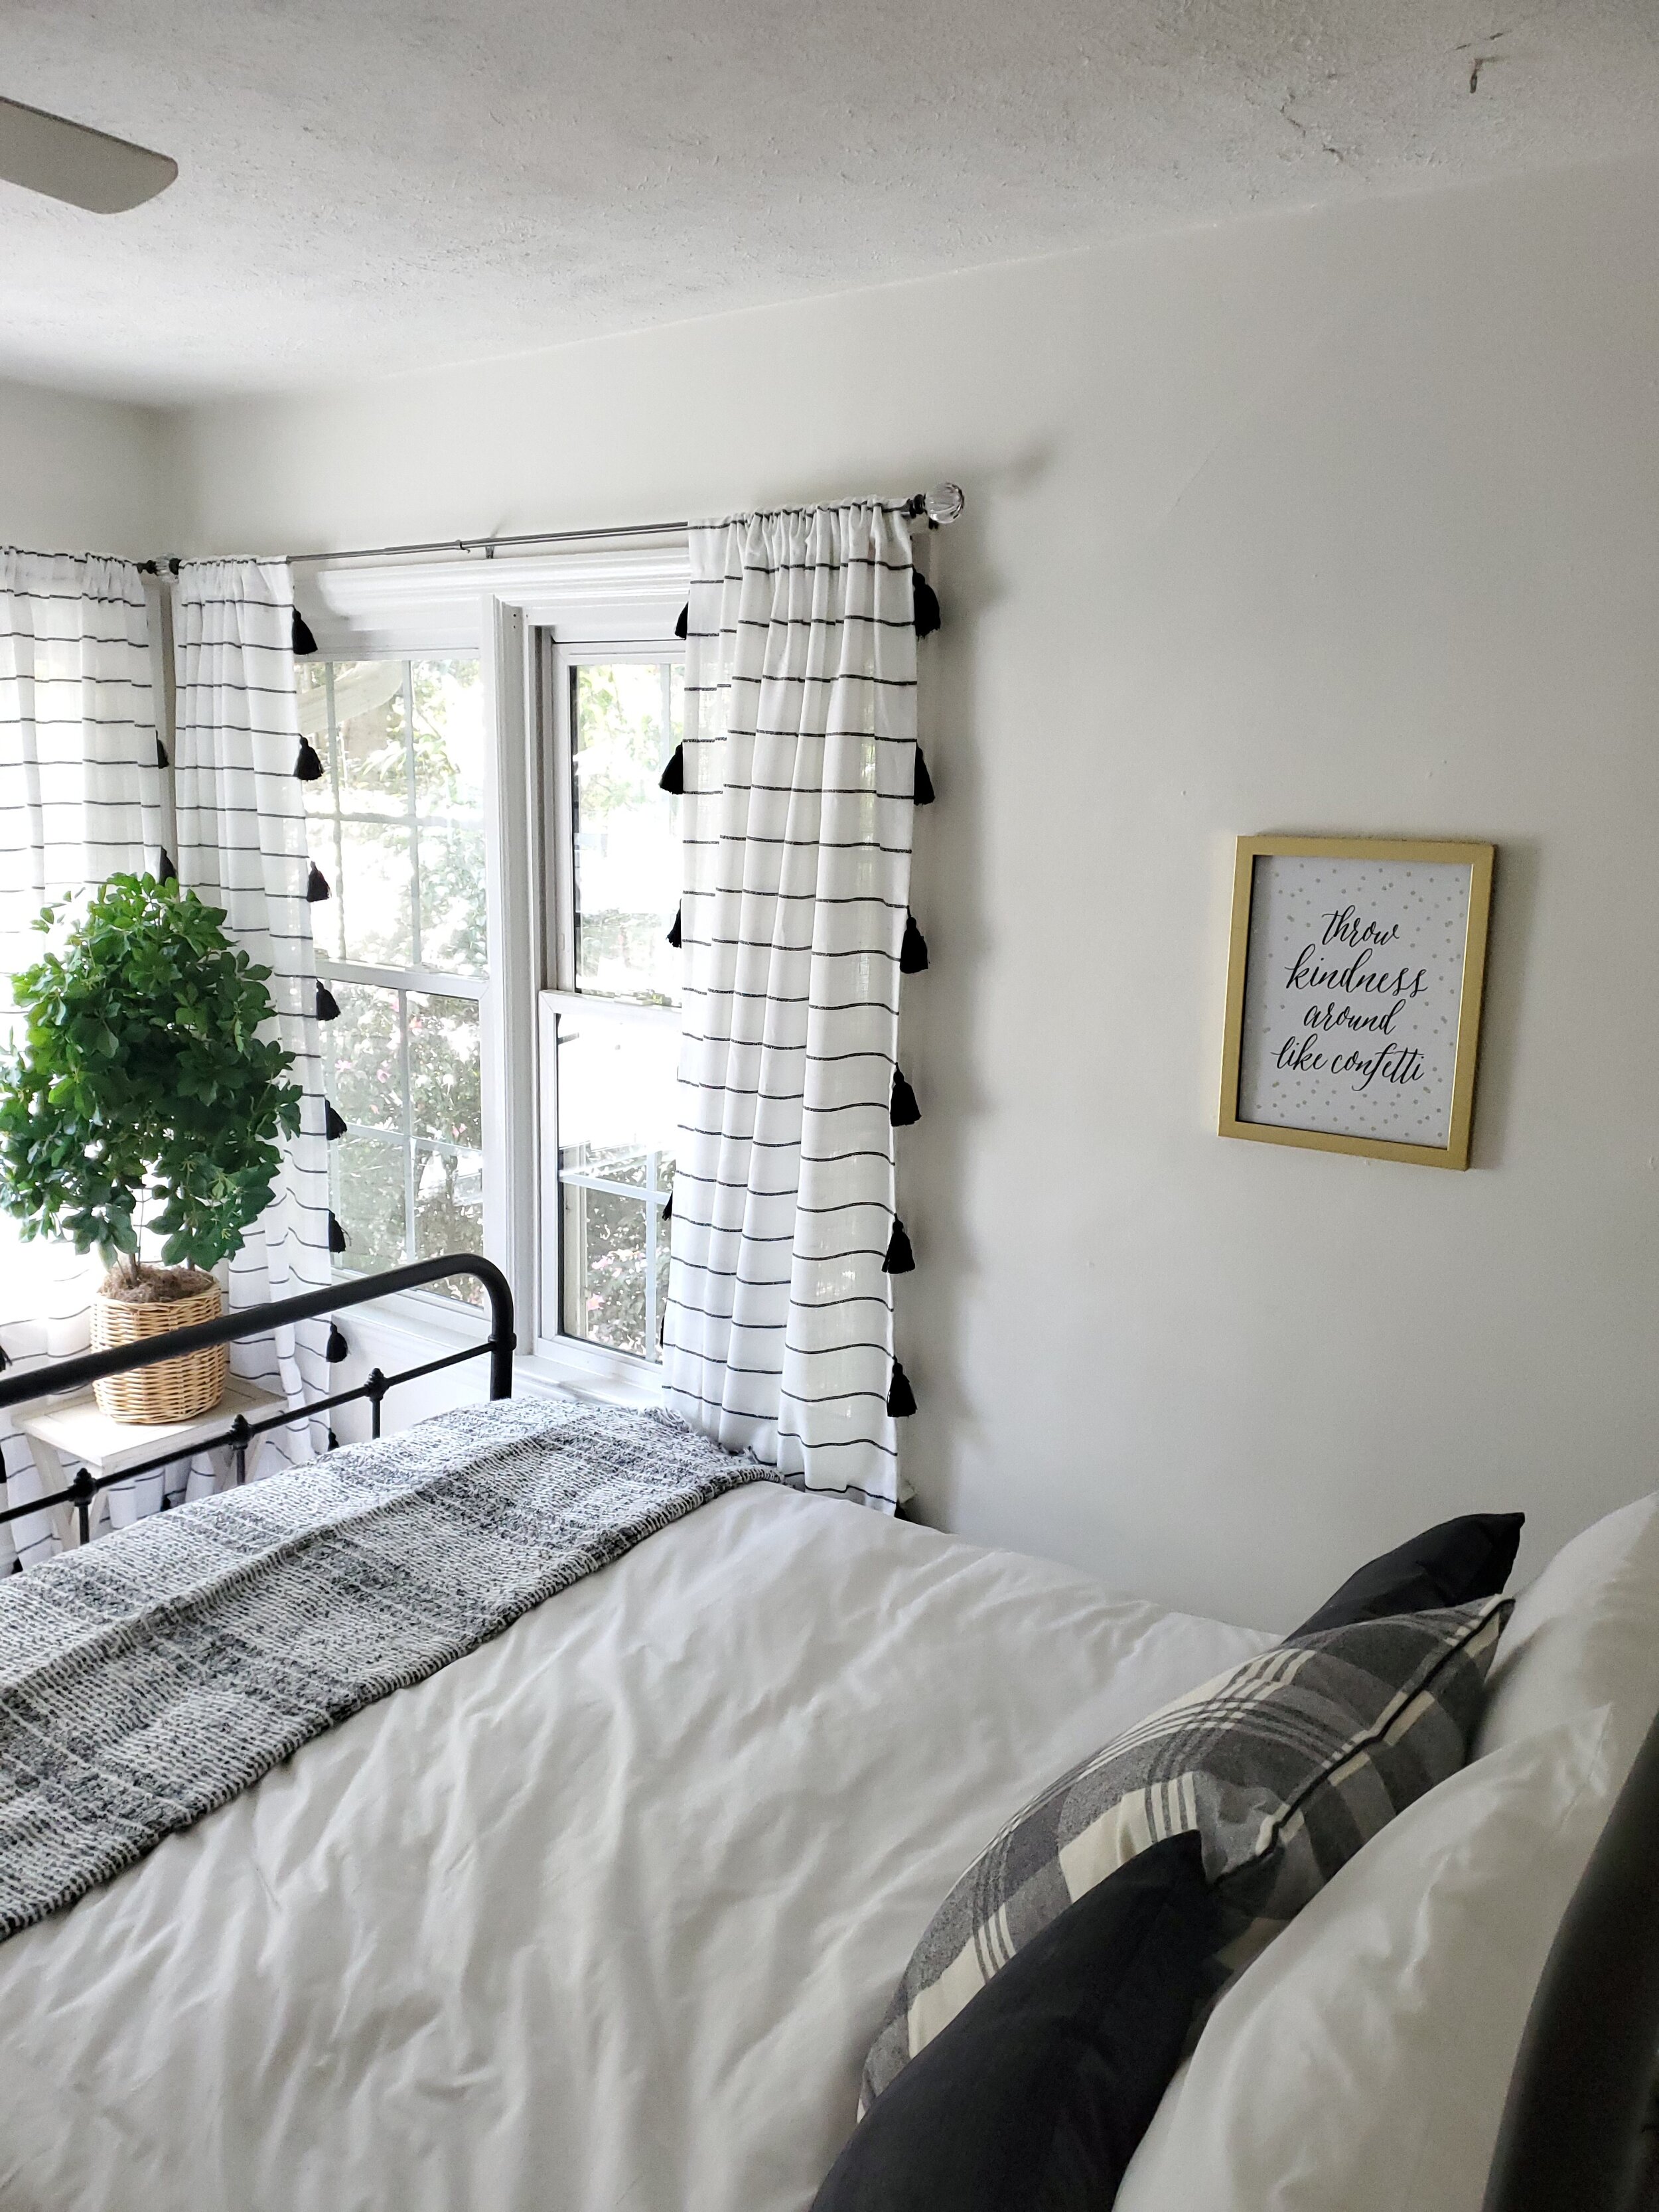
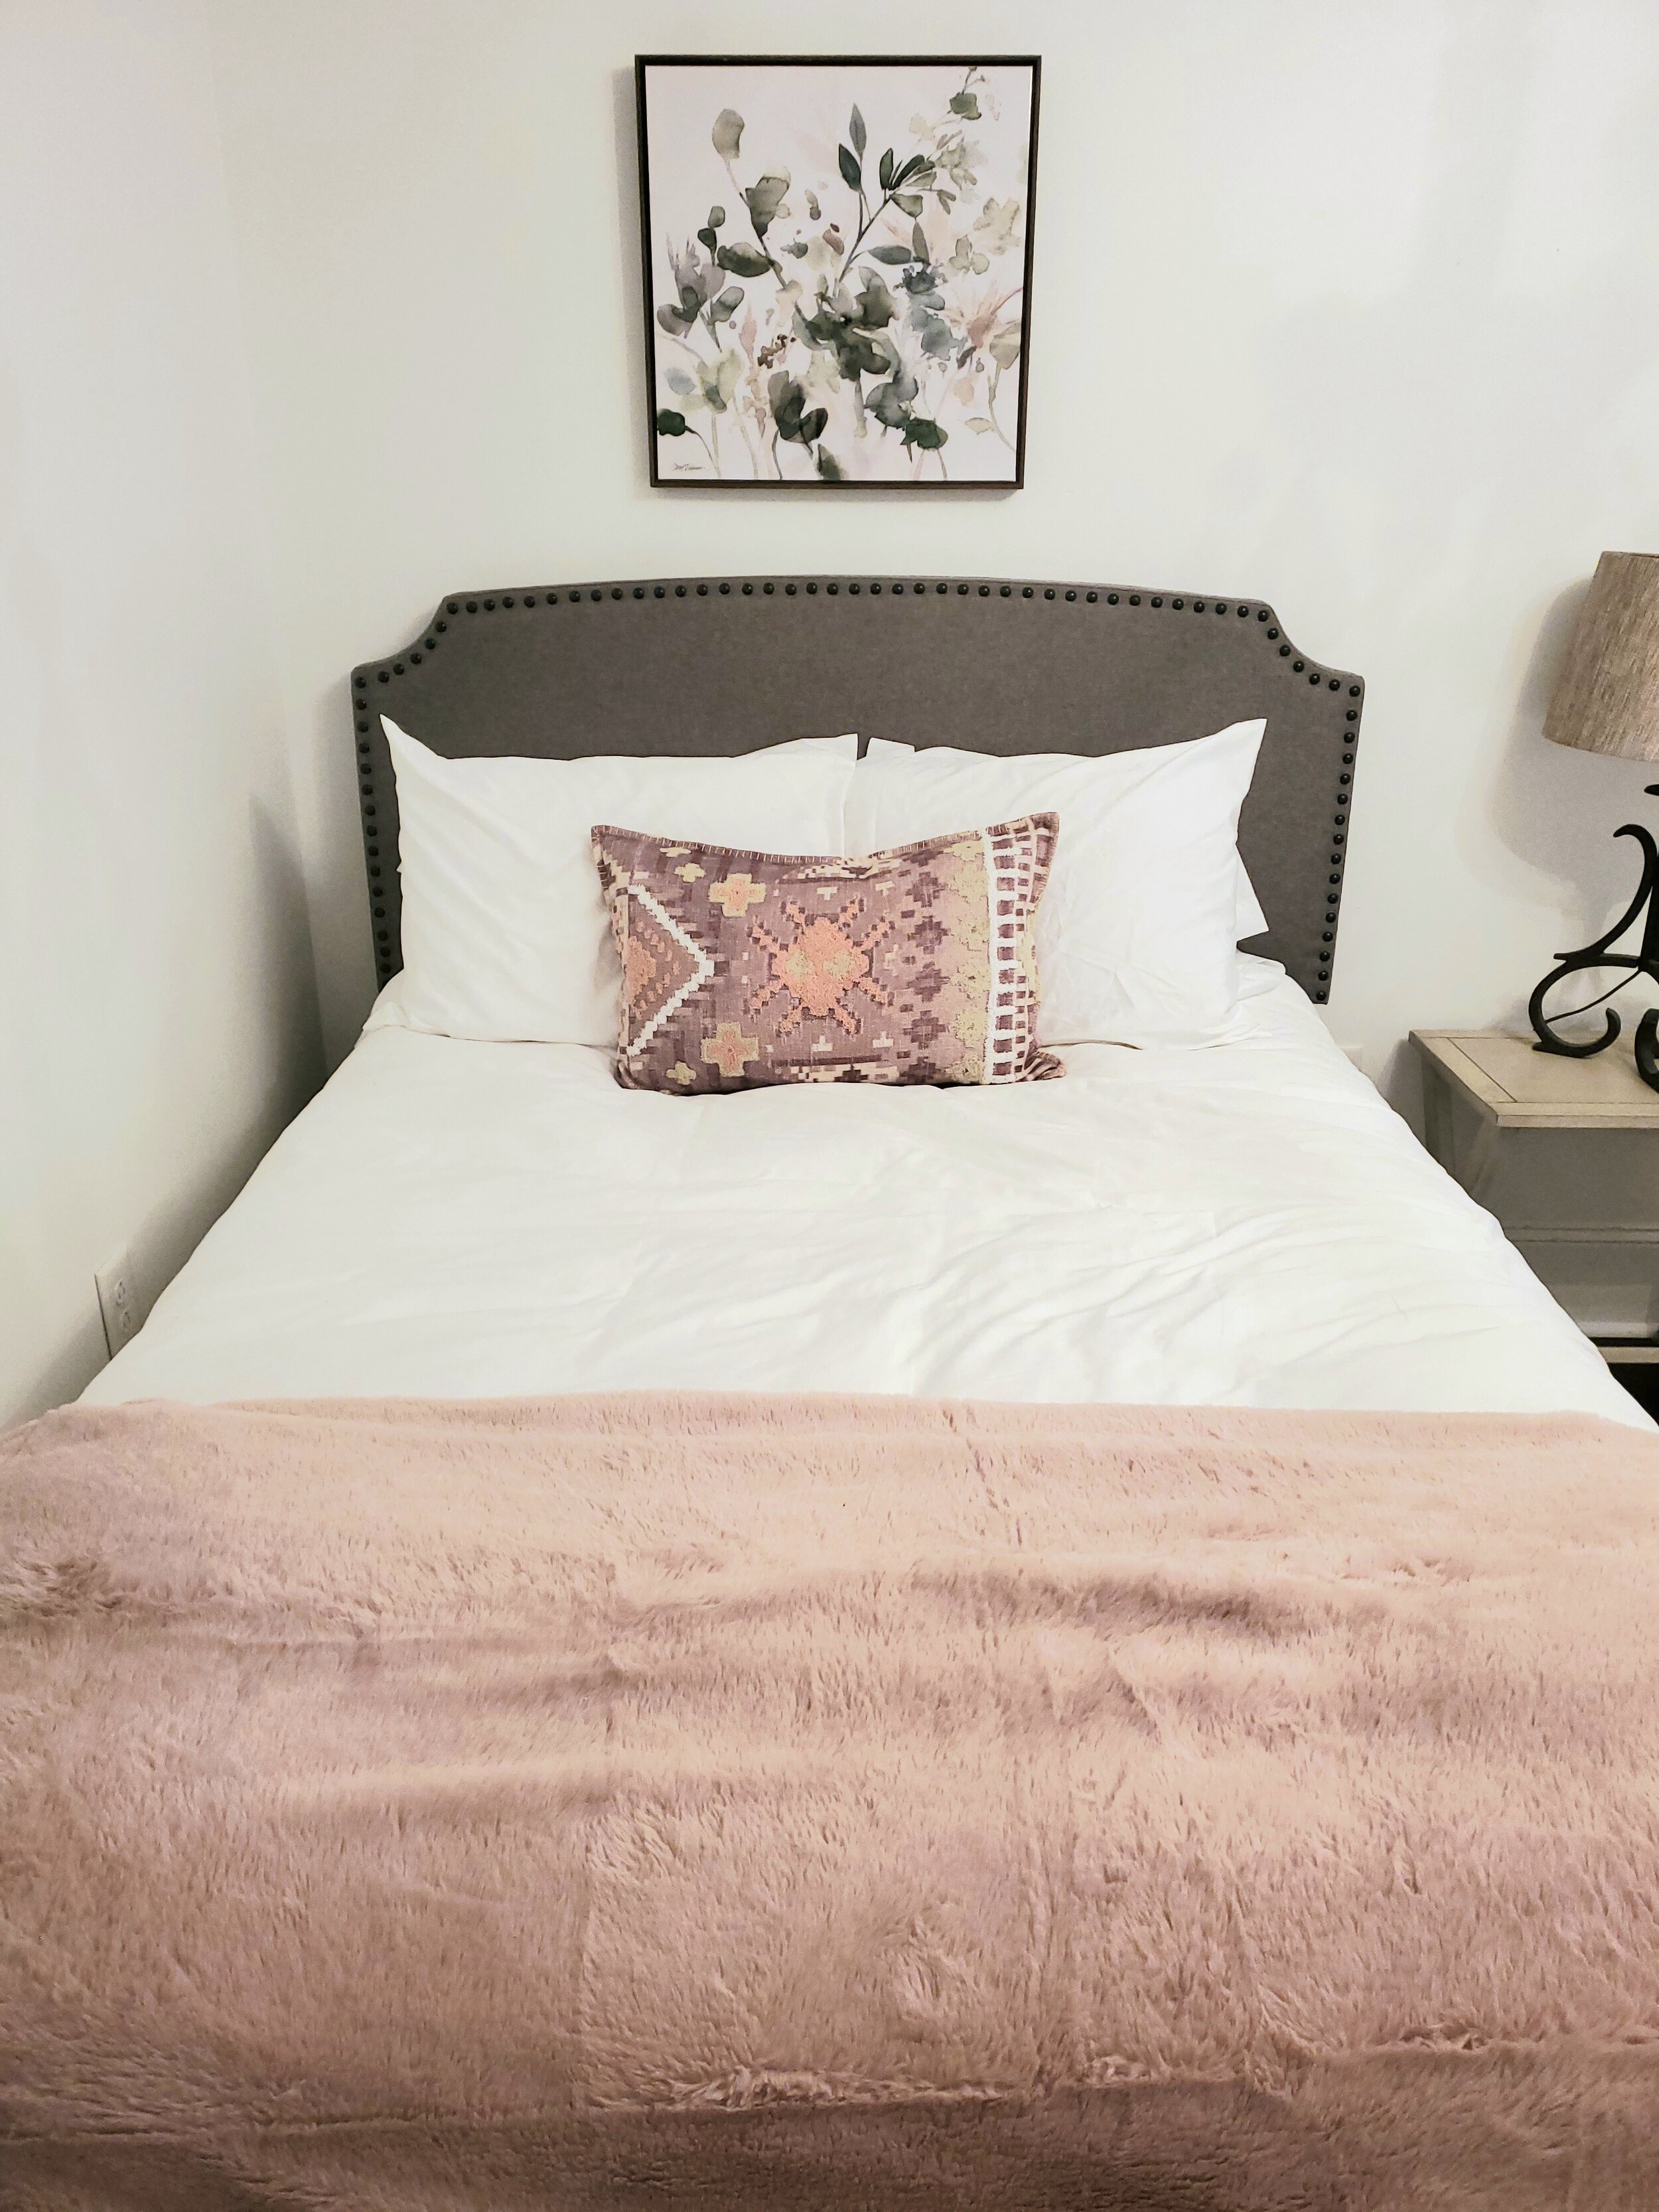
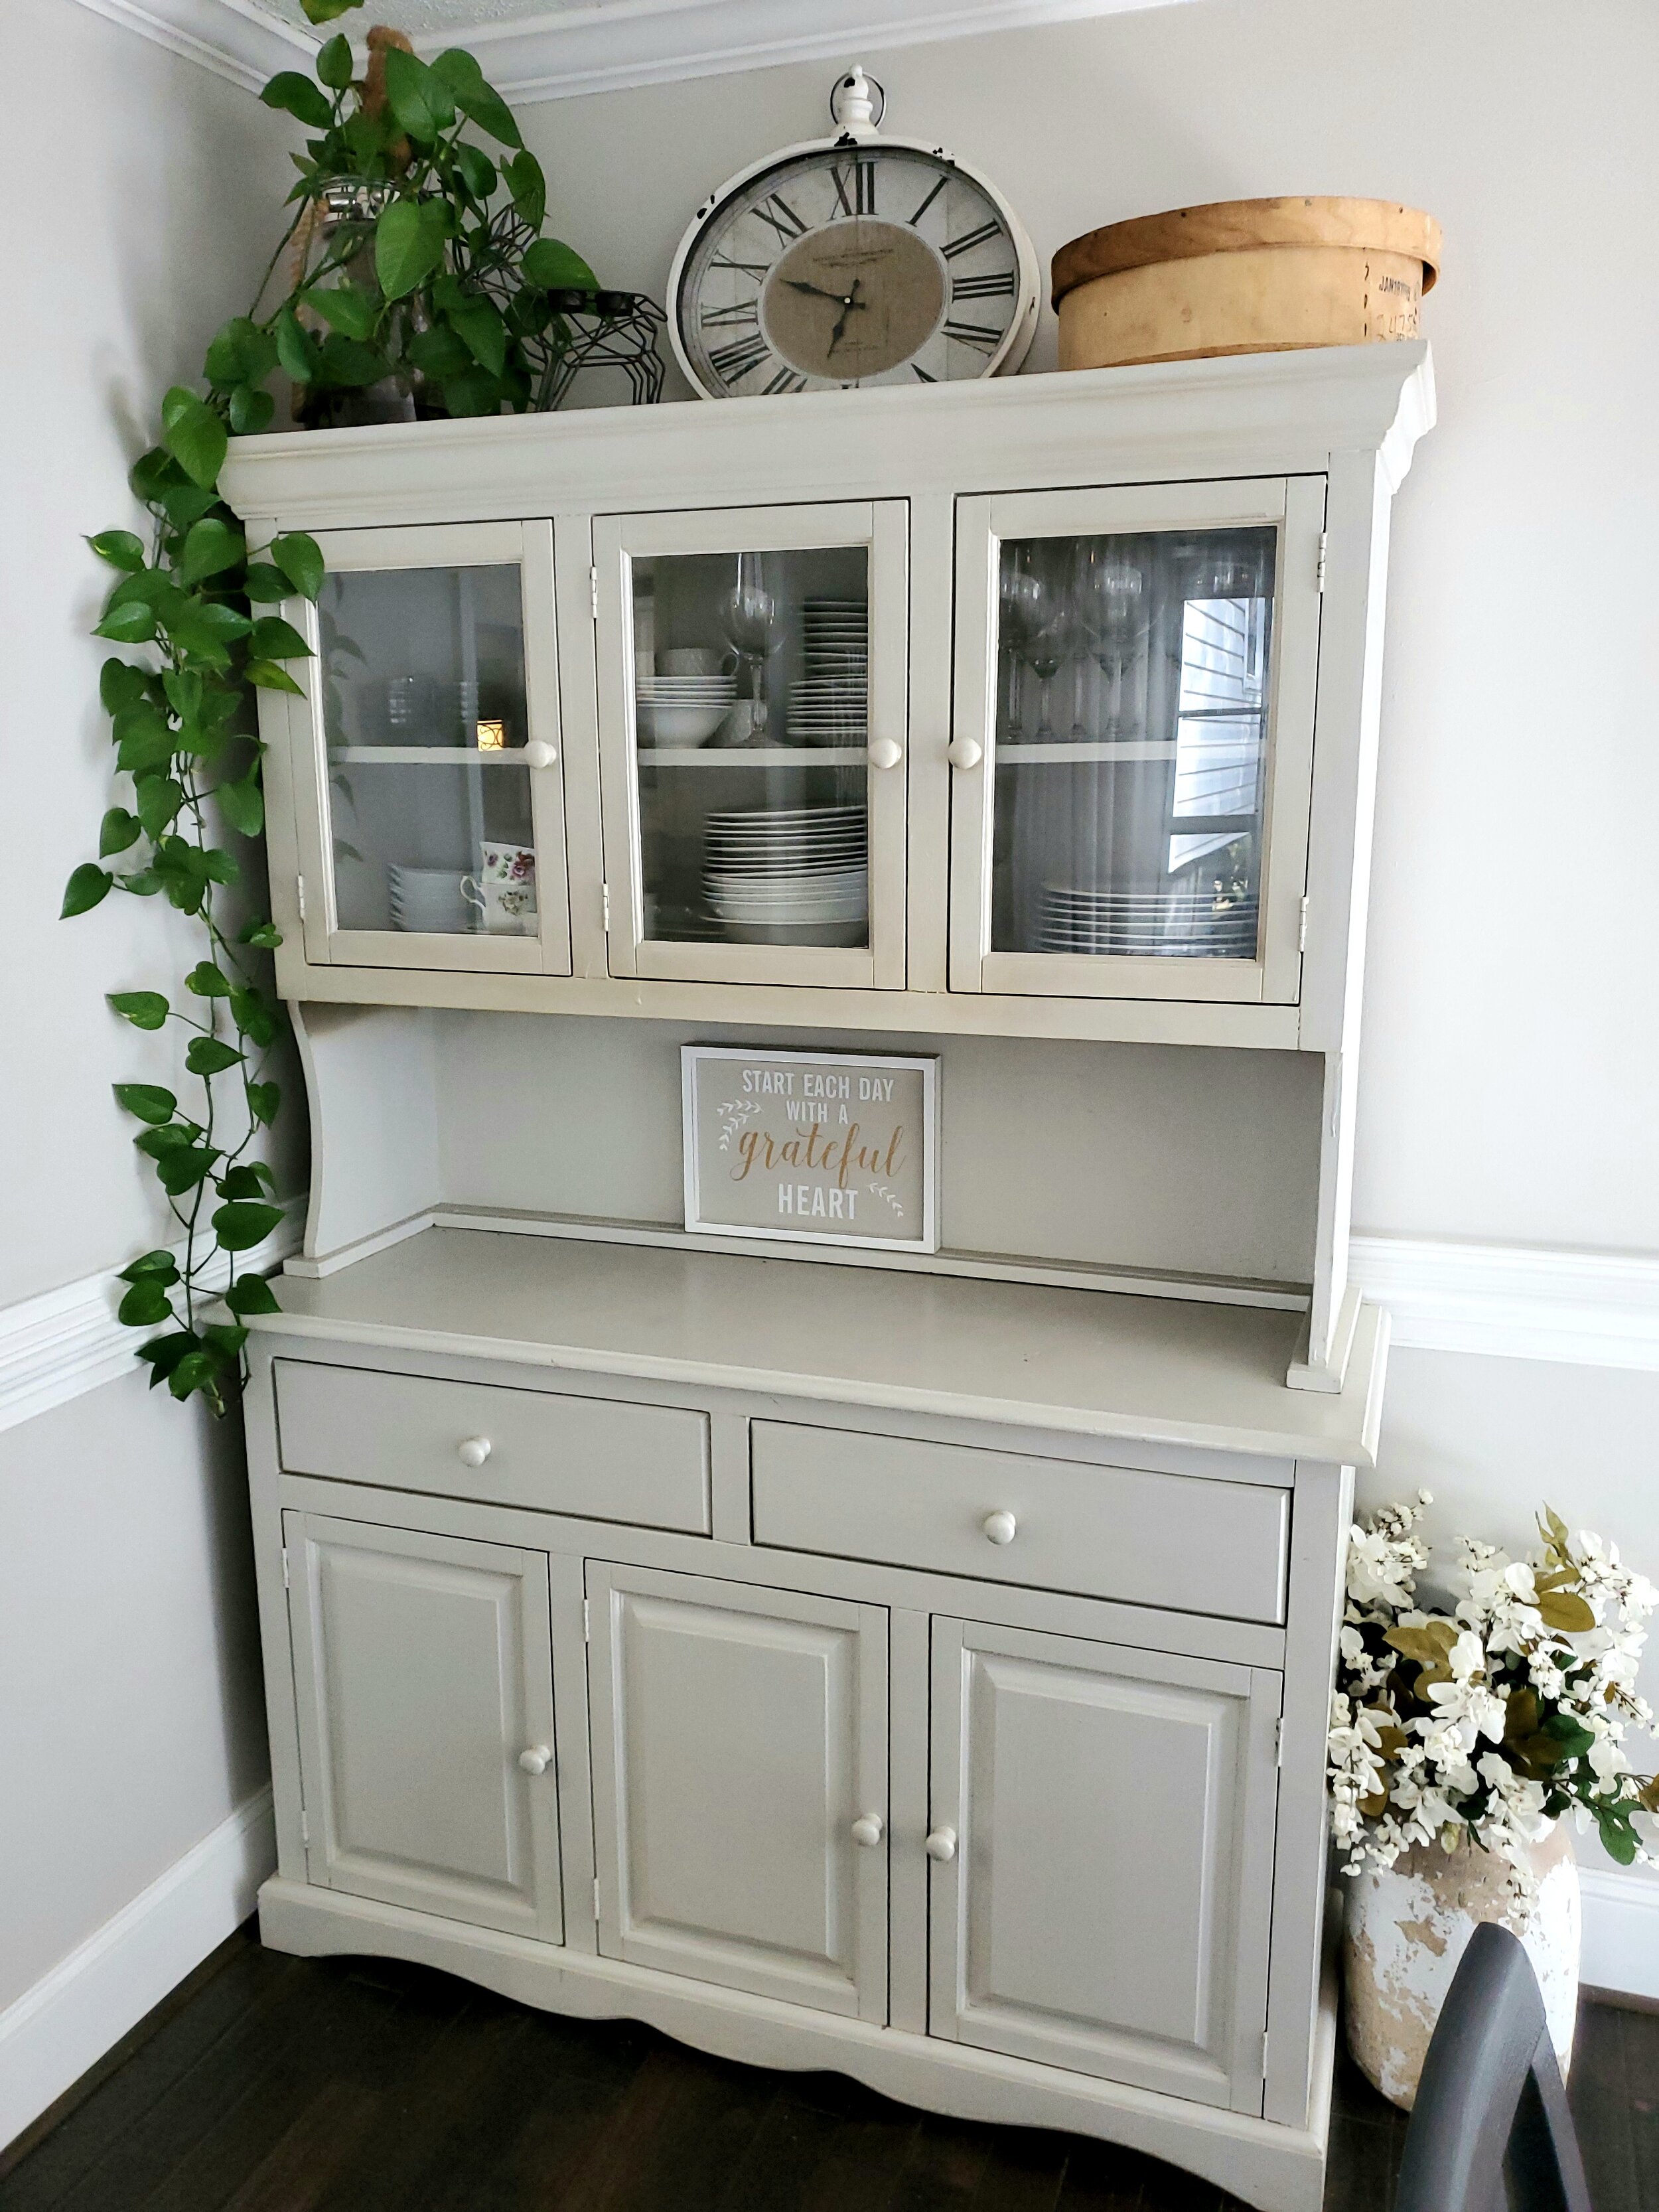
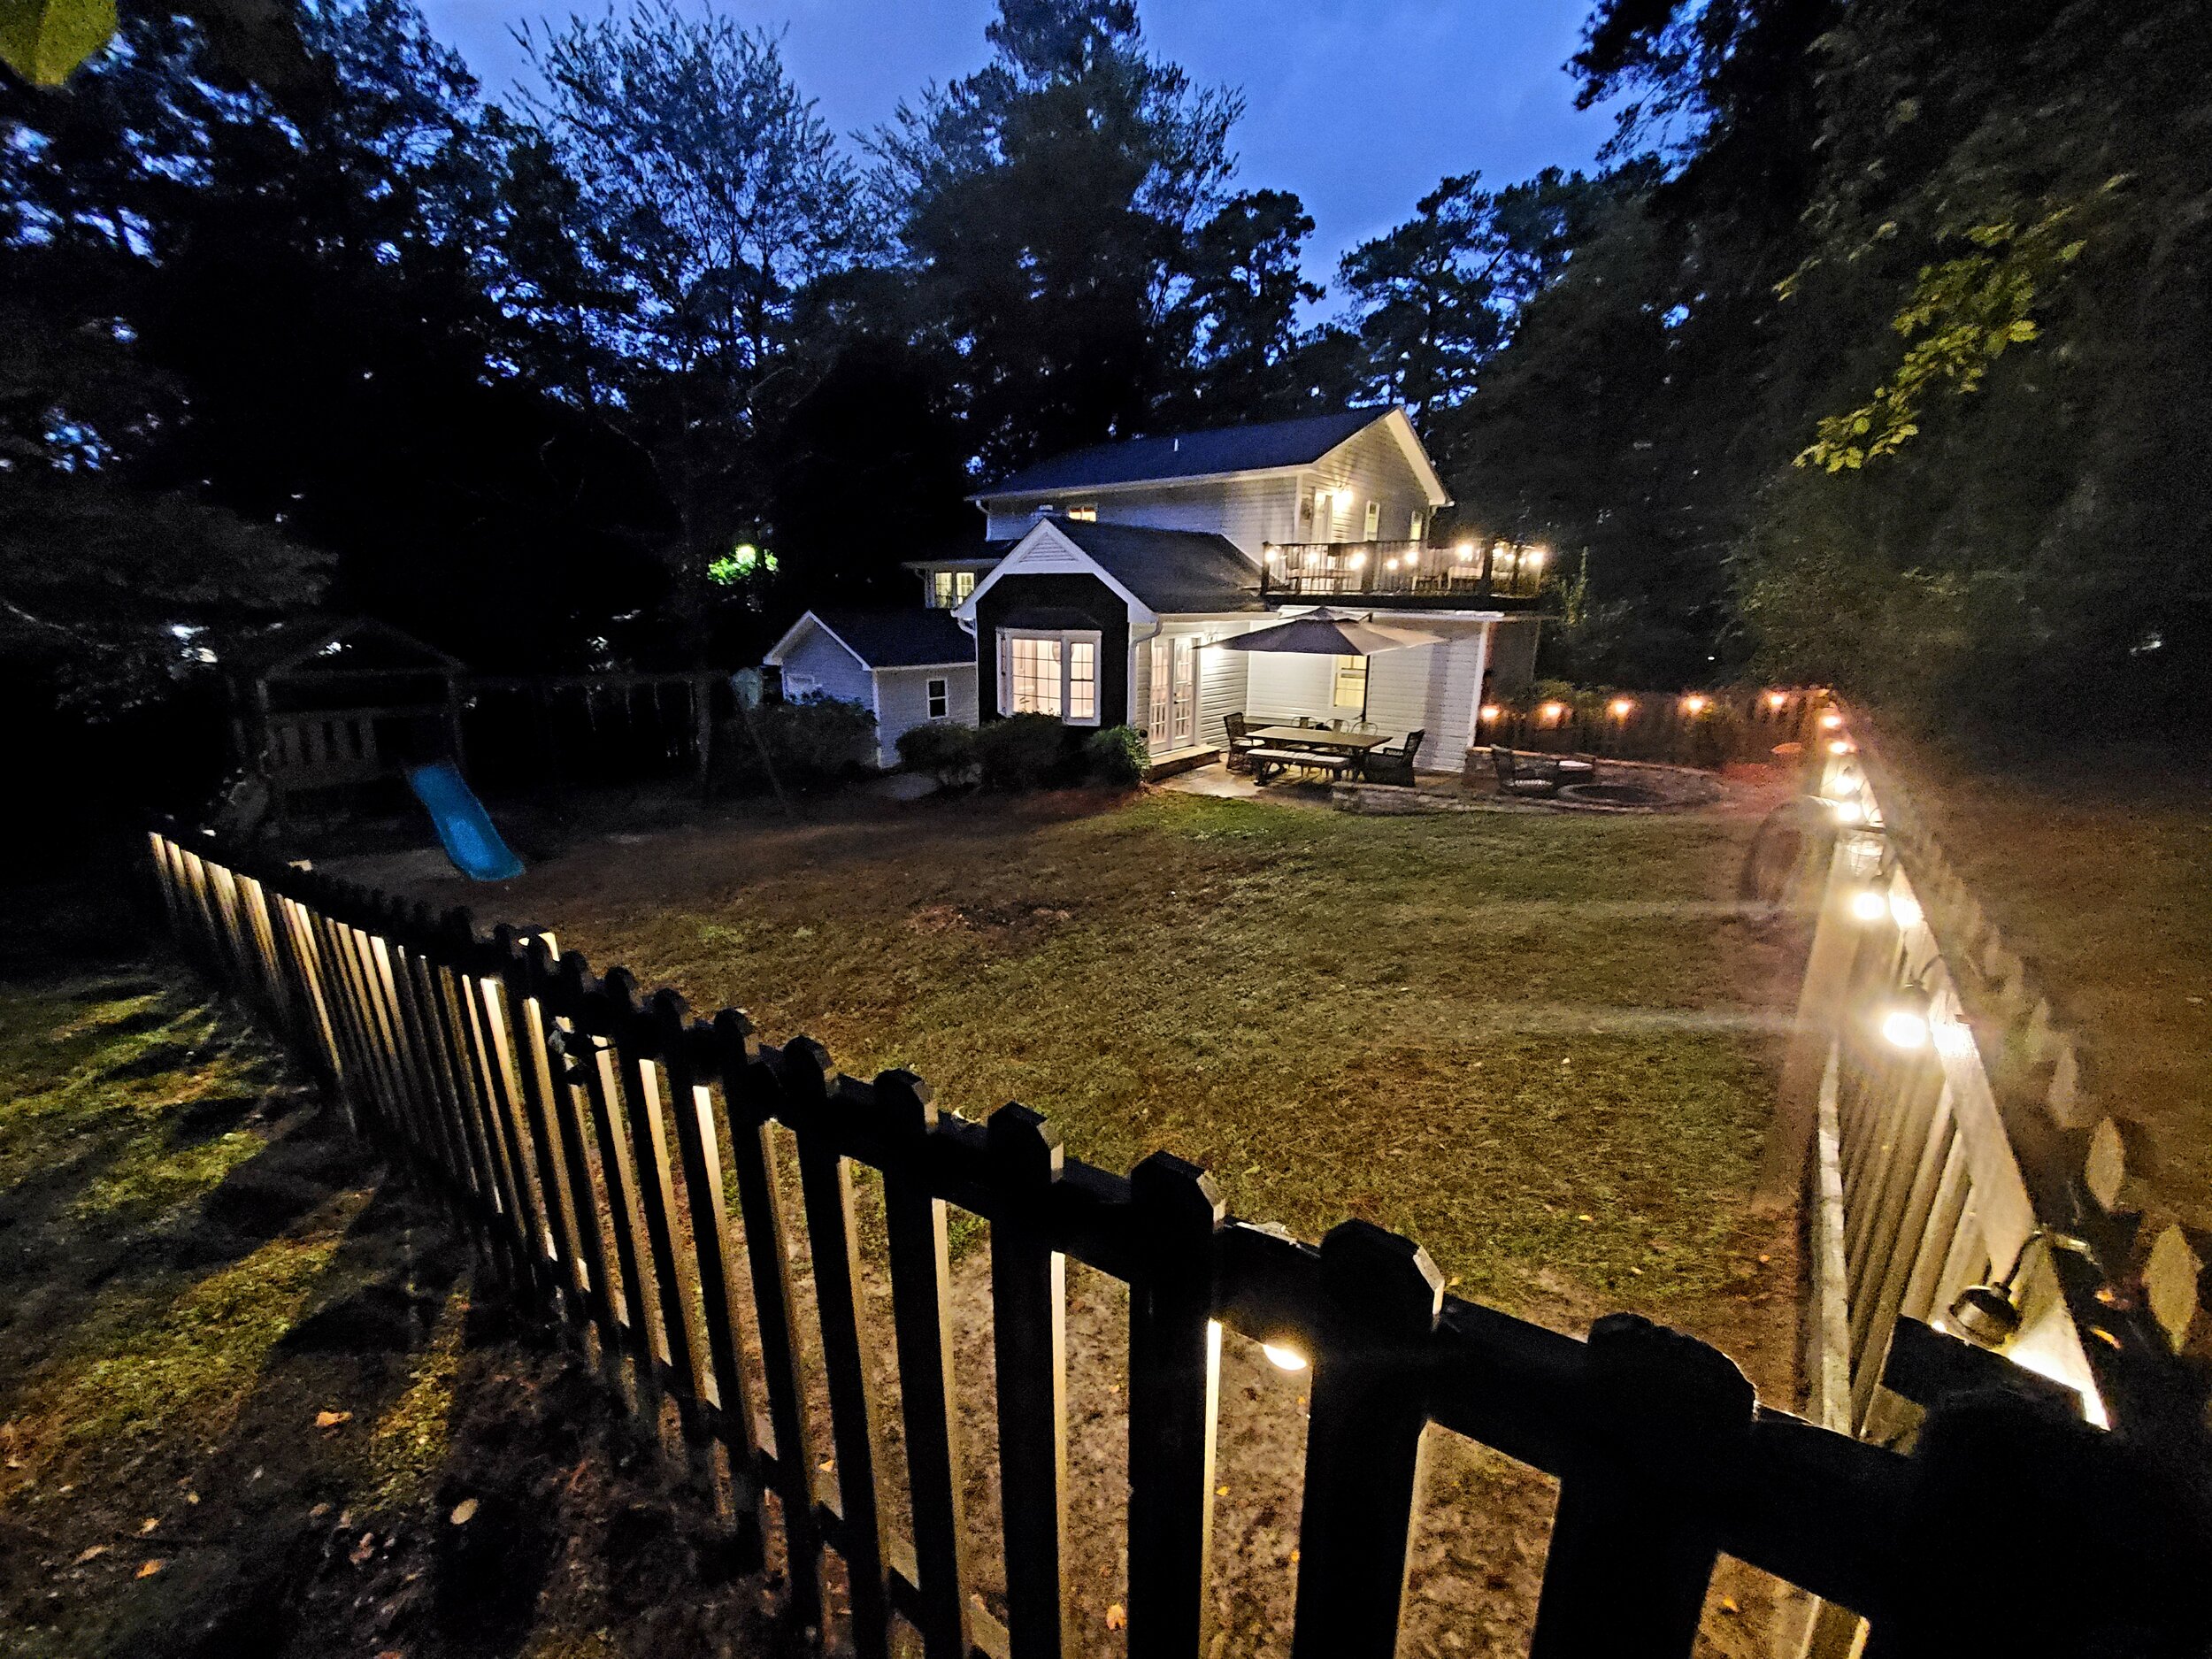
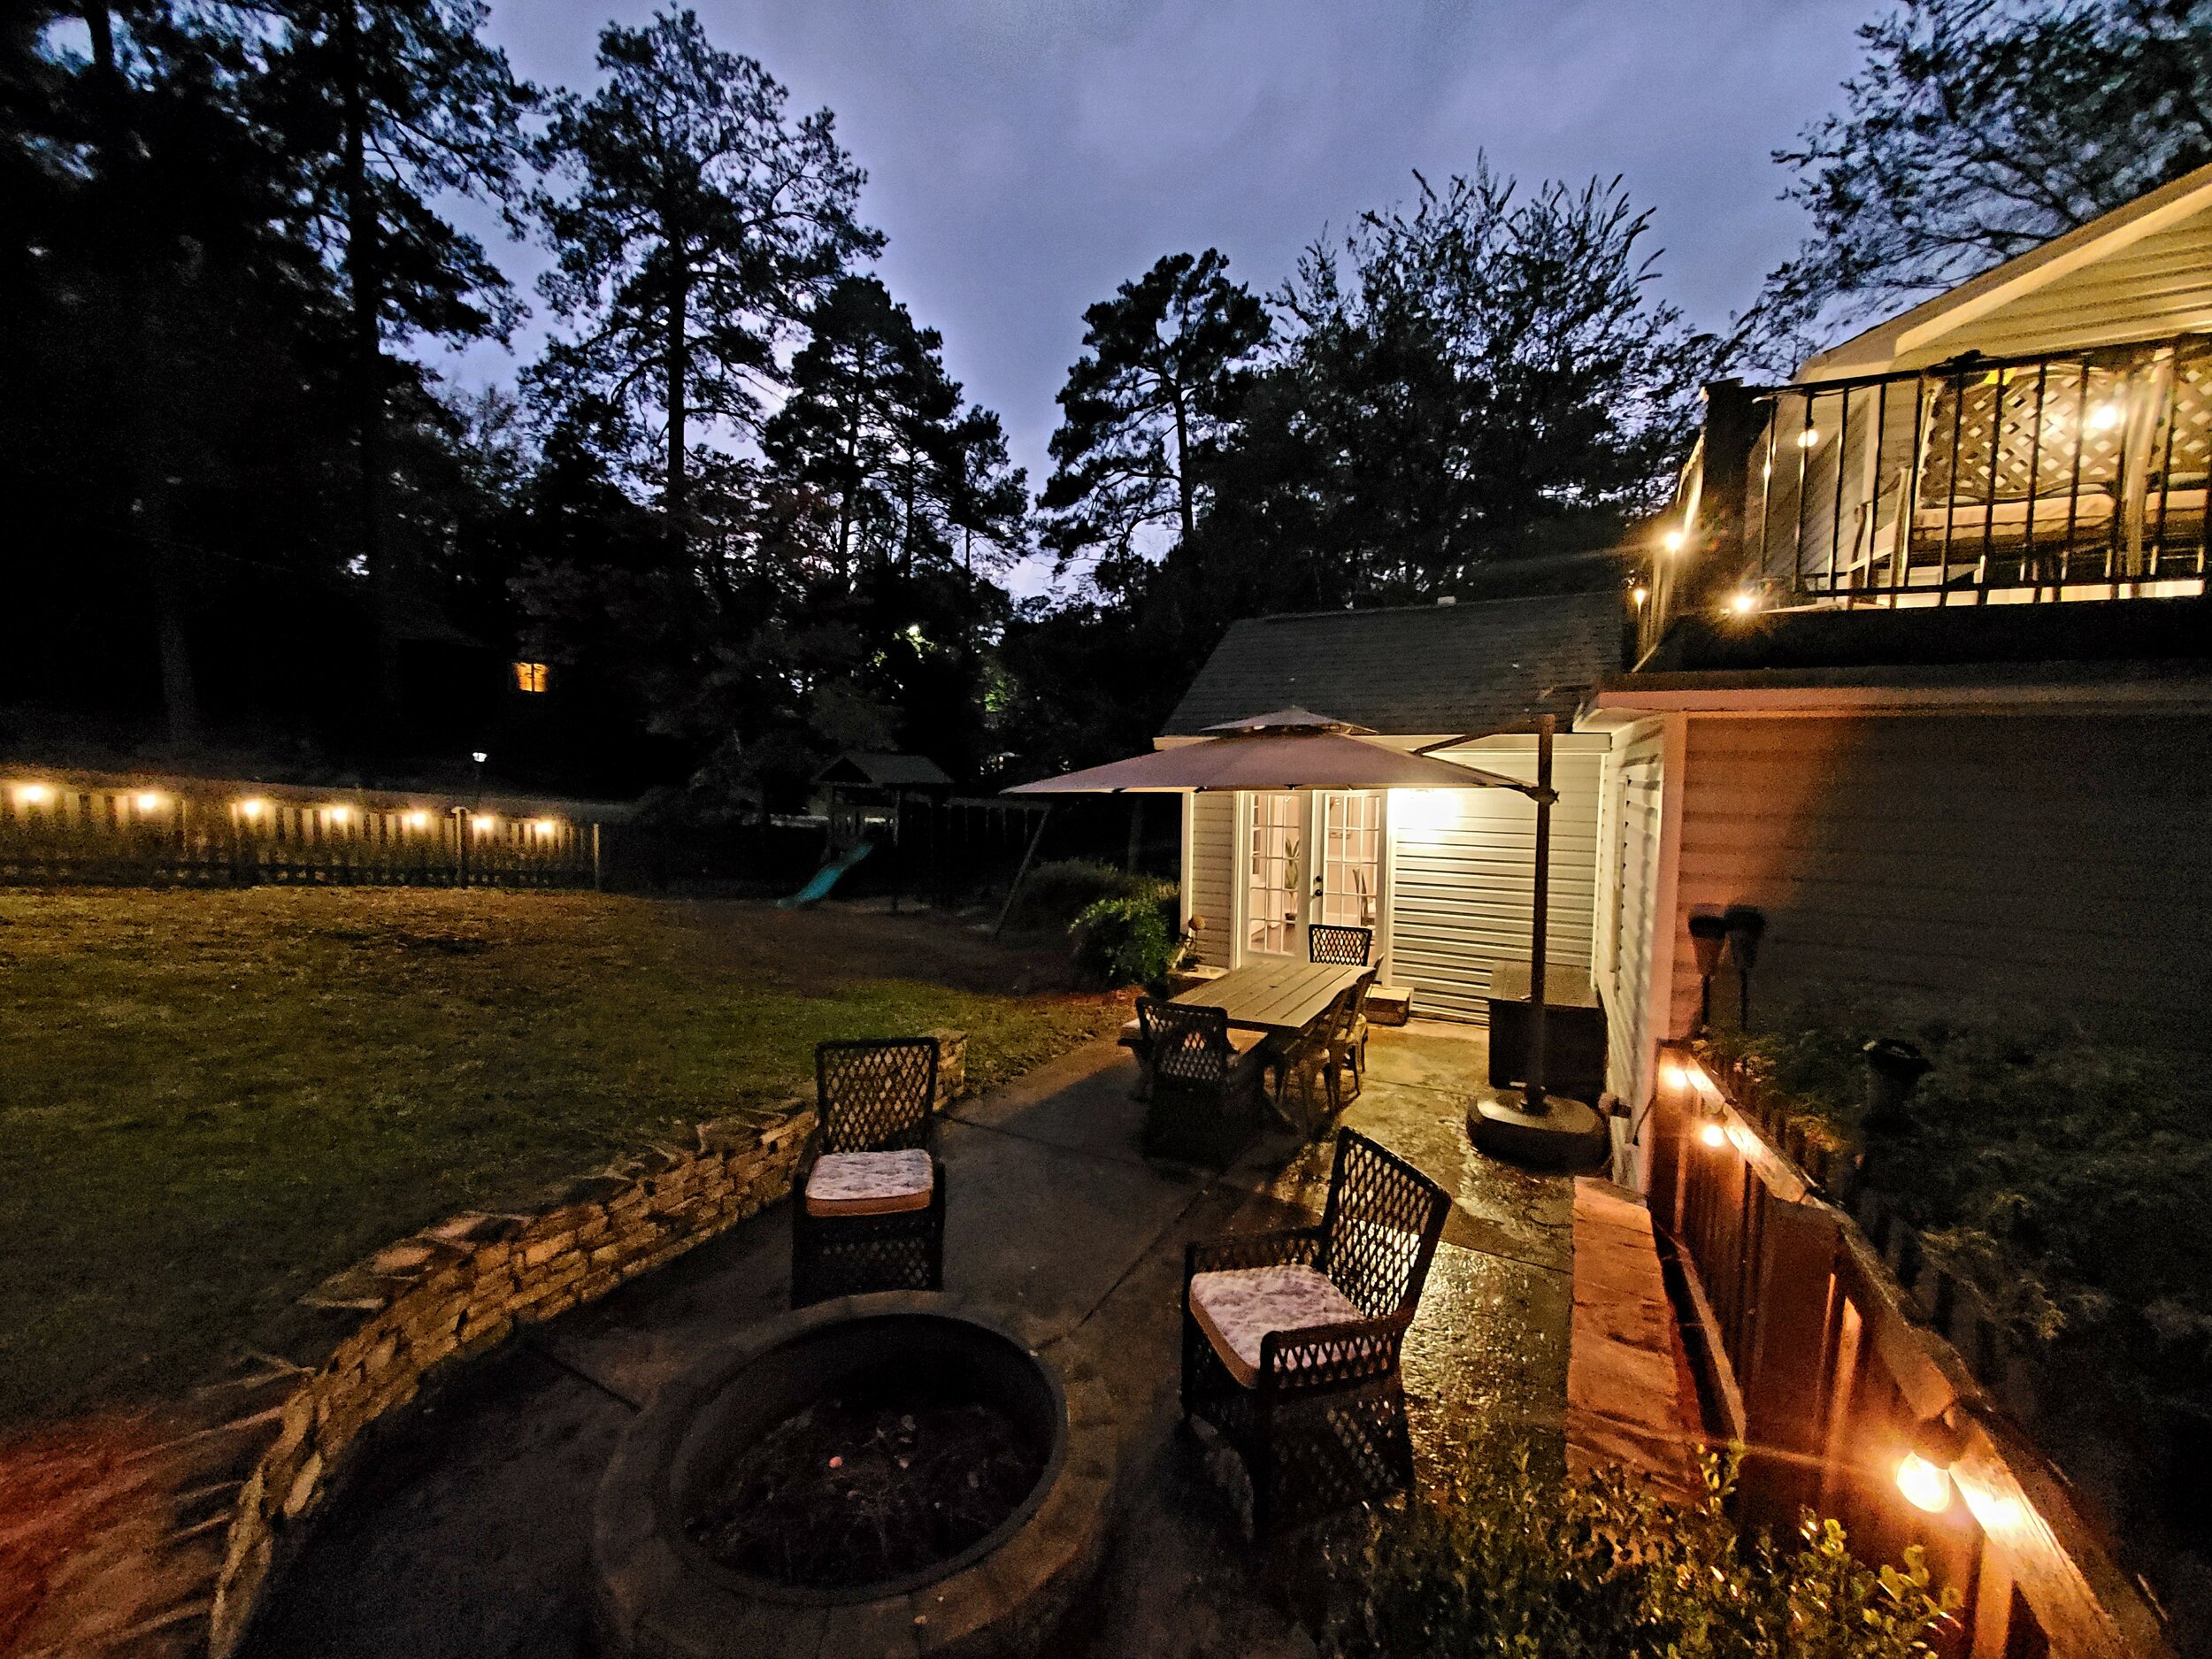
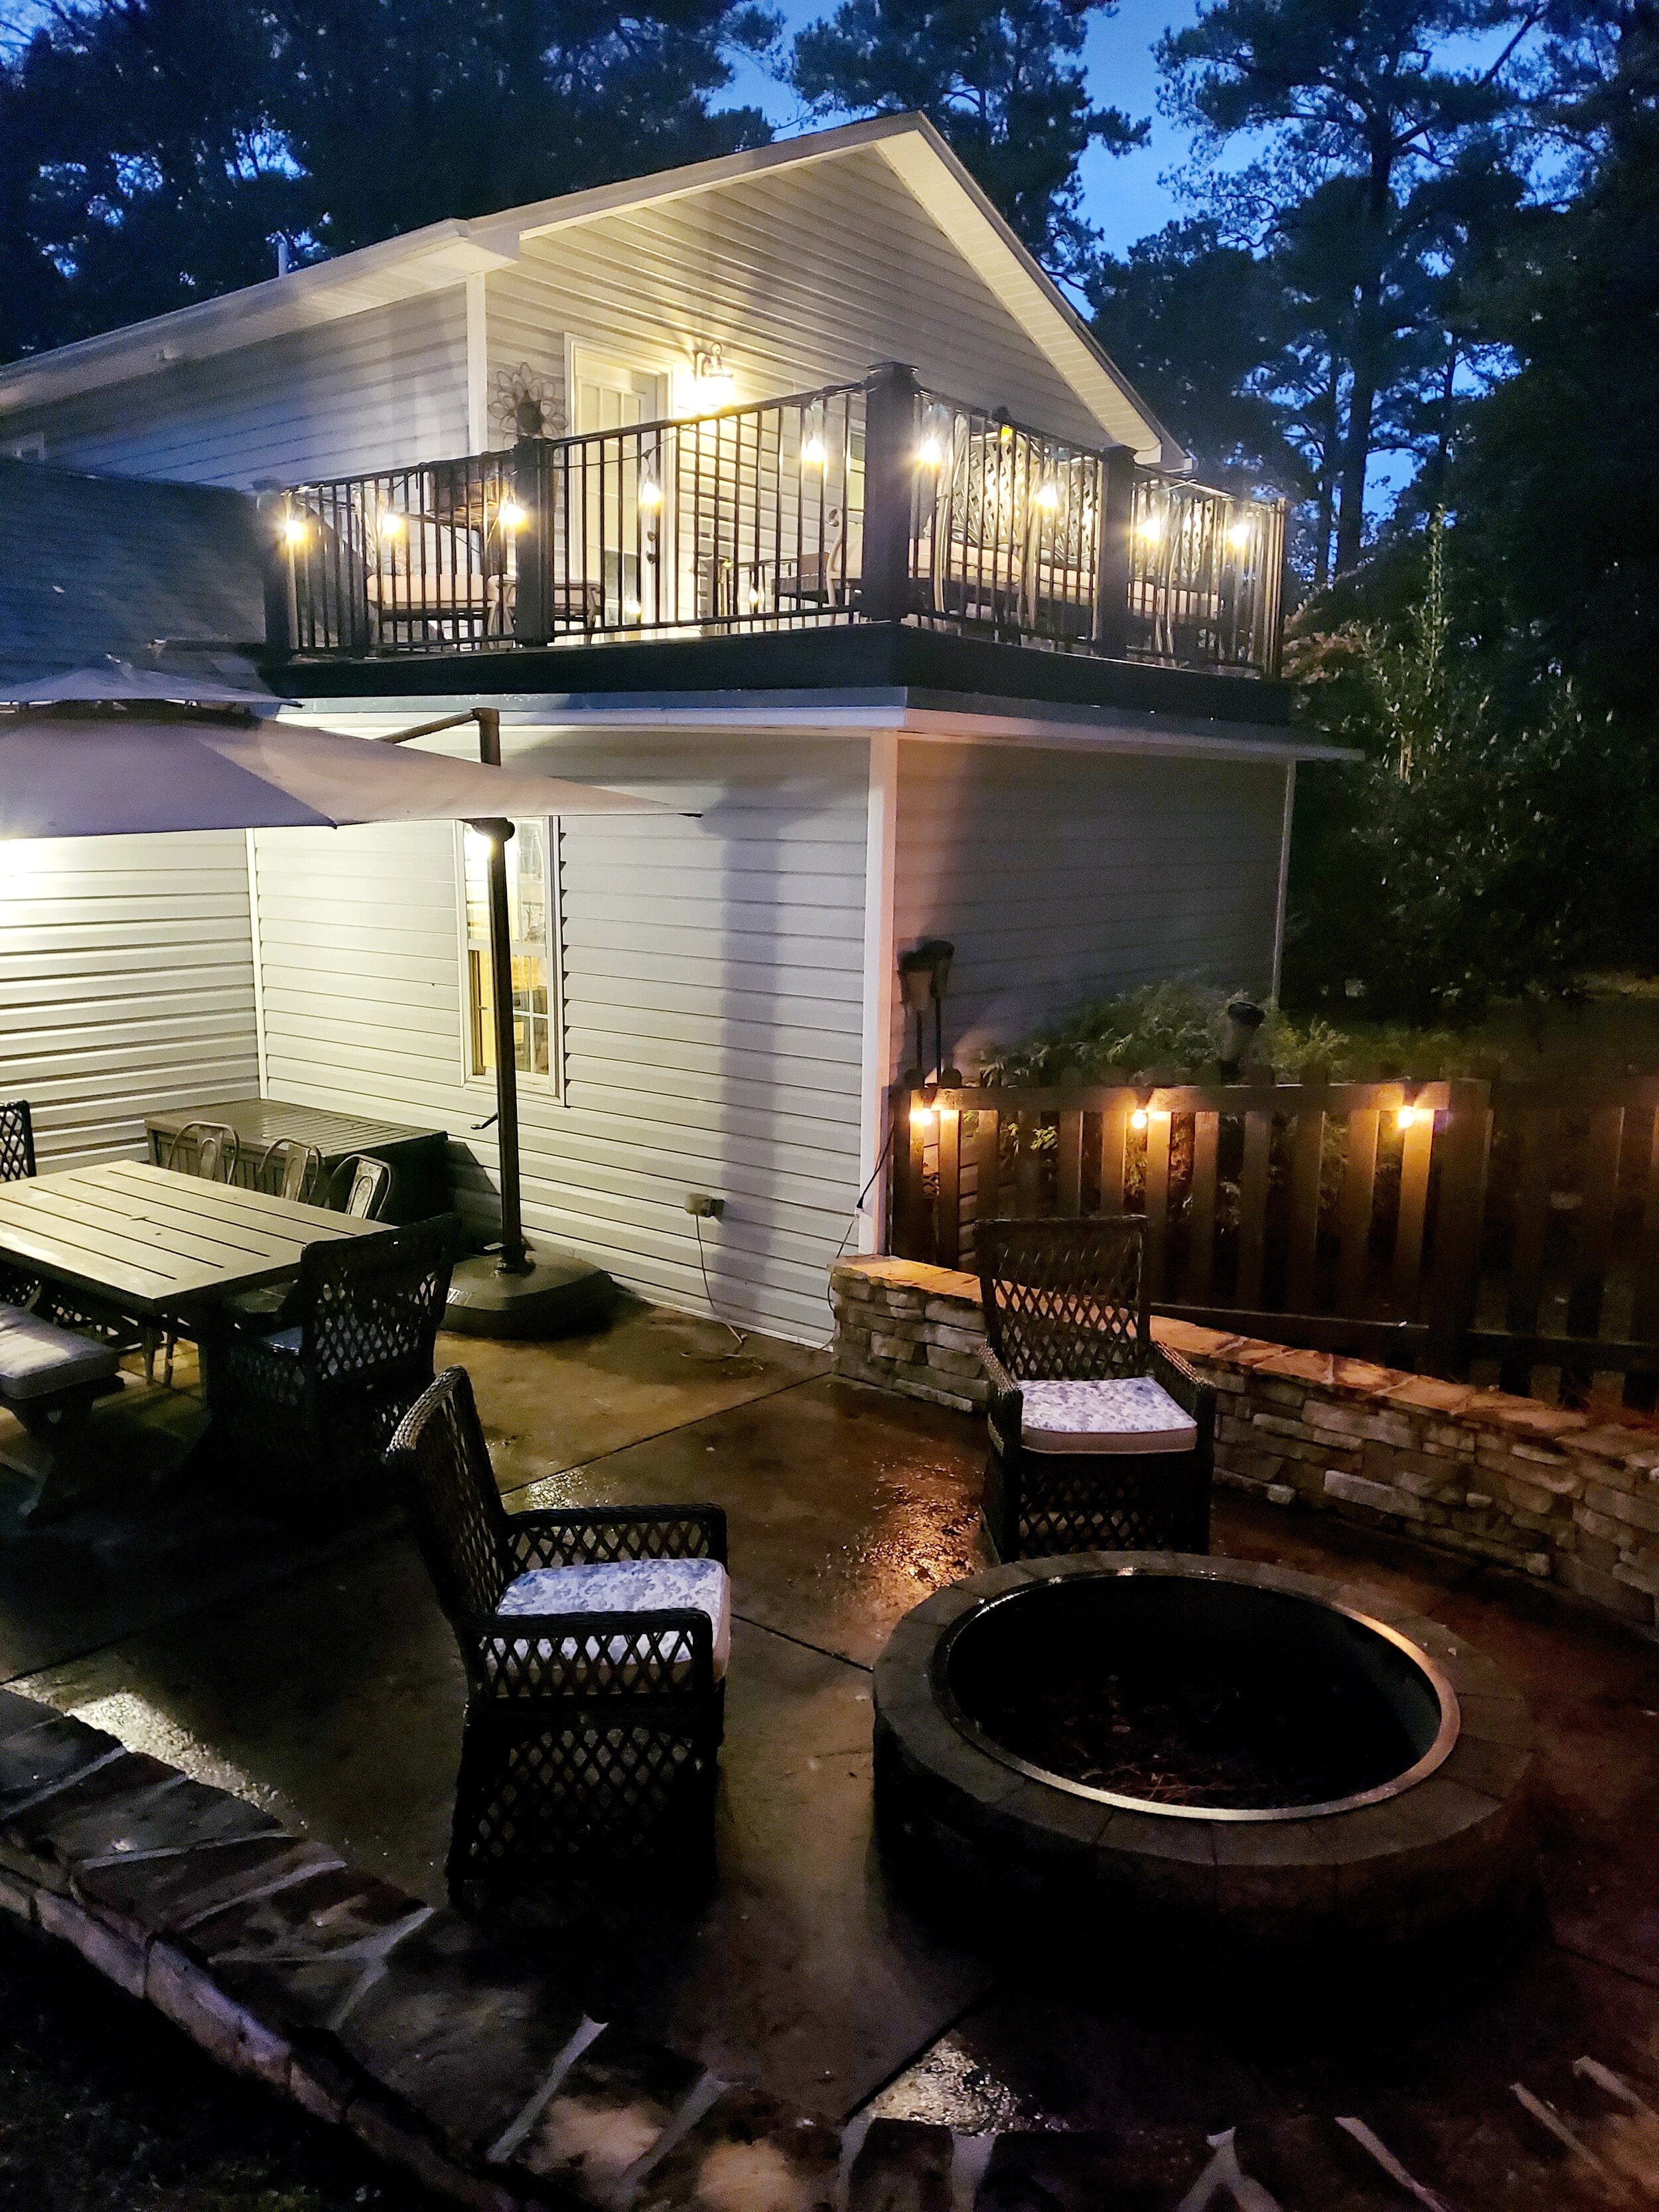
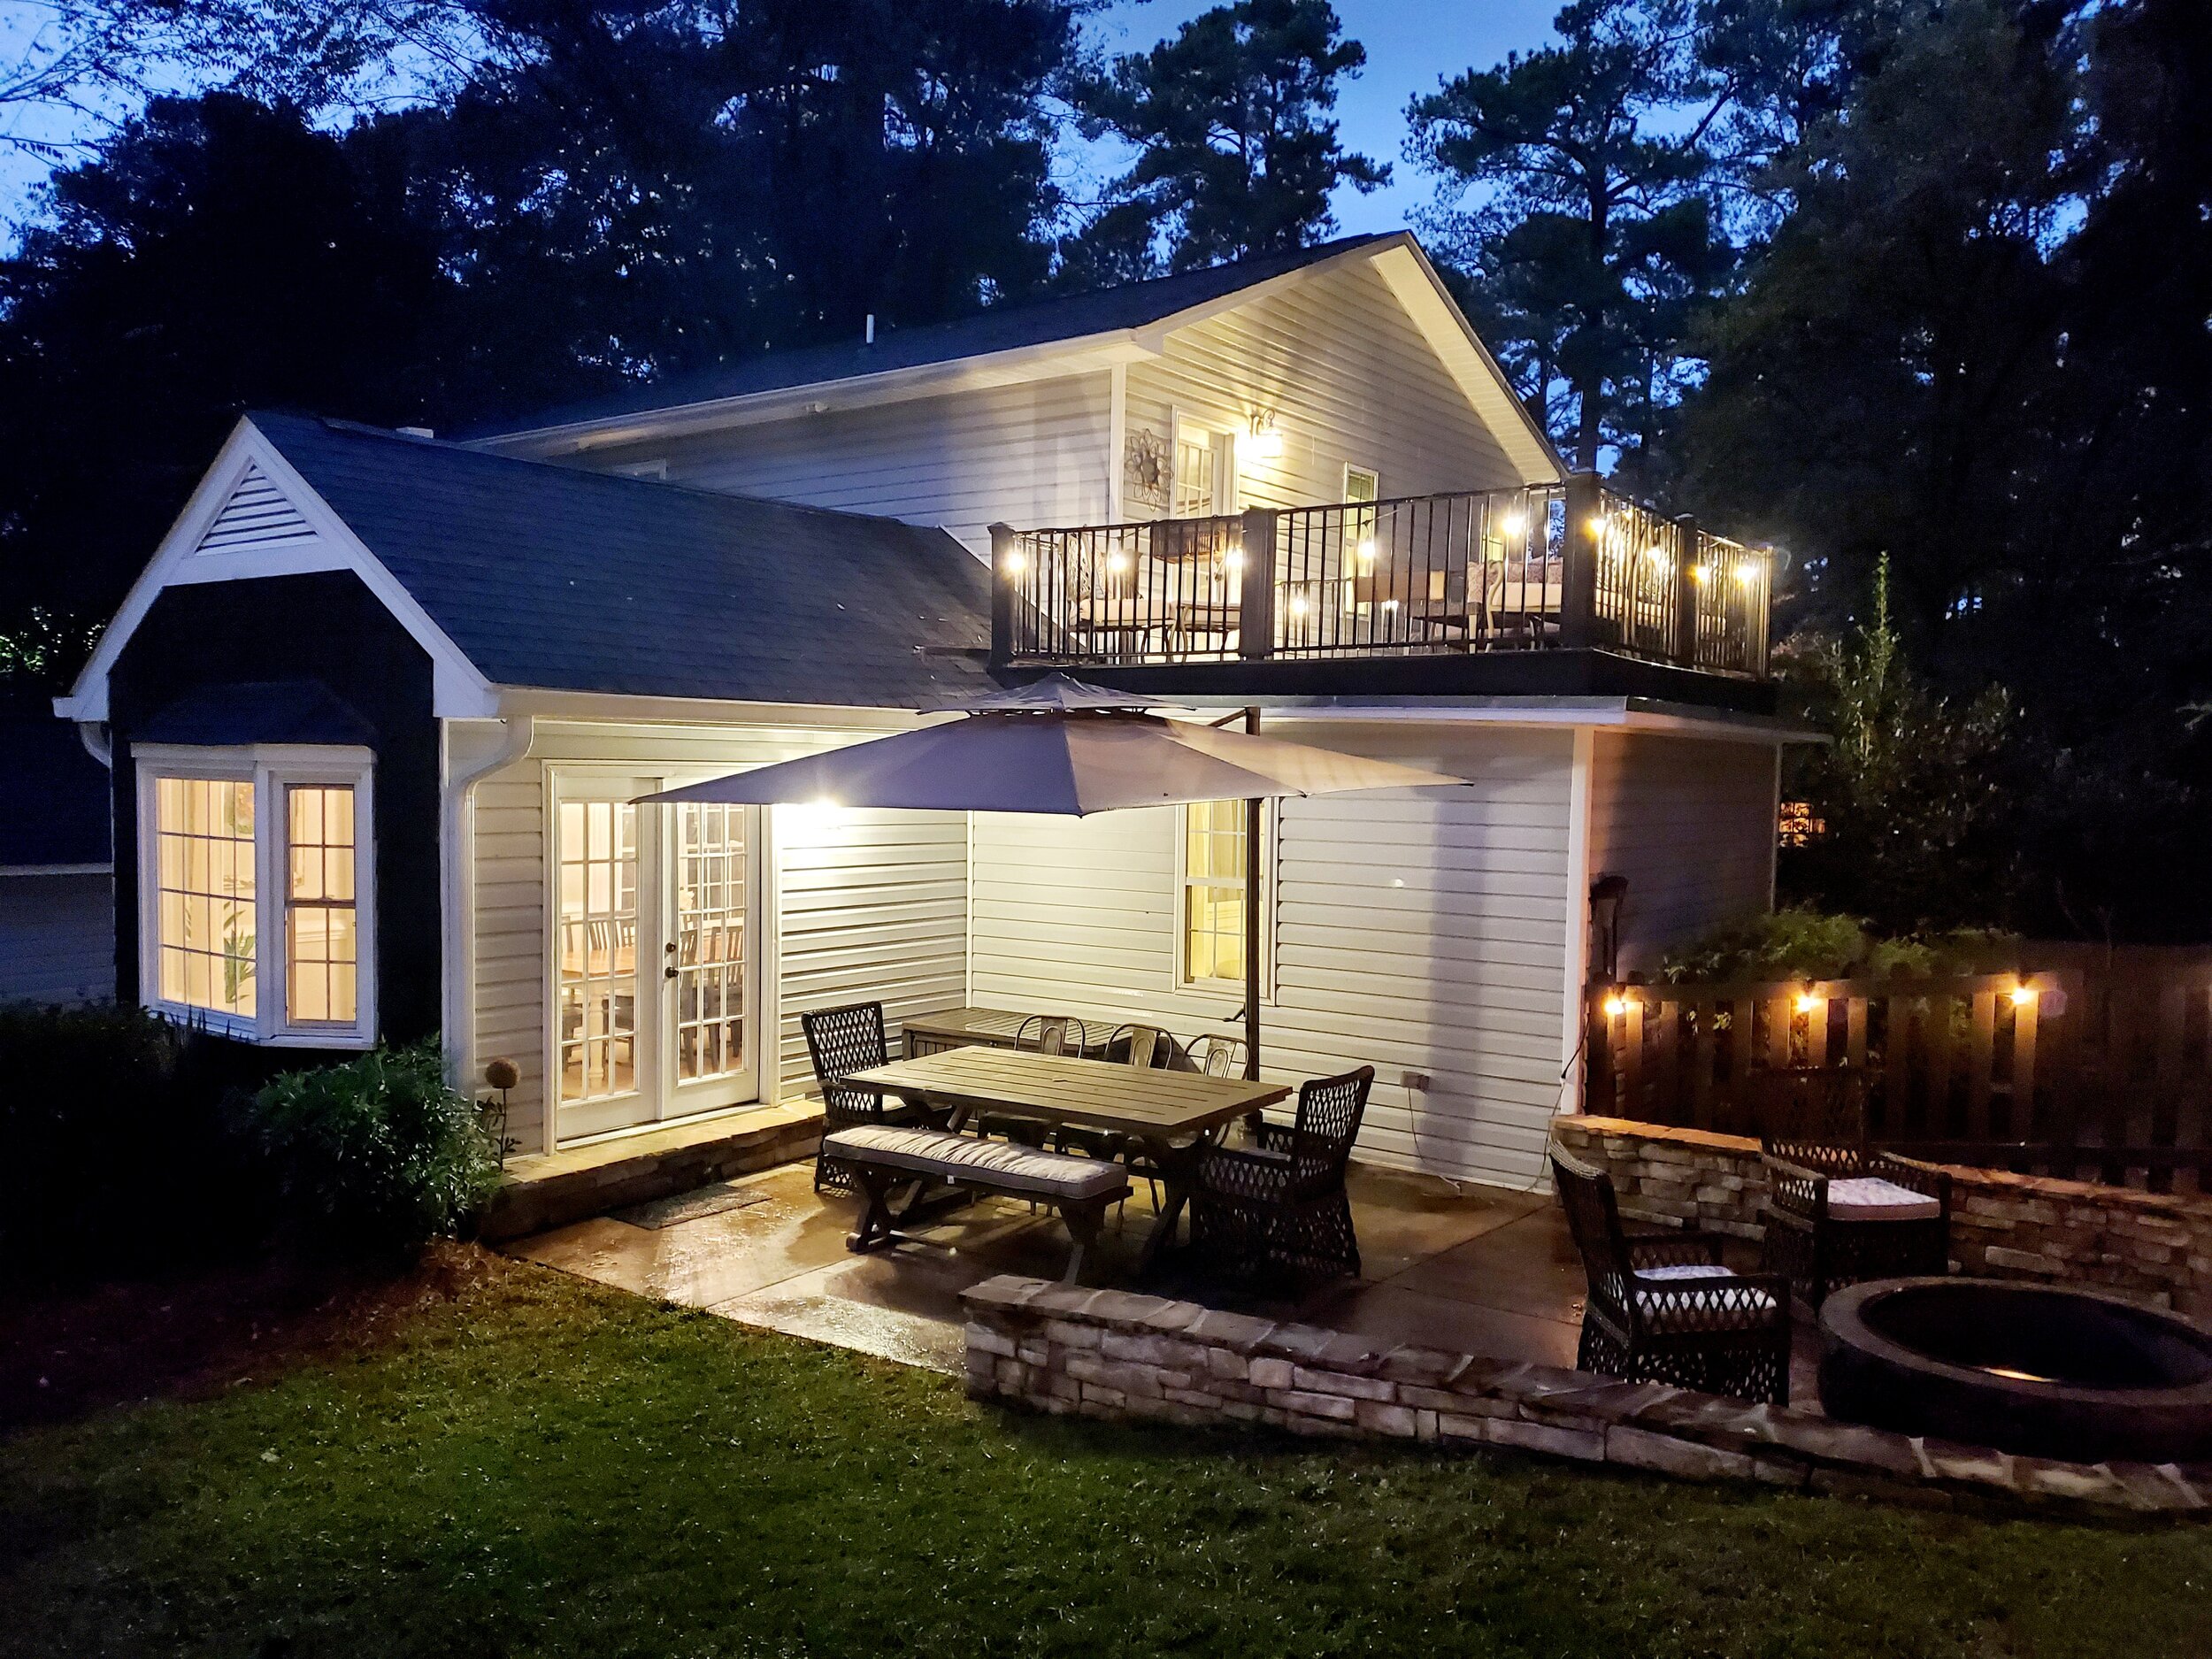
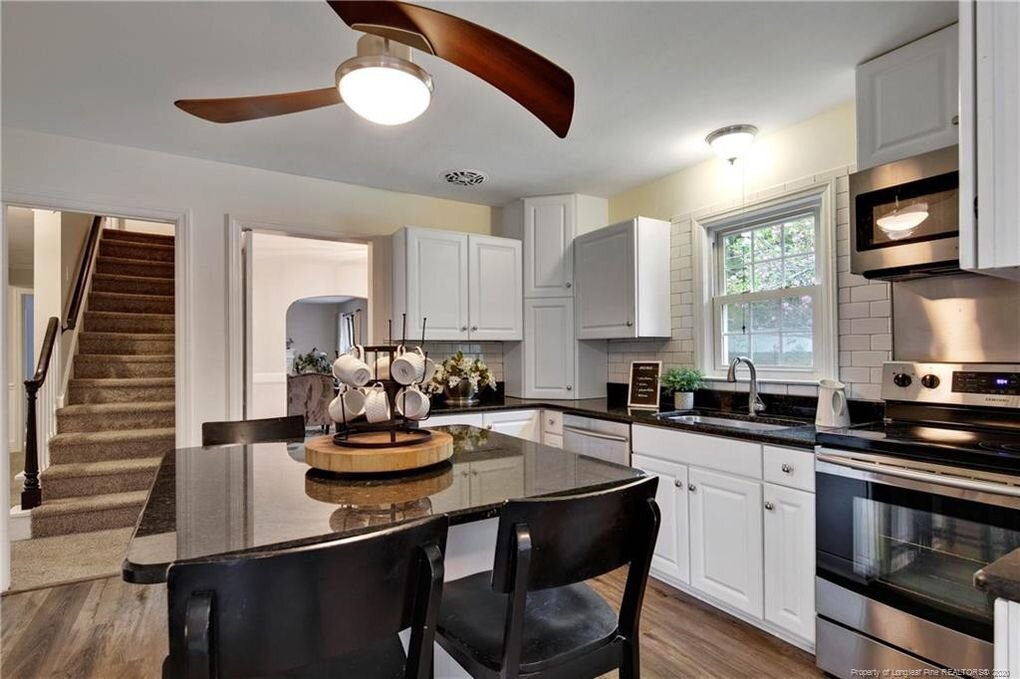
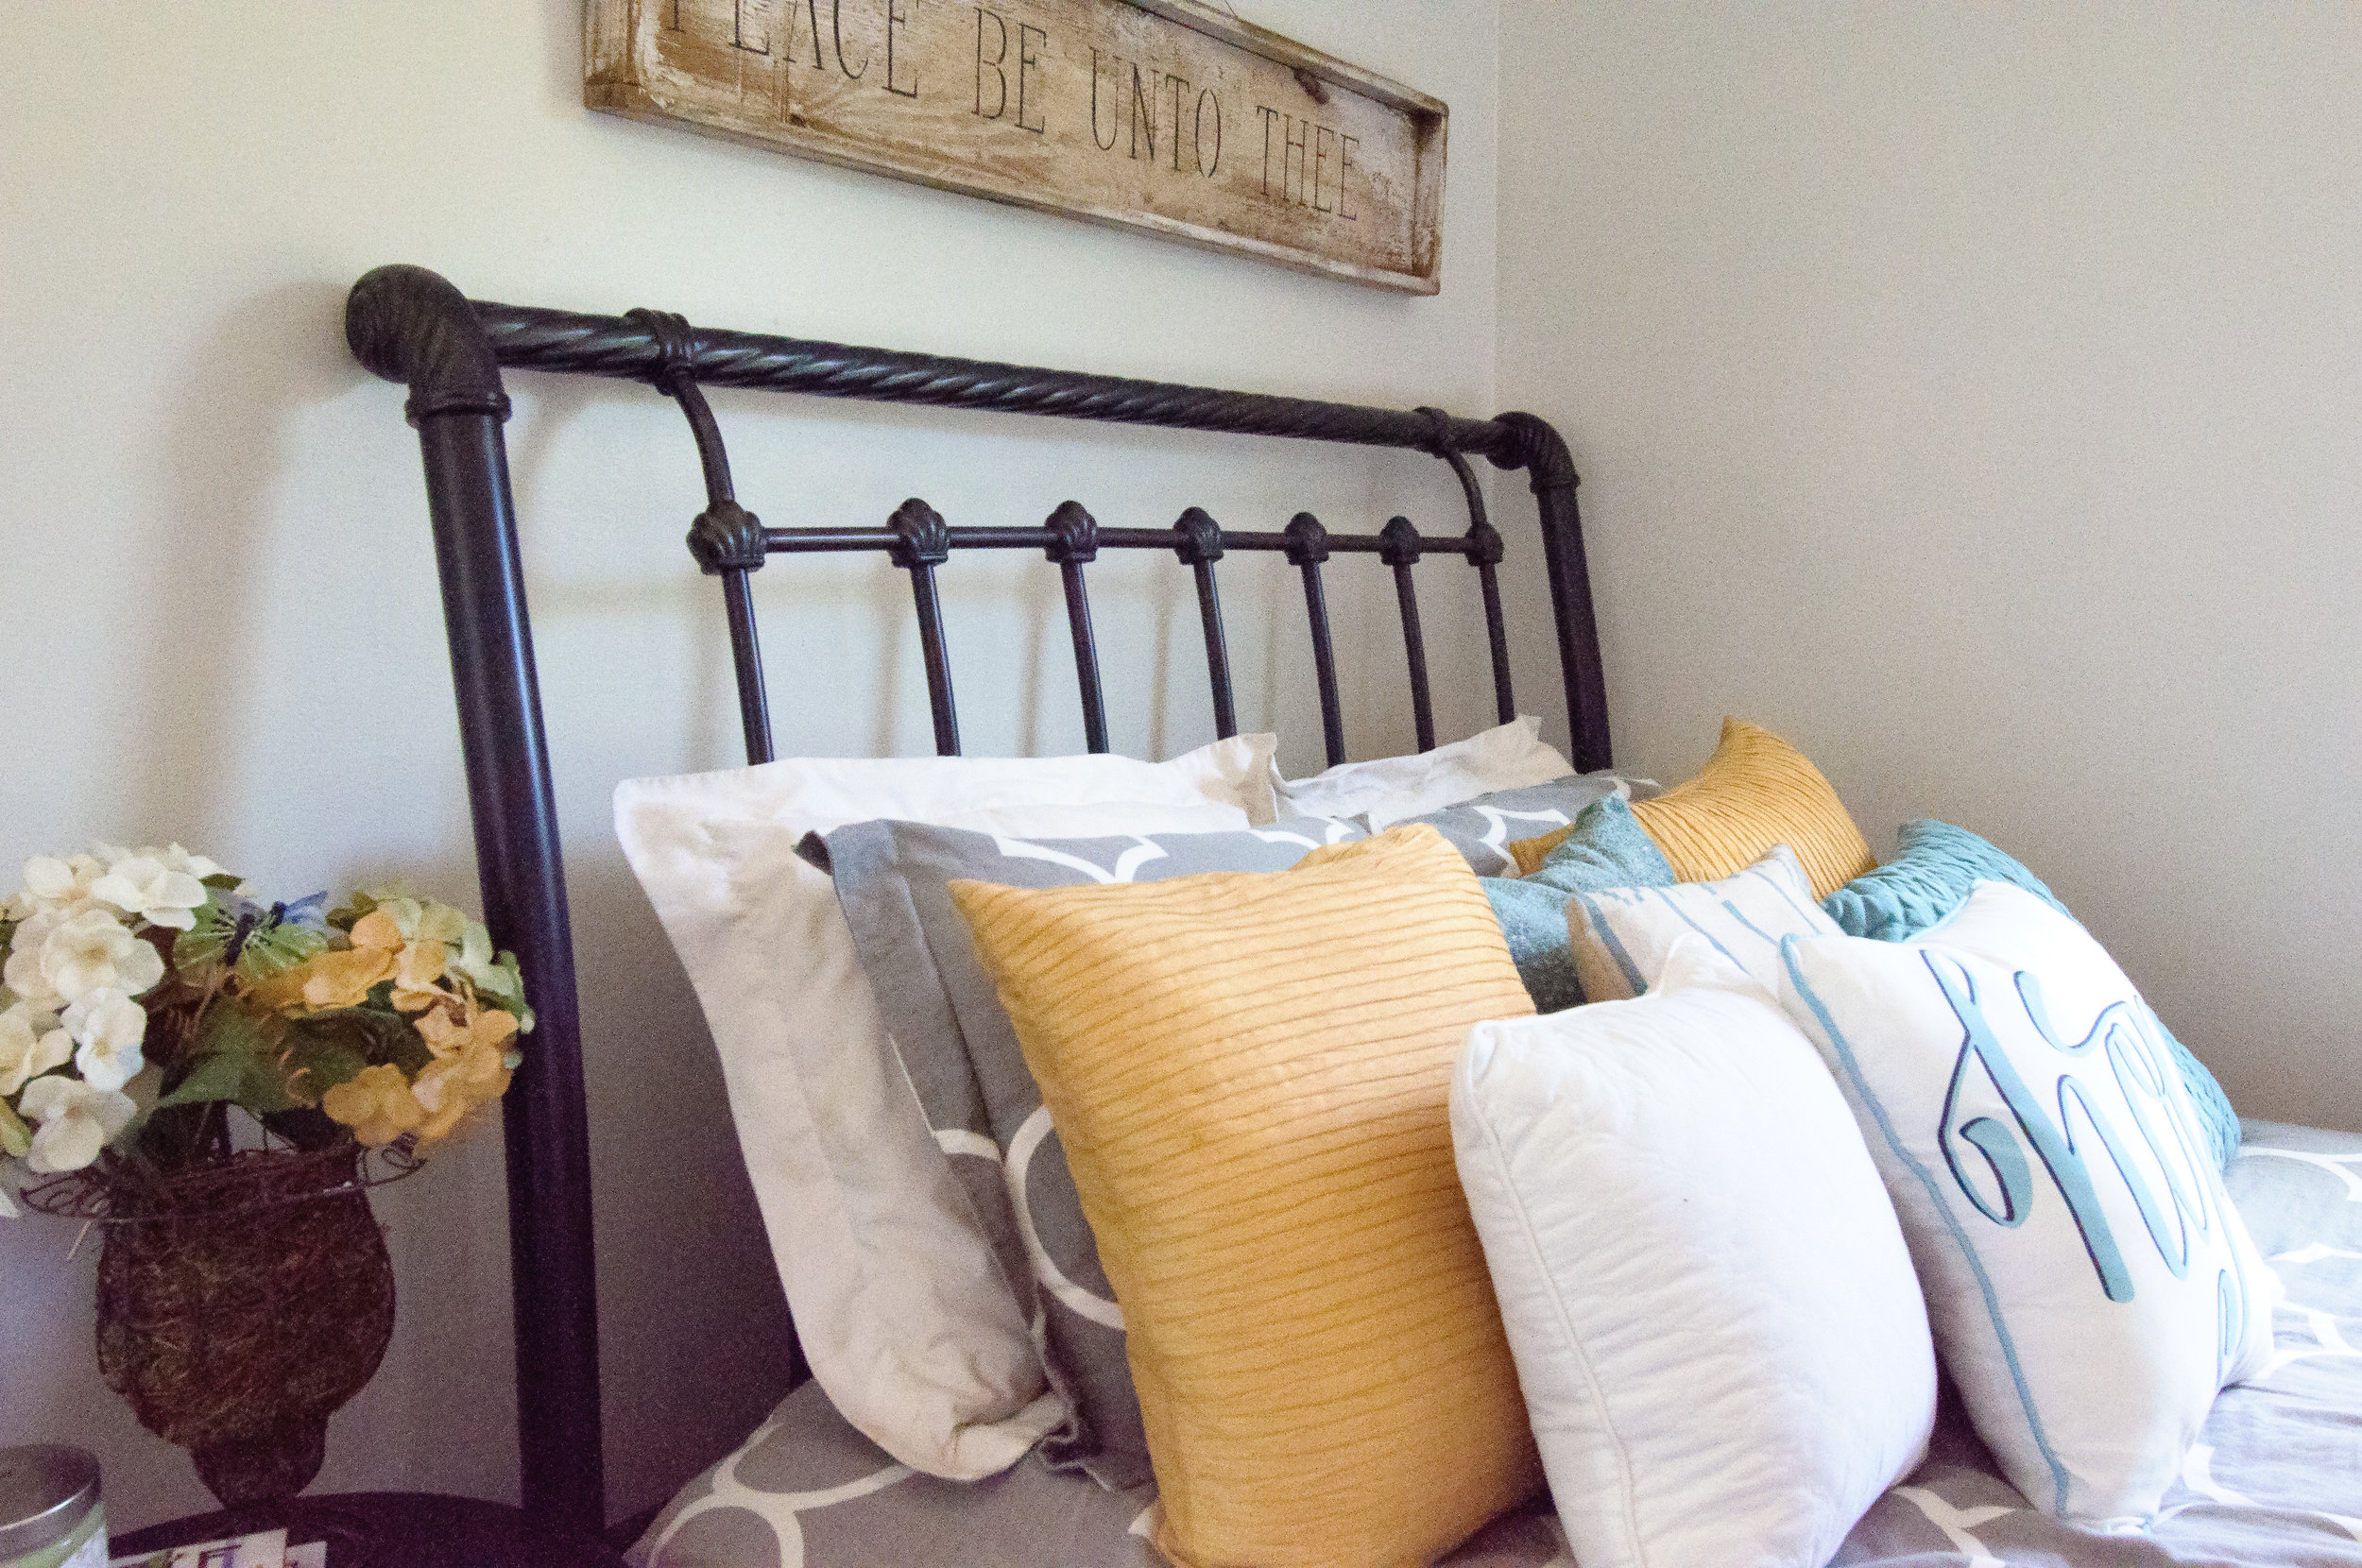
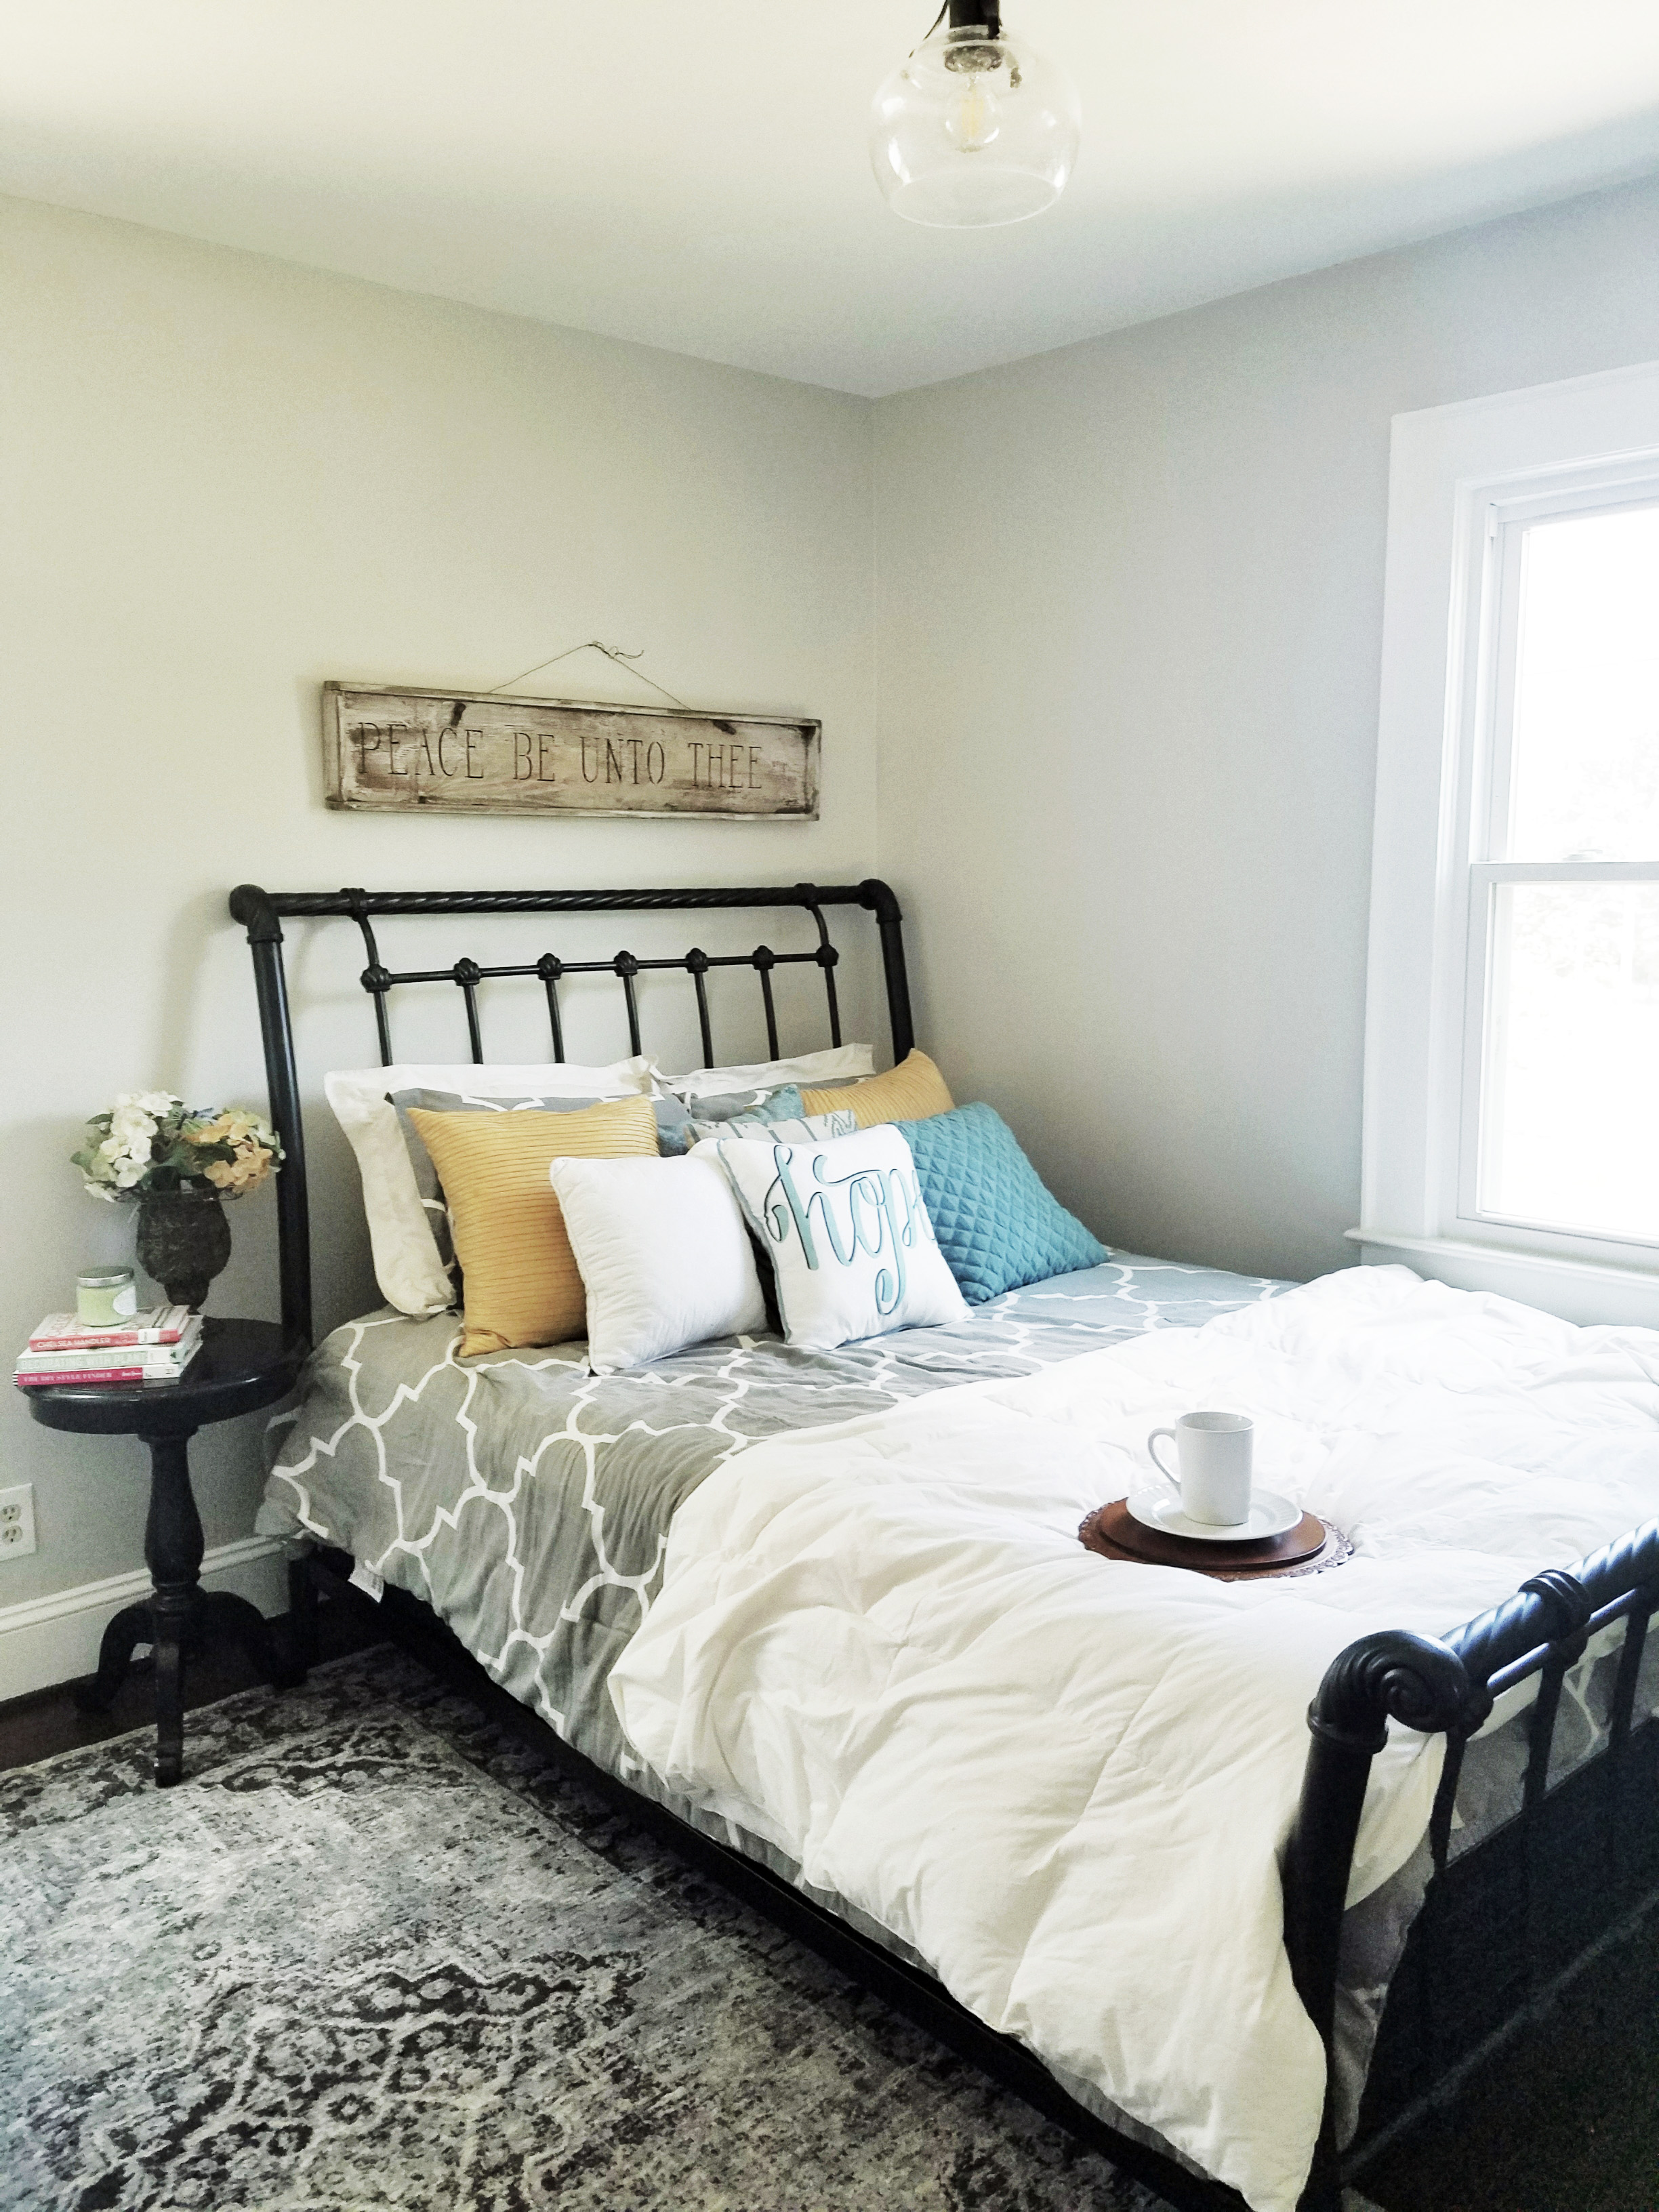
Introducing: the Haymount Bohemian - our newest airbnb
We are so excited to announce the arrival of our newest short term rental, The Haymount Bohemian.
This adorable short term rental is only available this holiday season, for a limited time only. We have space to accommodate your overflow of friends and family, giving them their own space in the heart of Haymount! If you are planning to travel to Fayetteville to visit your friends and family, we hope you'll consider our home!
You can find our property listed on Airbnb and VRBO (copy and paste: https://www.vrbo.com/2514446) or you can contact us directly to arrange a booking.
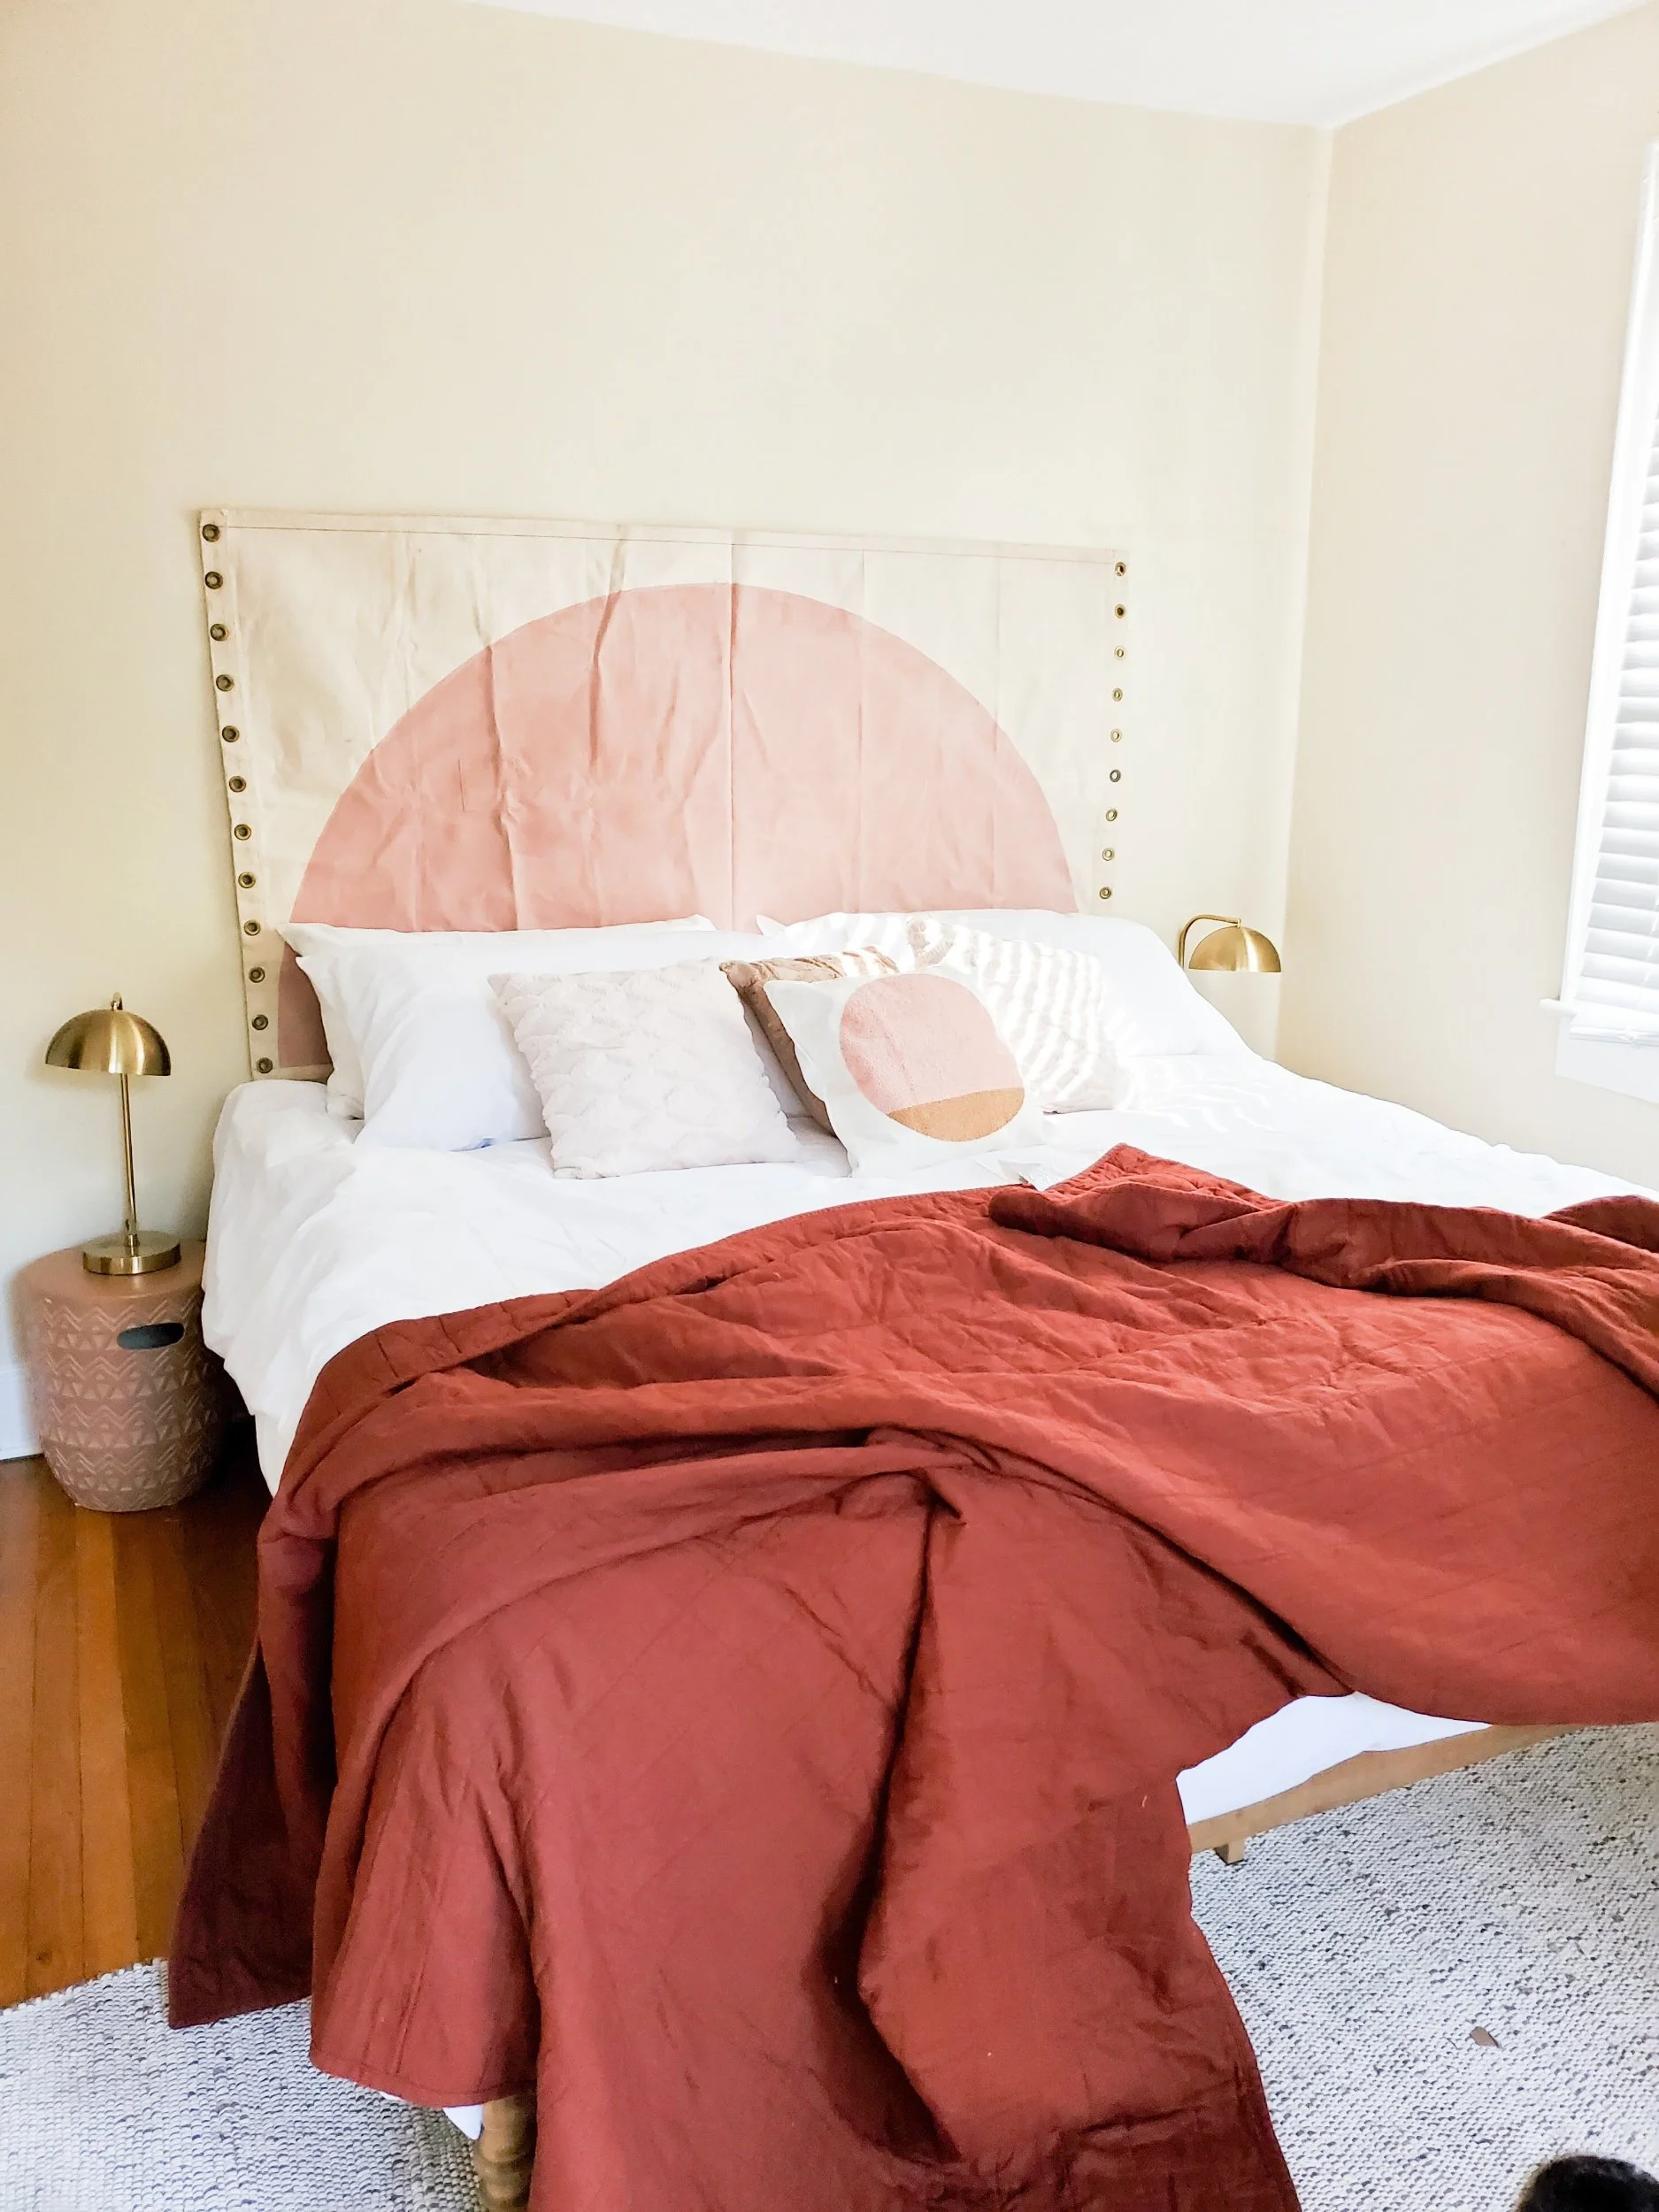
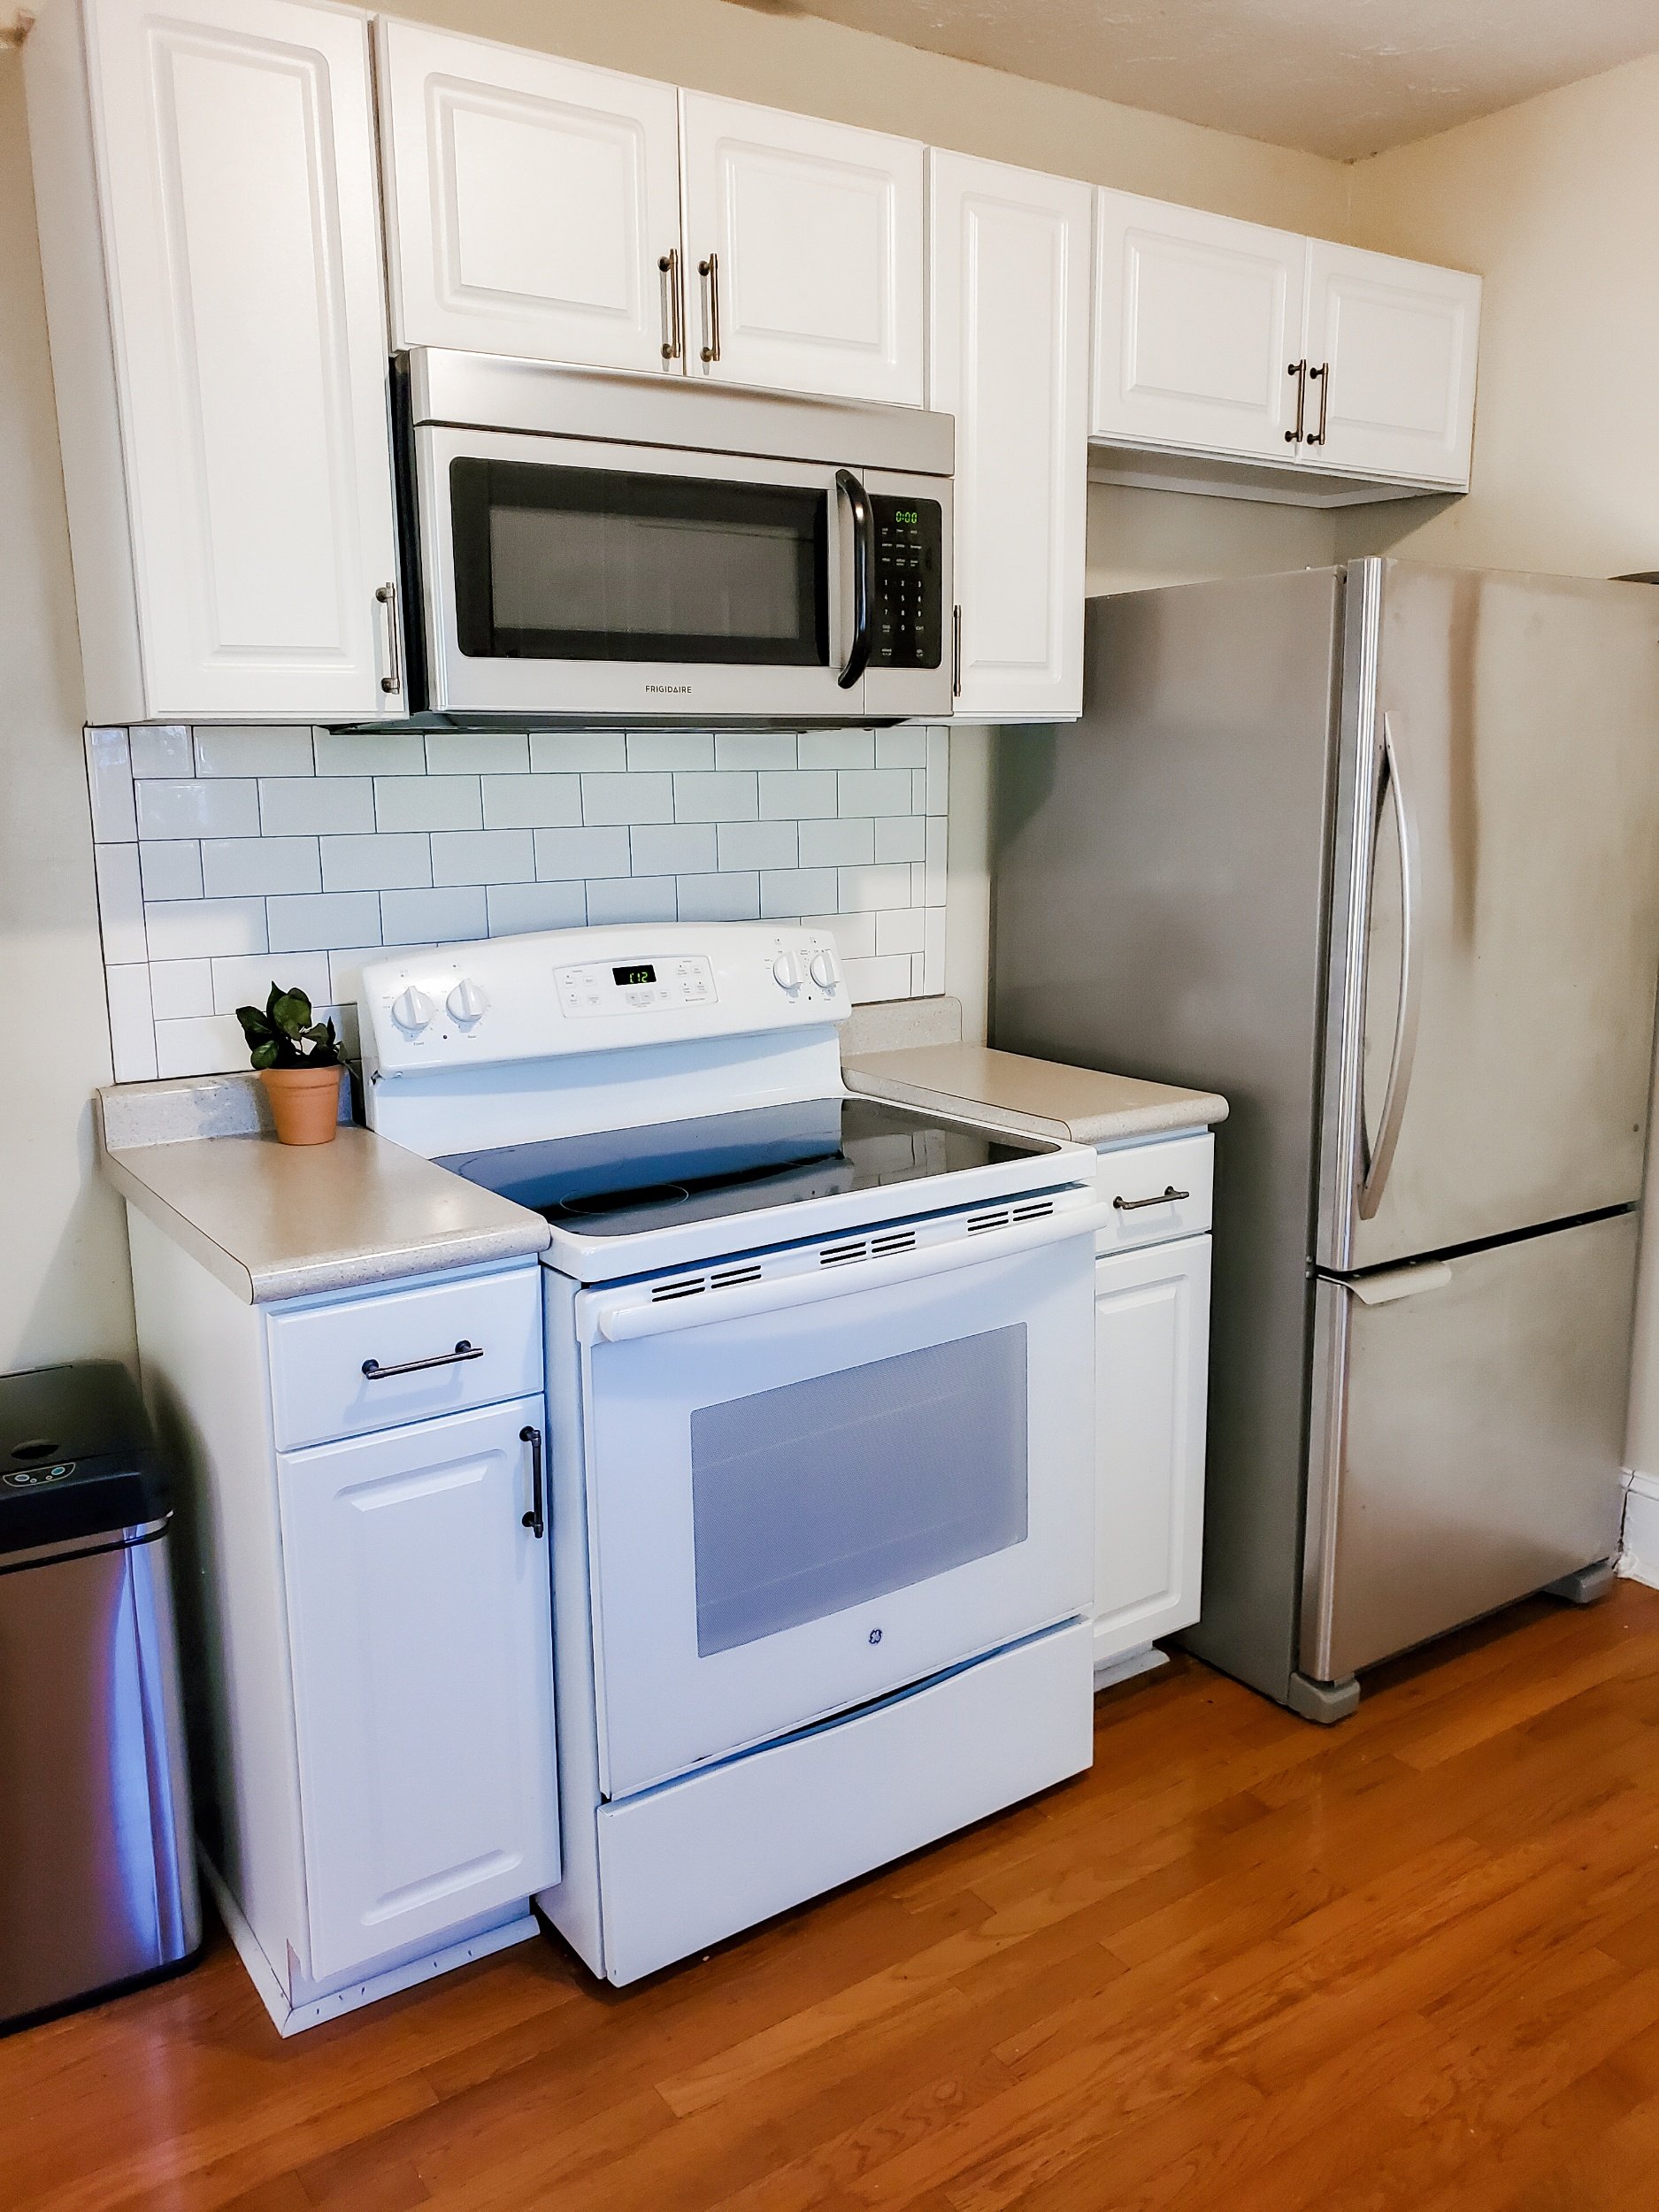
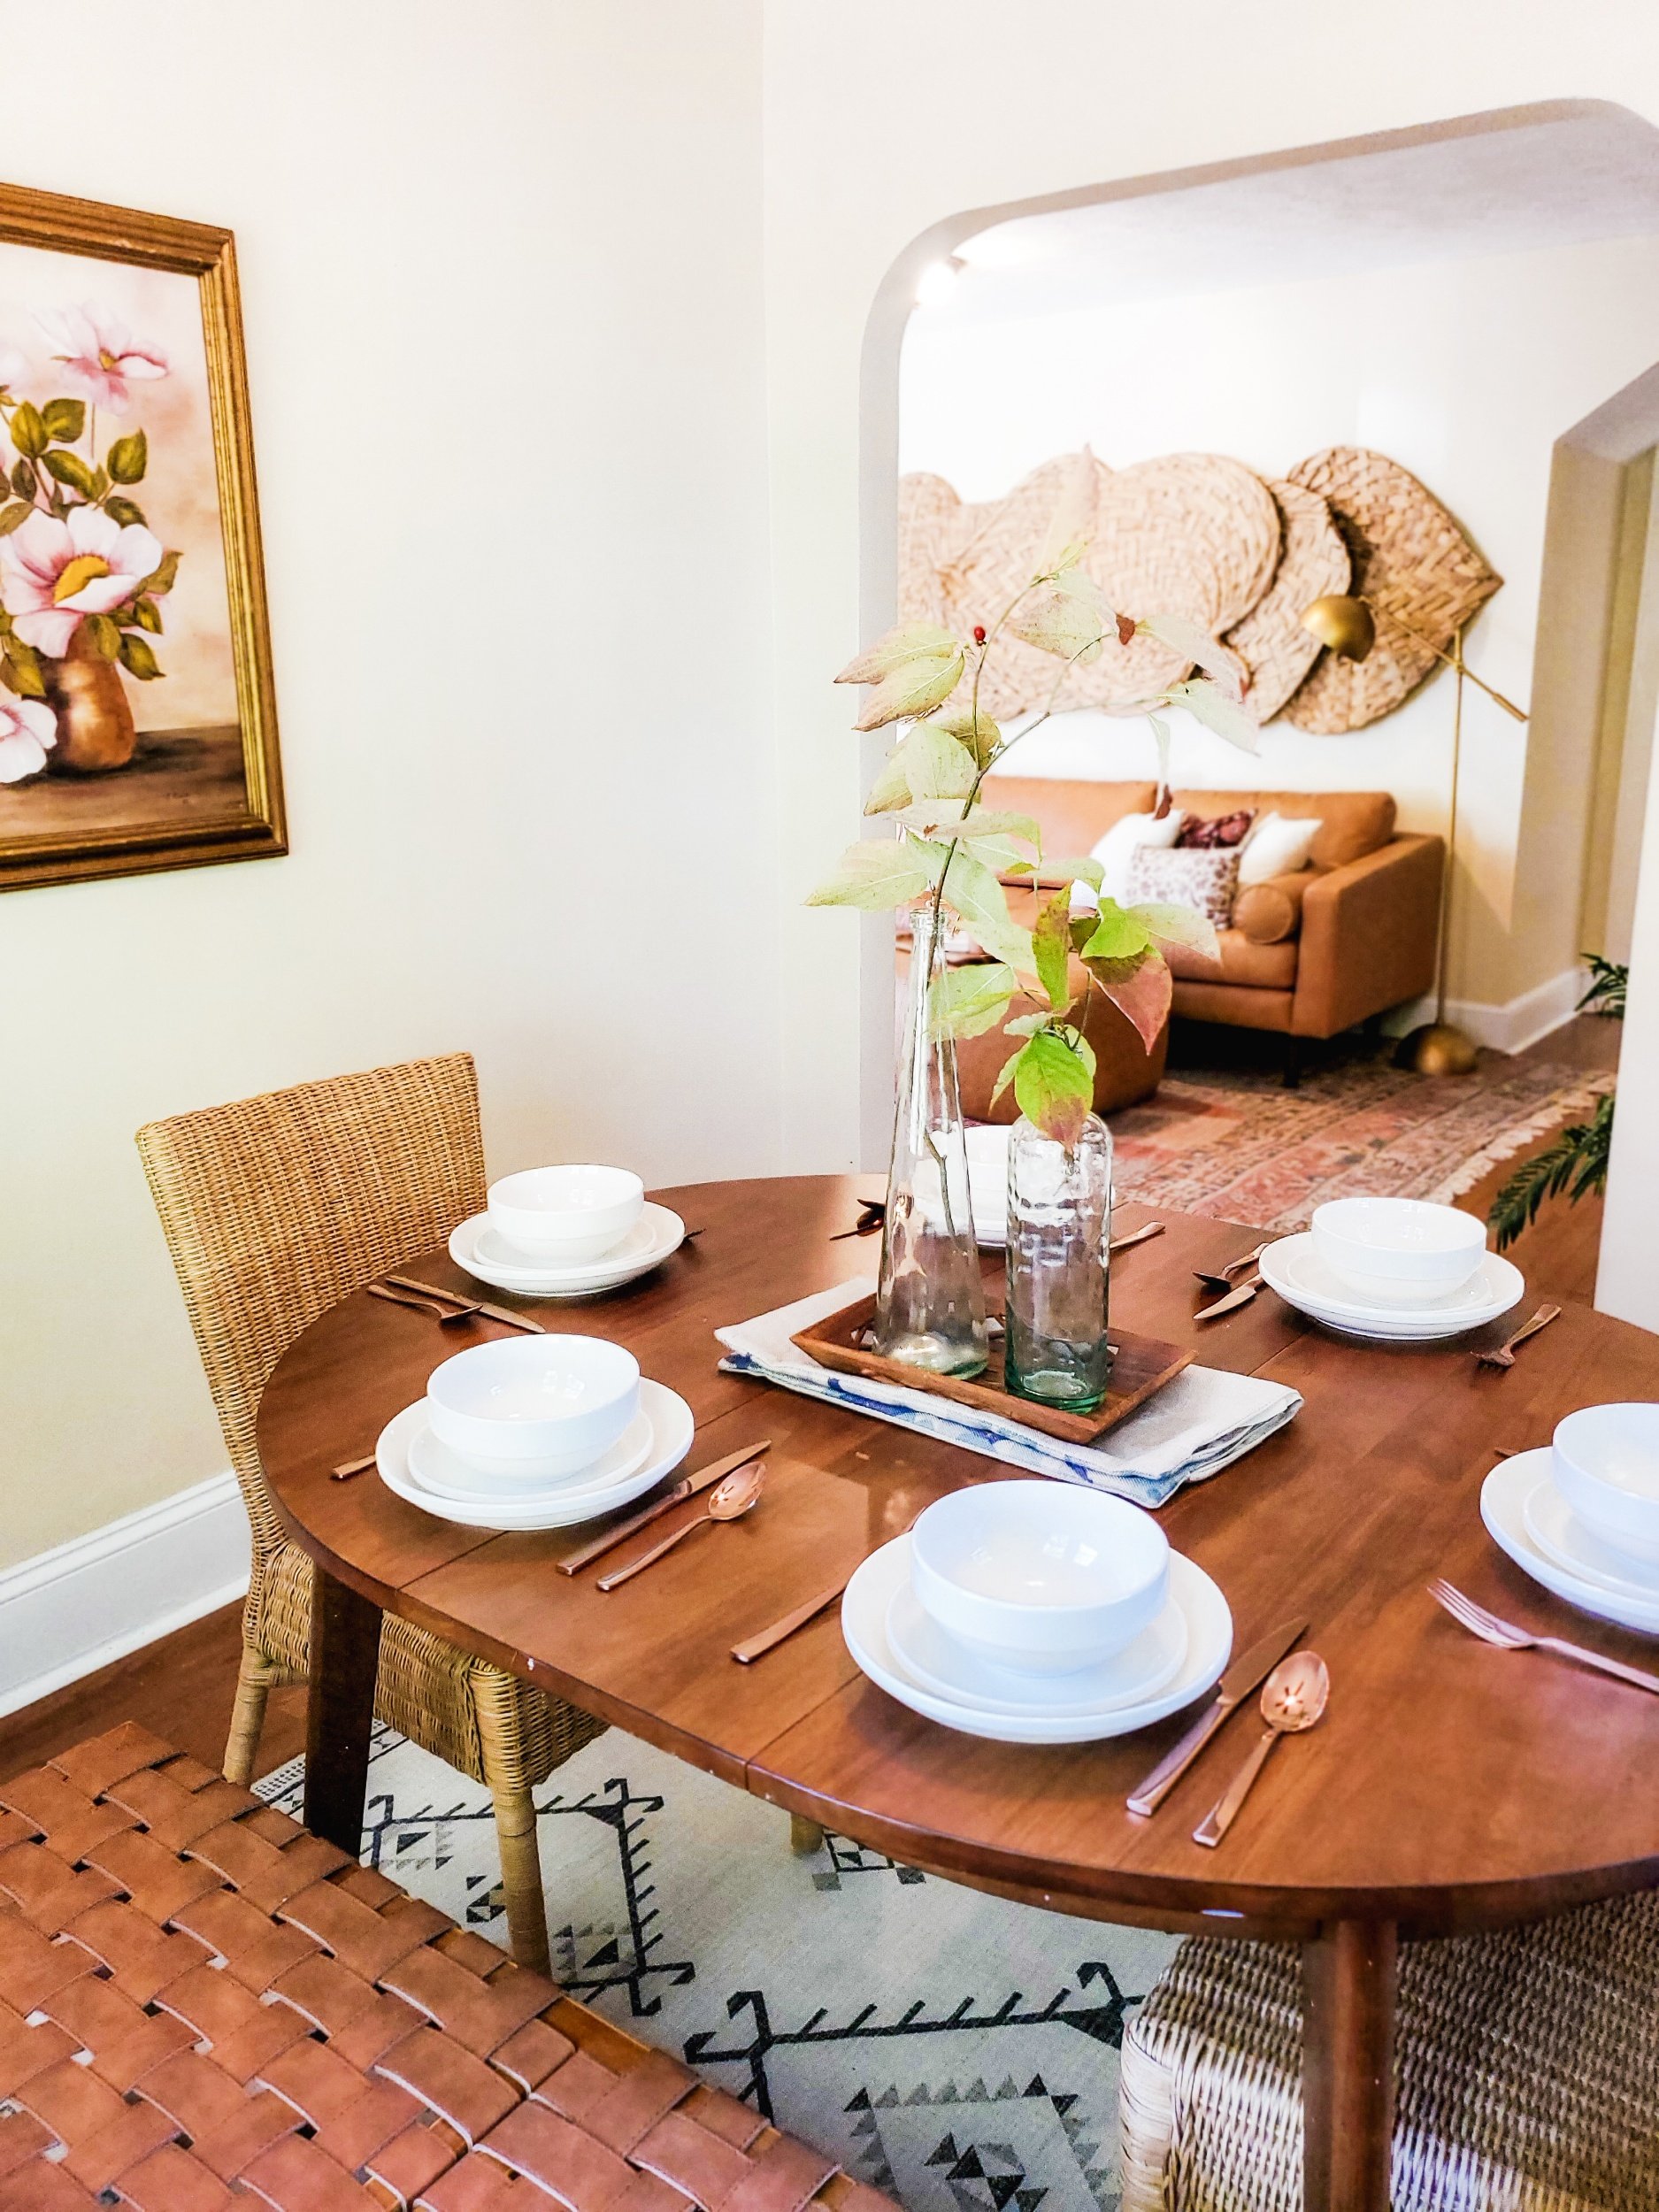
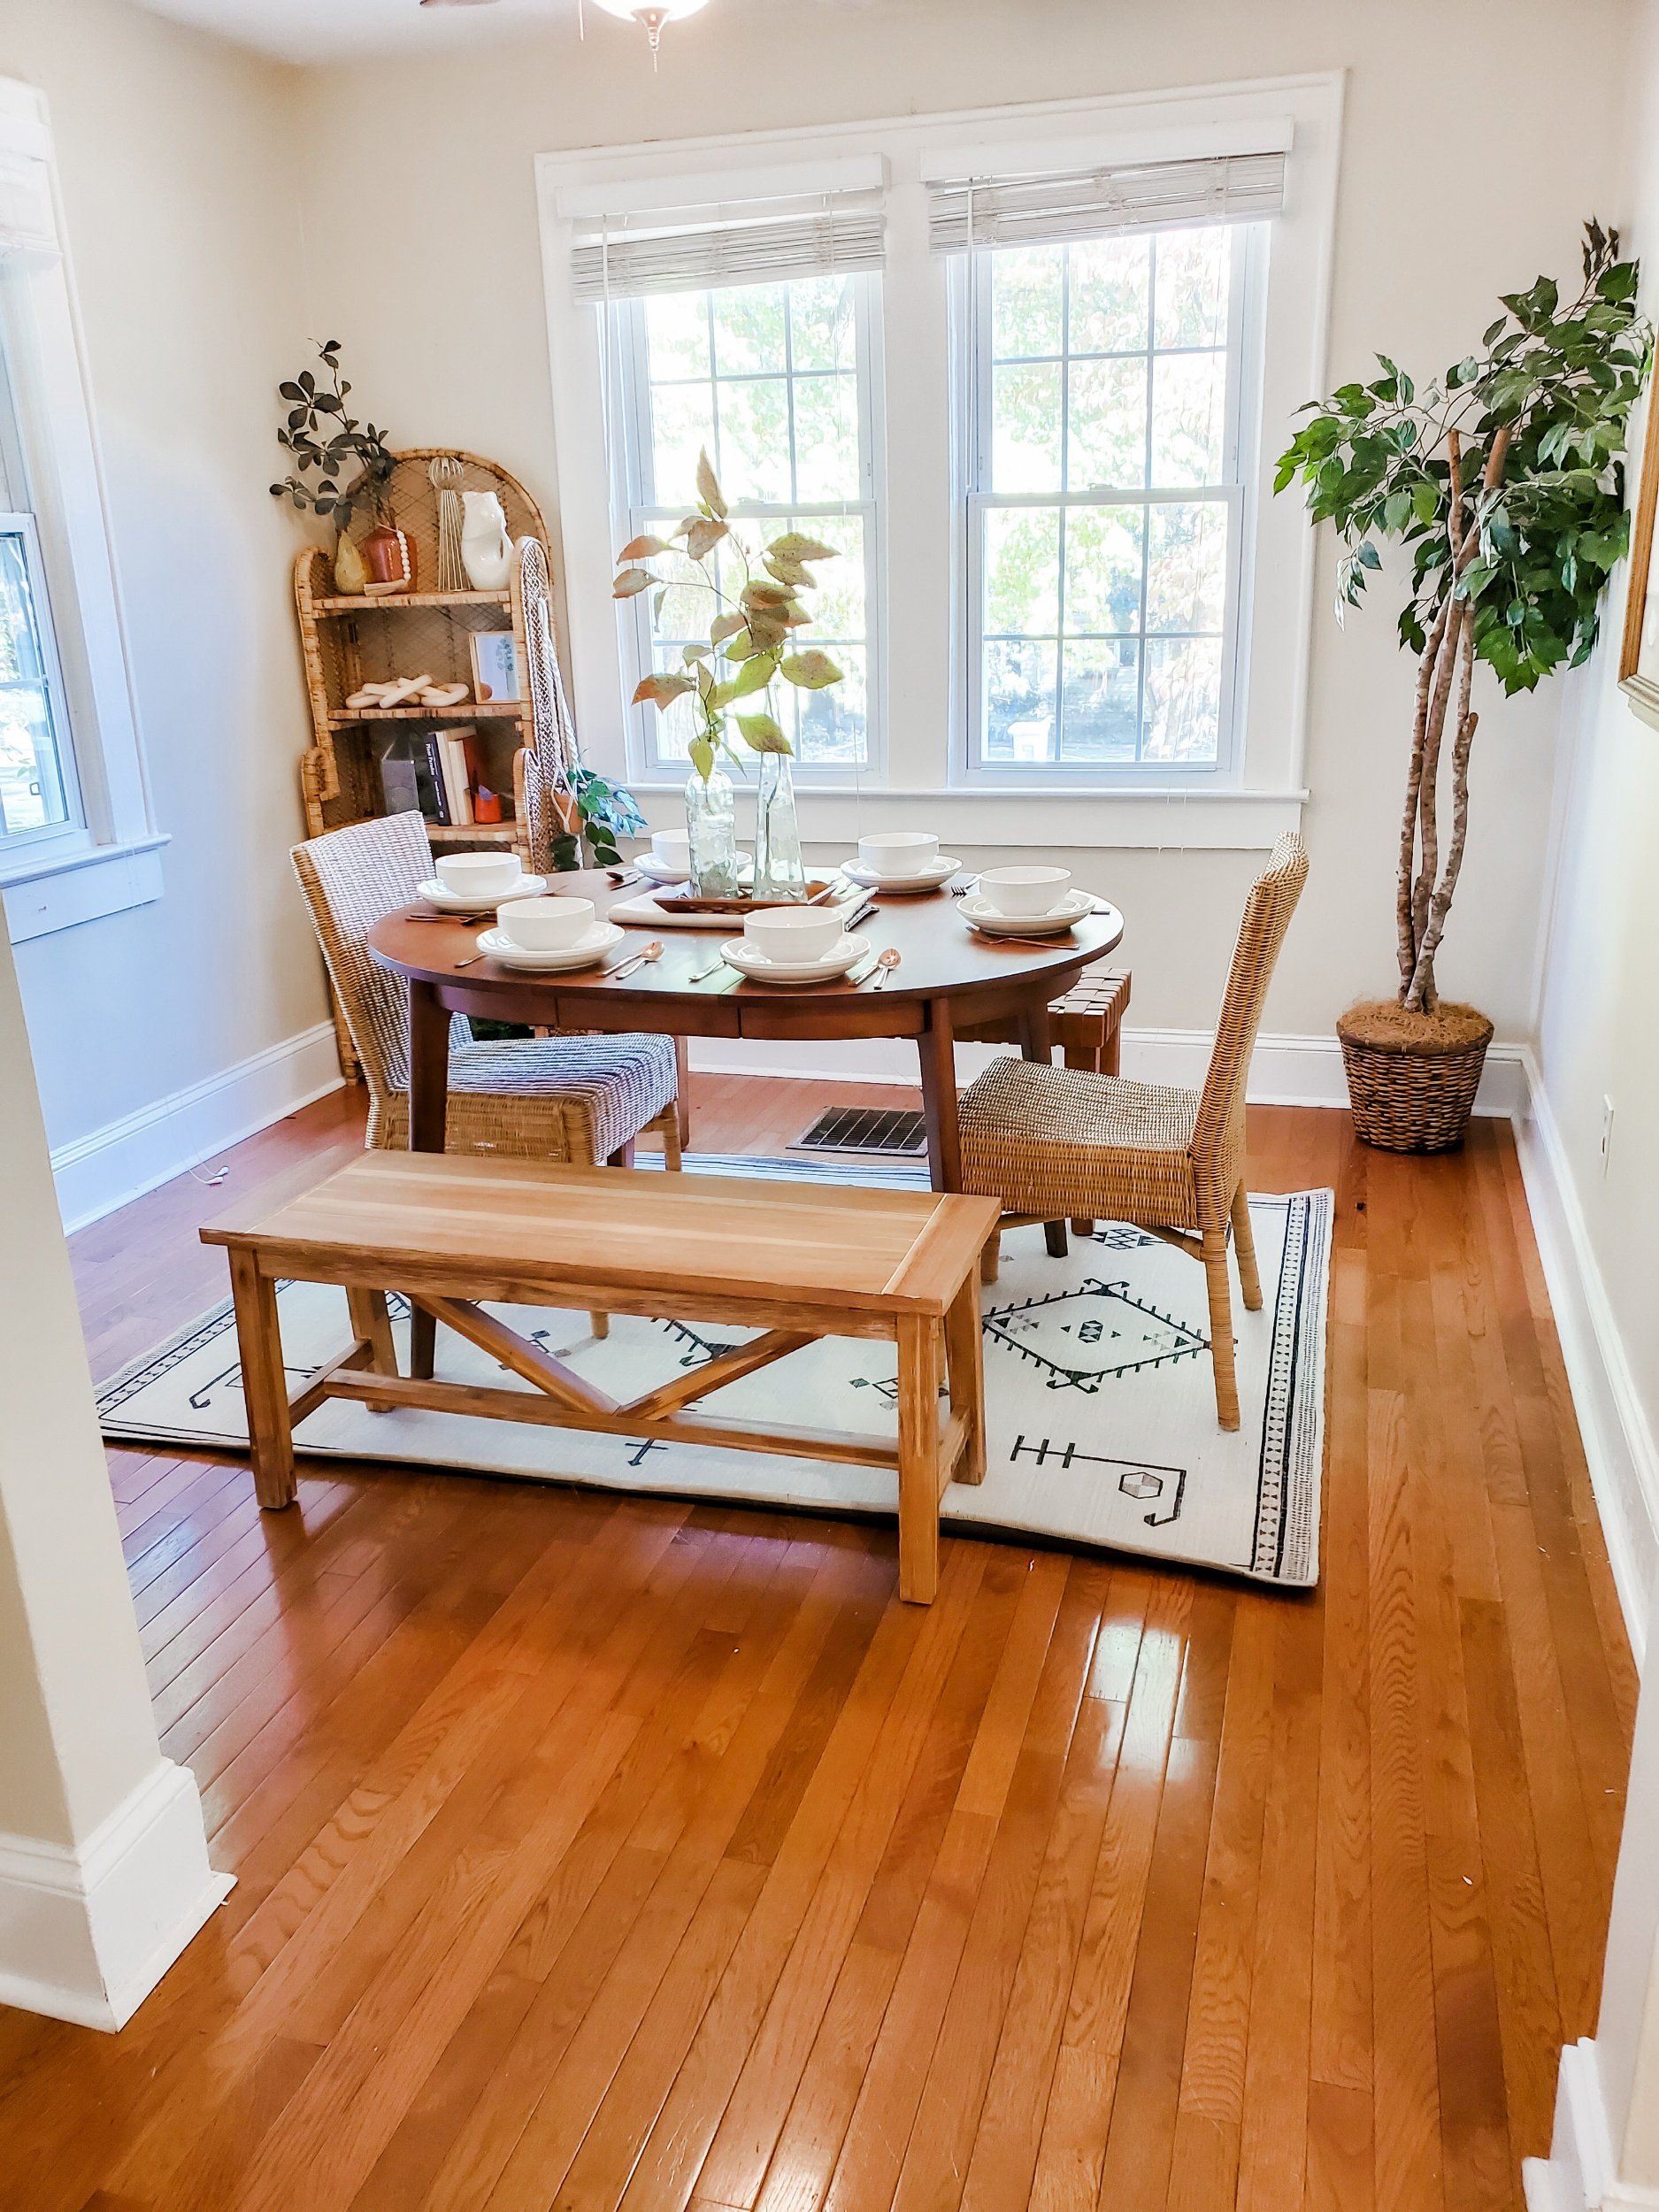
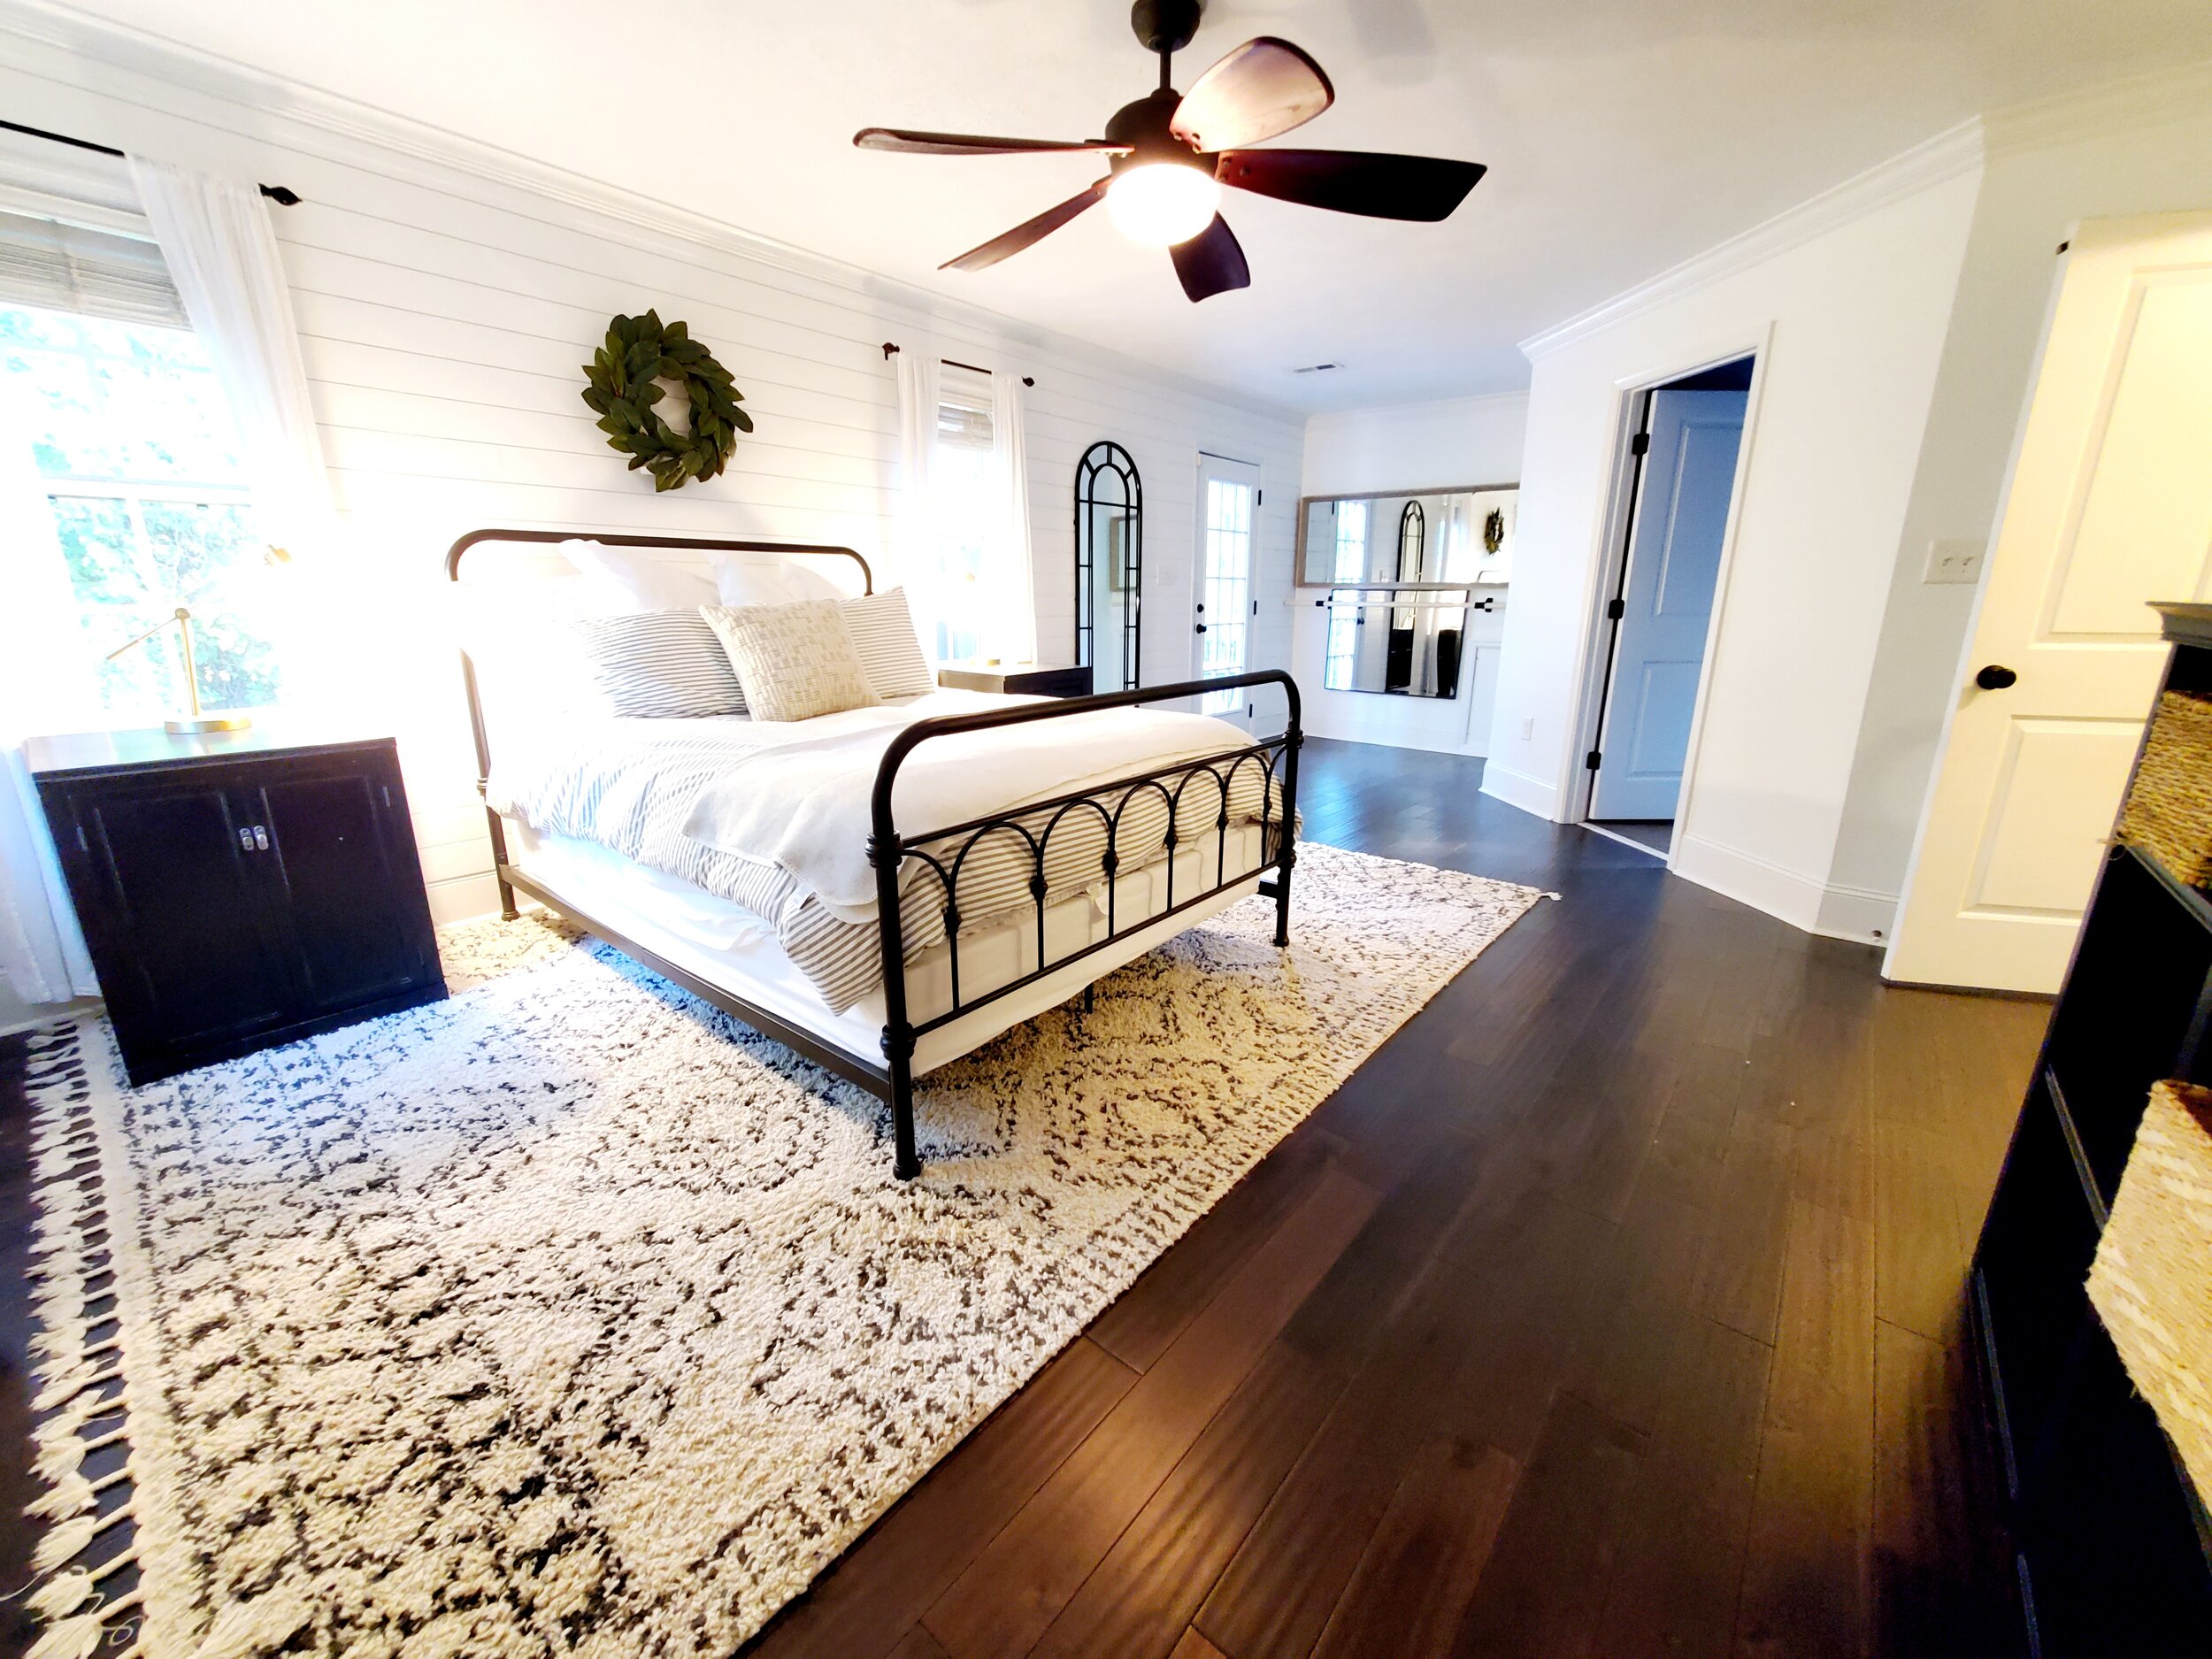
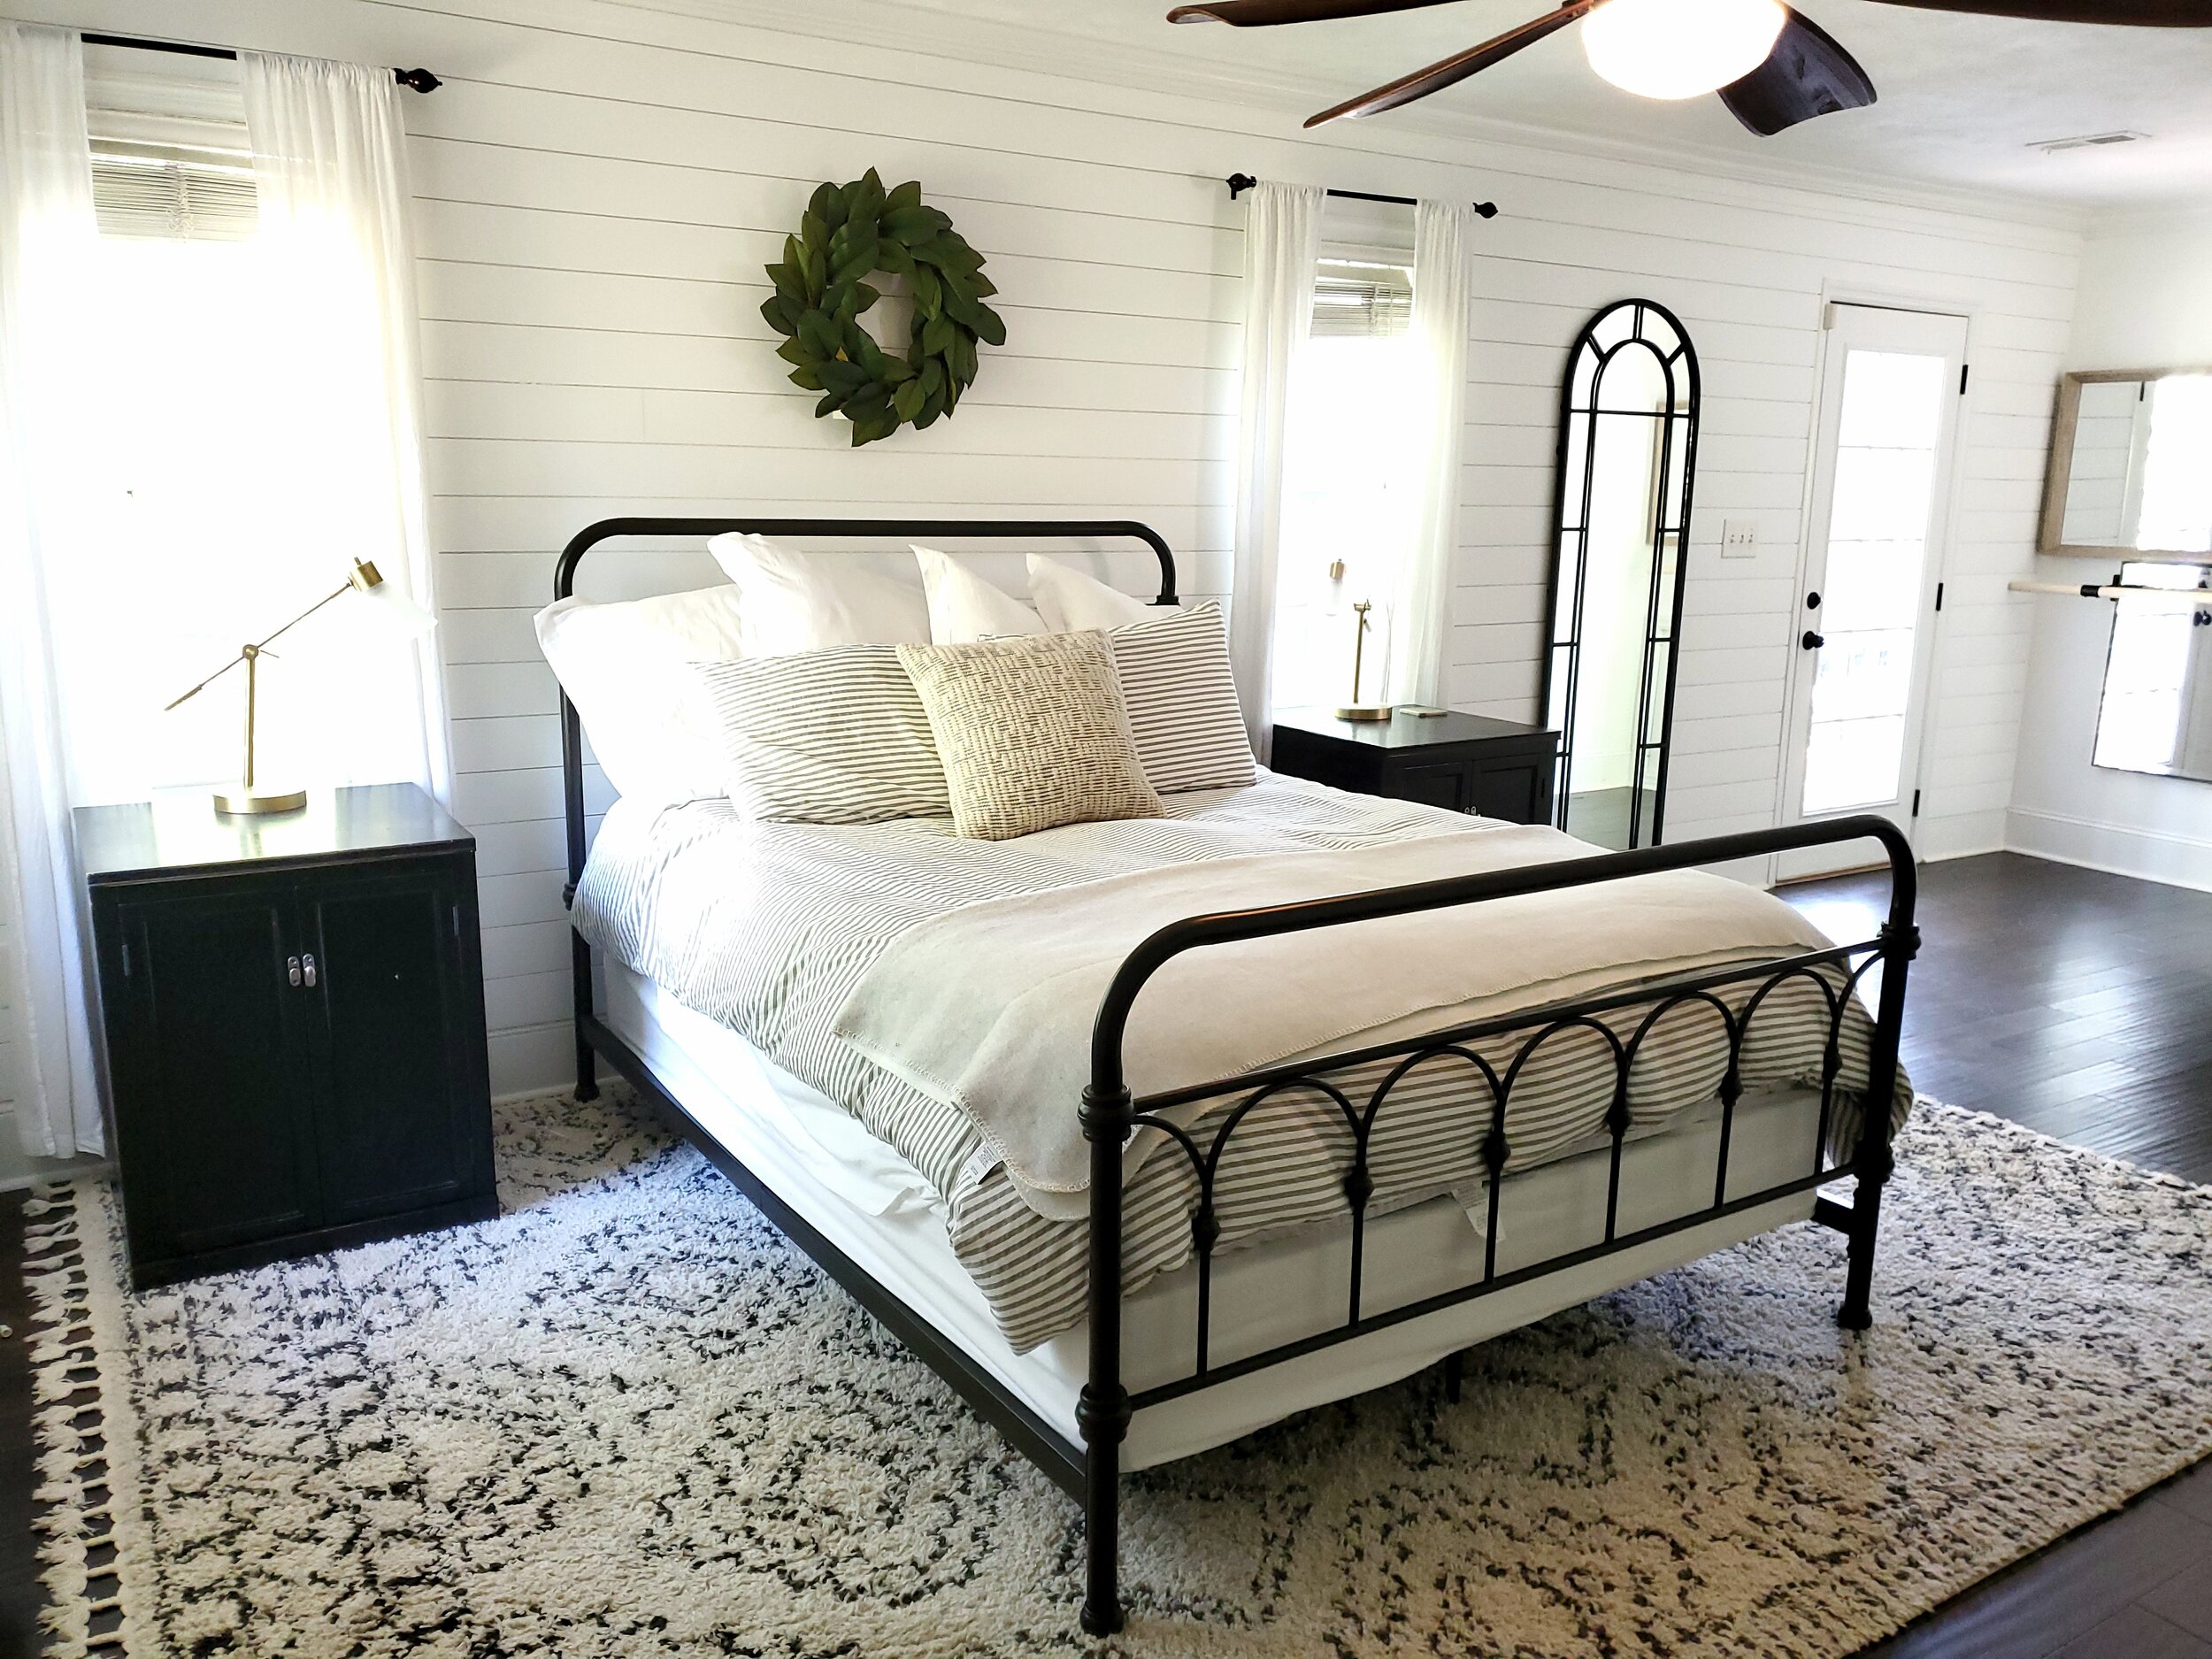
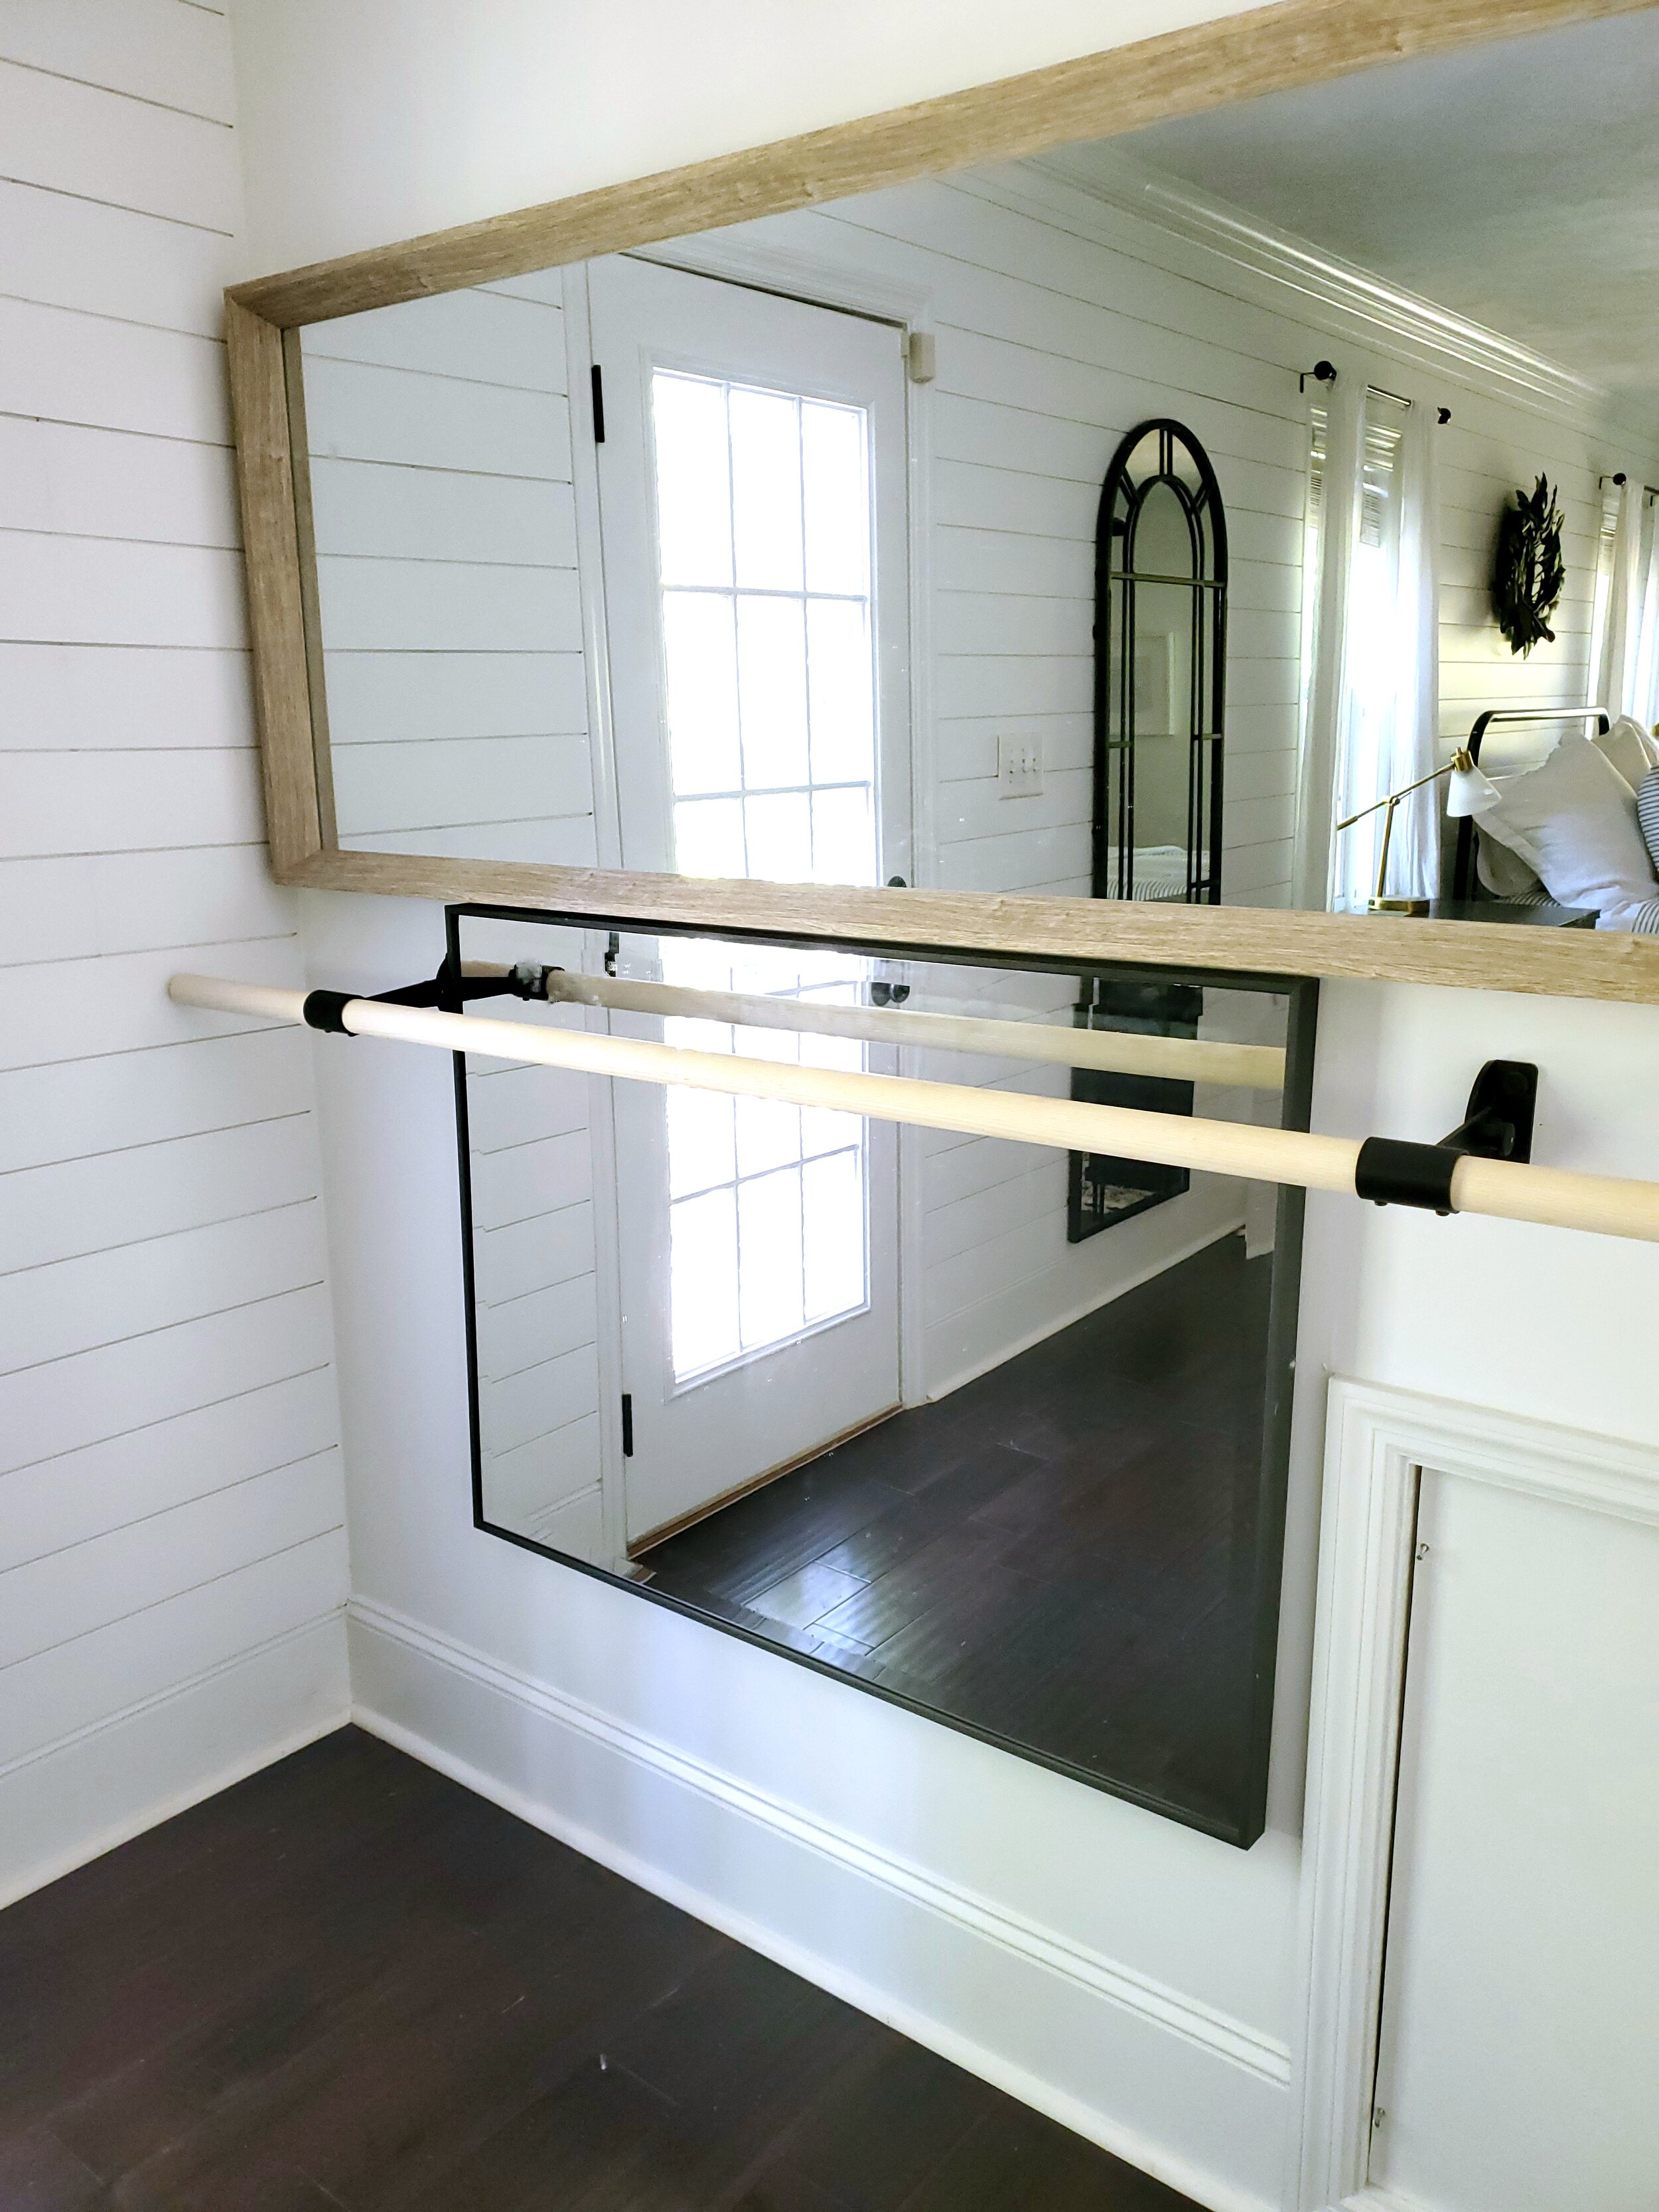
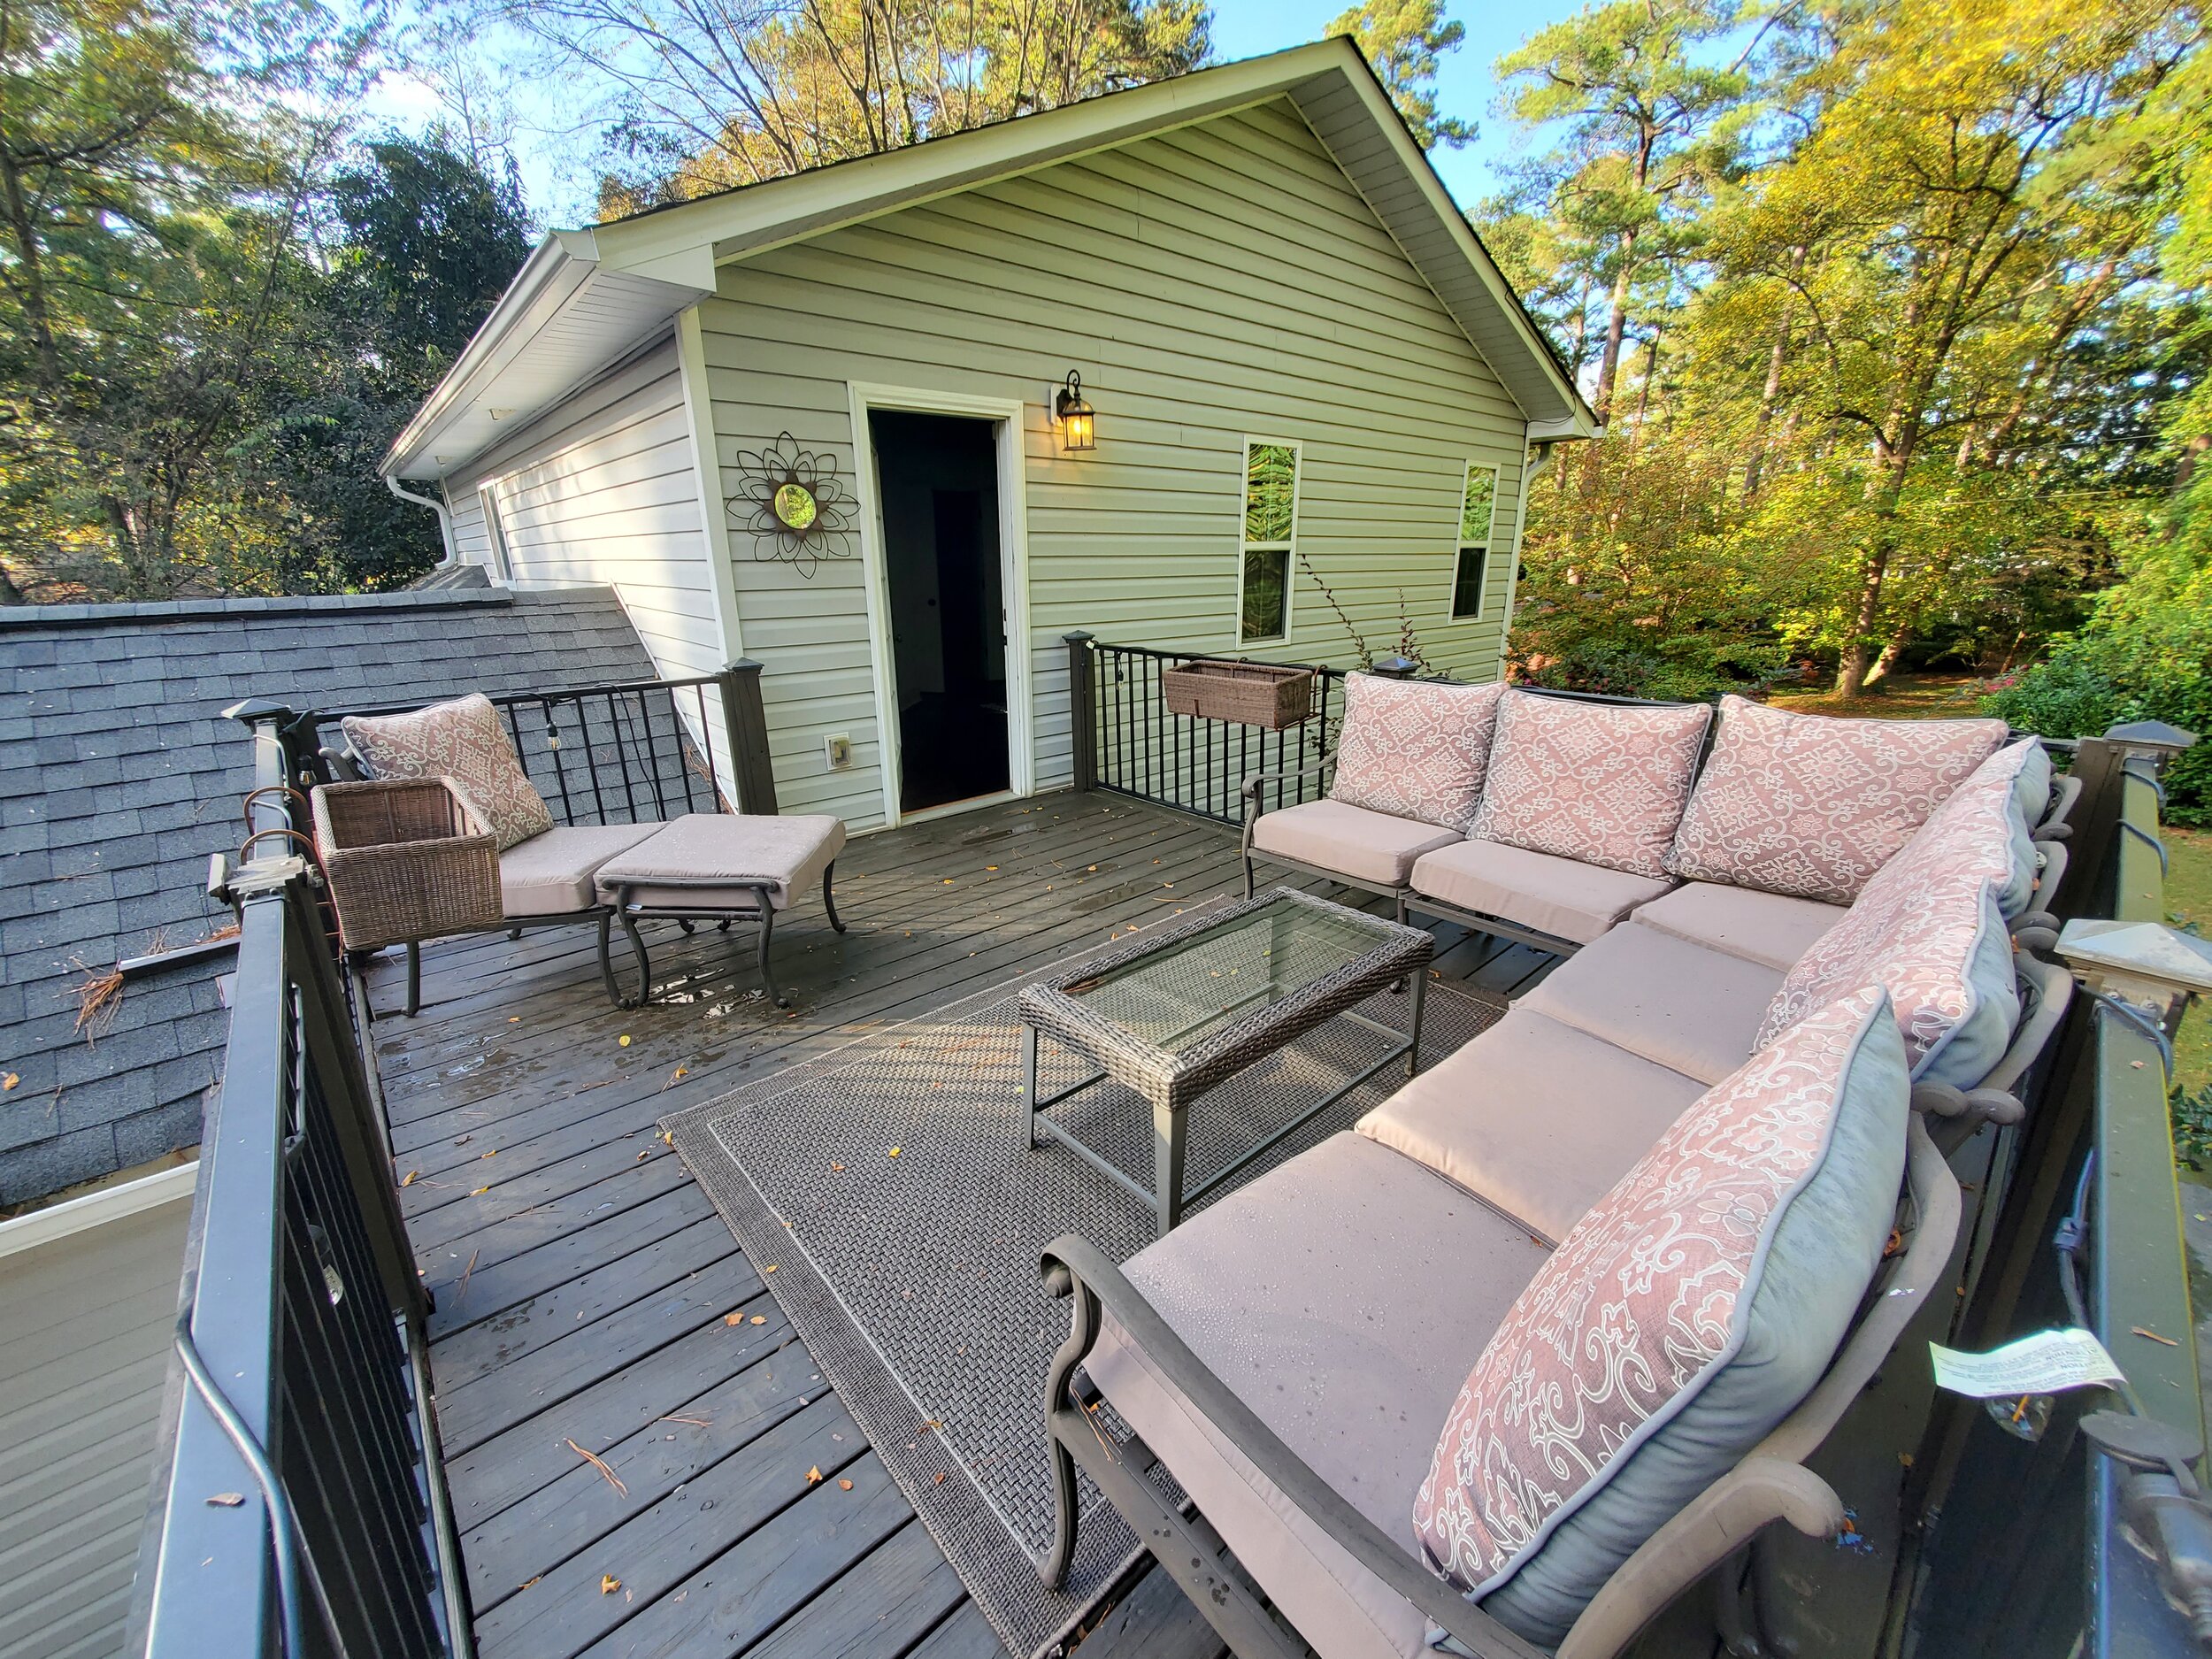
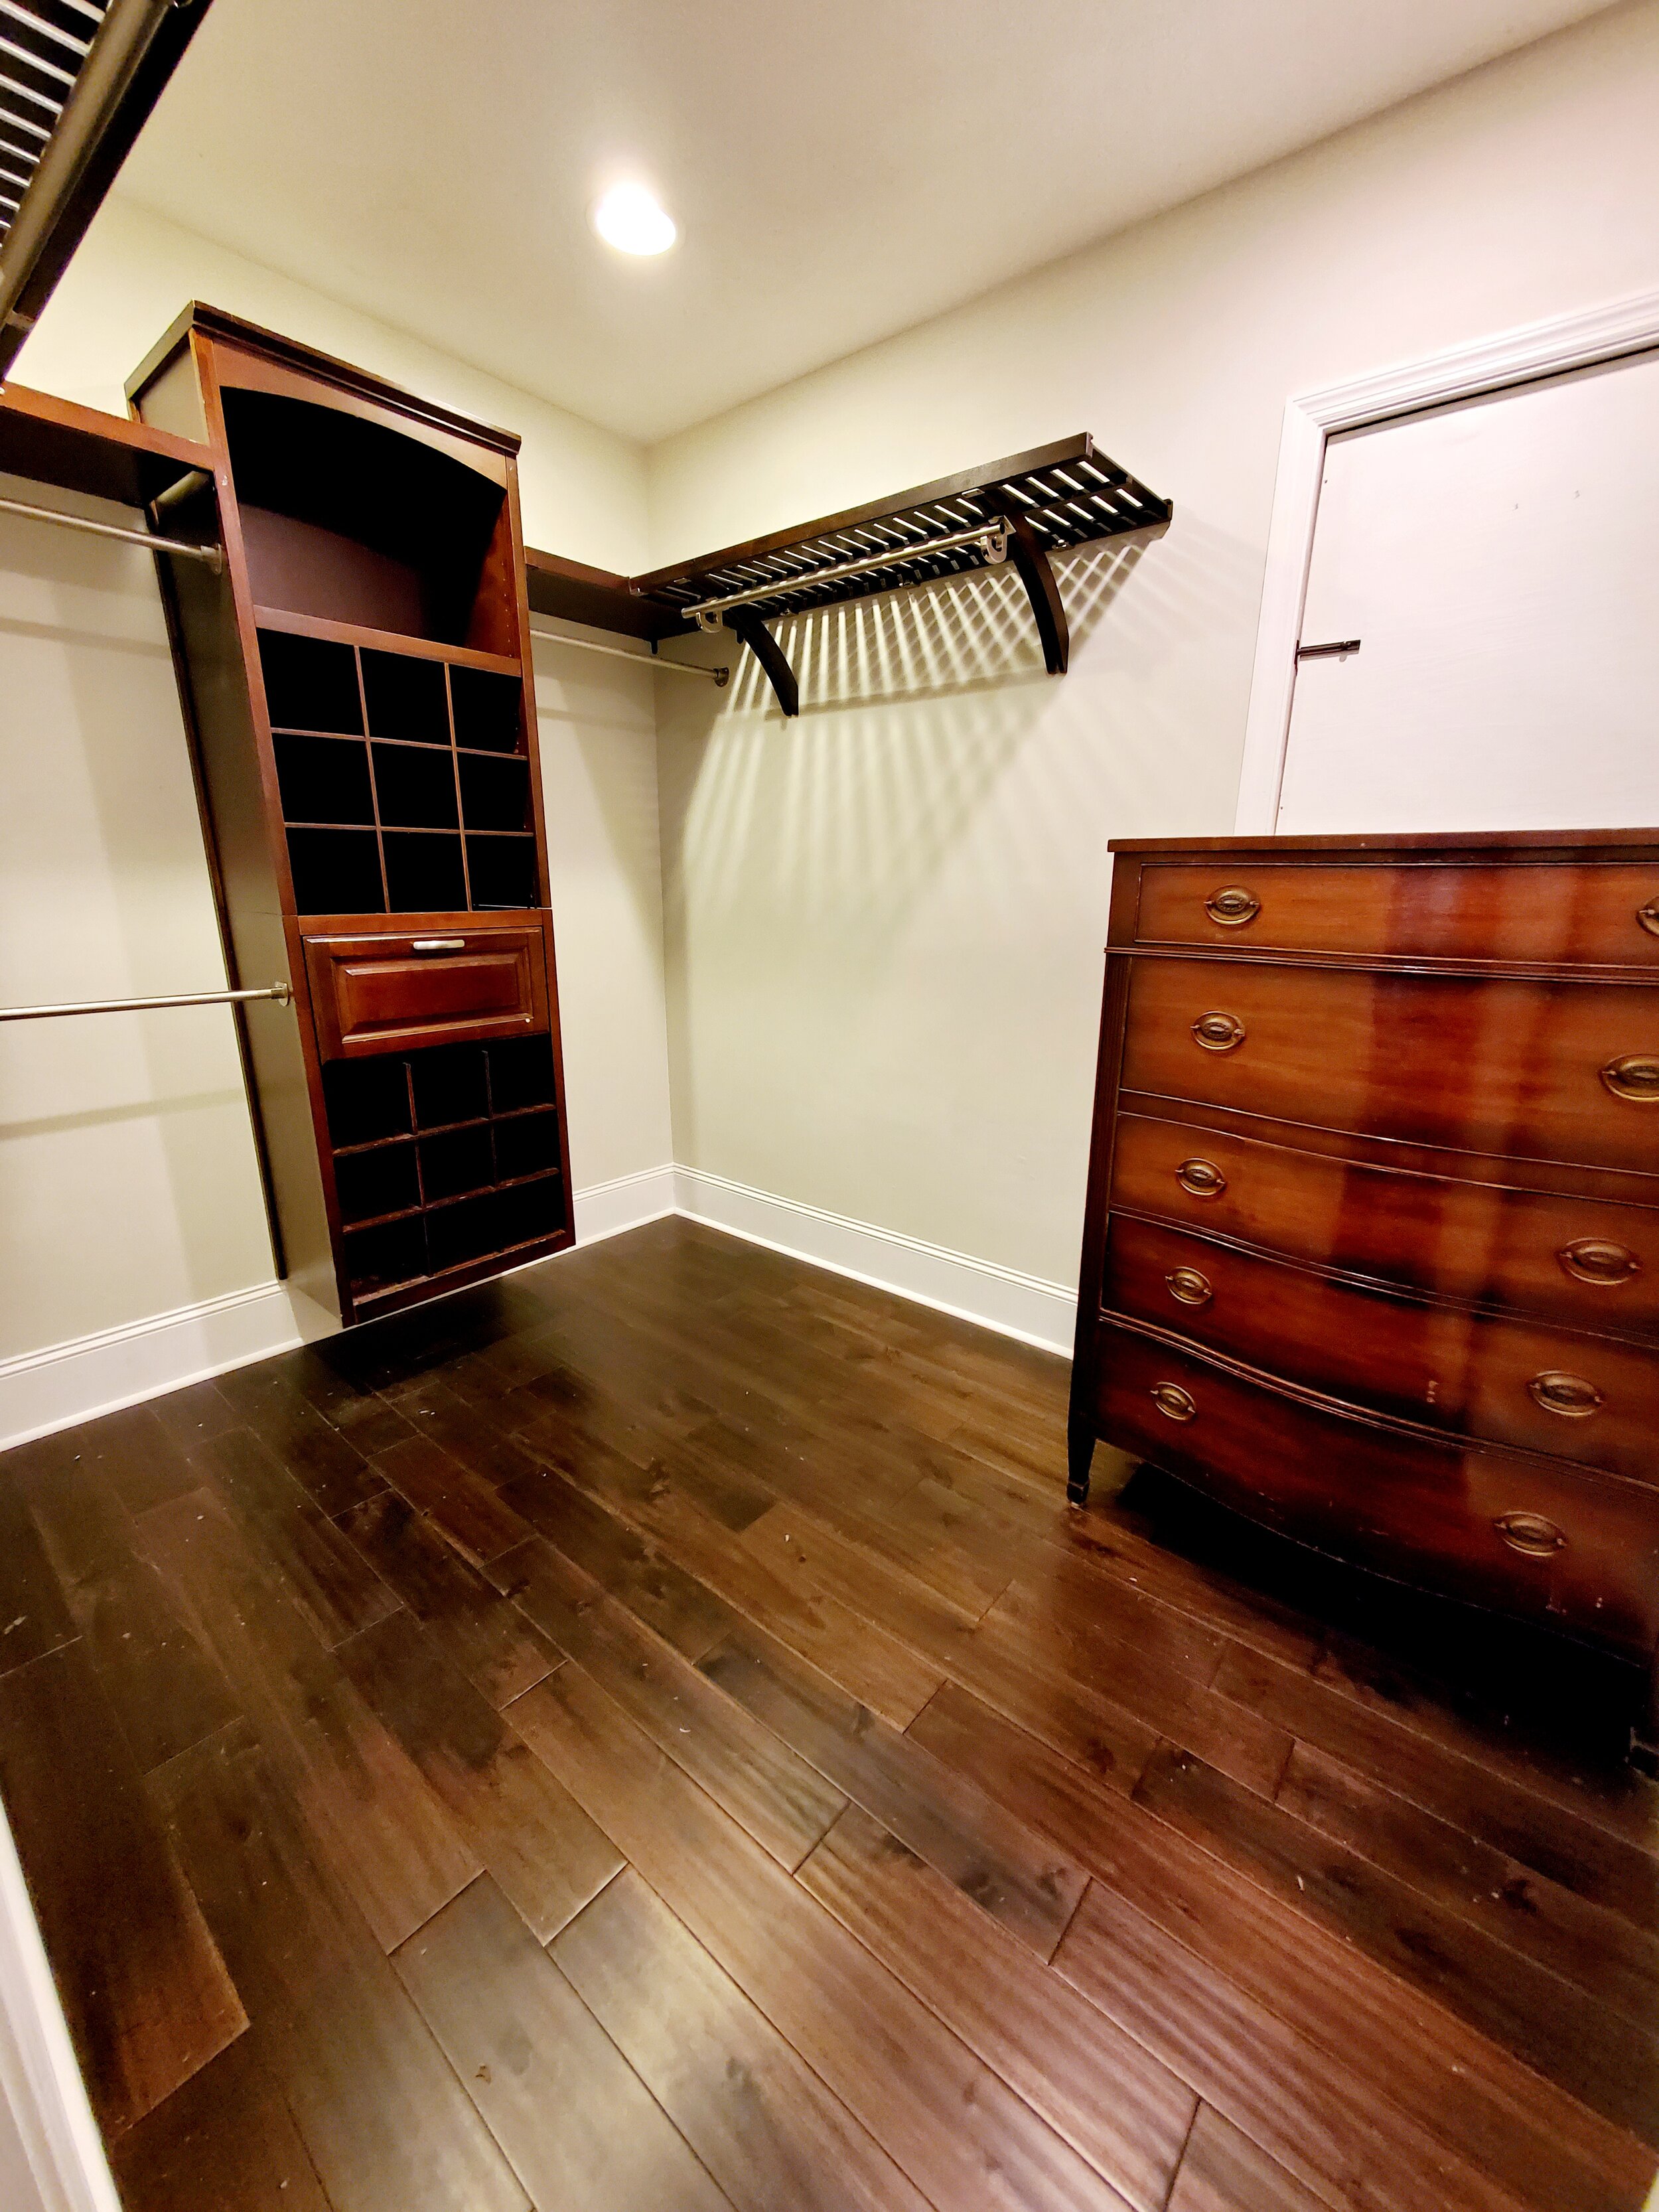
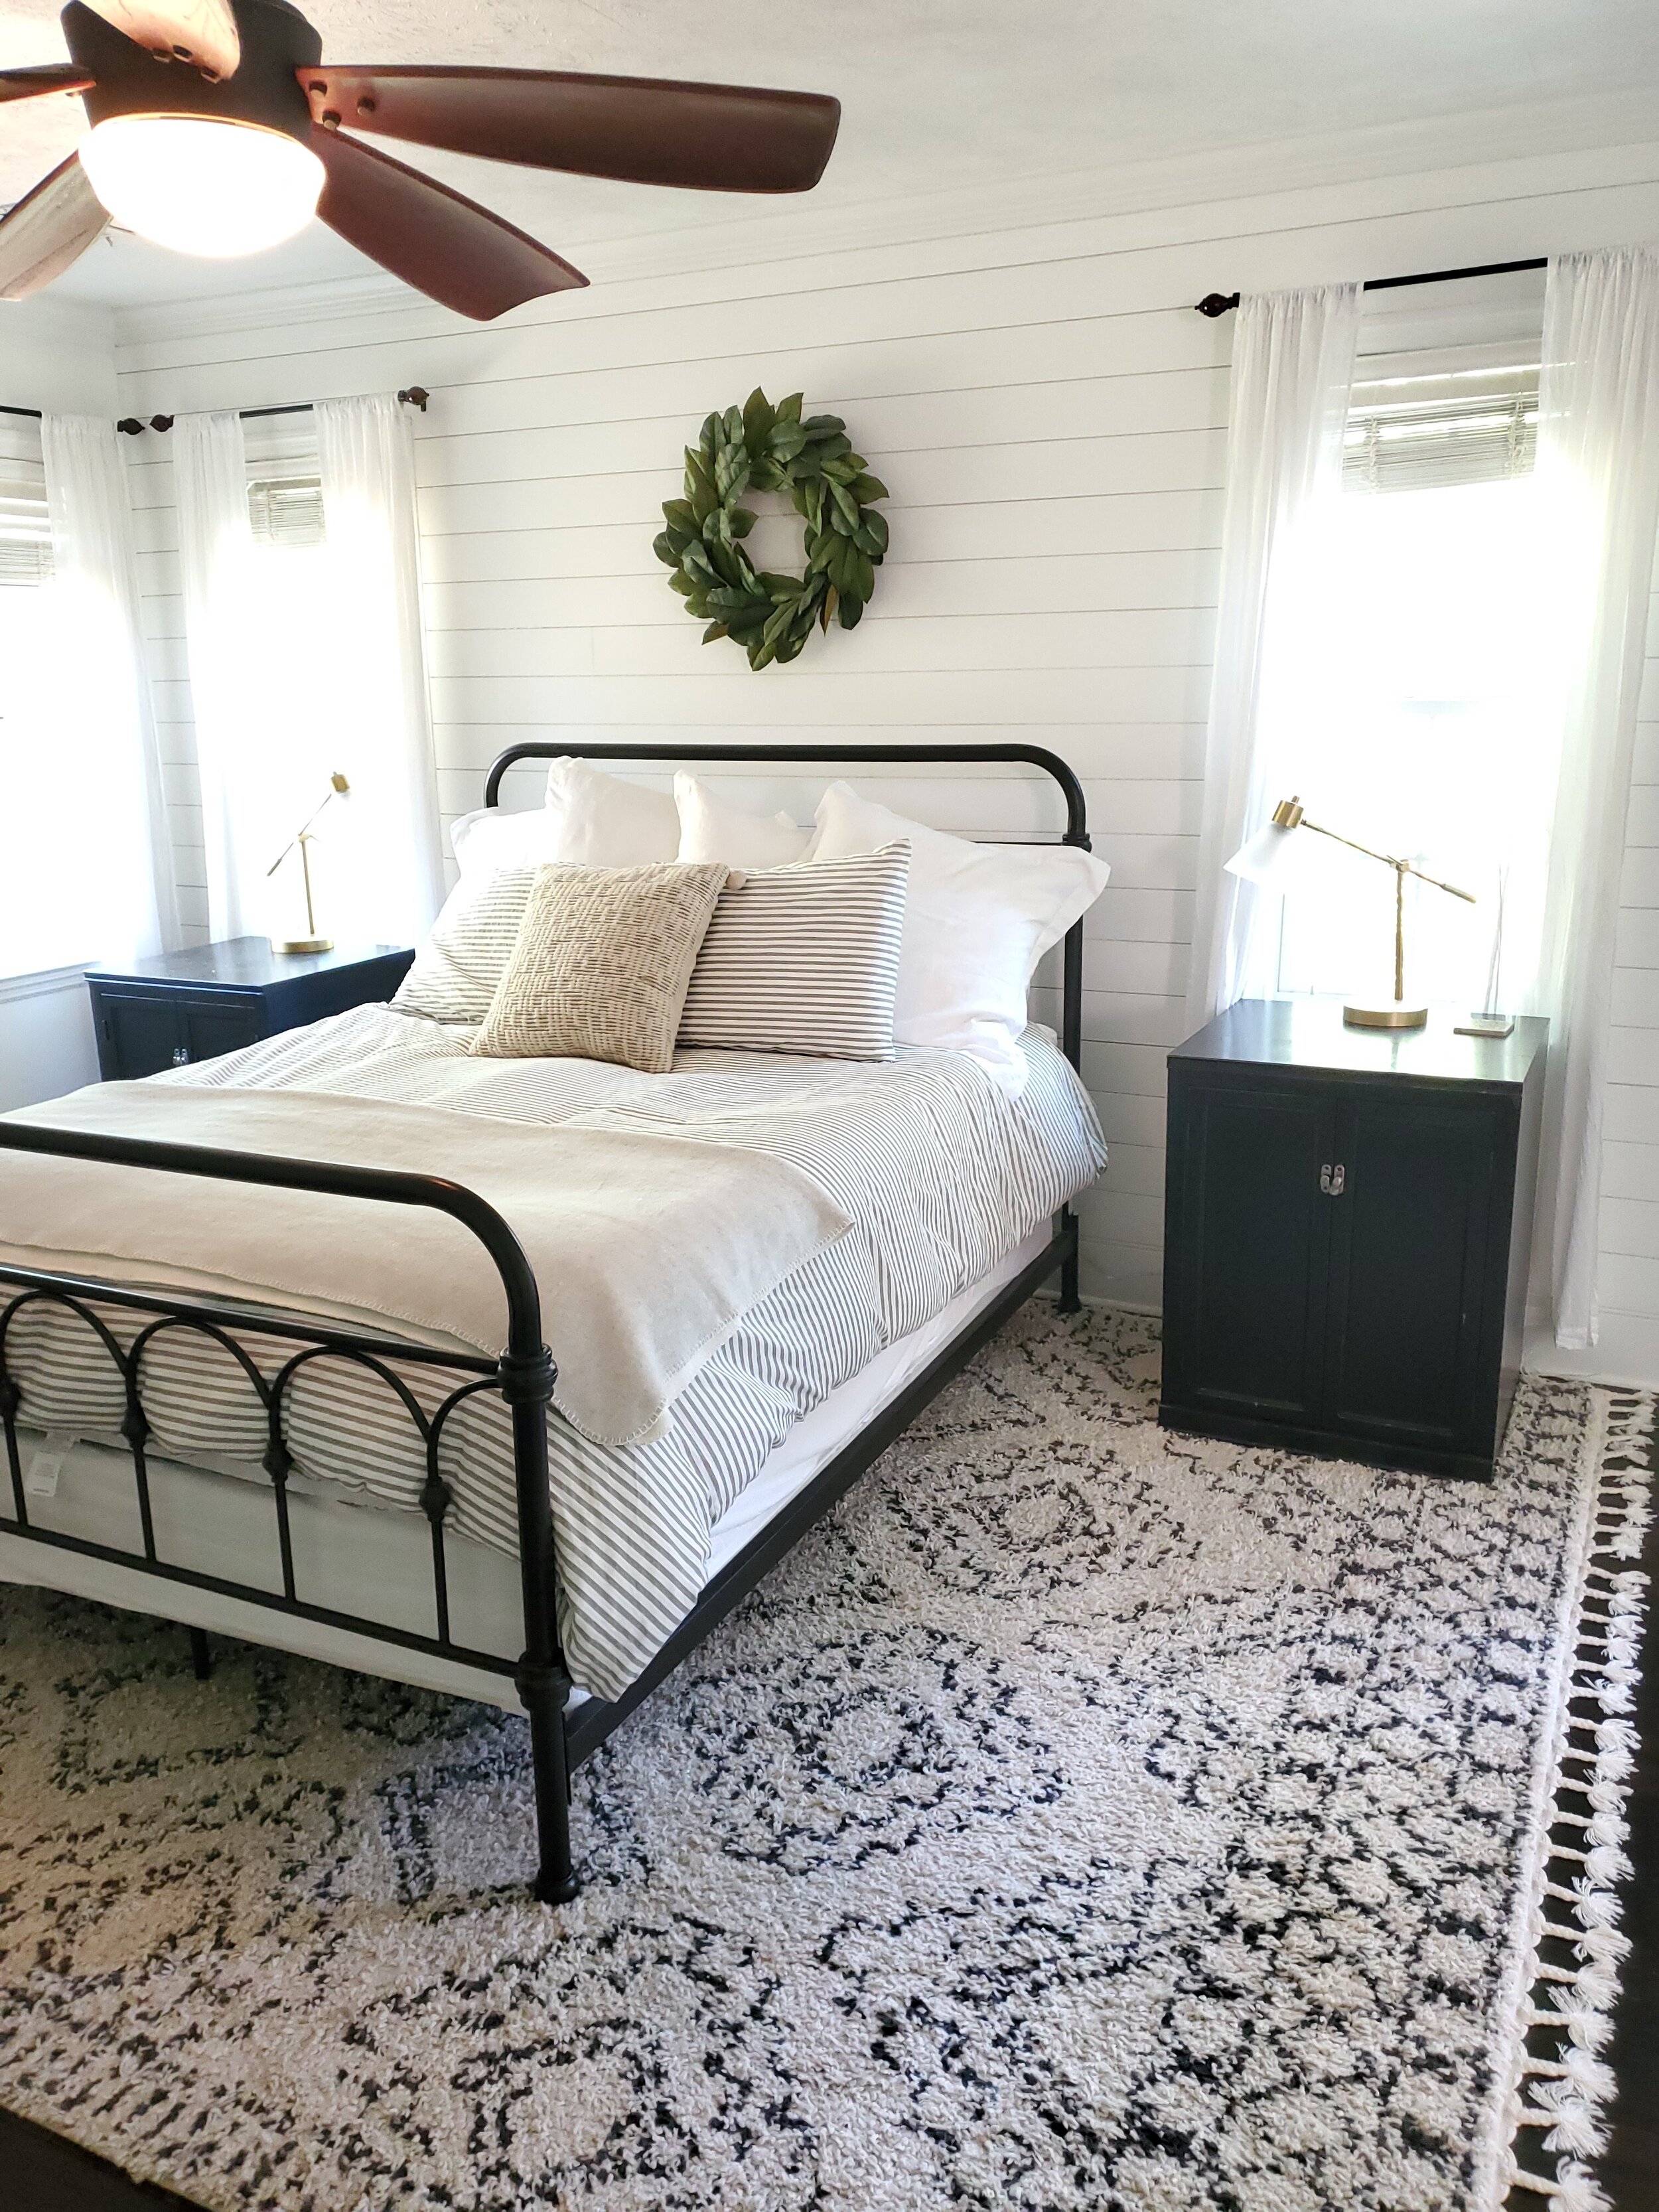
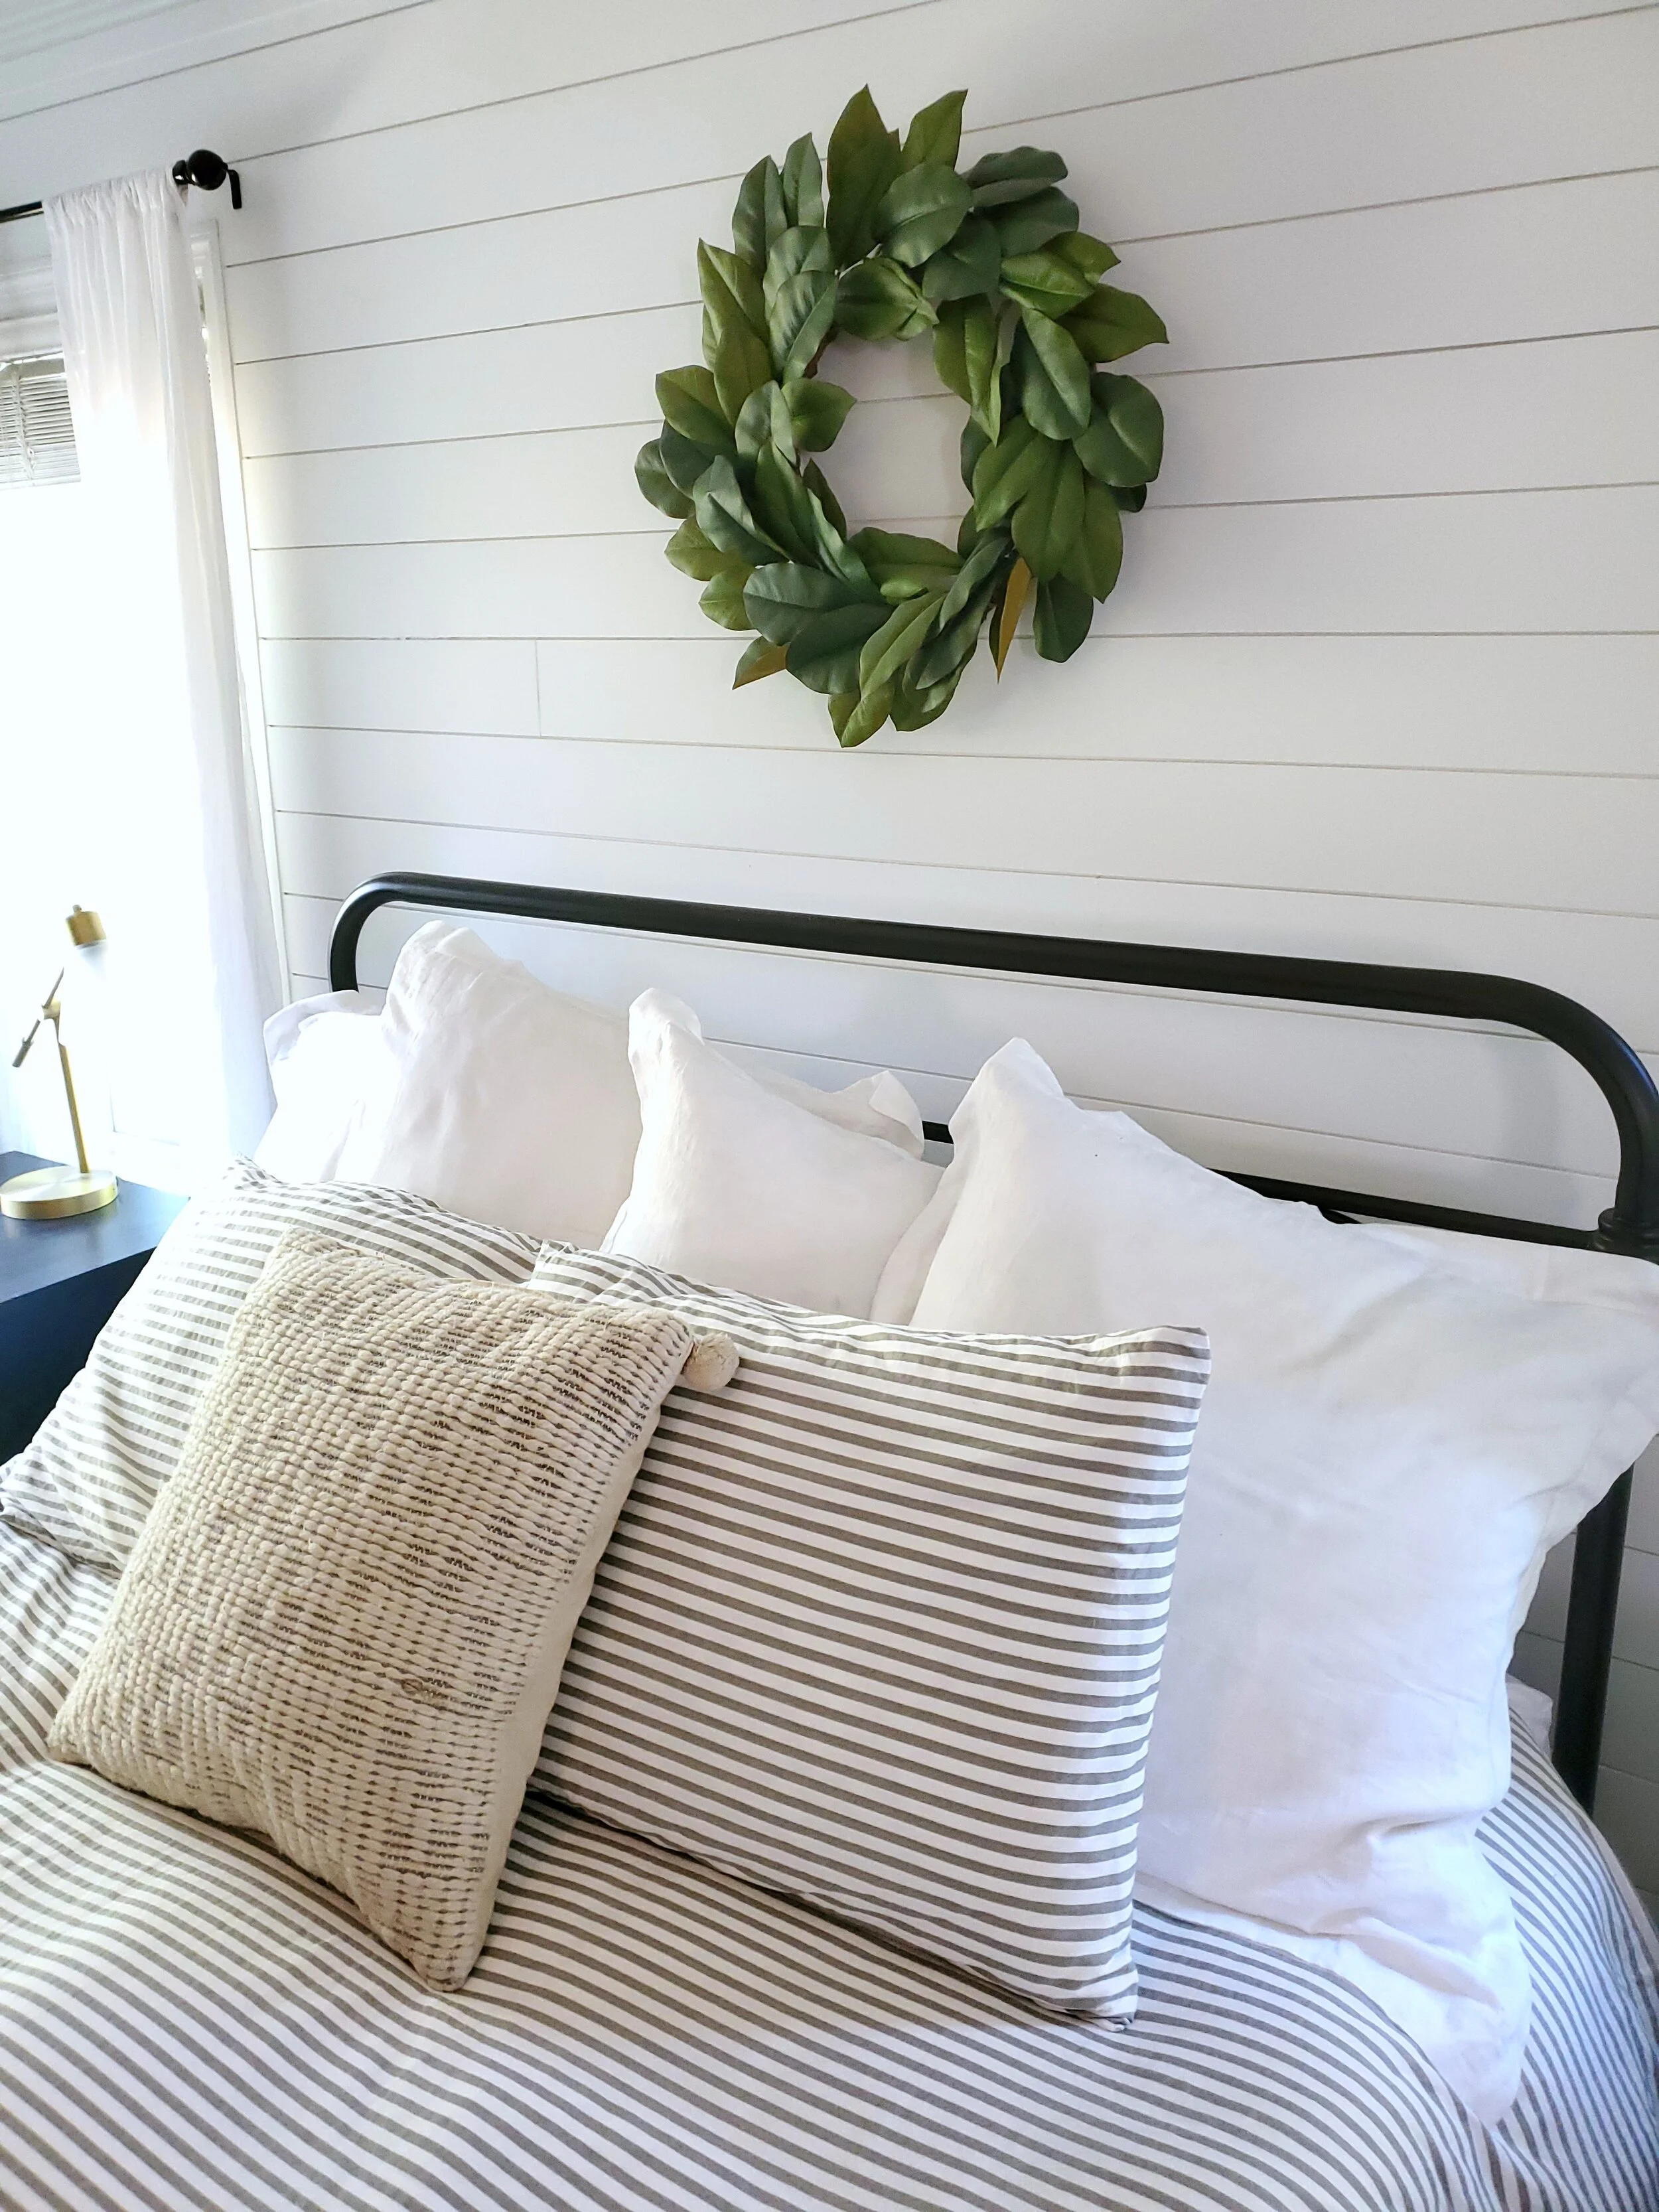
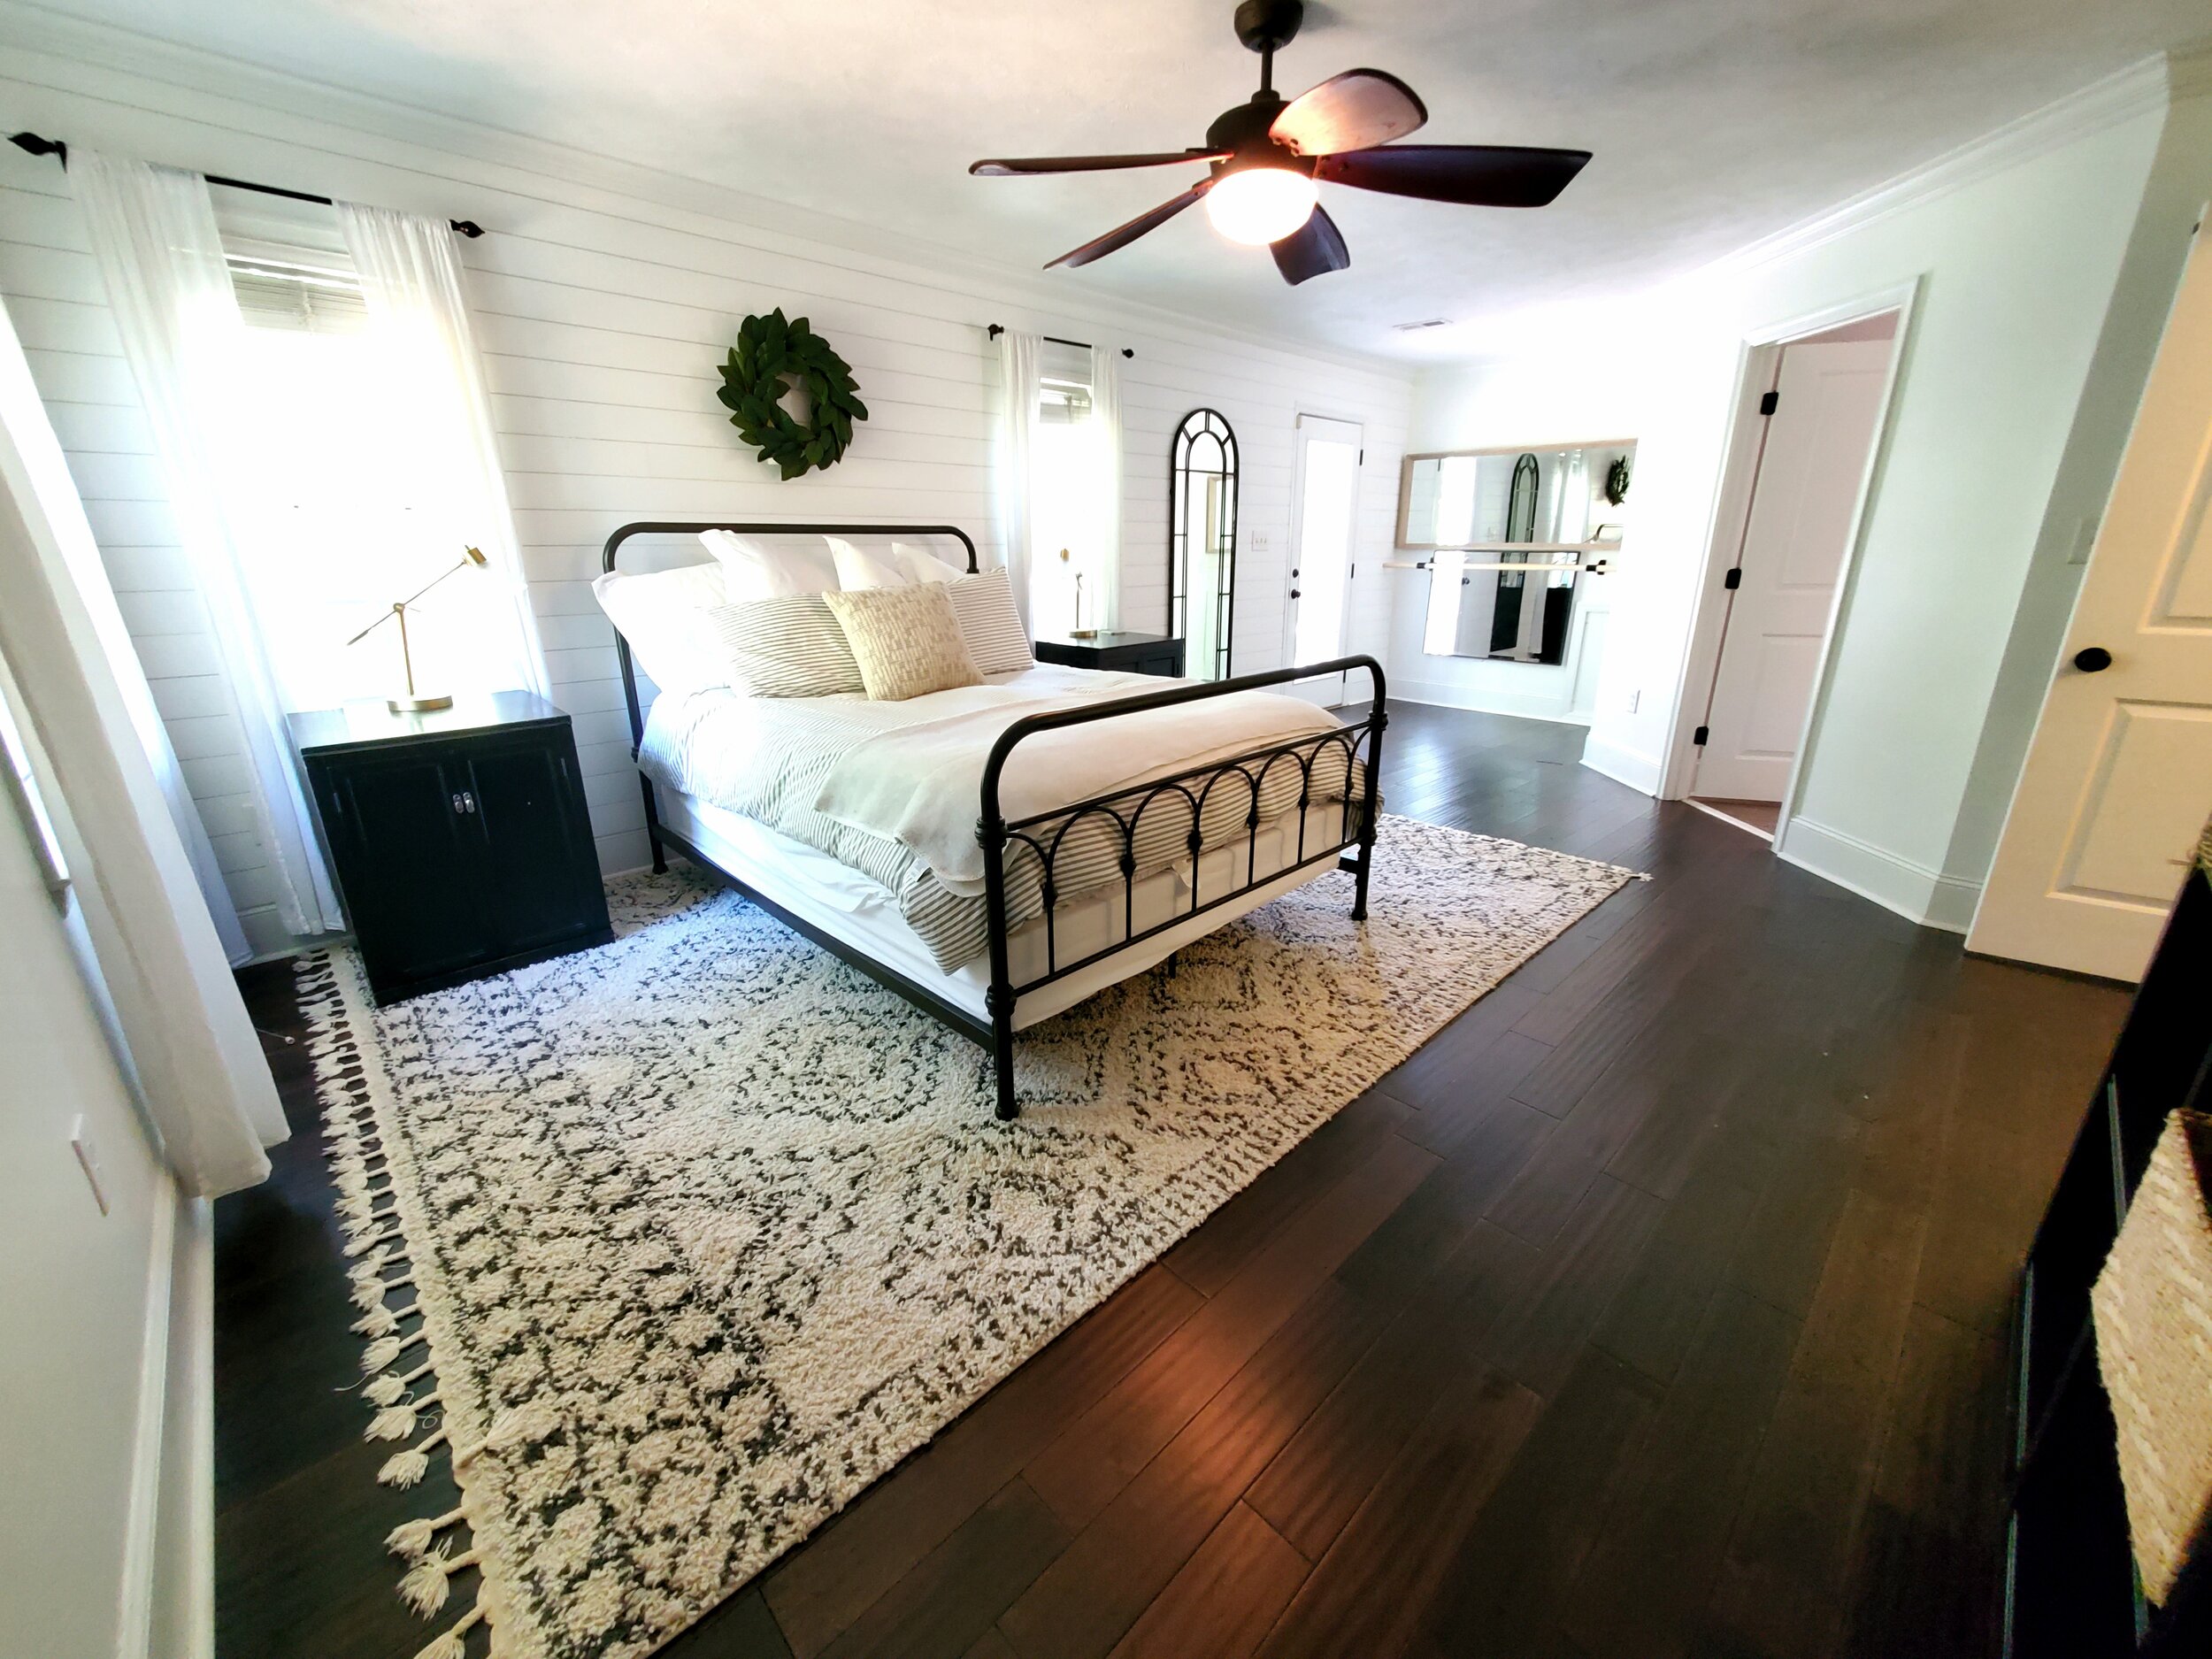
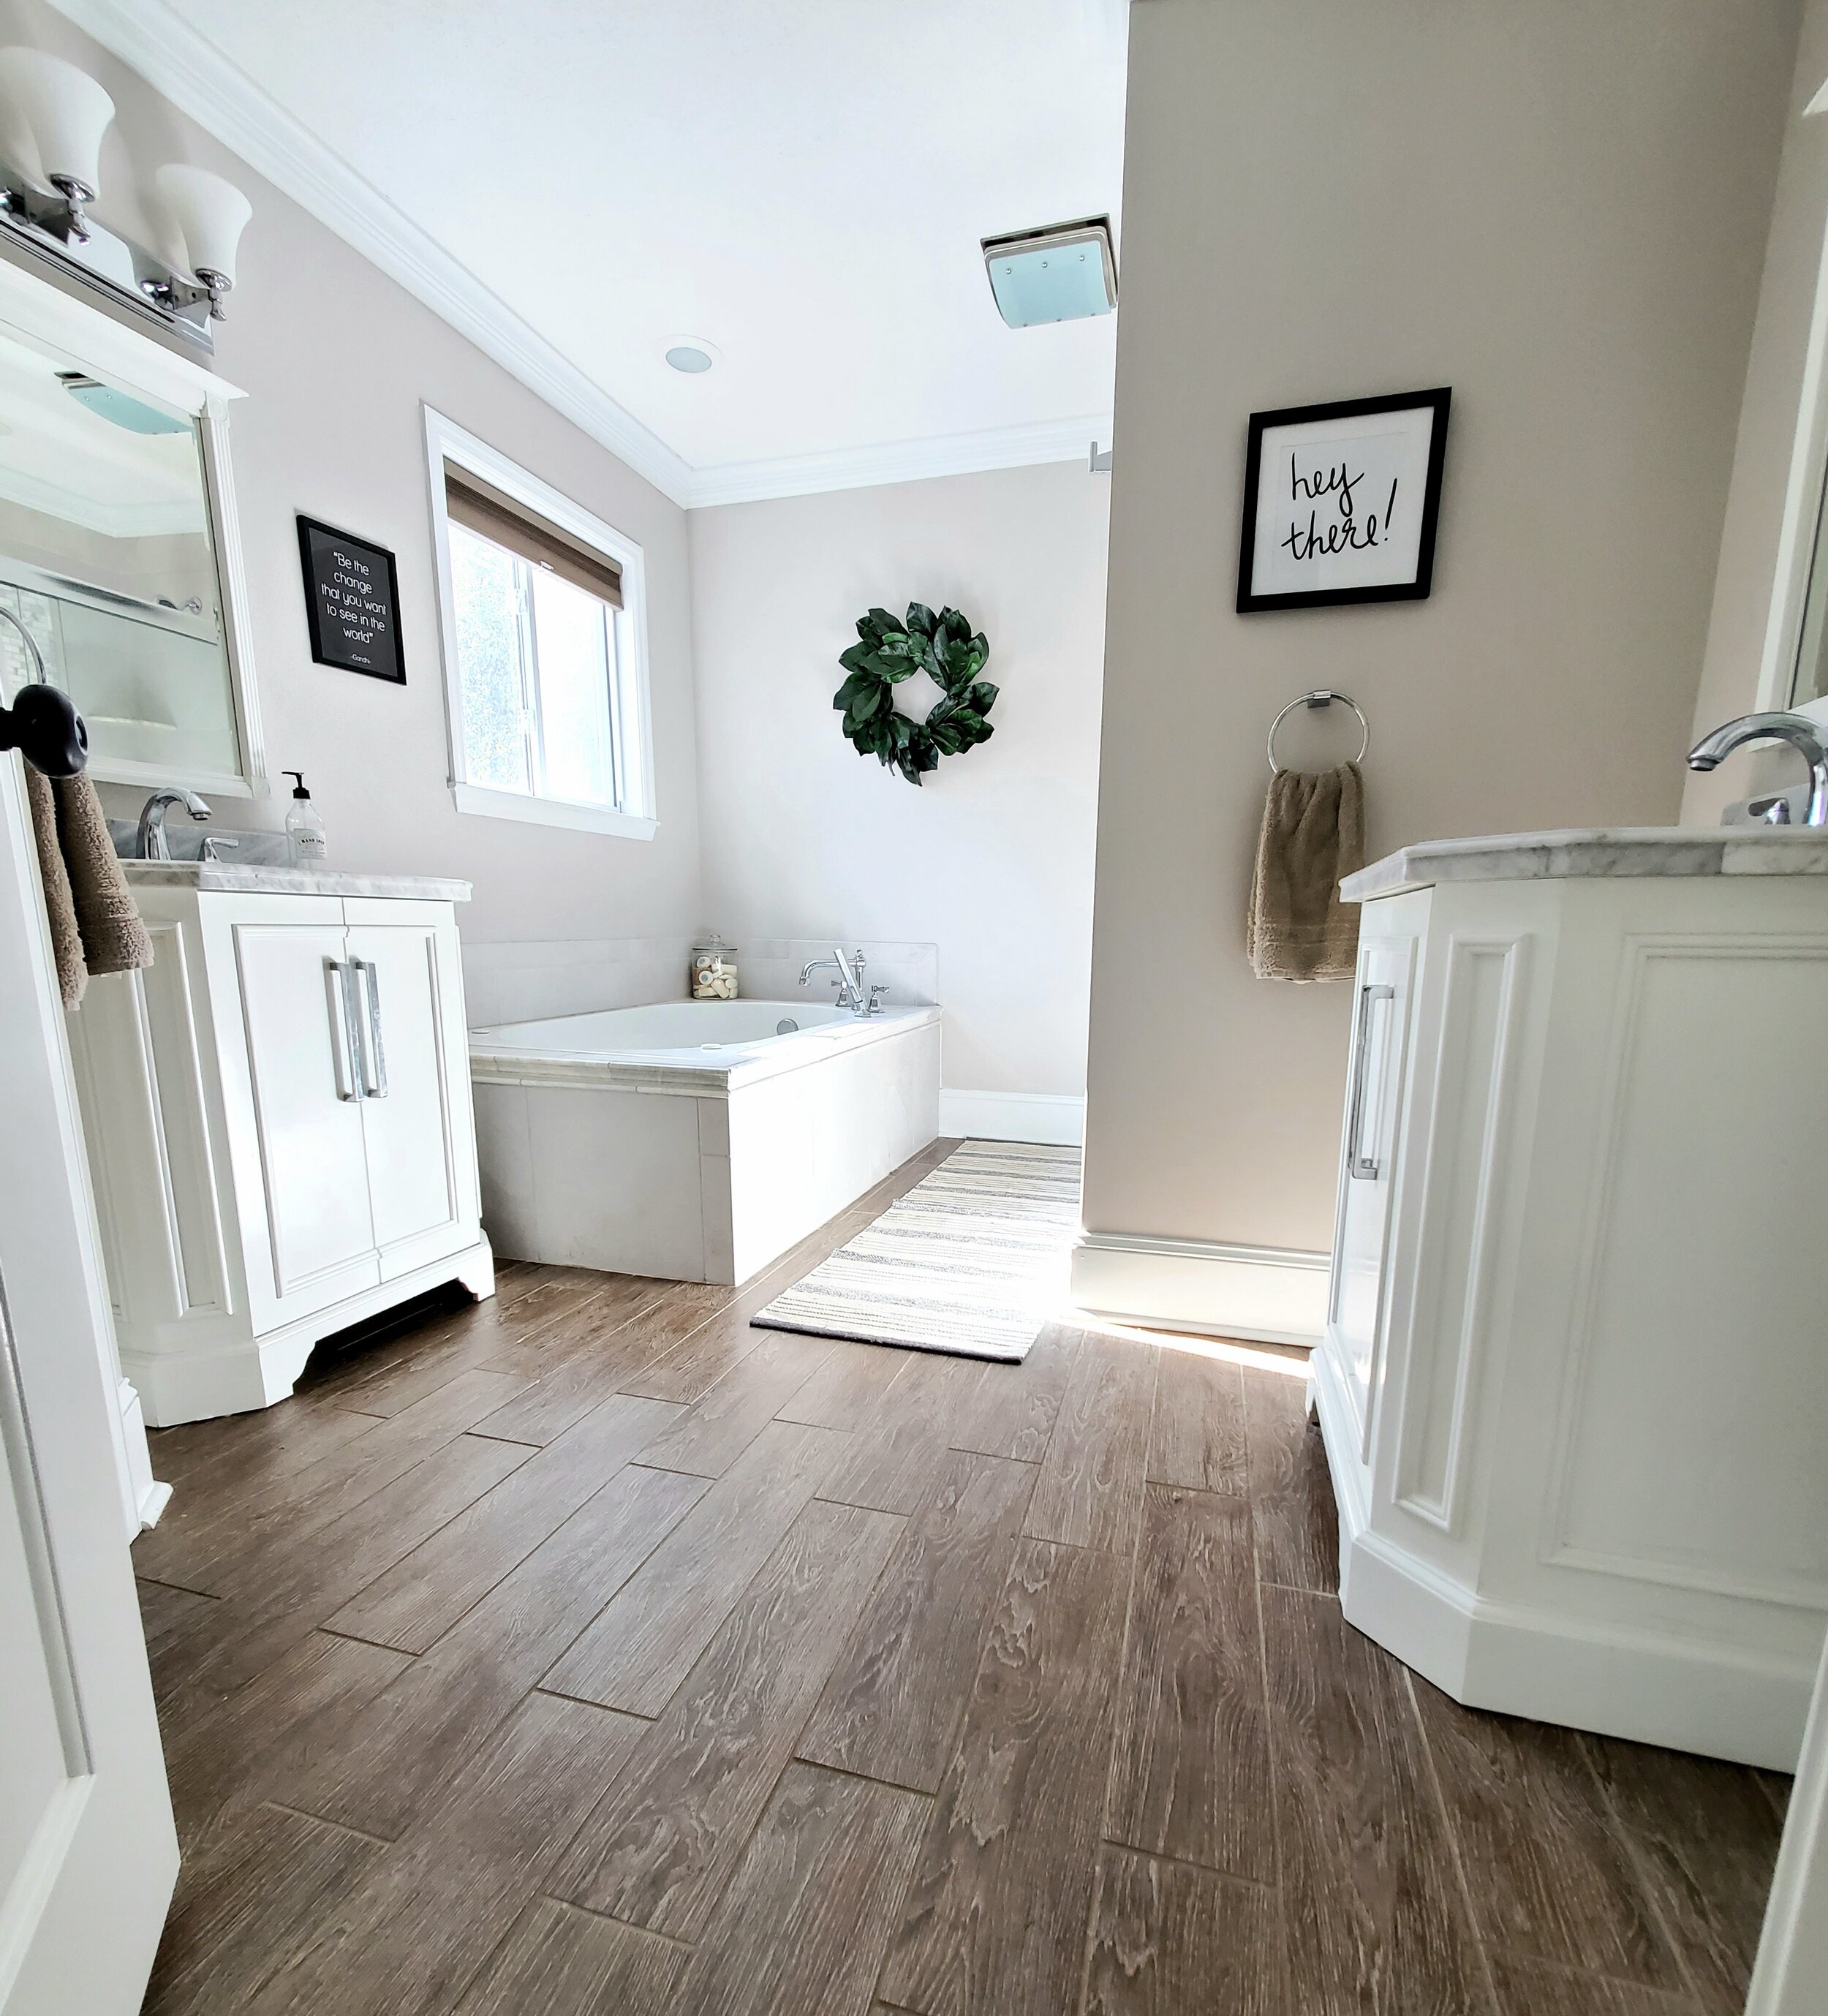
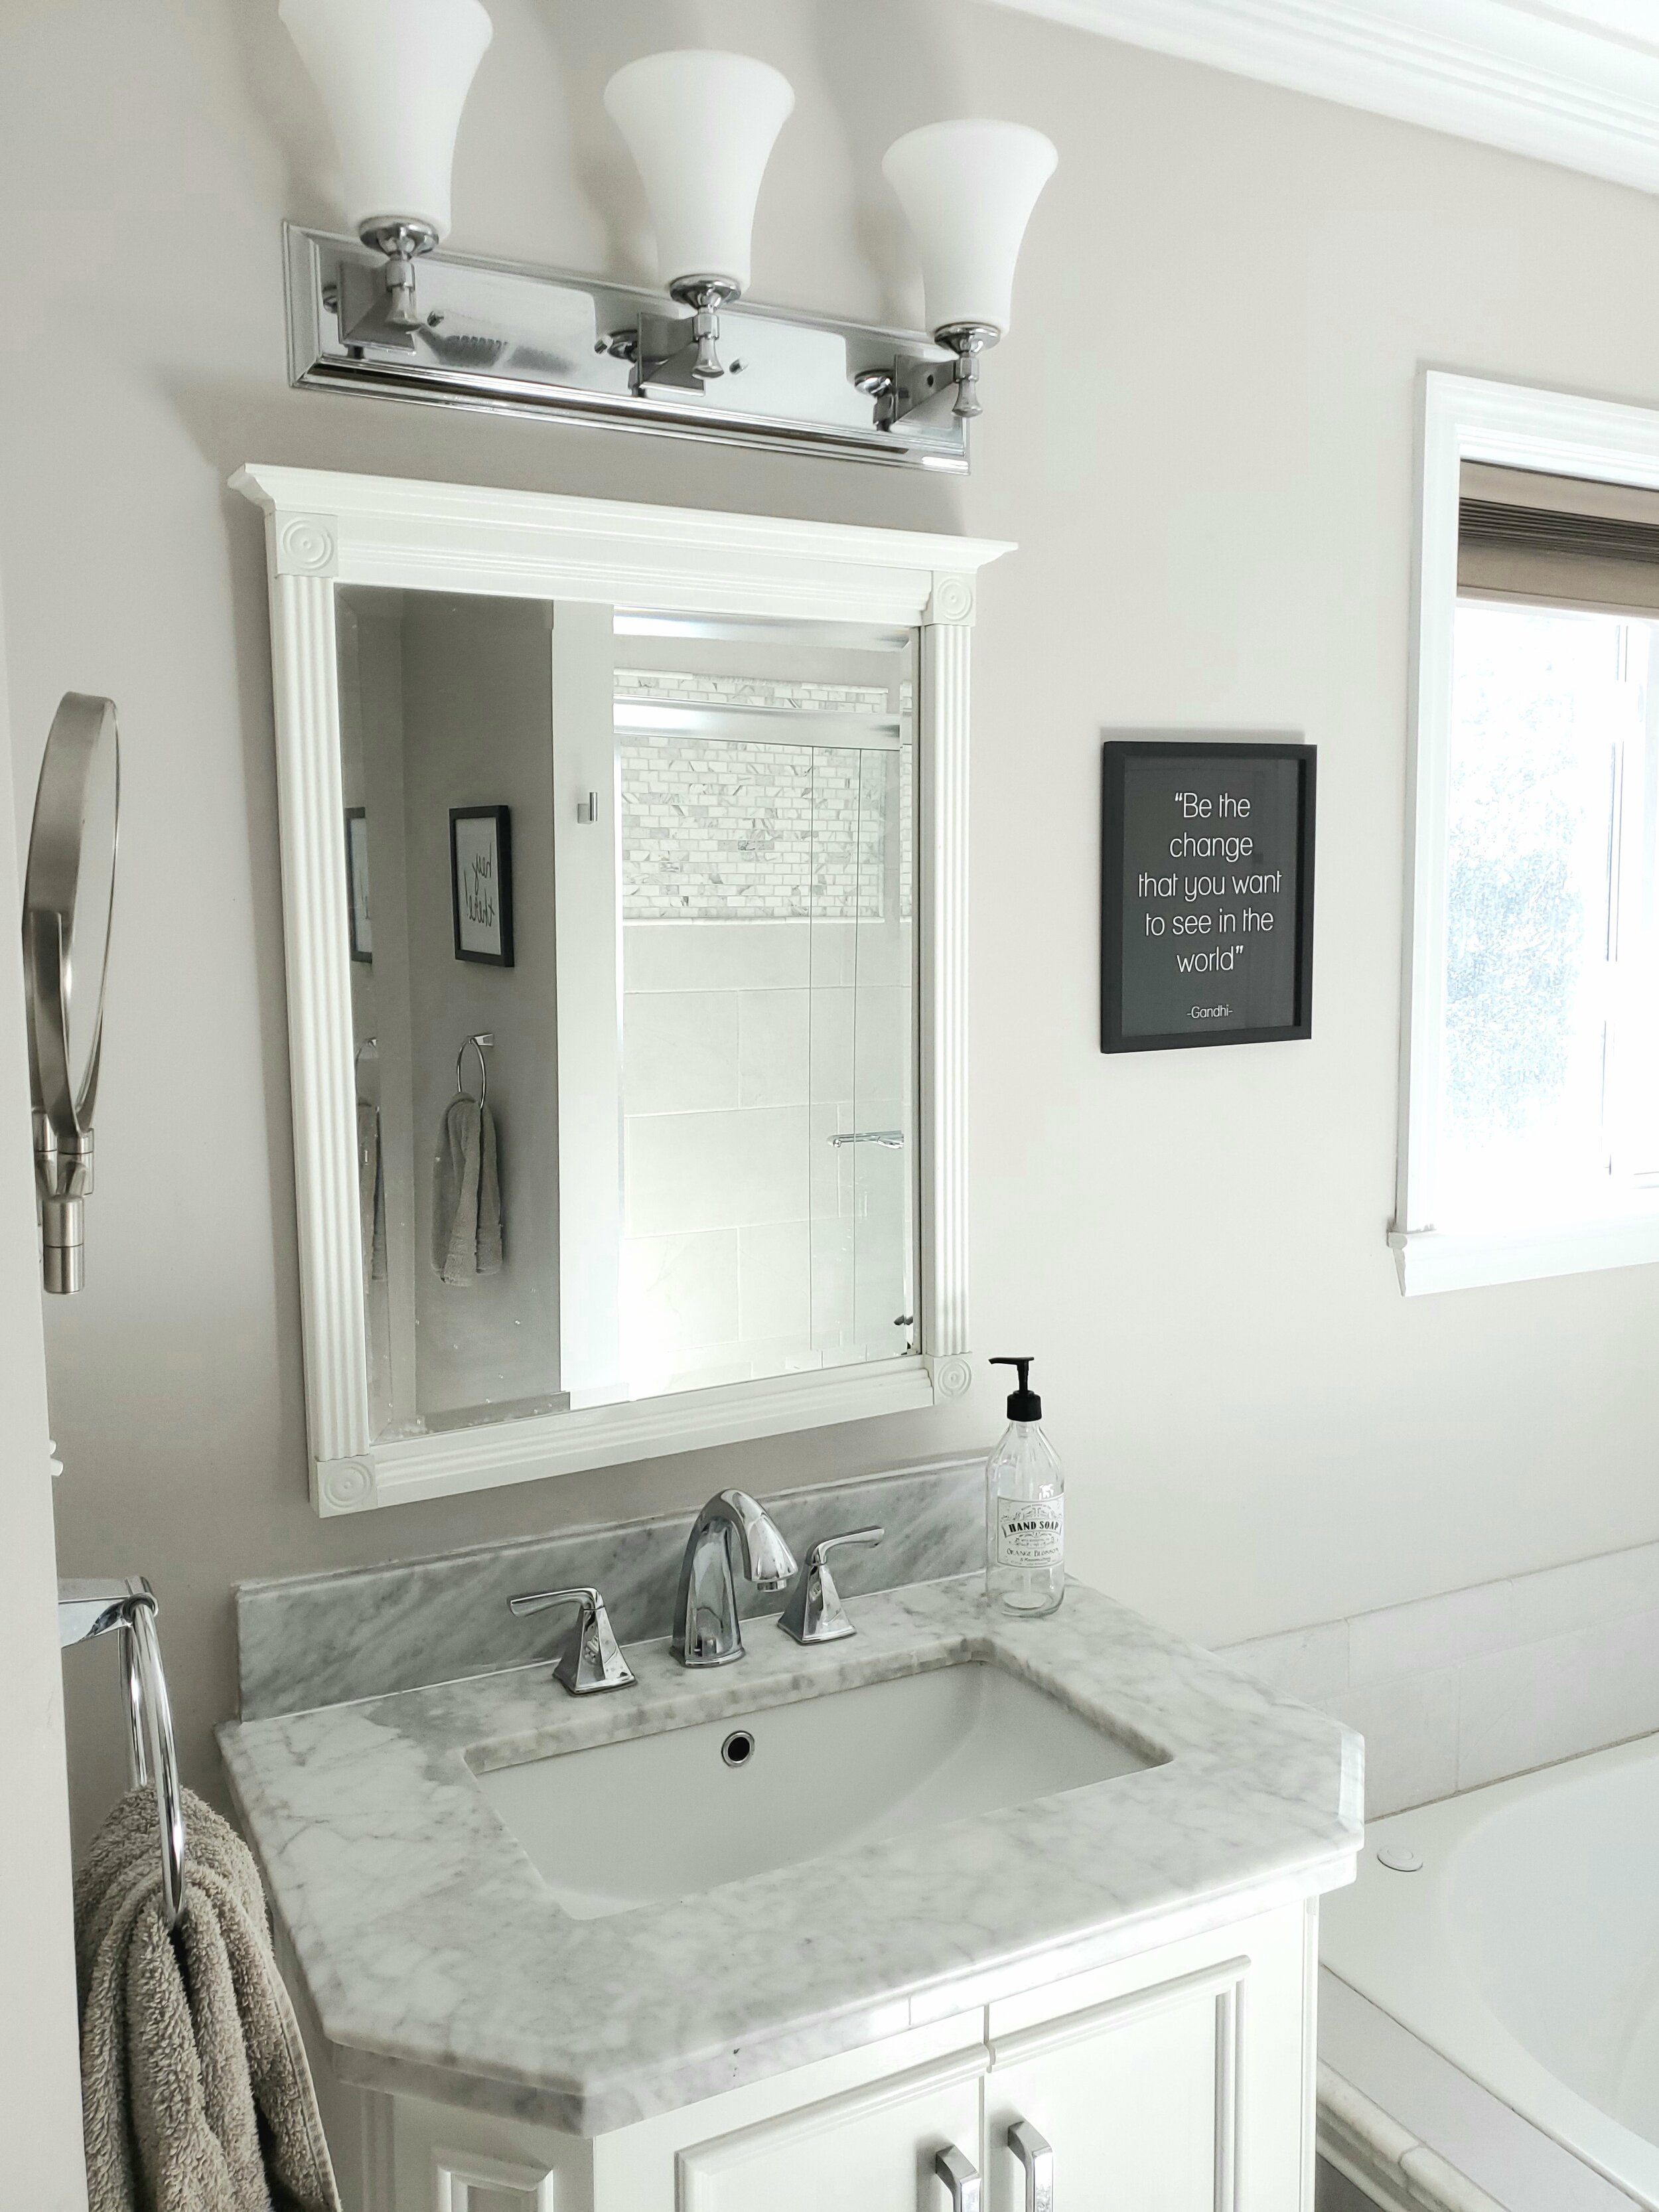
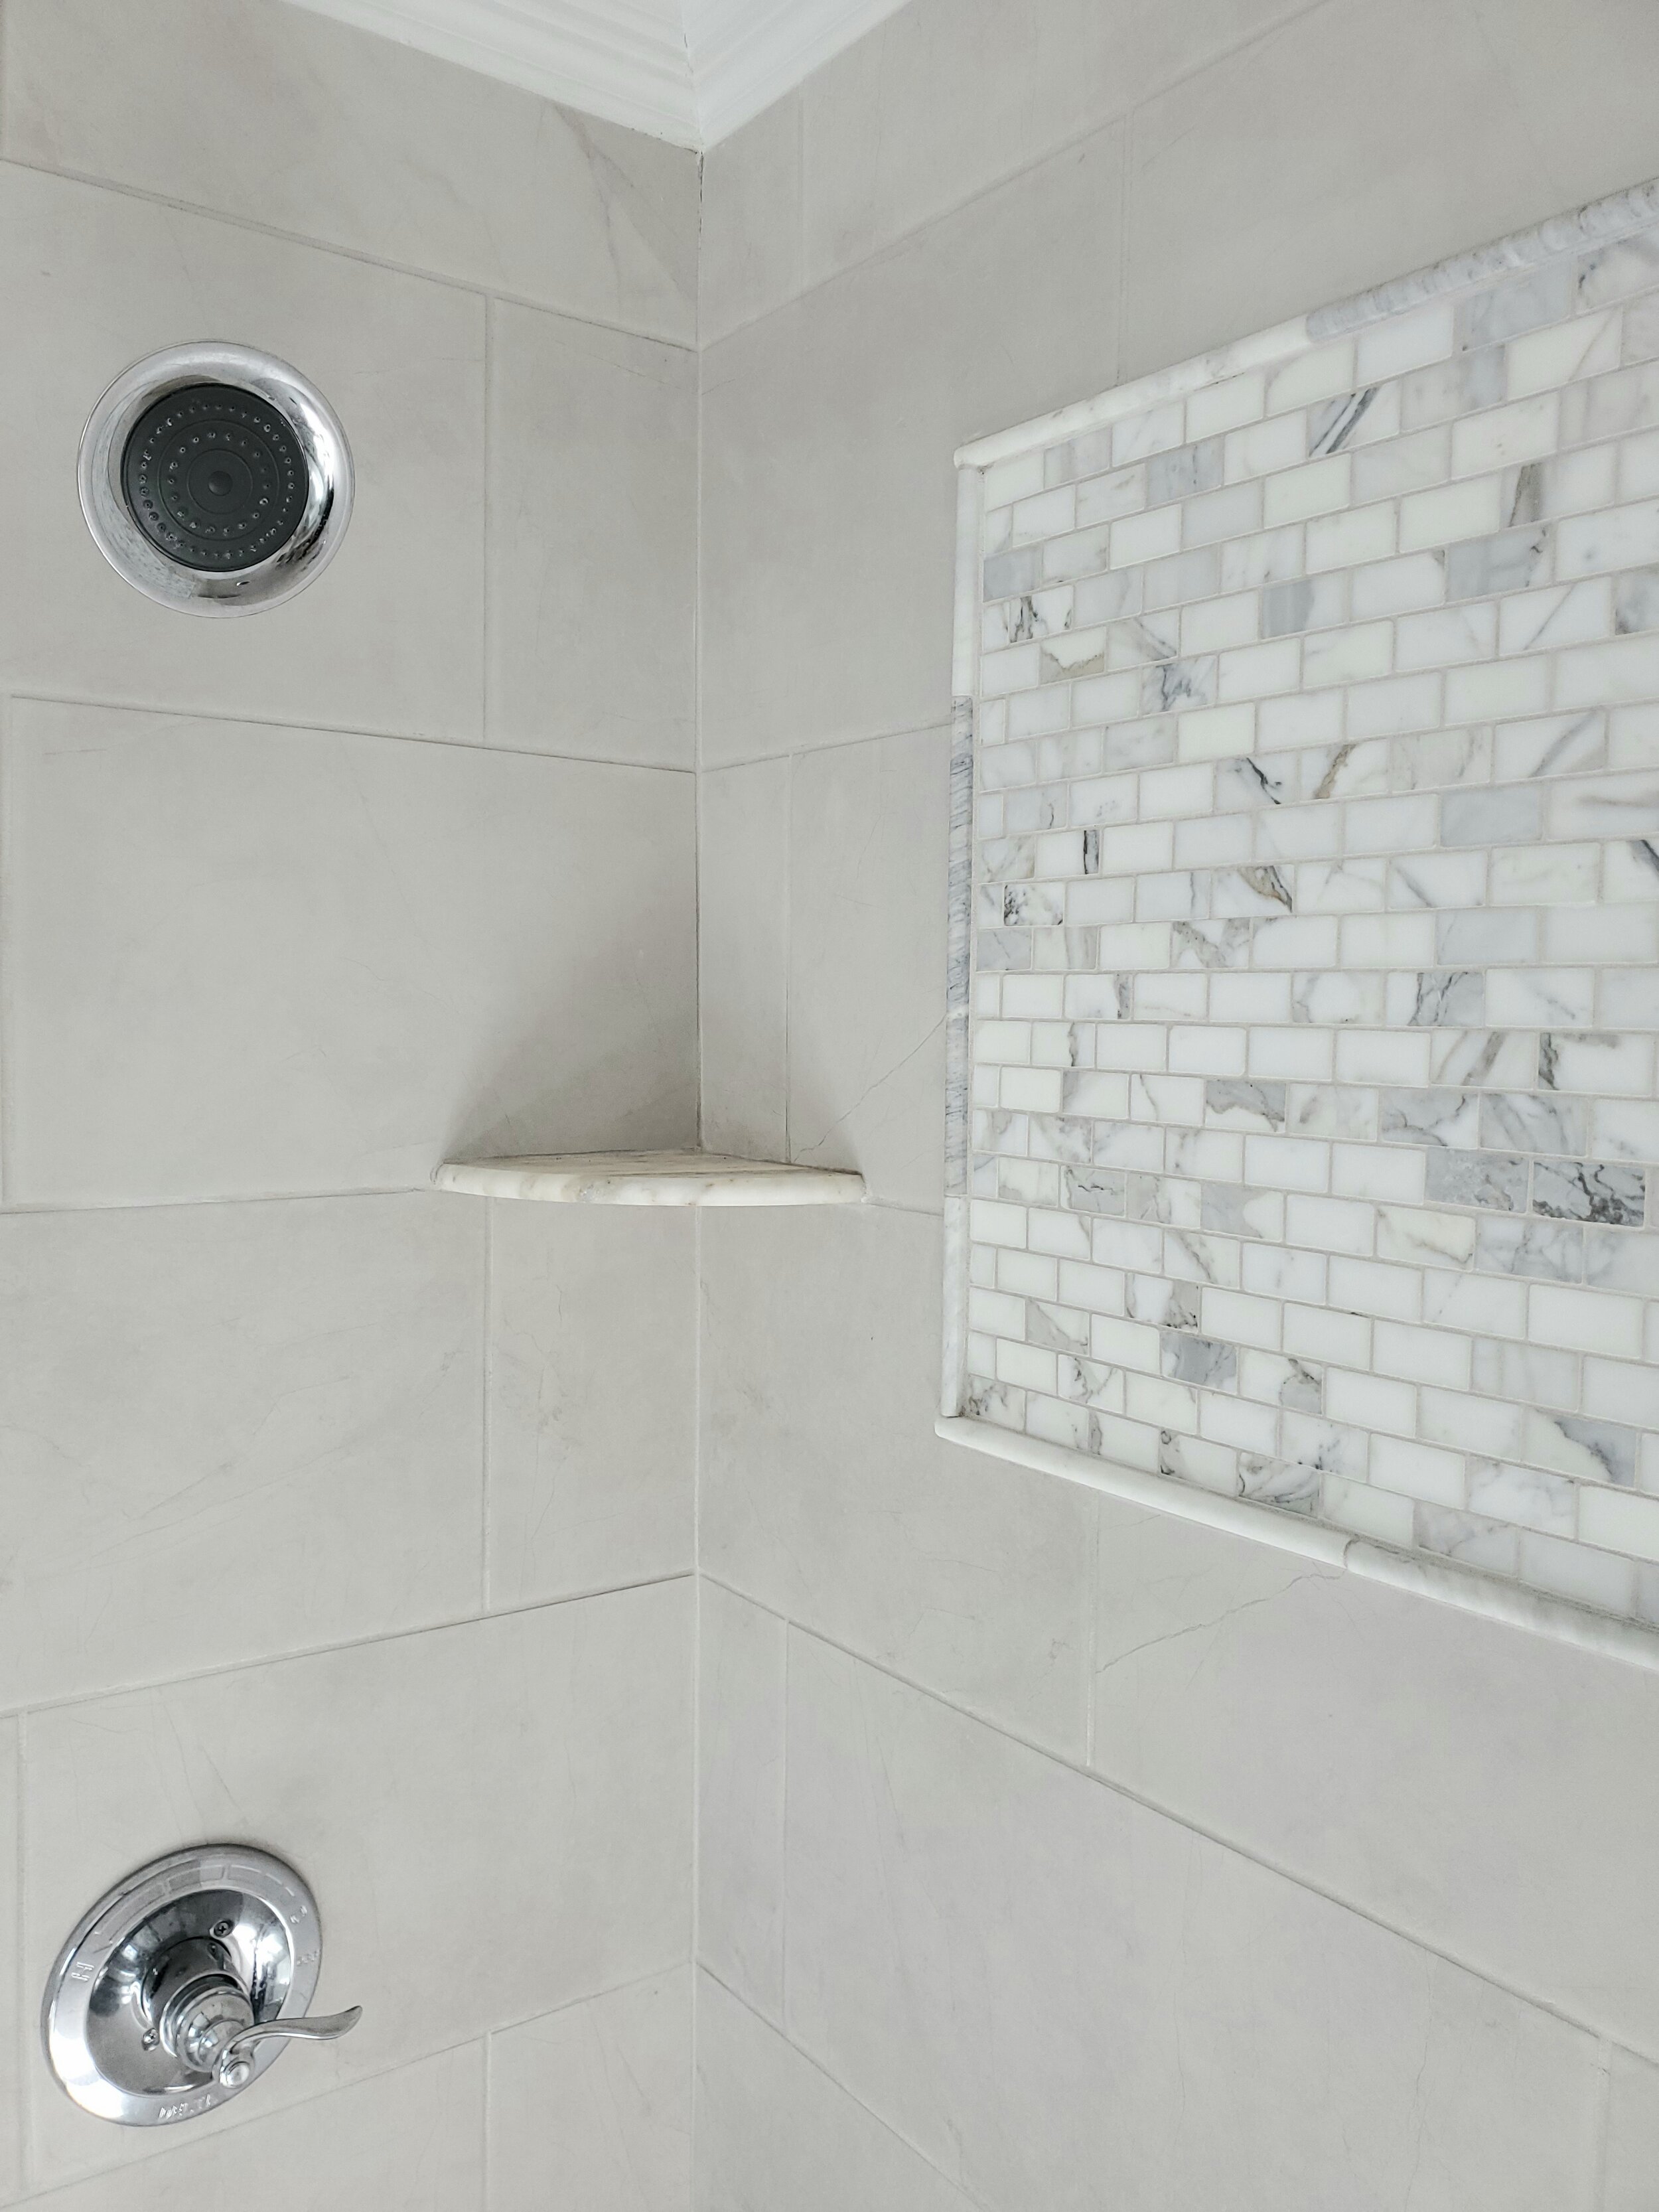
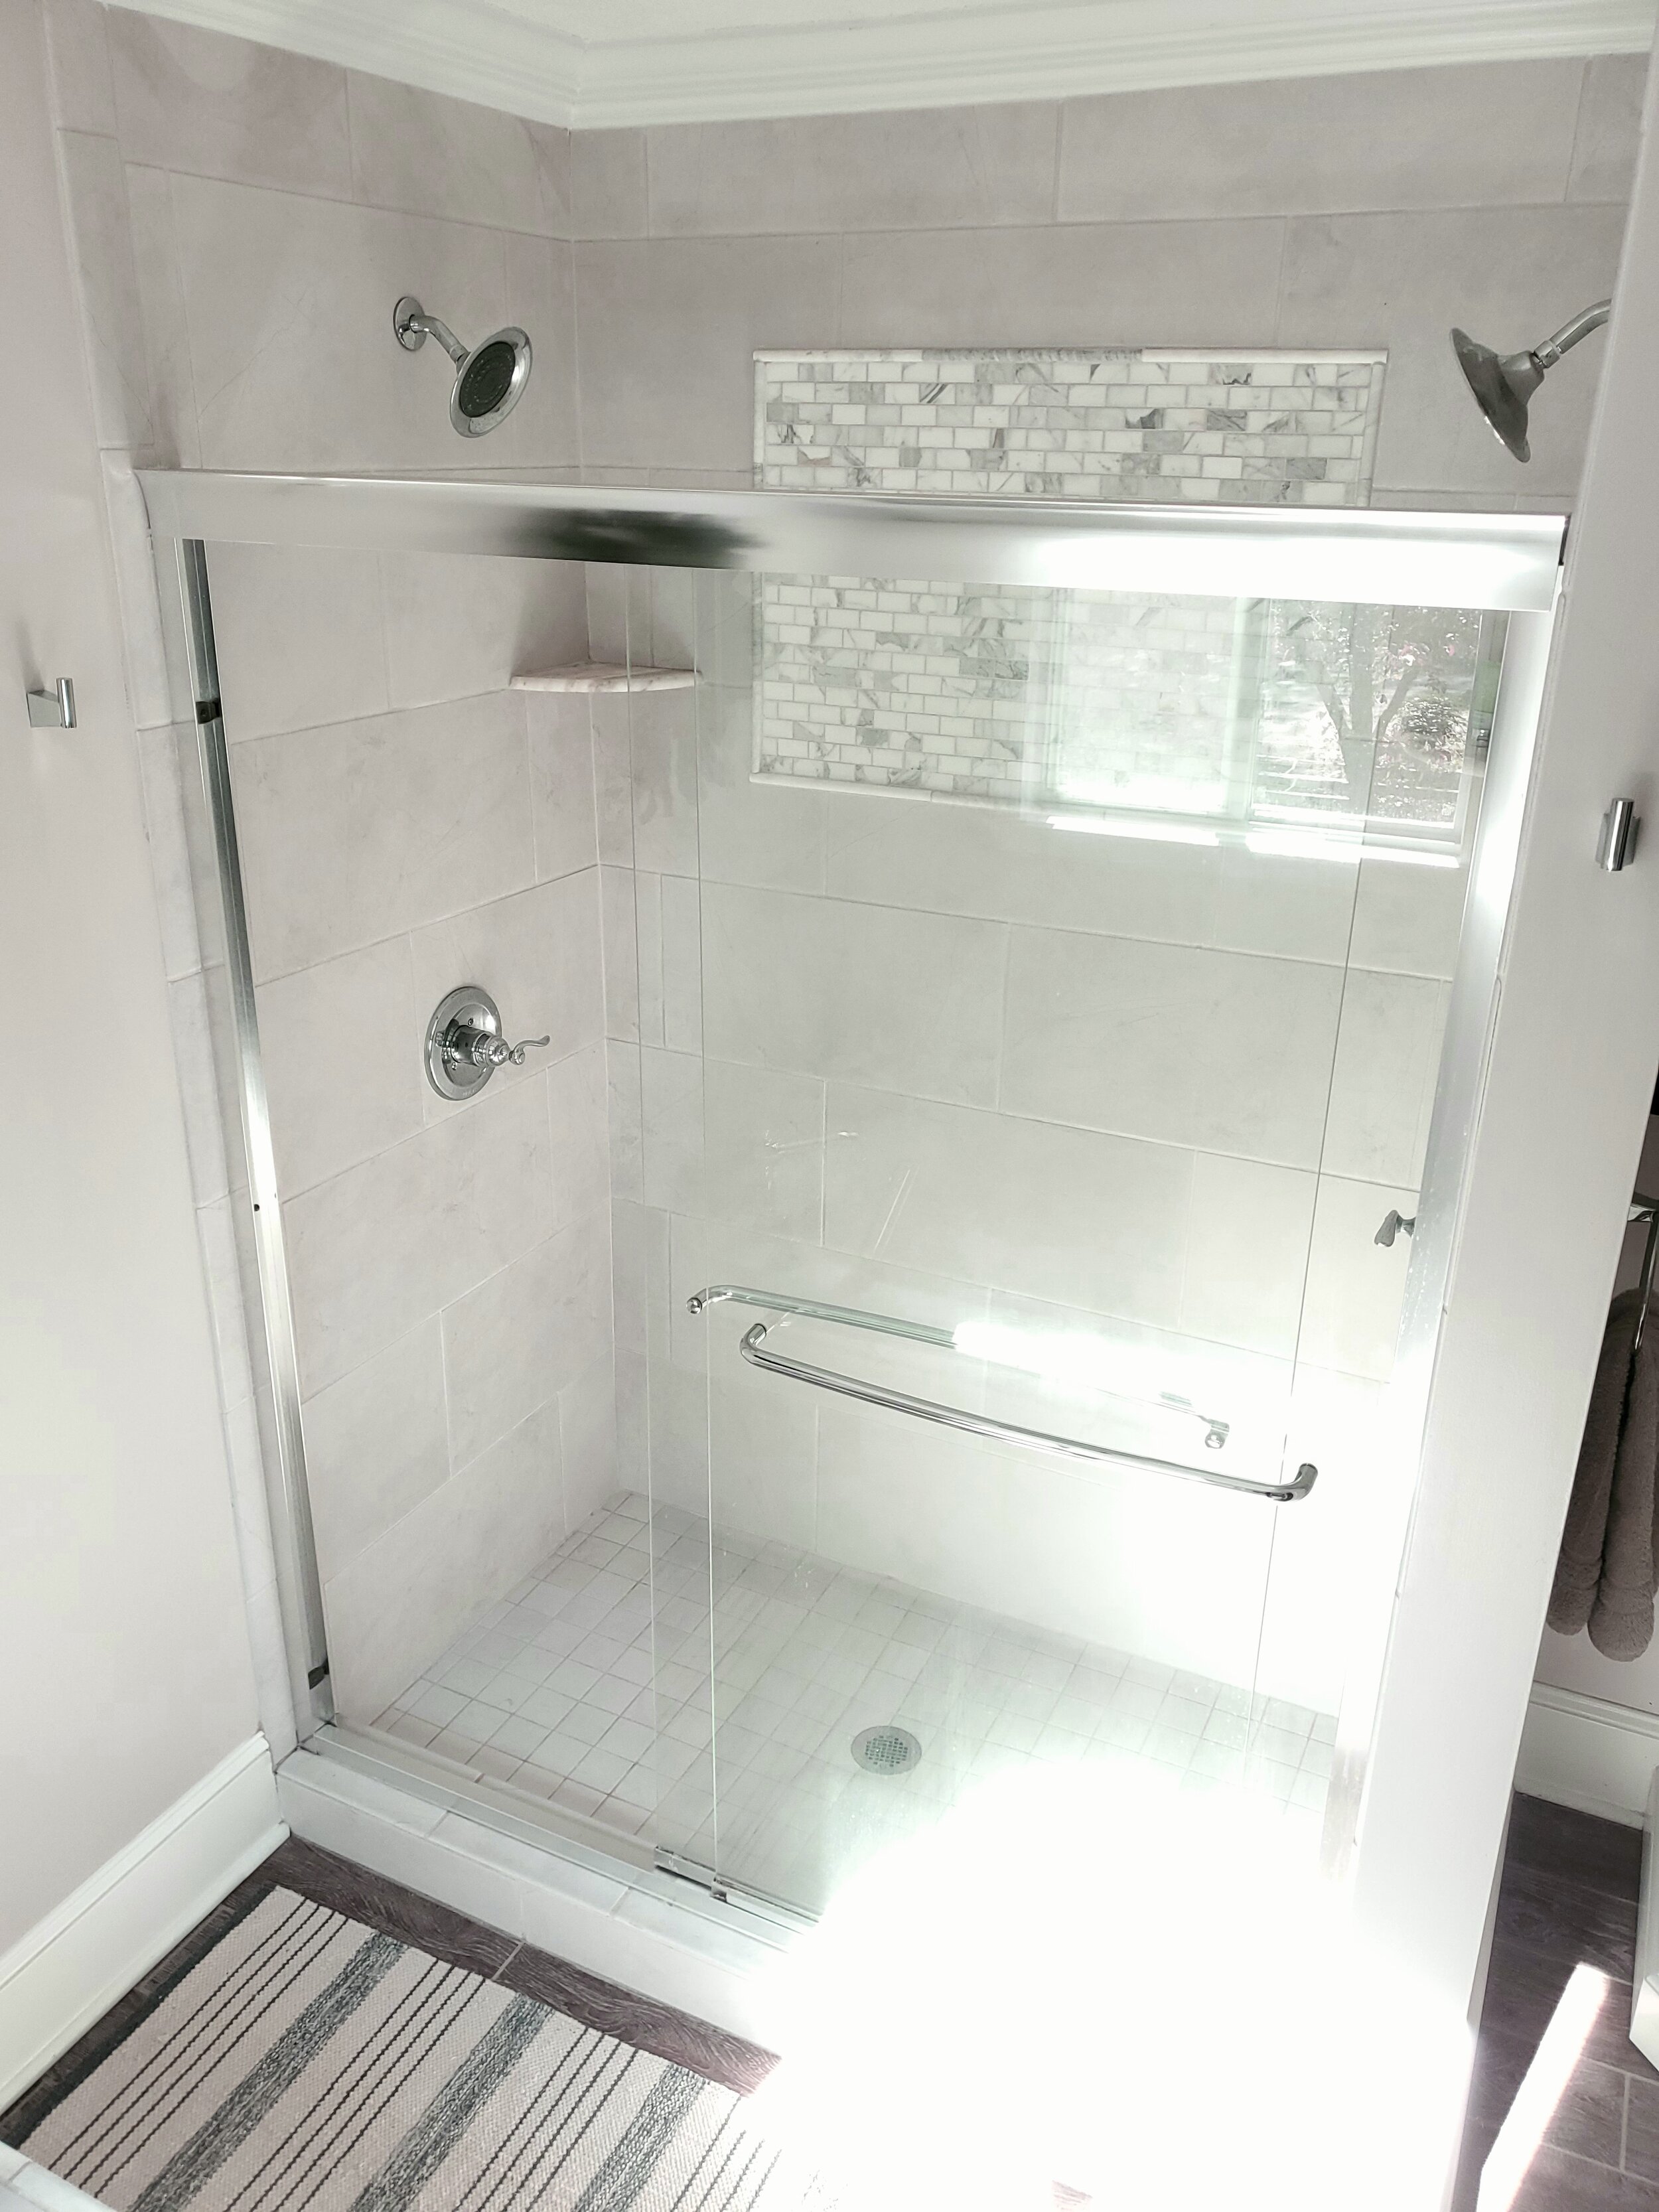
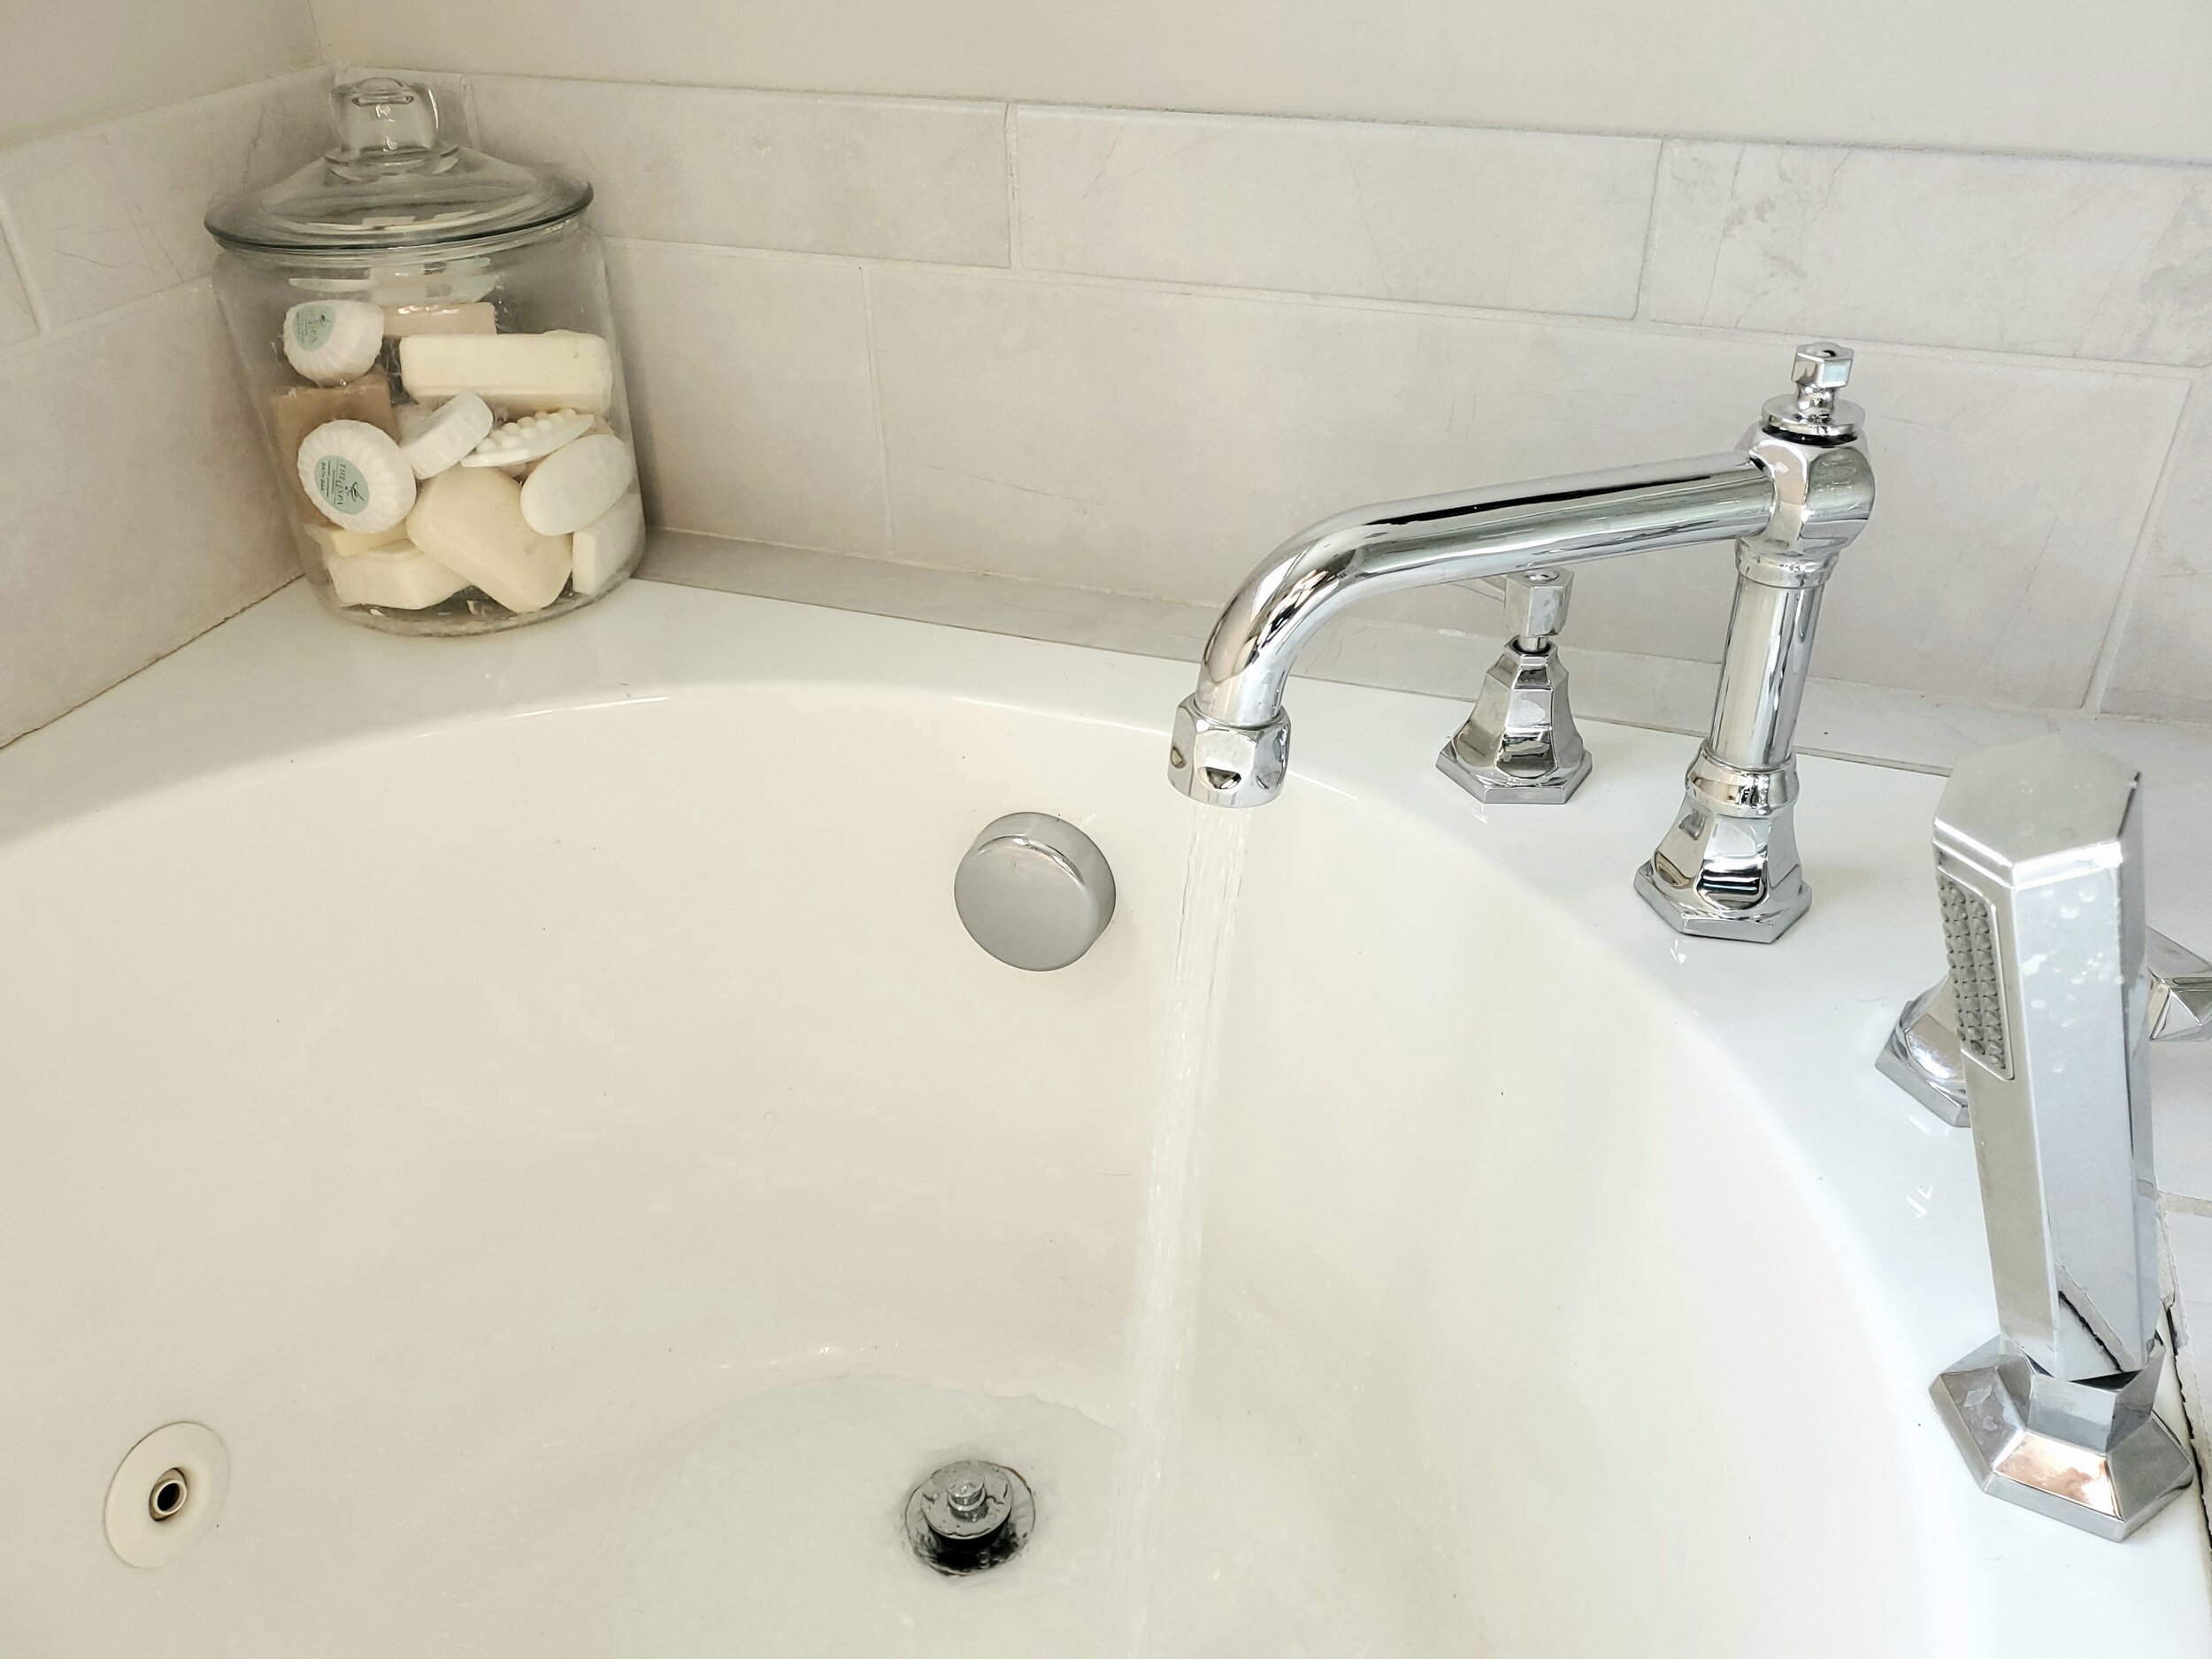
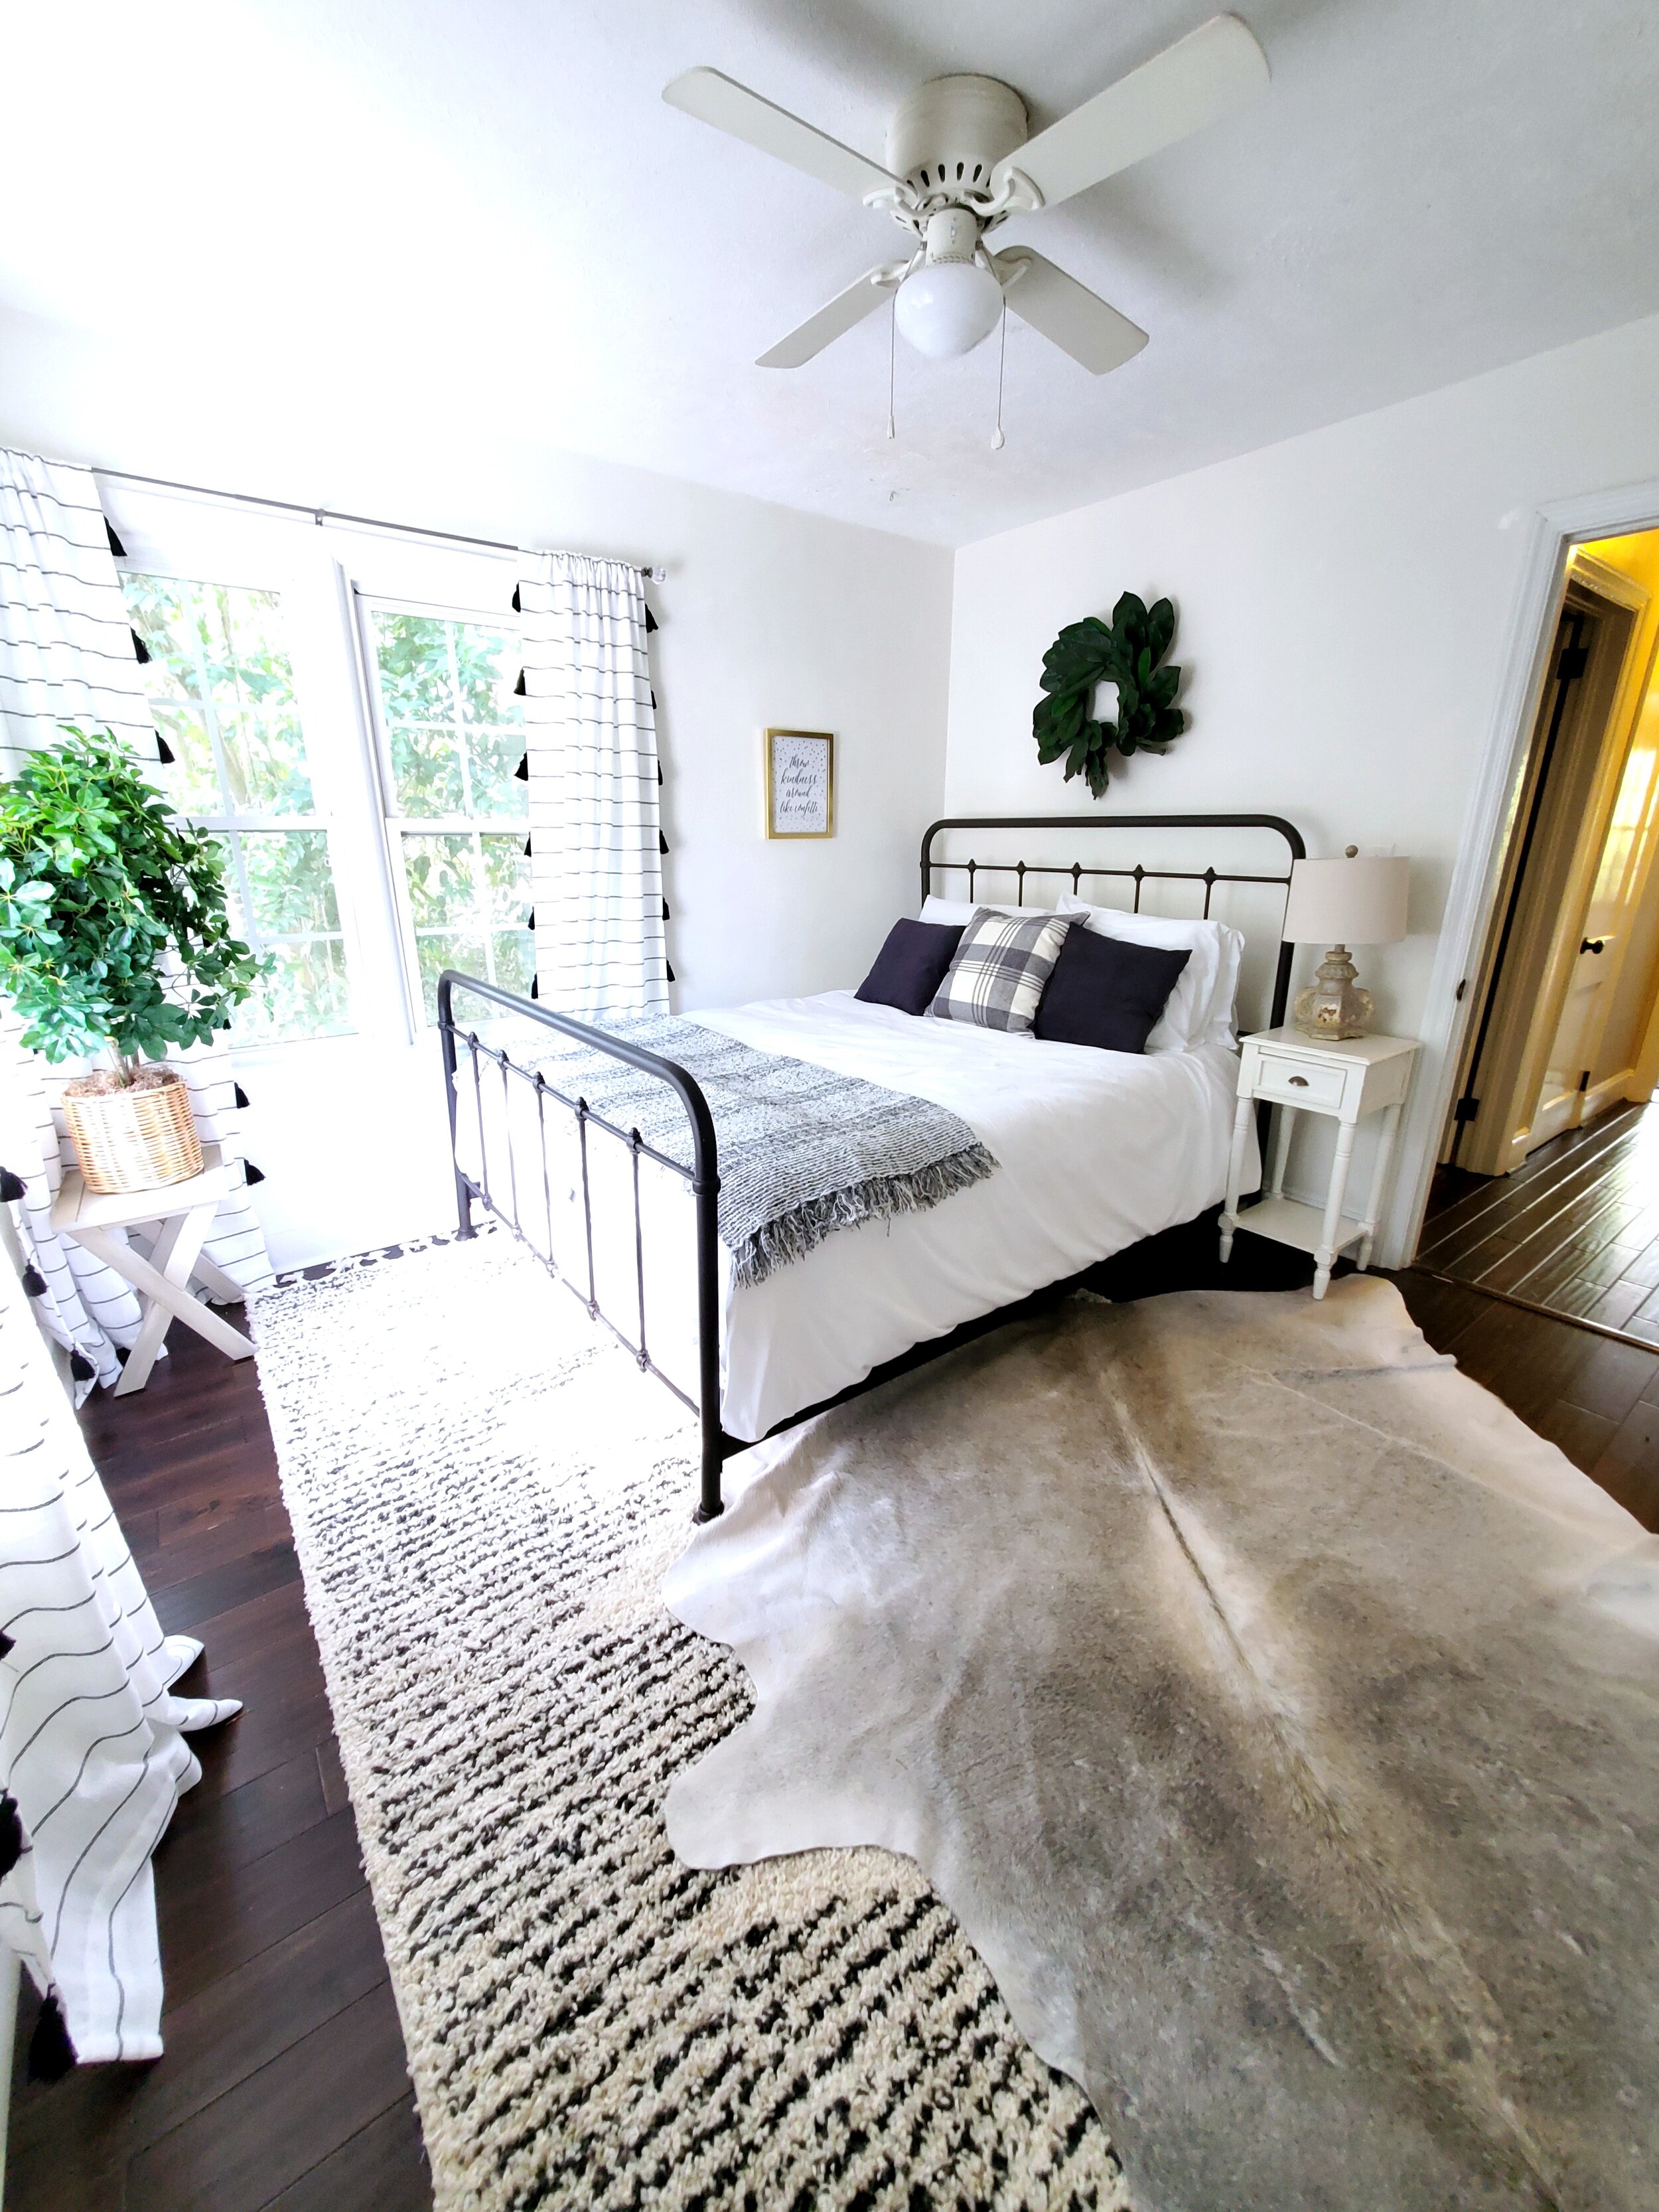
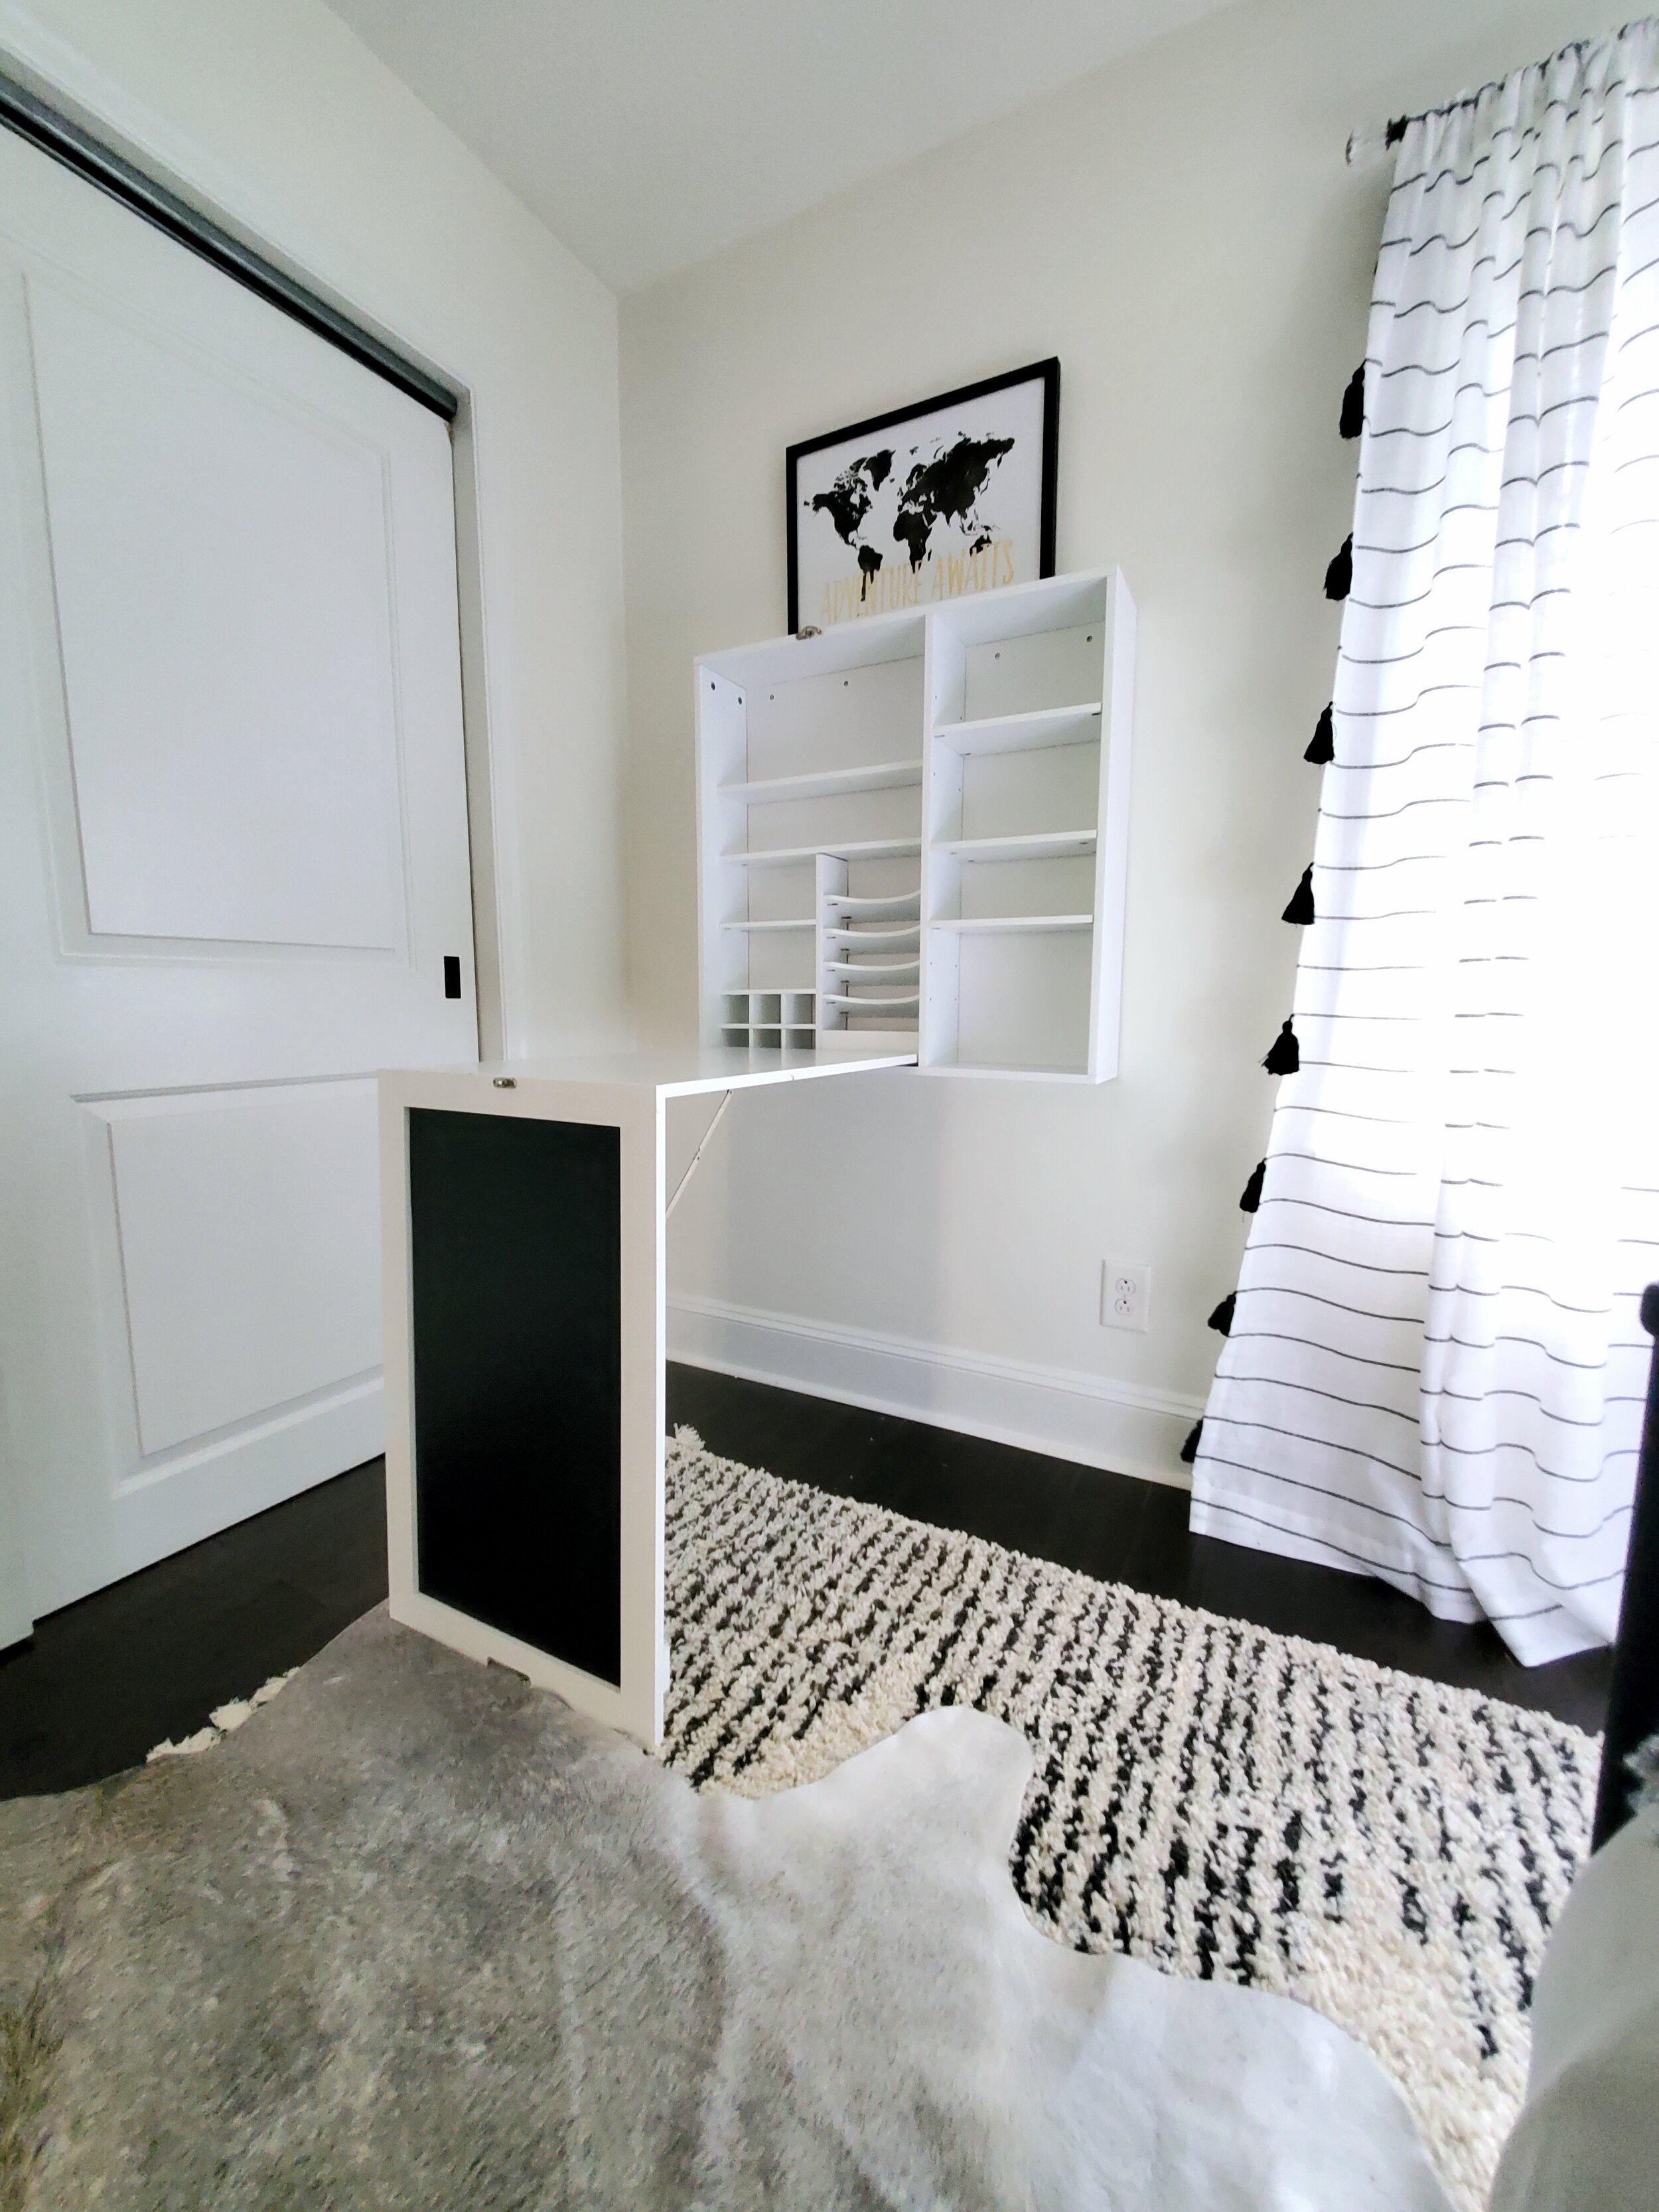
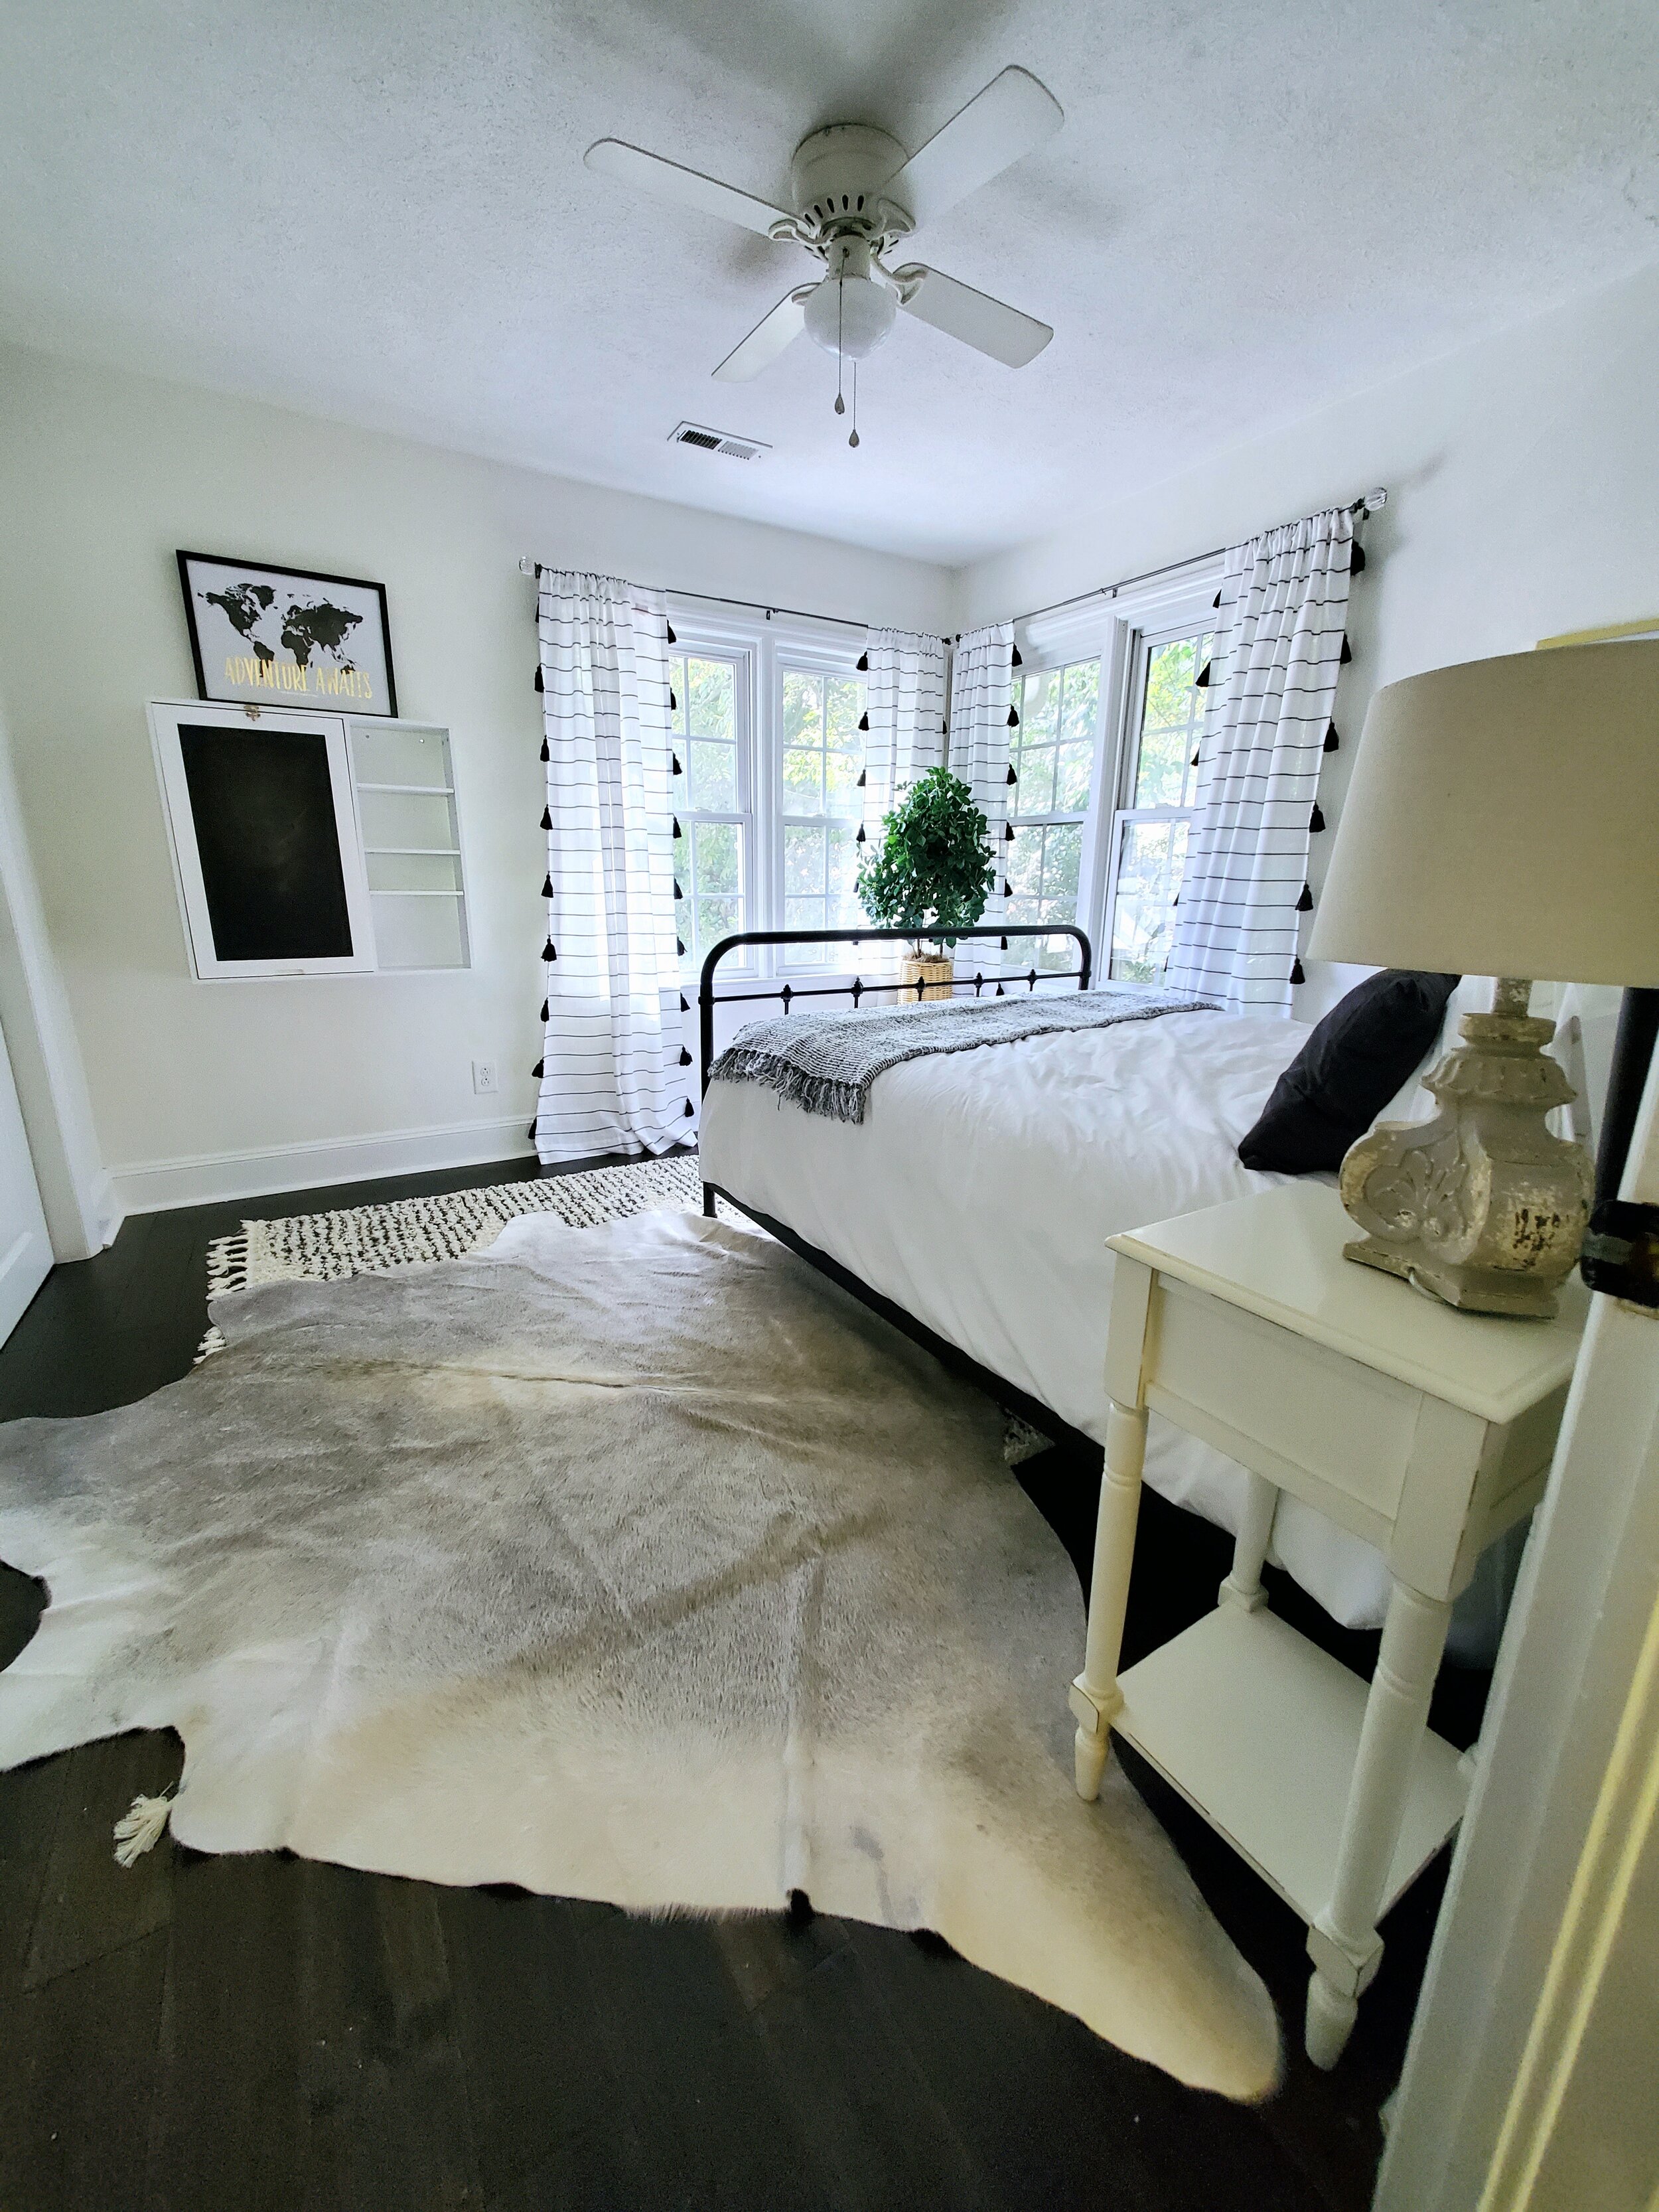
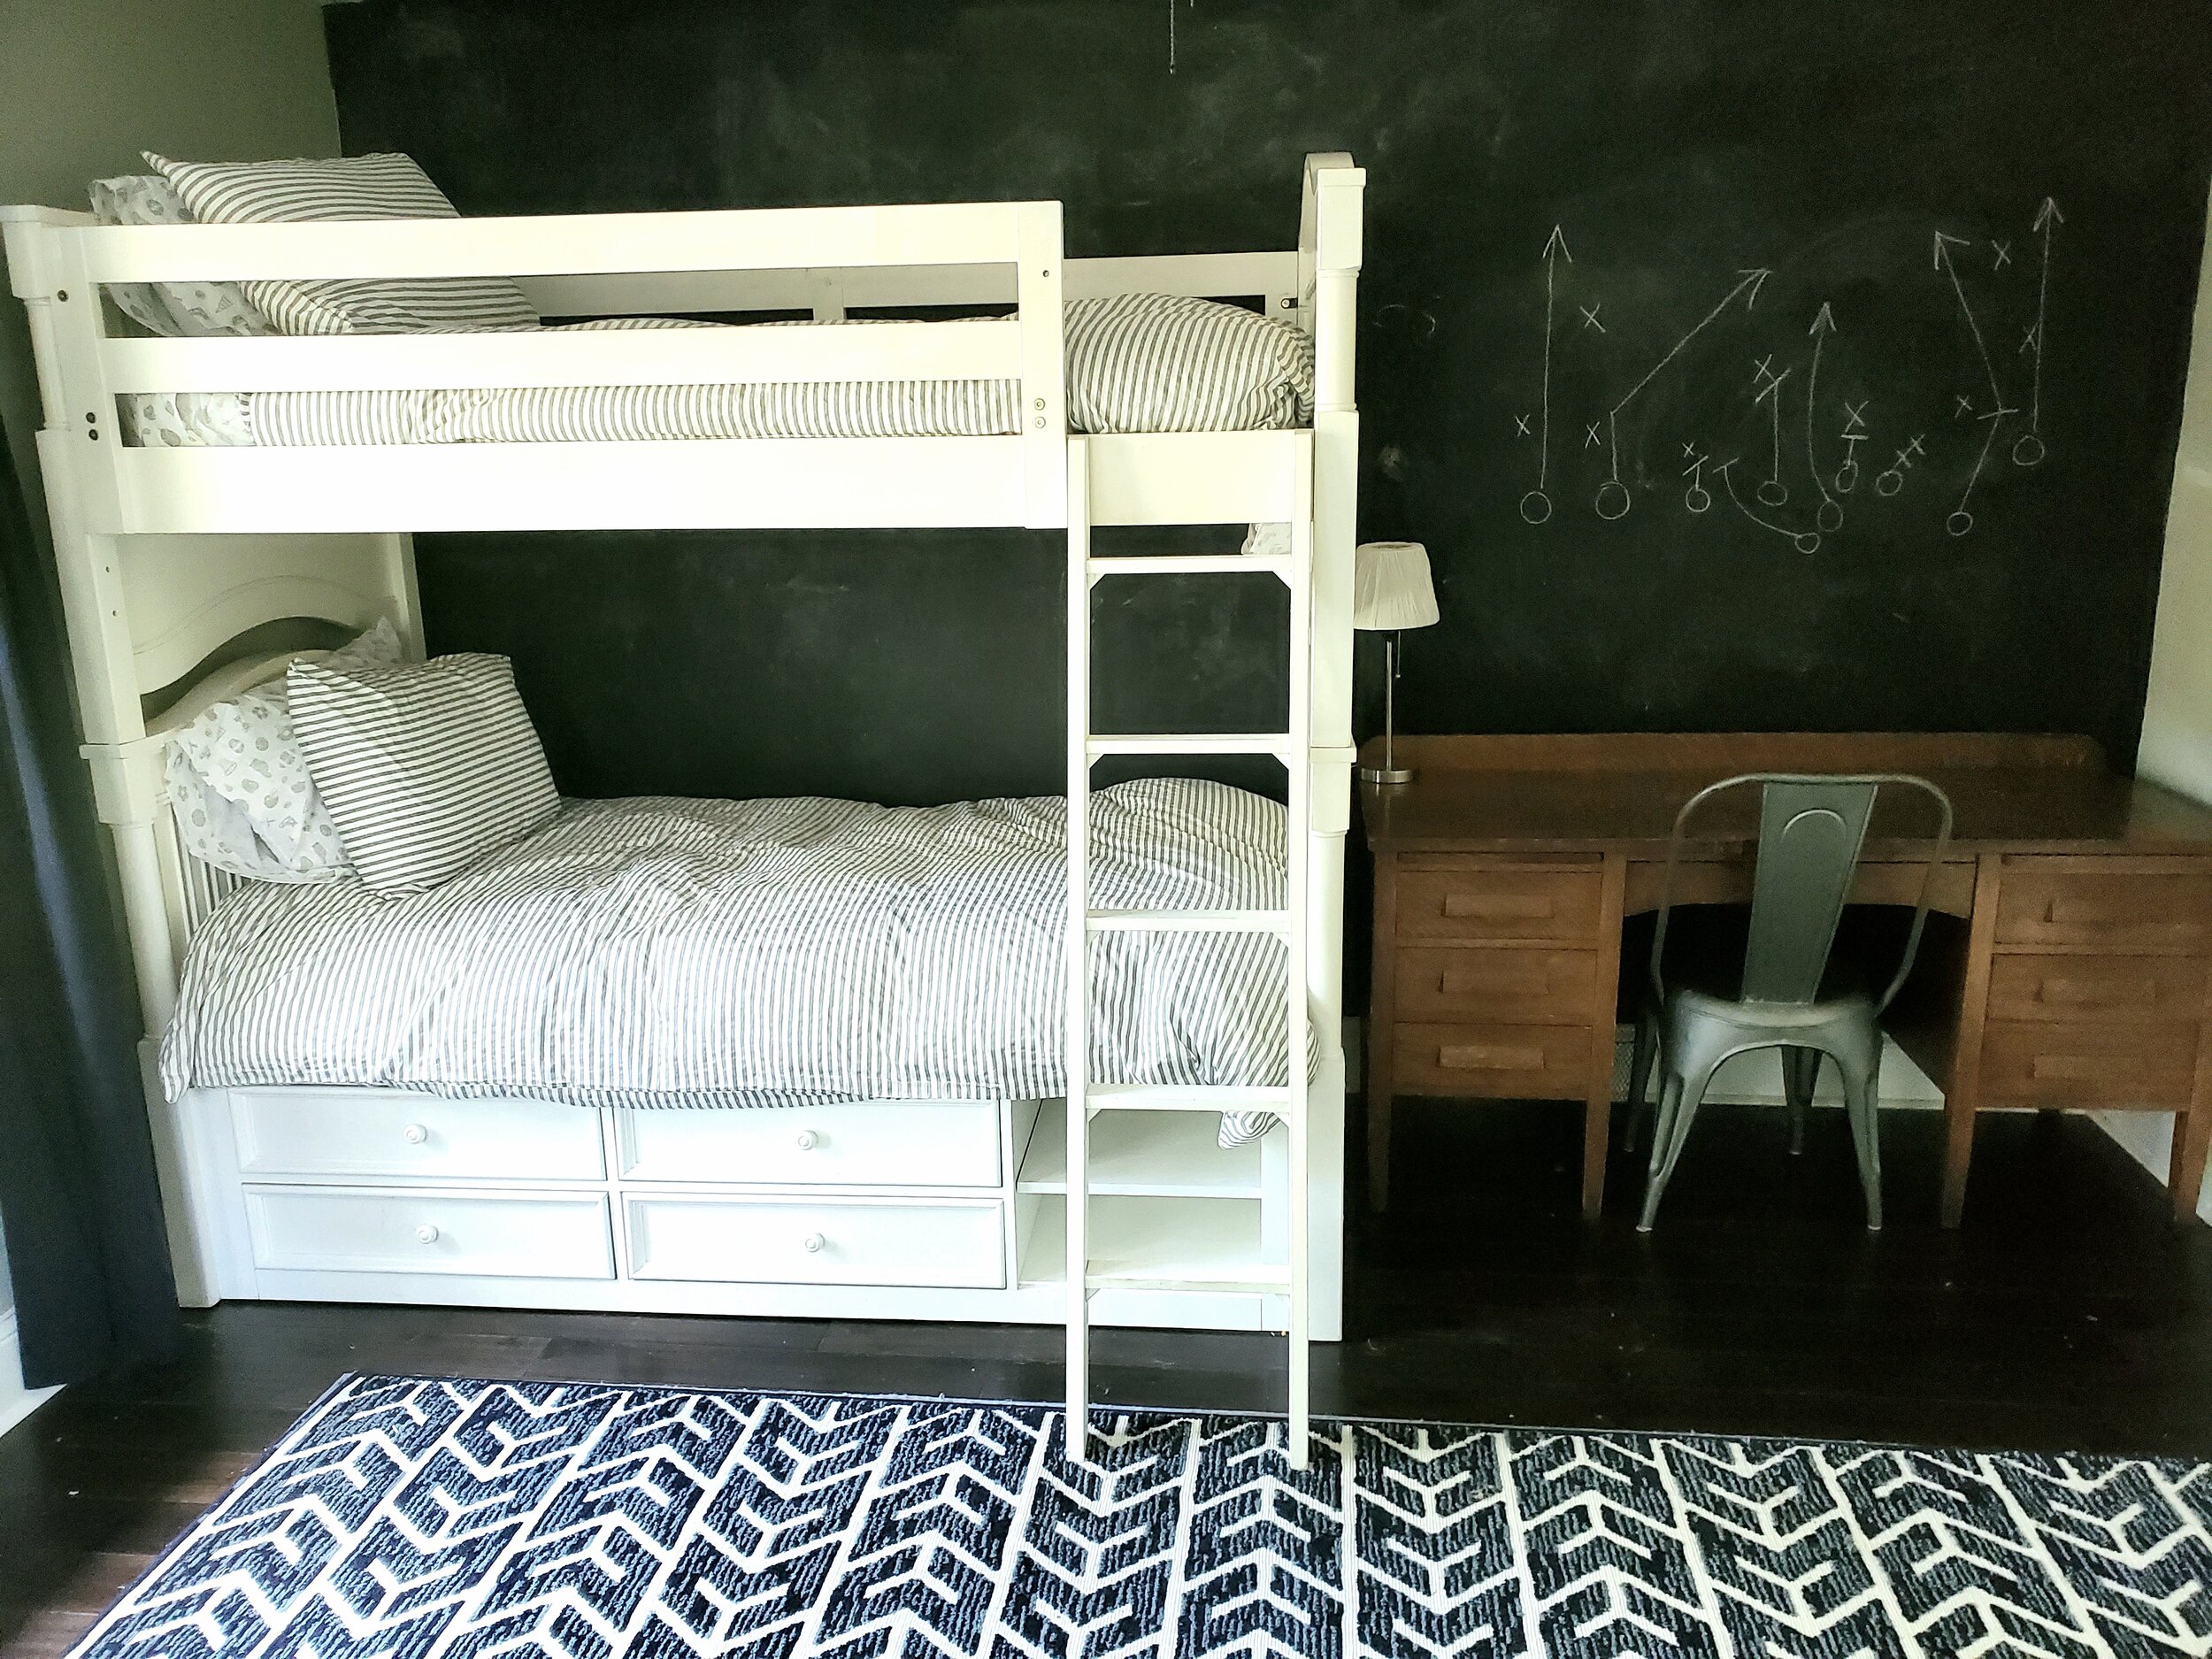
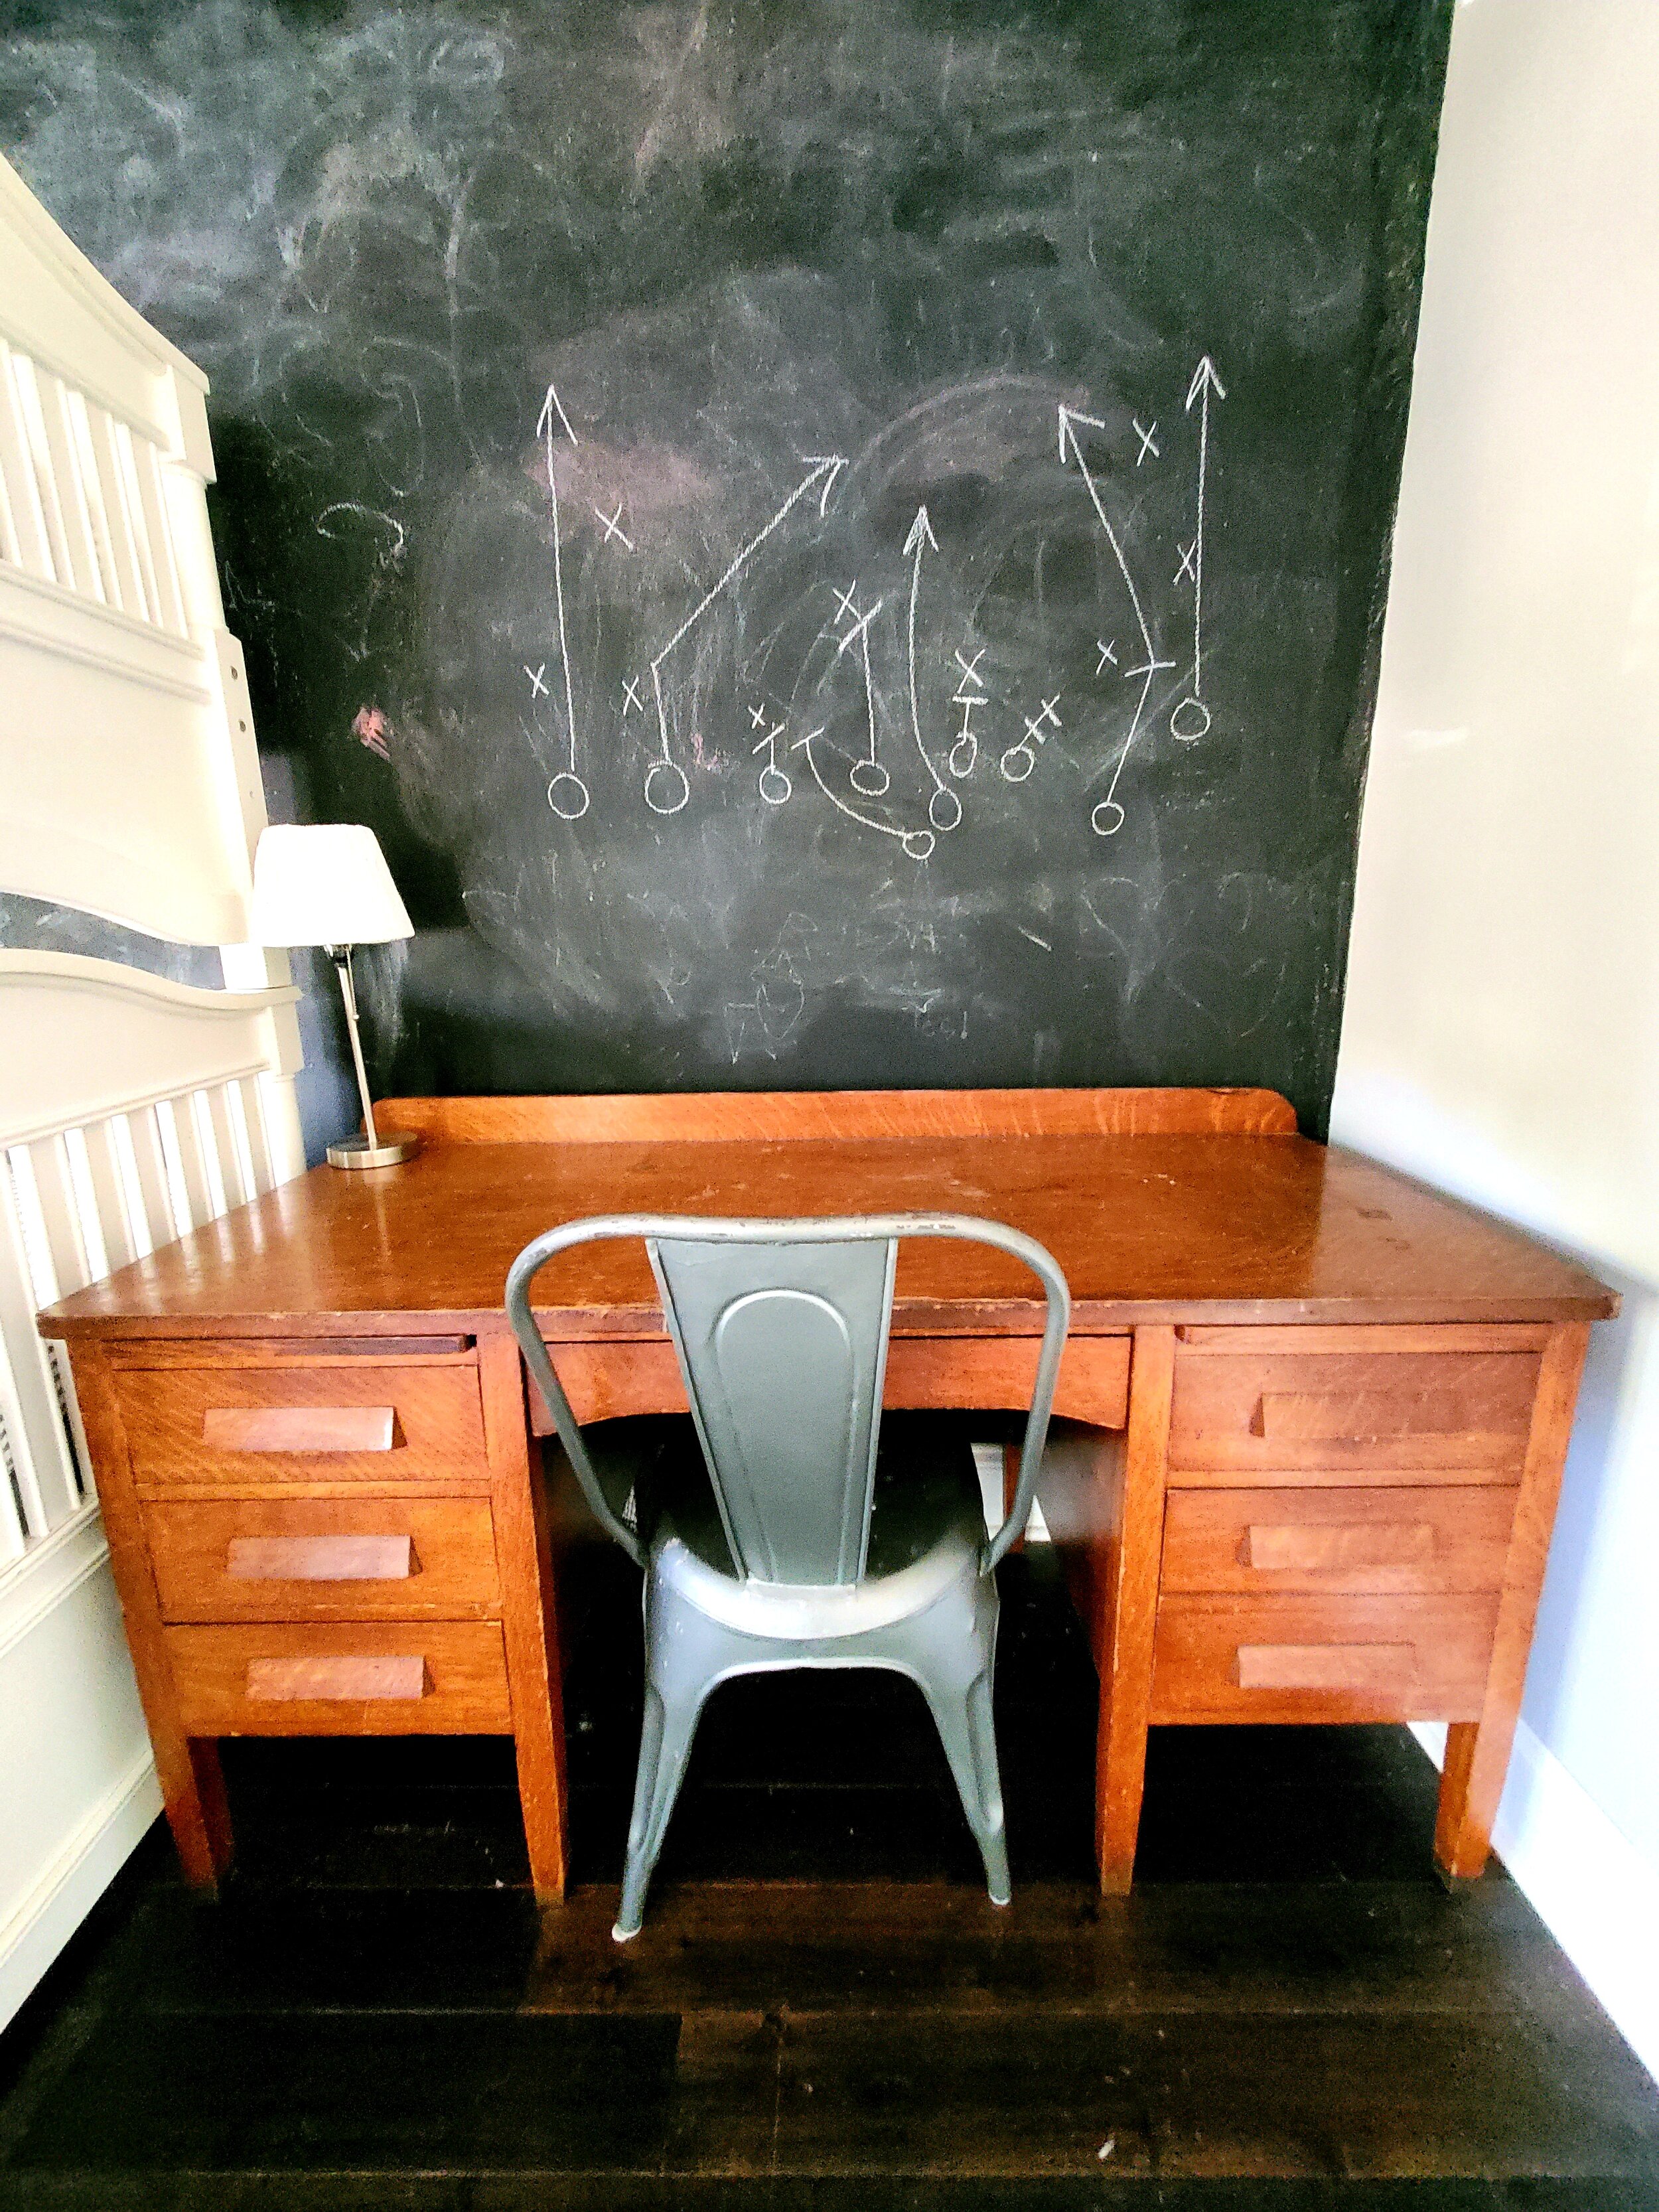
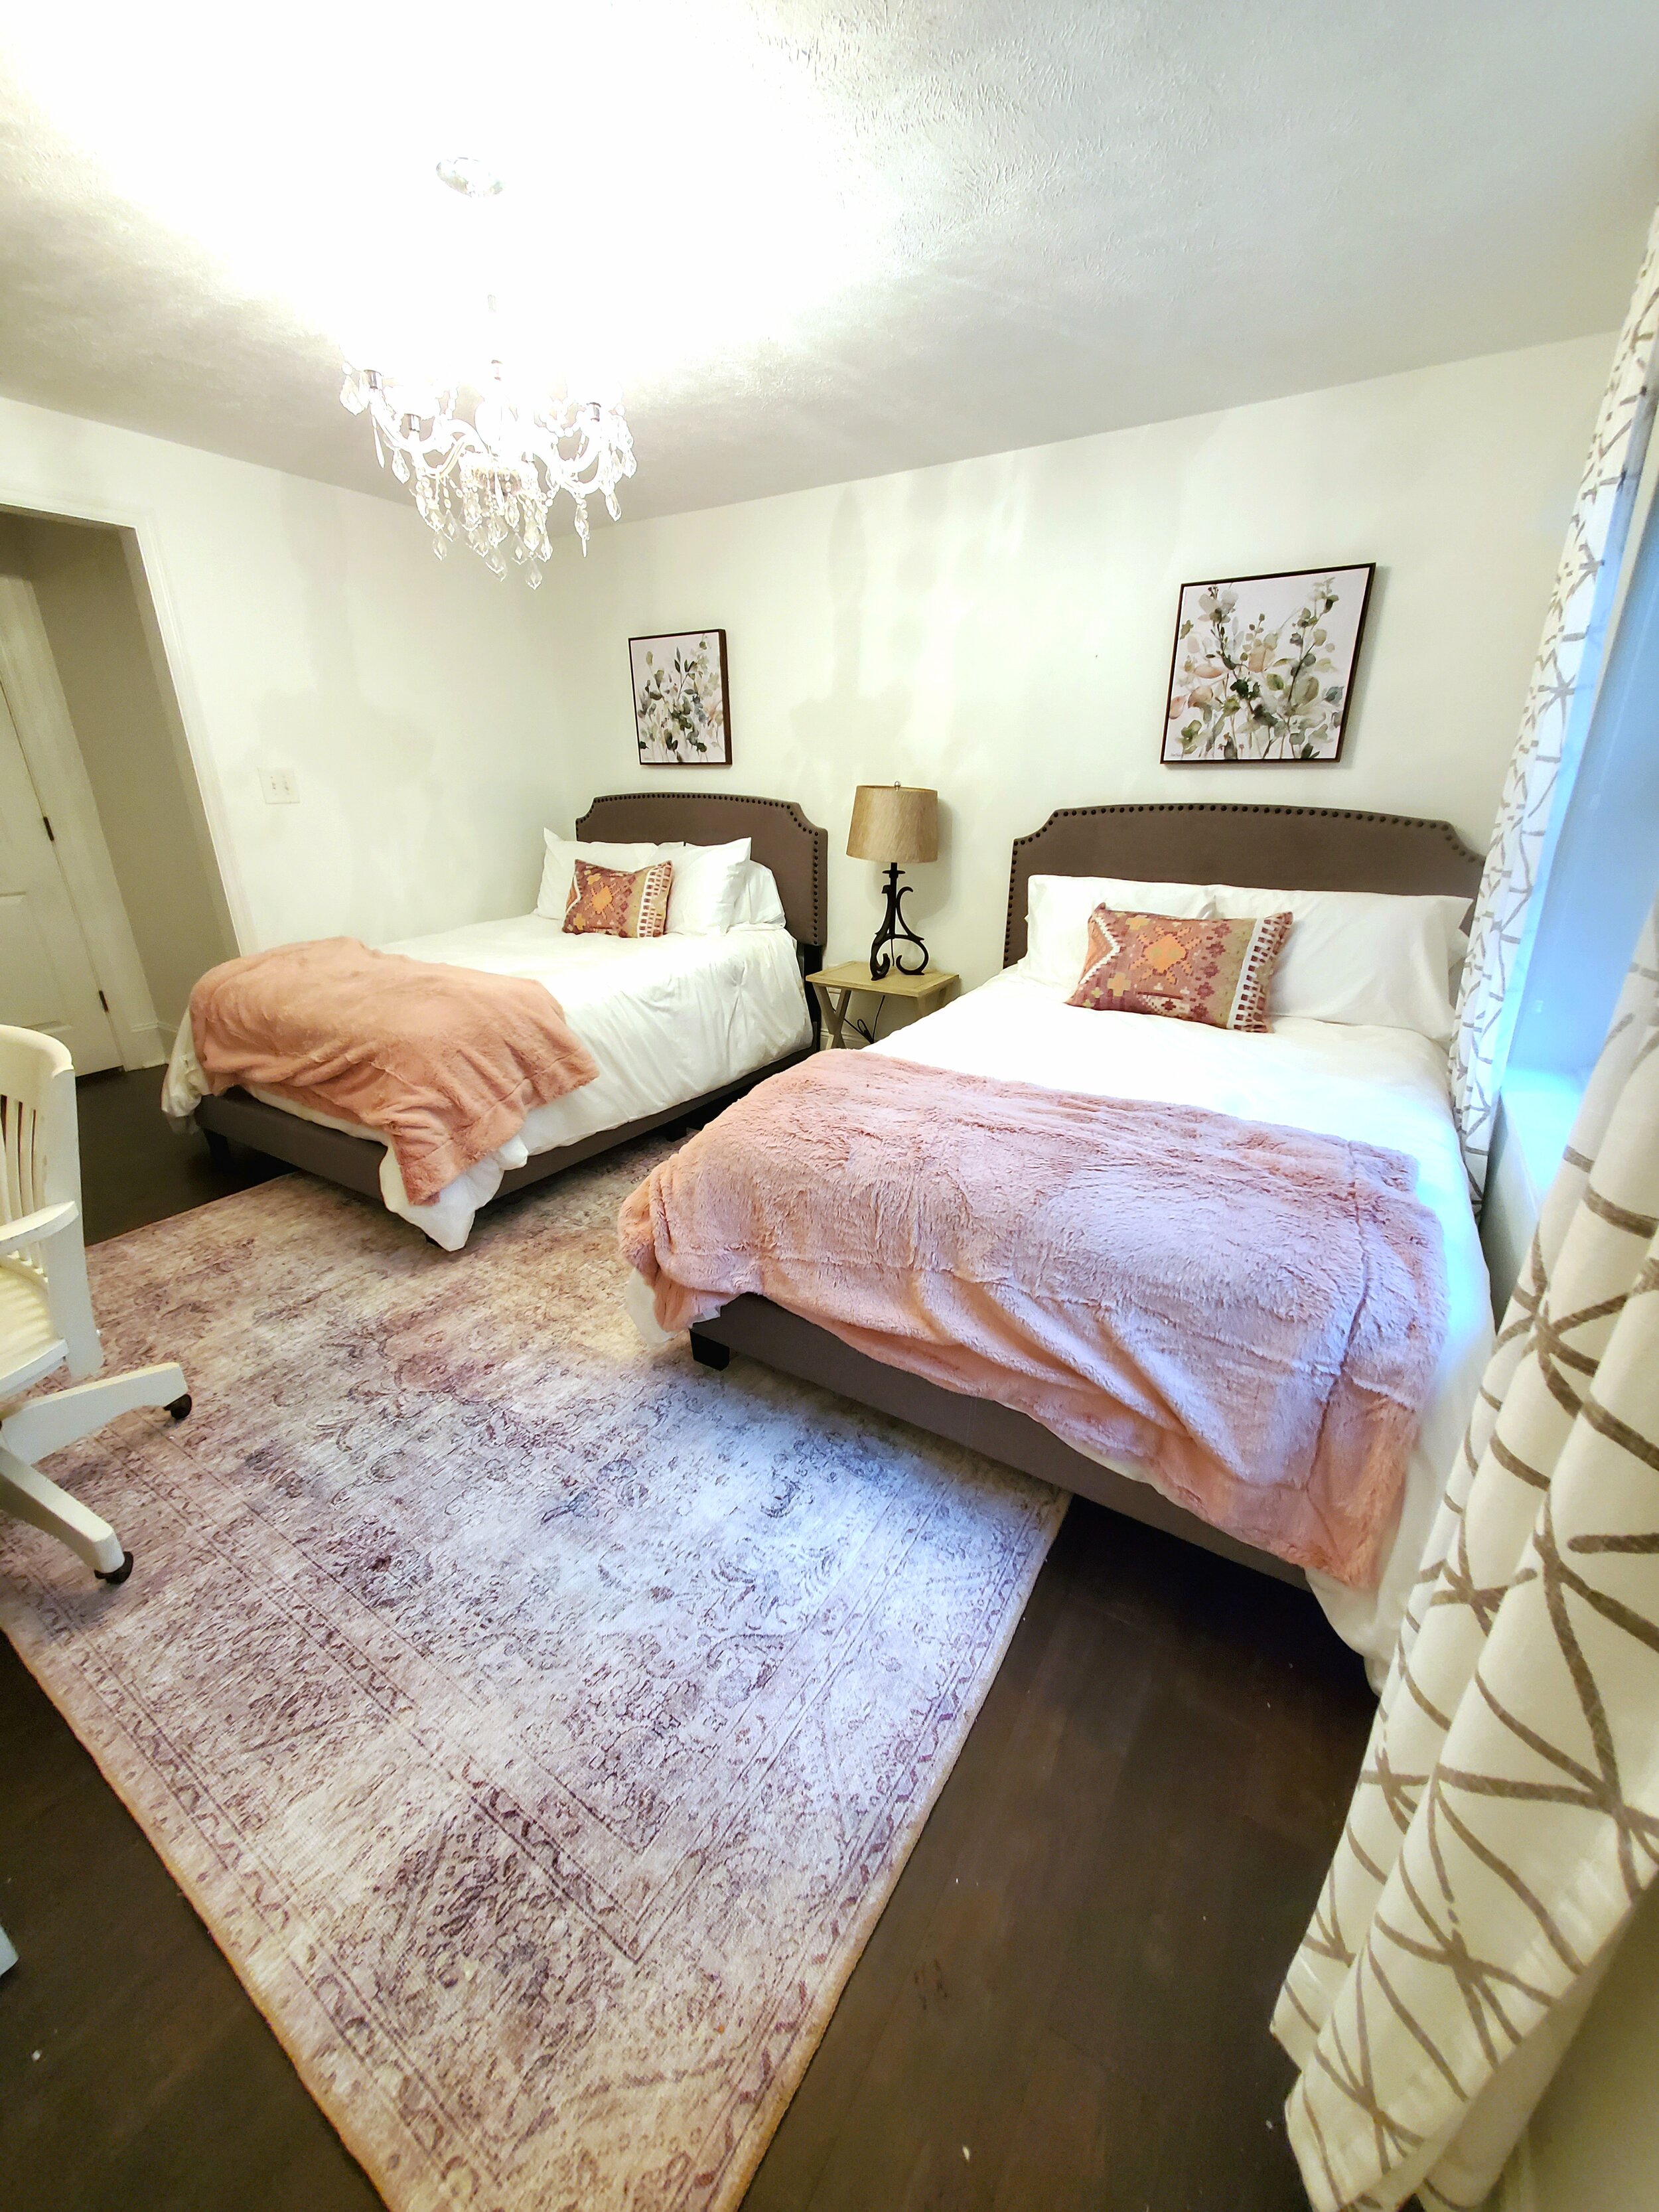
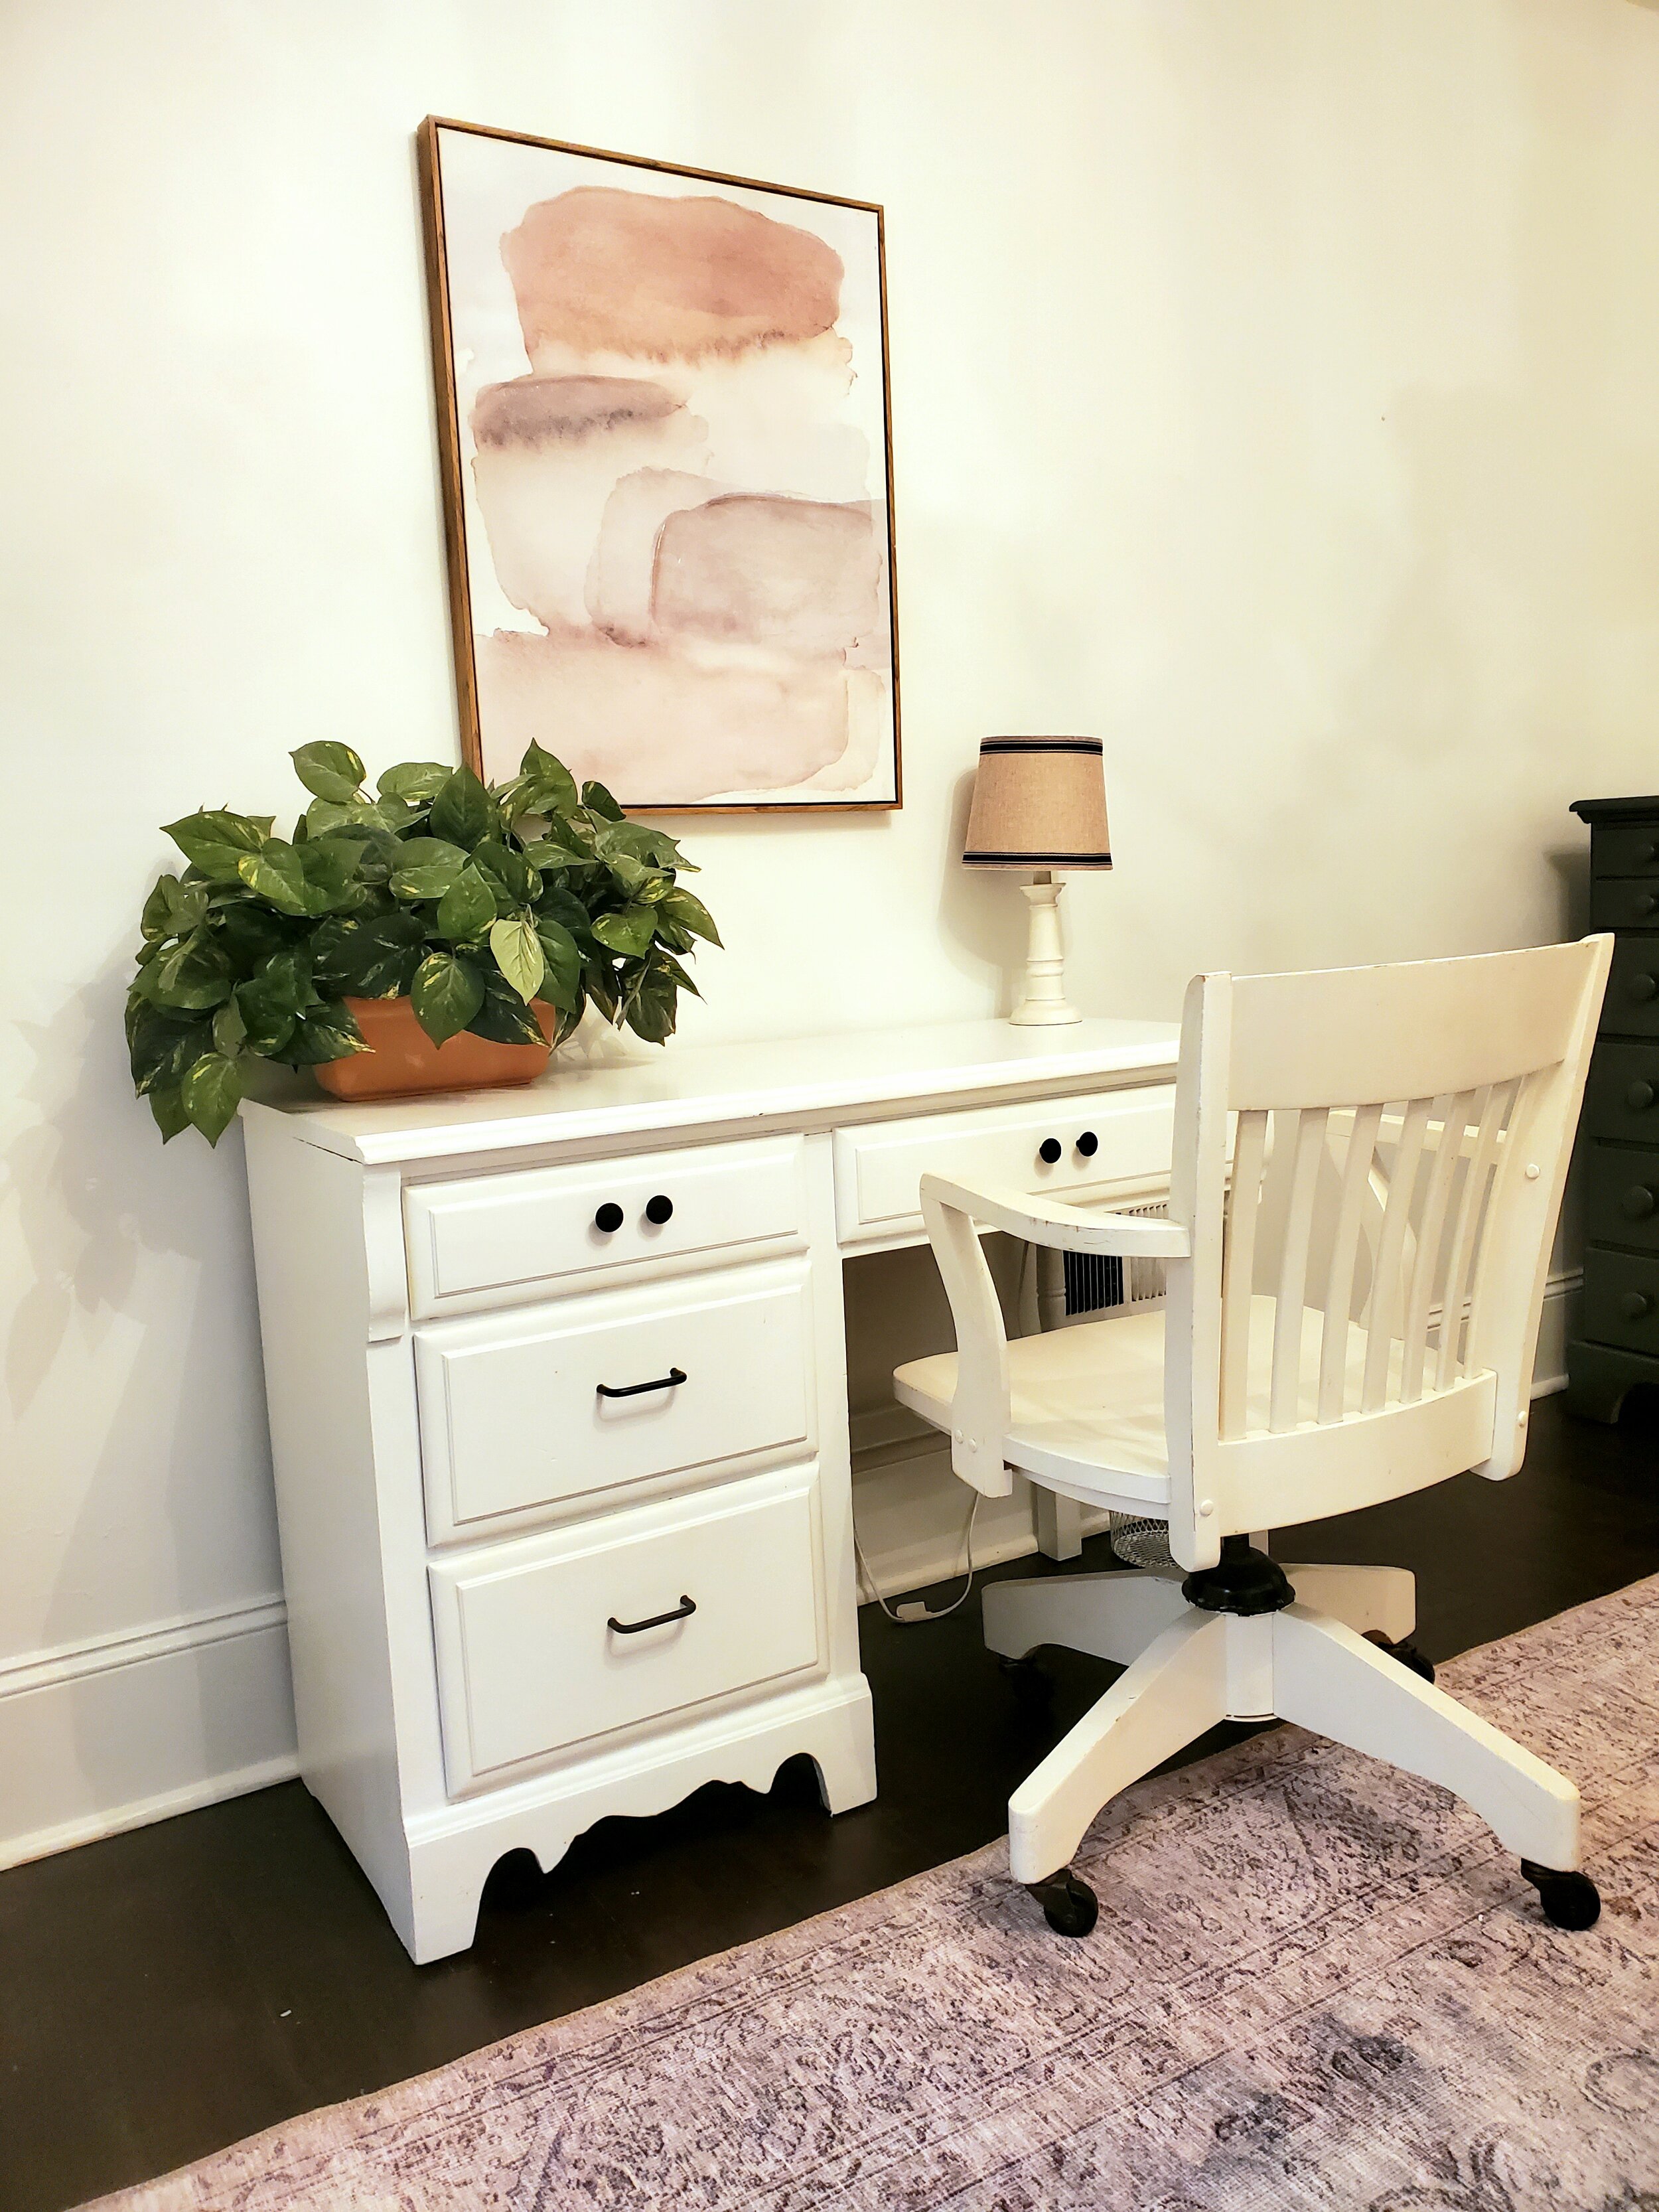
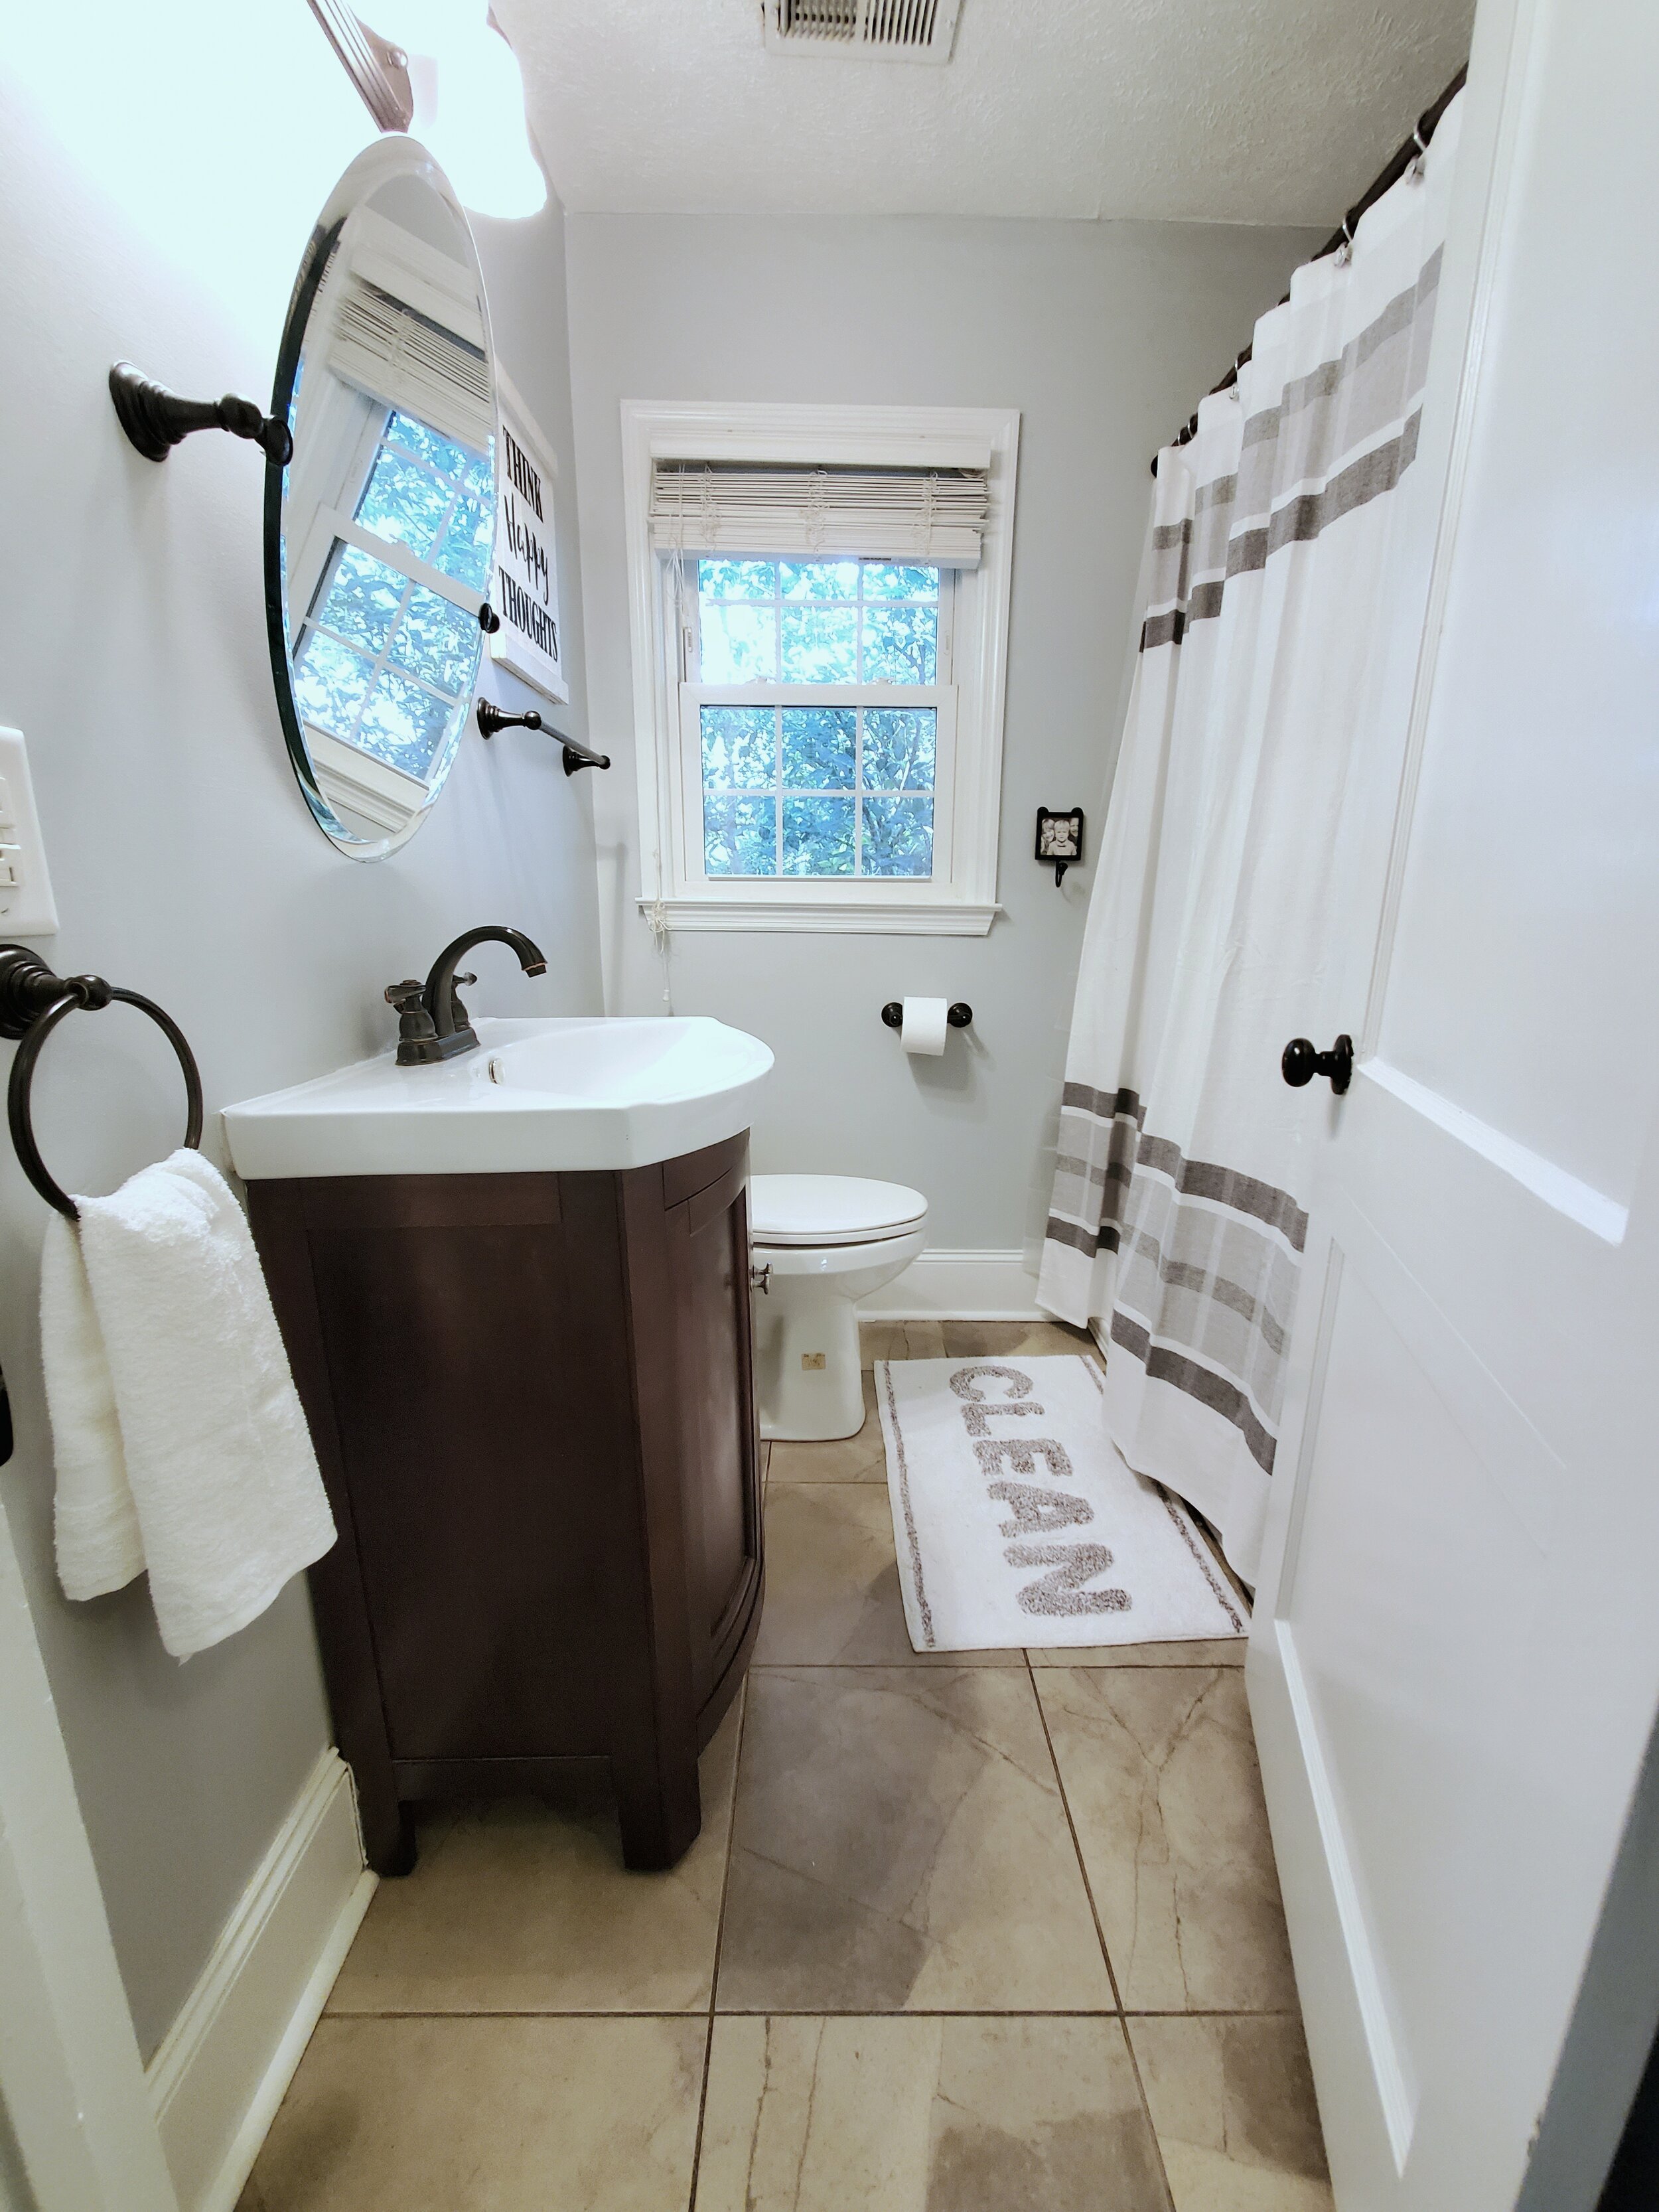
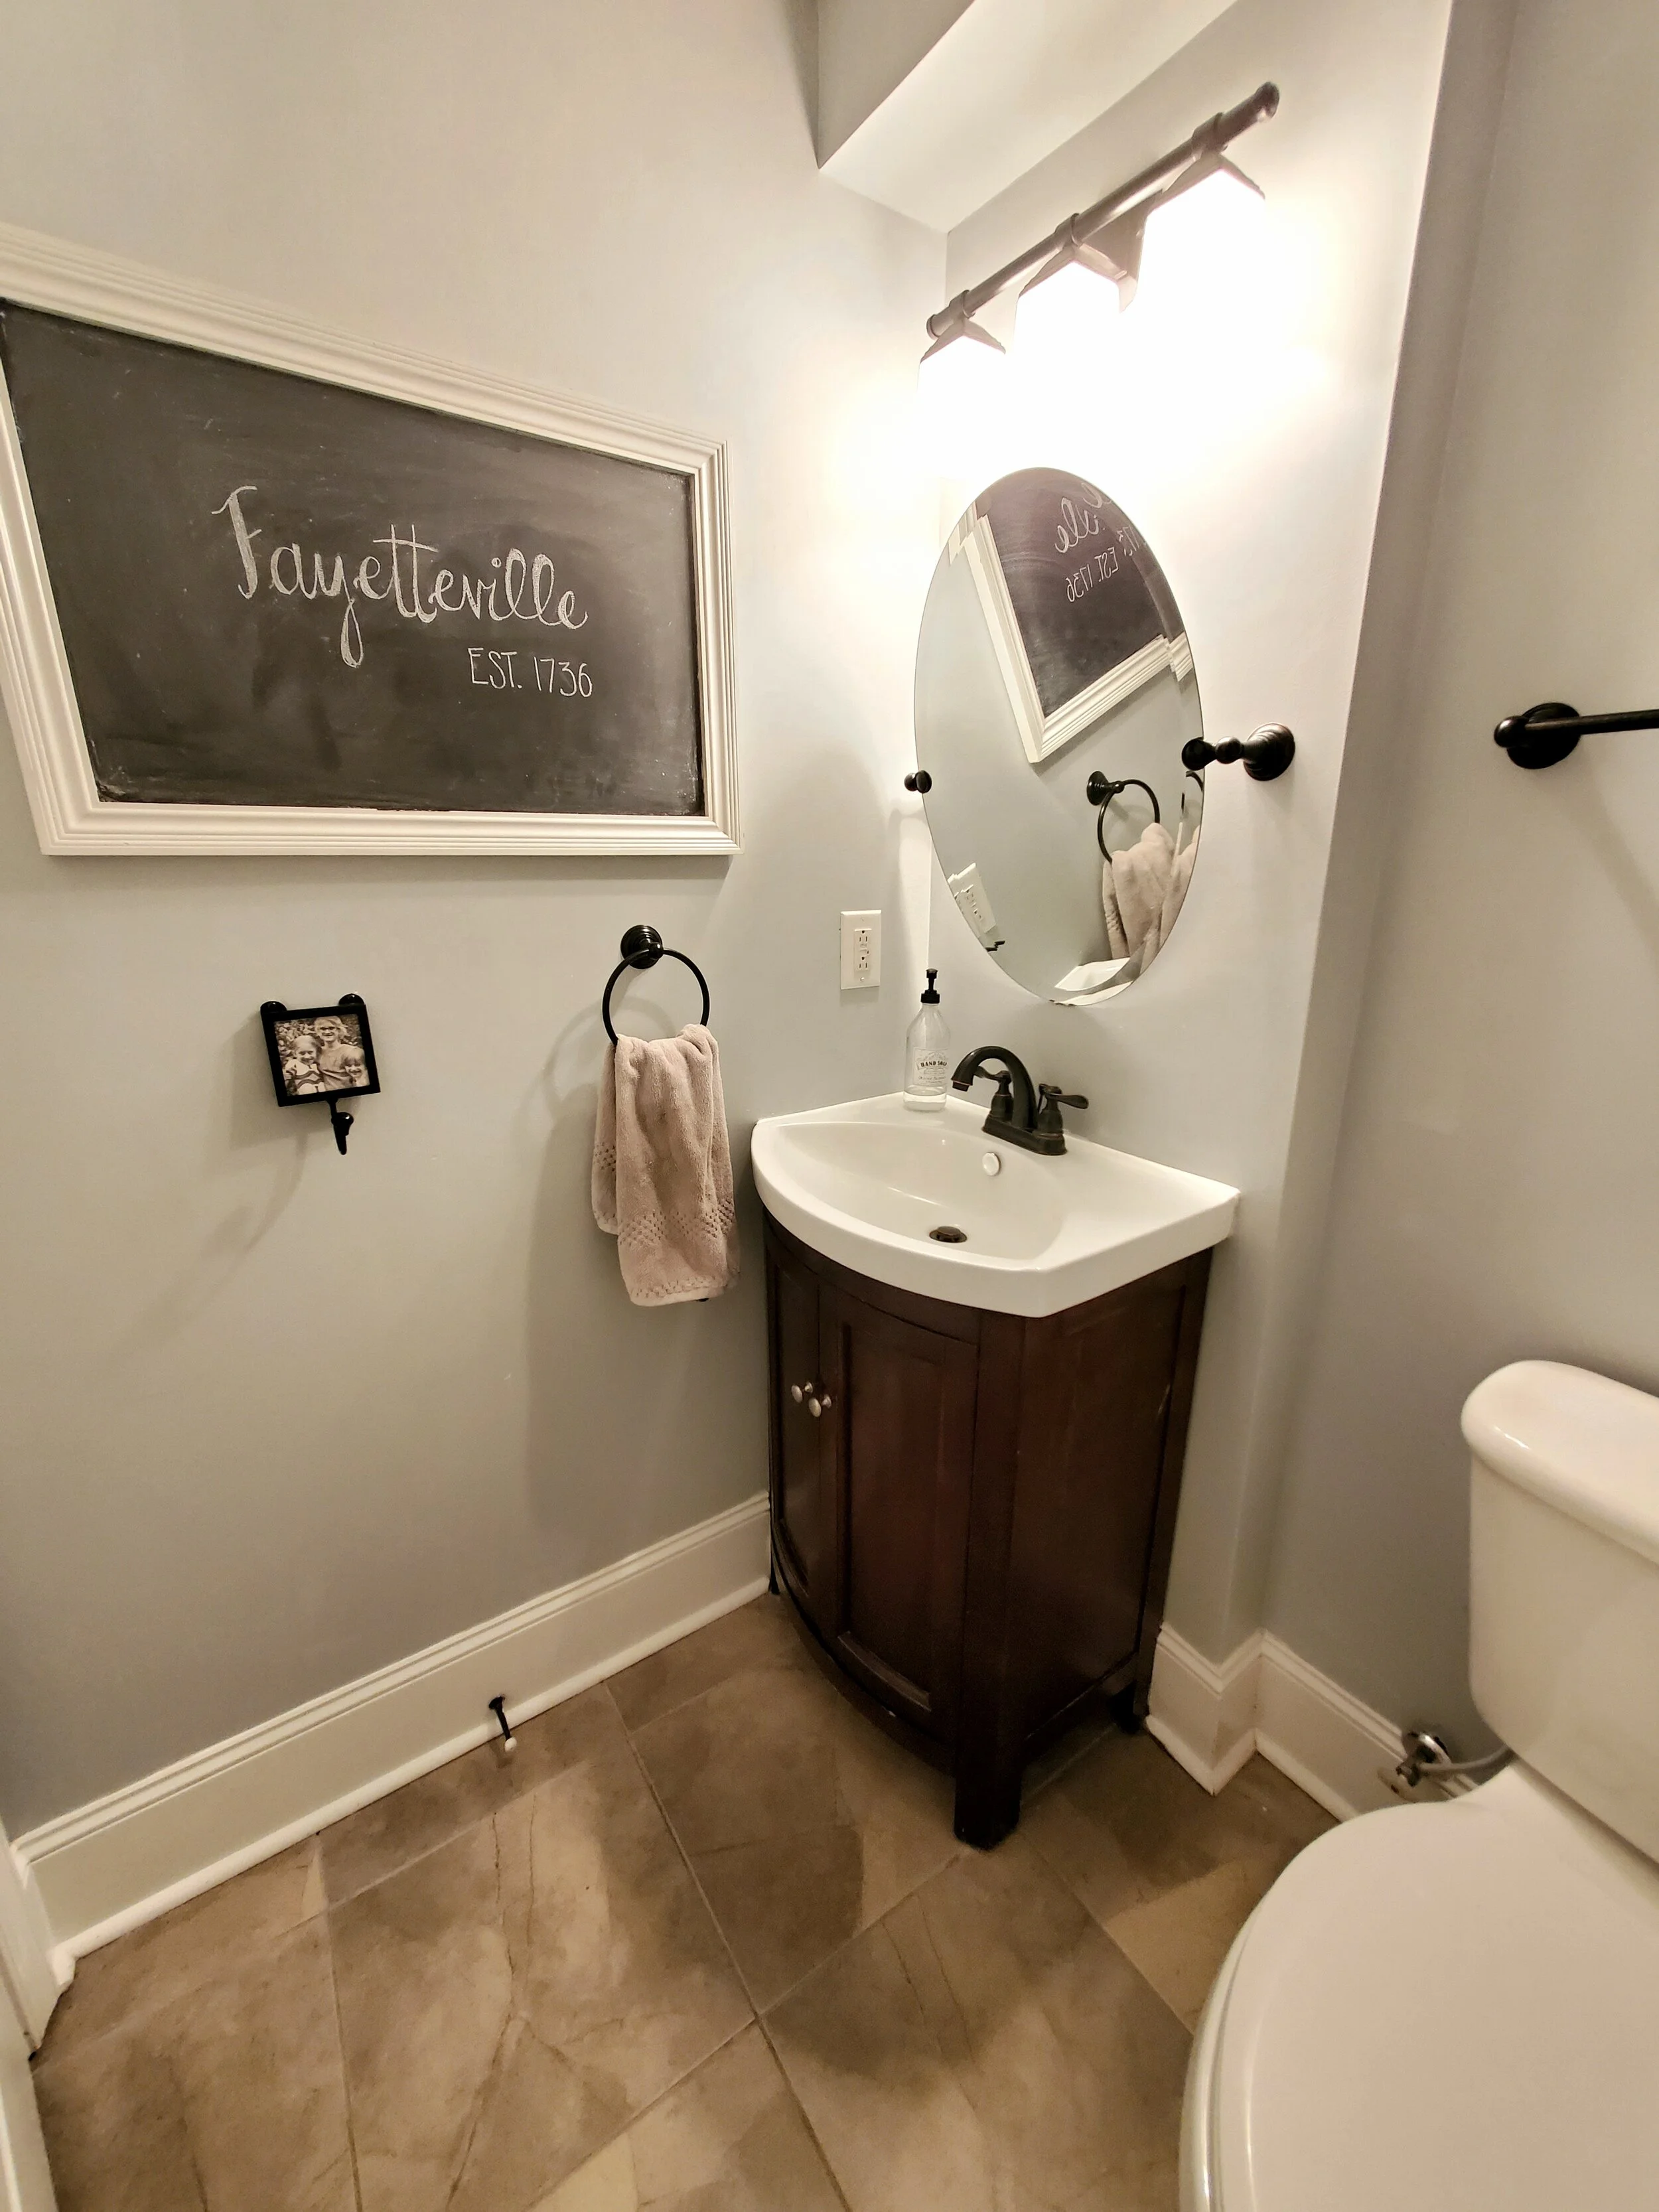
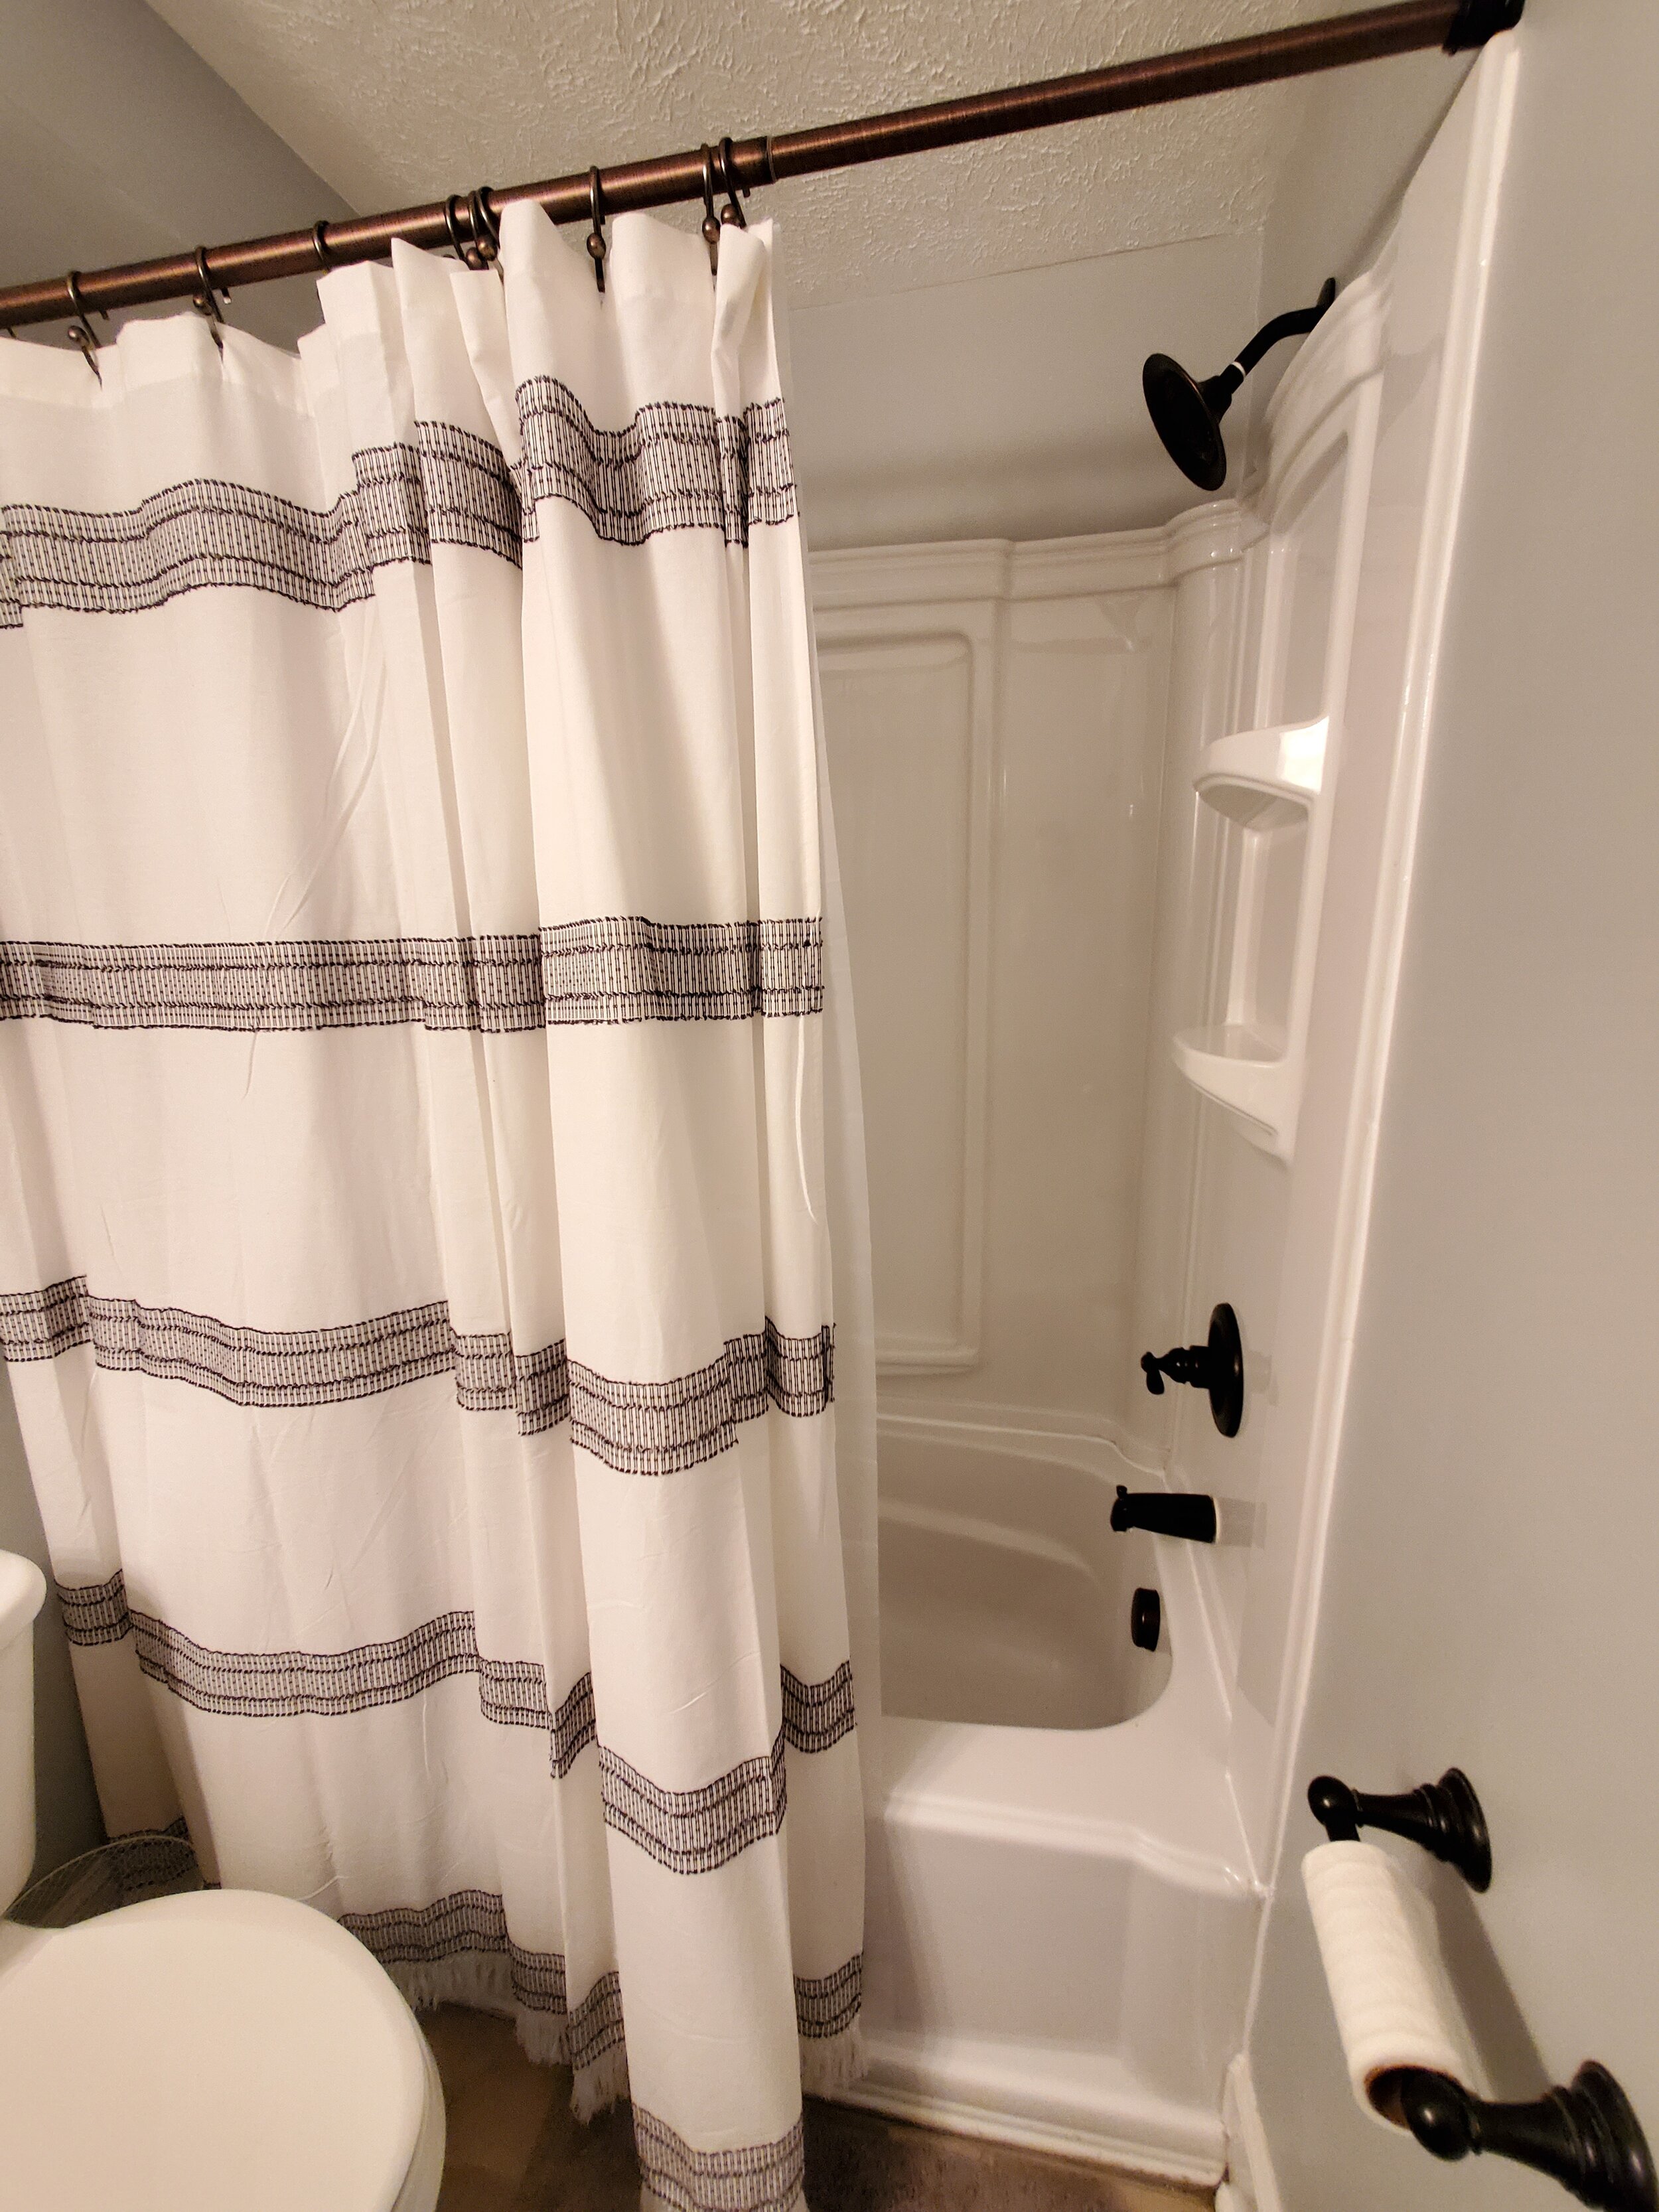
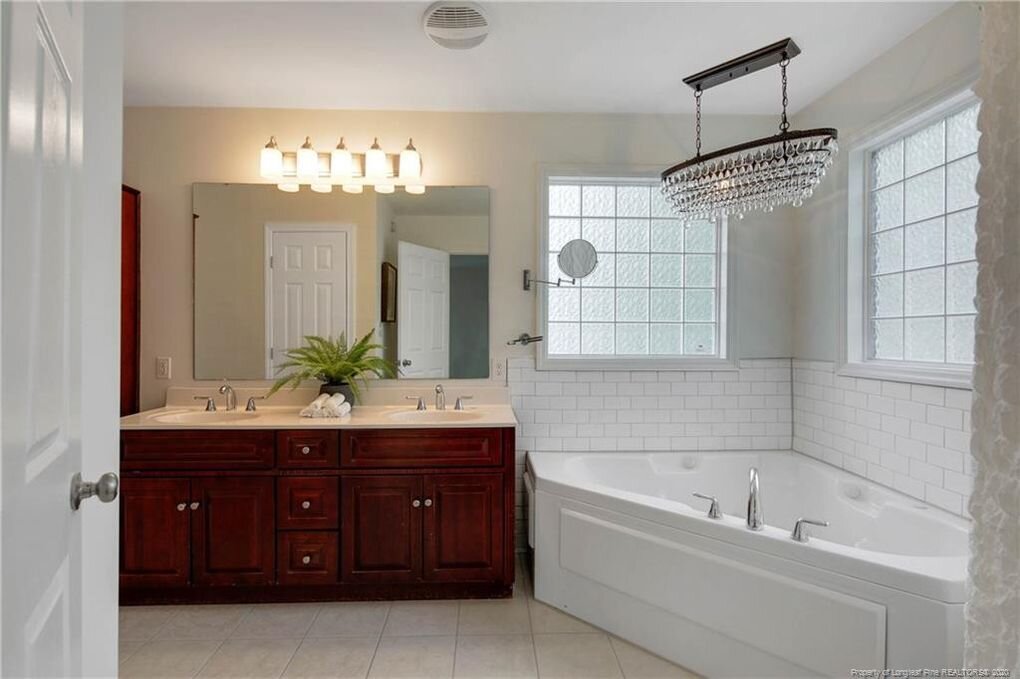
The Haymount Bohemian features high quality mattresses: deluxe ghost hybrid, nectar premium, and tuft and needle deluxe. You will find thoughtful touches throughout this three-bedroom home, and plenty of space for 6 guests to enjoy their getaway!
Enjoy the home to her below and thank you again for considering us for your holiday guests! We wish you the most beautiful holiday season yet!
Casey and crew


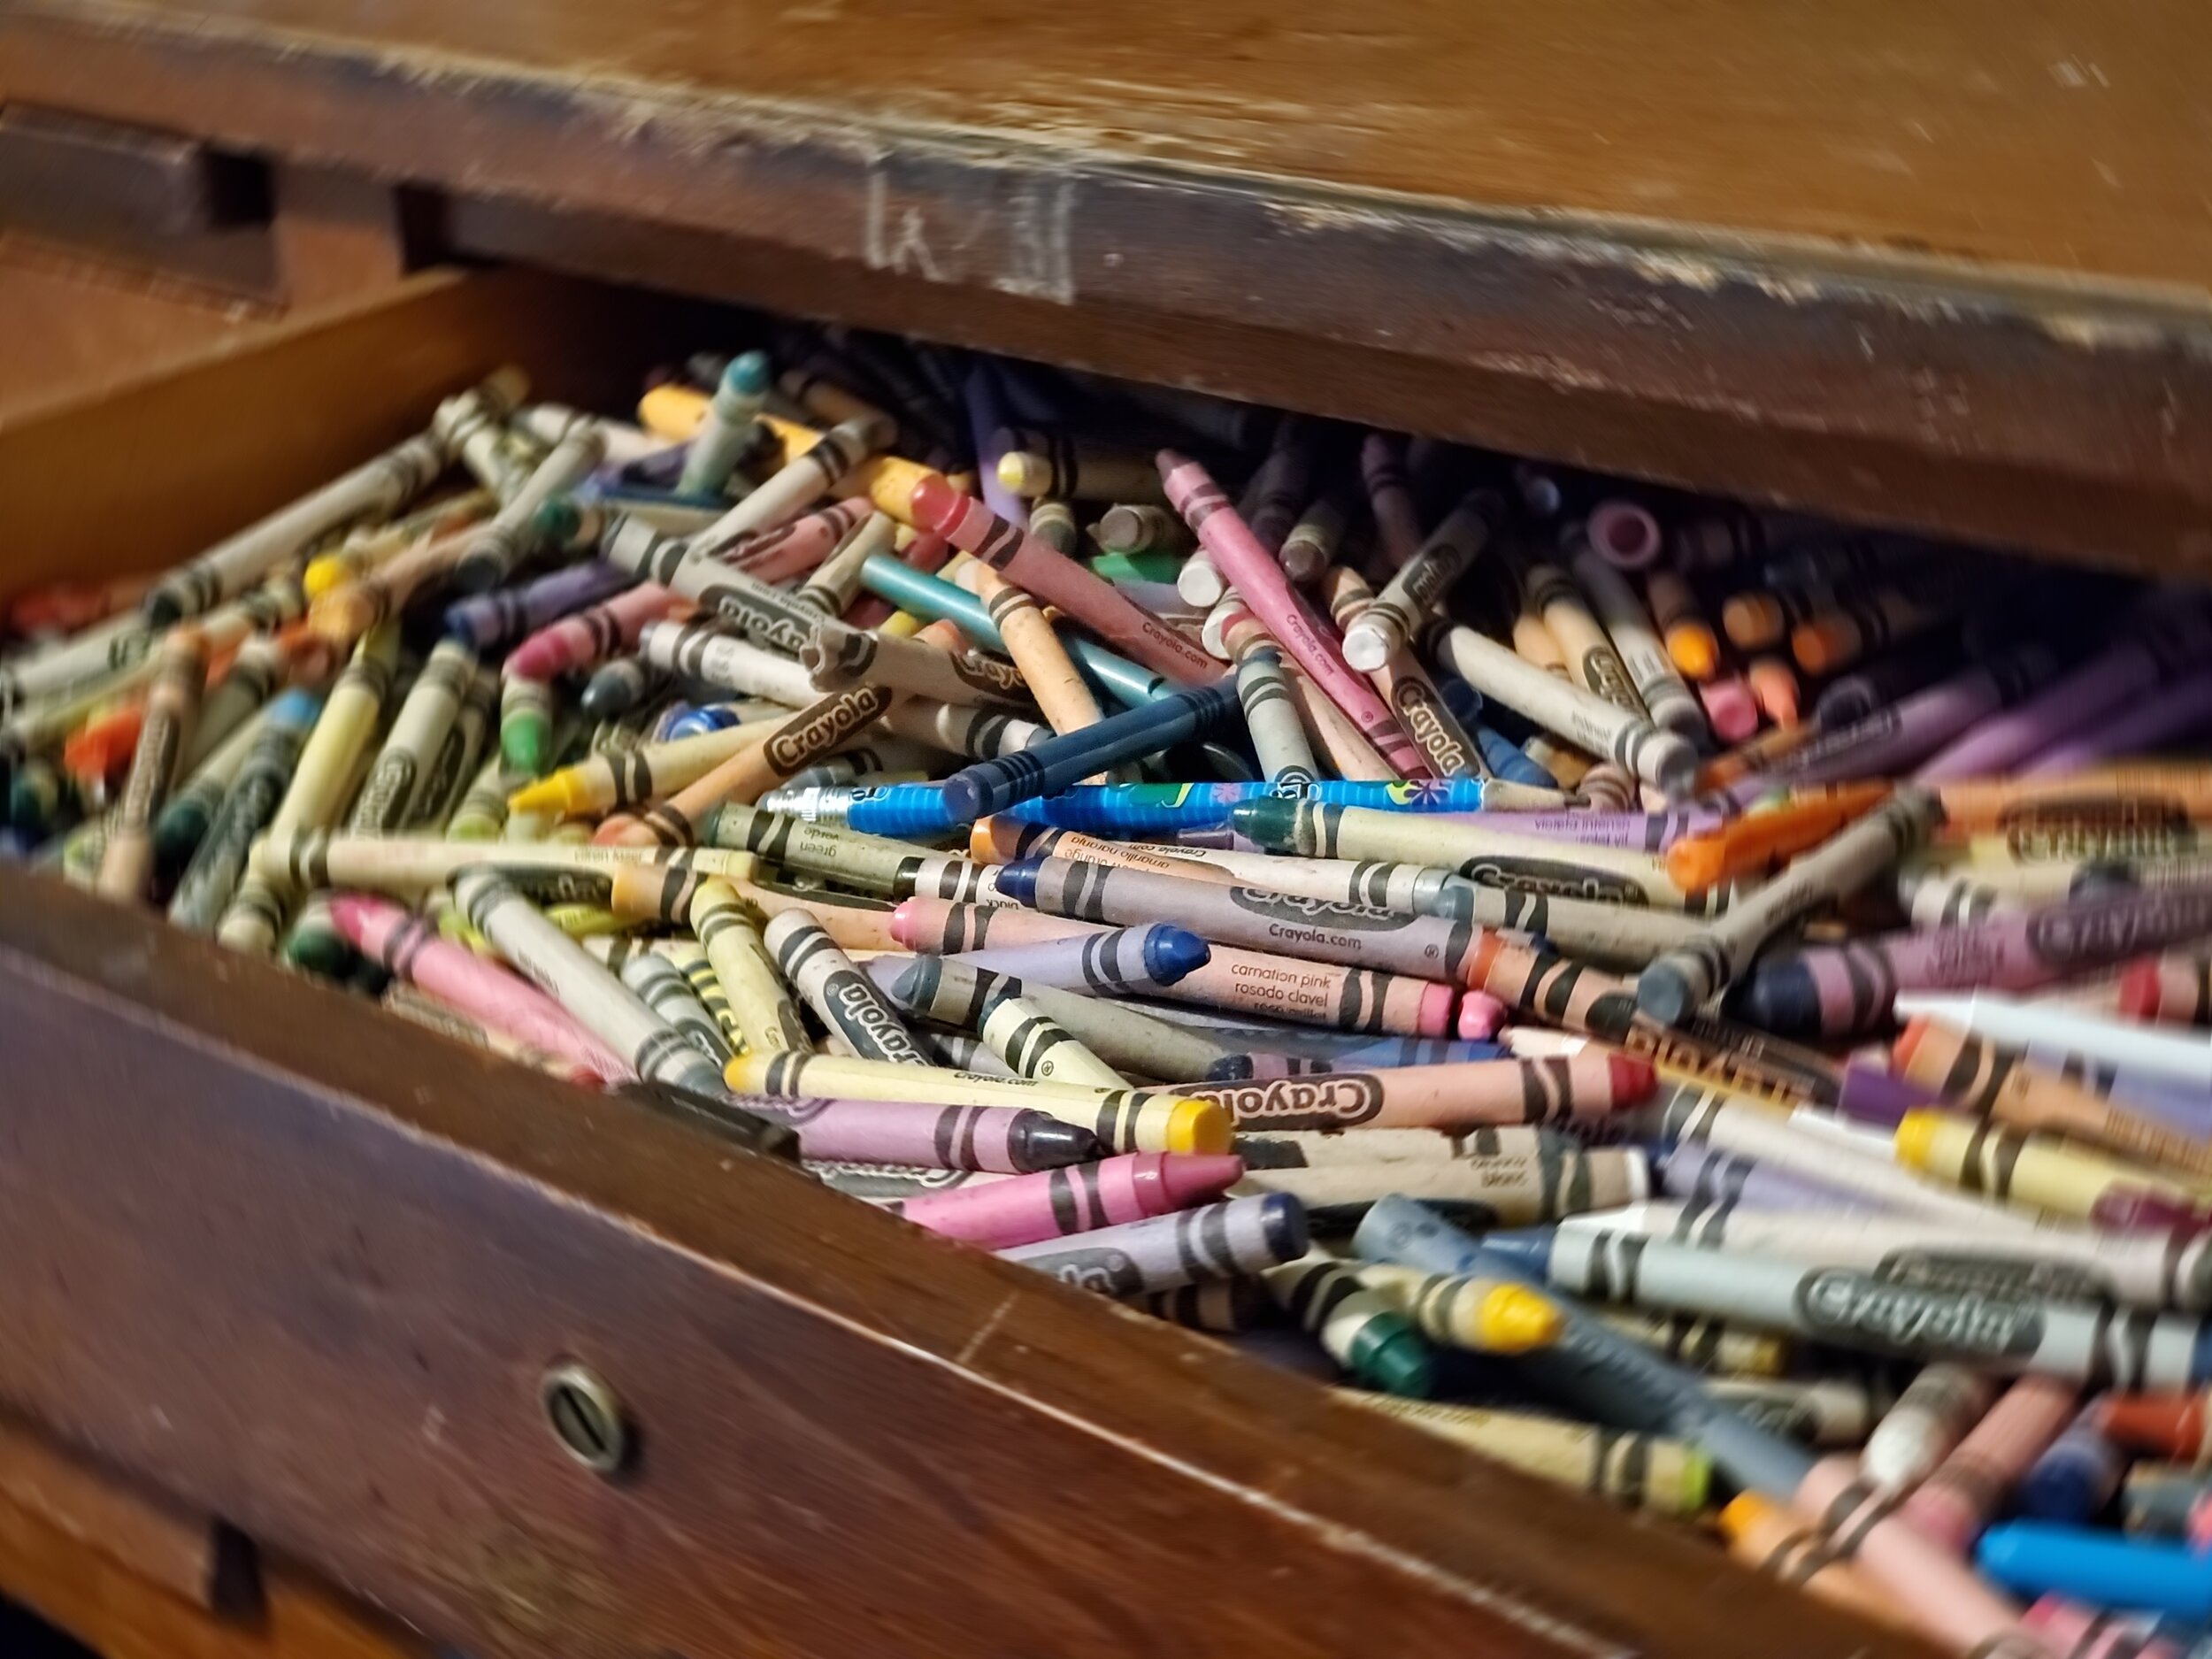
How to Spark Joy in Your Life with DIY Decluttering

Guest post by Virginia Cooper
There are many jobs around your home that require an expert, but if you’re thinking of tidying and decluttering your home, you really do not need an expert to get the job done. All you really need for a cleaner, more organized home are some tips to make the tasks involved easier - and maybe even more fun!
Start by Taking Out and Sorting through Your Things
When you’re ready to begin tidying up your home, it’s helpful to pull everything out. Having everything laid out this way will help you see how much you really have in your home, and will make it easier to decide what needs to go. Take note of items you may have duplicates of or things you no longer need, and put them into their own box. You can toss unneeded items, but it might give you a greater sense of satisfaction if you donate them instead.
Think About Renting a Storage Unit to Make Life Easier
For those items you’re not ready to let go of, consider putting them into a local storage unit. To save time, think about contacting a service to handle this part of the decluttering process. The company sends you a secure storage container to put your things in, and collects it to take to the storage storage unit once you’ve filled it. Plus you will create more space for storage inside your home. You can also use one of these fun garage projects to make better use of that square footage.
Burn Some Calories While You Tidy and Clean Your Home
We’ve talked about ways to make decluttering easier, but if you want to stick to all of your cleaning and organizing tasks, you need to make them fun. As you move around your rooms picking things up and wiping surfaces down, consider dancing while cleaning to make housework double as a fitness routine. If you’re not the dancing type, use these active cleaning tips to get the most out of your tidying and decluttering project.
Redo Your Walls to Open Up Your Space
Get the most out of your decluttering efforts by dressing up your home and making it feel less cramped. When painting, avoid dramatic color changes and look for patterns that complement your space. Another idea is to use custom-designed wallpaper for an elegant touch. Repositionable and removable wallpaper allows for simplified application, and it’s available in an assortment of textures and colors.
Give Yourself a Reward for All of that Effort and Hard Work
Getting your home organized will reduce your stress, but you may need more motivation to actually get the job done. To make yourself want to work on cleaning up, make a commitment to treat yourself to something special once all the work is done. Maybe you can go out for a nice dinner at your favorite restaurant, or you can think bigger and treat yourself to a relaxing staycation. You definitely deserve it!
You may not feel a lot of joy while you tidy up your home, but you’ll feel more relaxed afterward. It takes some work to get a home organized, but it definitely does not take an expensive expert. Save that money for something that truly sparks joy for you, and take care of the tidying up all on your own.
When you’ve finished decluttering, reach out to Haymount Homes to help decorate and design your home. Schedule a consultation today!
Photo Credit: Pexels

Haymount Homes REDFIN FEATURE!! “choosing the right art for staging”
How to choose the right art to stage your home for sale. Tips from experts!

Don’t miss the recent Redfin article we were featured in!
Choosing art for staging sounds simple
..but anyone who has sifted through countless options of art and decor, realizes that it can become overwhelming and difficult to select the right art that will help sell your house!
Redfin has taken the guesswork out of it and put together an article to help you understand what you're looking for and how to select the best pieces to stage your home.
We were delighted to be featured in this article and hope you enjoy the tips below!
-Casey and crew

Experts Reveal Their Best Tips on Choosing the Right Art for Home Staging
A well-staged home can make all the difference in enticing a buyer to tour a listing, and something as simple as the artwork you choose can make or break a sale. Your home is where your design personality shines through, but when staging your home for sale, it’s important to keep personal mementos and photos tucked away to appeal to a wide range of buyers.
Everyone will inevitably have differing design opinions, but with a few simple tips and tricks, choosing the right artwork for your home when staging can help buyers envision themselves living there. To help put your home on a buyer’s “must-have” list, we reached out to design experts from Irvine, CA, all the way to Calgary, AB, for their best advice on choosing the right art for home staging.
Select artwork that enhances your home
Let the artwork serve two purposes - choose artwork that adds appeal to the home and markets the geographical region. This makes the home even more appealing to potential buyers. For example, if you are staging a home near a big city, choose artwork that shows images of the city. -Elegant Transitions
Be intentional when selecting artwork to showcase a property. Placement and scale are critical when enhancing the space around the art or using it as a tool to draw the eye to an architectural feature nearby, such as a fireplace. Also, the subject matter of the artwork you choose should be deliberate, such as using a landscape piece to create interest in a dark or windowless room. -Diversa Design
Think of art as an accent piece. Artwork can be used to provide a focal point, highlight a feature in your home, and add color to a space. I have found modern art or landscapes to be the most effective when staging a house - framed family photos and religious art tend to make prospective buyers uncomfortable. Also, be selective about placement. When staging, only a few walls need to be adorned - less is truly more. -Gin Treadwell Home Interiors
Art placement and procurement create a statement within the room by adding focal points, becoming a key role in enhancing the room. Artwork can bring the room to life and serve as an attractive feature to help build up the environment within the room. When you're looking to add character to your room, a few key art pieces may be all you need to bring that “wow” factor that your wall needed. -Eden Home Staging
Be mindful of your artwork choices
Consider the three C's: Color, Contemplation, and Coalescence. First, a pop of color can enliven an otherwise neutral space. Second, art helps buyers envision living in your space by hinting at how a room may be used and evoking certain emotions. Think about the feeling conveyed by a black-and-white cityscape in an office or a blue abstract in a bedroom. Third, art can help unify a space, as may be seen if two or more related pieces are hung on the walls in one or more rooms. For example, use a geometric abstract on a wall in a living room and a similar piece on the wall in the adjacent dining room to create a cohesive look. -Greenhouse
When selecting the artwork, keep your target audience in mind and avoid using art that portrays sinister or risqué scenes, which may not appeal to a broader audience. Instead, choose pieces that can provide a space with a focal point where there isn't one, add color, or emphasize the home's custom features. -CT Exclusive Homes
Envision the finished space when choosing artwork. Know the art story, context, color, size, and location of the wall art when choosing artwork for staging your home. Each piece should have a designated spot in mind (ambiance) to avoid misplaced wall art or proportion (size). -Designs By Dannette
Artwork is the supporting role; the main actor, the central character, is the home. Your artwork choices should mirror a home's style and design - its role is to enhance the vibrant elements and unique features. The masterpiece is always the property; thus, the buyer's eyes should be drawn toward the kitchen, bath, or living space, not a trendy art piece. -Alison Is Real Estate
Freshen up your home with unique pieces
Think outside the canvas. Art doesn’t always involve paint on a canvas. In place of a painting, woven baskets on the wall can add texture above a sofa that features a bright, patterned set of pillows. Mirrors, which provide intriguing reflective surfaces, can also be used in place of art. -Dezign Zoo
Using artworks made from different mediums throughout the home creates an elevated, gallery-like experience. For example, a canvas in one space, a print in another, combined with a sculpture and wall pieces in another room will make the pieces feel less “matchy-matchy” and more like an art collection that a prospective buyer would have. You can also highlight the home's best features and help potential buyers see the home's potential with size and scale. In a room with double-height ceilings, a massive oversized canvas will draw the eye upward and emphasize the height of the walls. -IMG
Be creative and think beyond a typical canvas or framed print. Don’t be afraid to play with textures, shapes, and forms which can add additional interest to the visual appeal a home buyer will relate to. For example, a home with a young family could benefit from brighter colors and whimsical artwork, while a home for a younger couple or single person might be best presented with a more boho vibe, such as a guitar on the wall, a vintage map, or a textural crocheted wall hanging. Mirrors can also be an effective artwork option if the reflection is highlighting an important interior or exterior feature or selling point. -Bloom that Room
Choose complementary artwork pieces
Art is like a topping on the cake, it should go with the design palette to complete the space. Keep your artwork choices neutral, calm, and something that speaks to the room and to the potential buyer. -Jennifer Michele Interiors
Keep it simple. We find that it's best to keep artwork simple - it should be subtle yet attractive to the eye. To present the home in the most appealing light possible, use artwork that doesn’t feature images of people. Instead, consider using pieces that portray interesting but neutral visuals. The best art for home staging will compliment the space it's placed in while not distracting from the home itself. -Beycome
Choose pieces that match your home’s architectural style. A current trend is chalkboard art with inspirational sayings such as “love makes a house a home.” Most important, be certain that artwork won’t be offensive to potential buyers. -Harb & Co
Use artwork that fits the space and doesn't overpower the room. When you start to use big, bold, and personal pieces, you are decorating the space. When determining what kind of art and wall décor to use when staging, you want to be sure to keep things simple and neutral. The whole point of staging is to draw buyer's attention to the features, size, and functions of the rooms and for them to envision themselves living in the space. -Designing Impressions
Use artwork to highlight specific features in your home
Hang art in bathrooms. The use of framed photos of plants, trees, or flowers in bathrooms gives these spaces a spa-like feel and enhances how each room photographs. When coupled with a few white towels and spa counter accessories, art can transform even the most outdated bathroom spaces. -Knoxville Staging Services
Art is the bow on the 'package' in room décor. It should be the first thing to catch your eye and draw you in to see what's inside. Abstract pieces that feature strokes of color on light canvases are always a good choice, especially if the frame is in a metallic finish that complements the light fixtures in a room. They catch the eye and draw people in, but they don't outshine the room itself, which is, after all, what good staging is all about. -Staging That Sells
Keep scale in mind when choosing artwork for staging
Choose large canvas wall art in the colors and style of the house. Wall art on each wall can make your home appear cluttered. Instead, large canvas pieces are easy to hang and will draw the eye to the home's focal points. If you have a large gorgeous fireplace, a large bright piece of canvas art will highlight this feature. Only hang wall art in spaces that are focal points for the listing photos to direct a buyer's eye. If you have one or two smaller plaques or pieces of wall art in a large area, it will look out of proportion, so make sure it's all in scale to the size of the room, the ceiling height, and the size of the furniture. -Dramatix Decor
Choose artwork that is “show-worthy” and offers the drama necessary to create a cohesive space. Keep in mind that the larger the scale, the fewer pieces are needed (and fewer holes in your walls when staging). Your artwork choices are also the foundation for selecting the accent colors to use in a home. Colors should flow gracefully from one space to the next. -Impact Home Staging
If you have a large empty wall, search for large artwork to anchor the space. You can then tie in the colors of the décor in the room to the artwork's colors, exhibiting a very uniform look. -2 West Photography
Along with selecting neutral art, be sure it's scaled and hung appropriately. We often come across artwork placed on walls in the wrong orientation, size, and or dimension. The center of the artwork should be 57 inches from the floor, 6-8 inches above a piece of furniture, and 3-6 inches apart when in a grouping. -Simplicity
Make sure your artwork choices are balanced
Think about how multiple art pieces are going to look when showing various rooms in a single photo. For example, consider how strategically placing a painting on the wall of one room, like a bedroom down a hall, might give depth to the living room in the foreground. Instead of showing a blank wall, that extra splash of color on the far wall could help to extend the perceived size of a space and make it more attractive to potential buyers. -The Best Local Real Estate Photographers
Choose art that is large and balancing for your space so that it’s eye-catching and attention-grabbing in photos. More often than not, a large statement piece of art will look more dramatic and enticing than multiple smaller pieces. Buyers love interesting photos with clean lines, and large statement art will help draw them in. -Haymount Homes
Artwork should be appropriately sized for the location. Wall art should take up 65% of the available wall space and be about 2/3 to 3/4 the width of the furniture. Your artwork choices should also have an impersonal, but coordinated, theme throughout the space. For example, sticking with abstracts in contemporary spaces, nature scenes in traditional spaces, and water or beach scenes in bathrooms. -Her Home Design
Originally published by Redfin


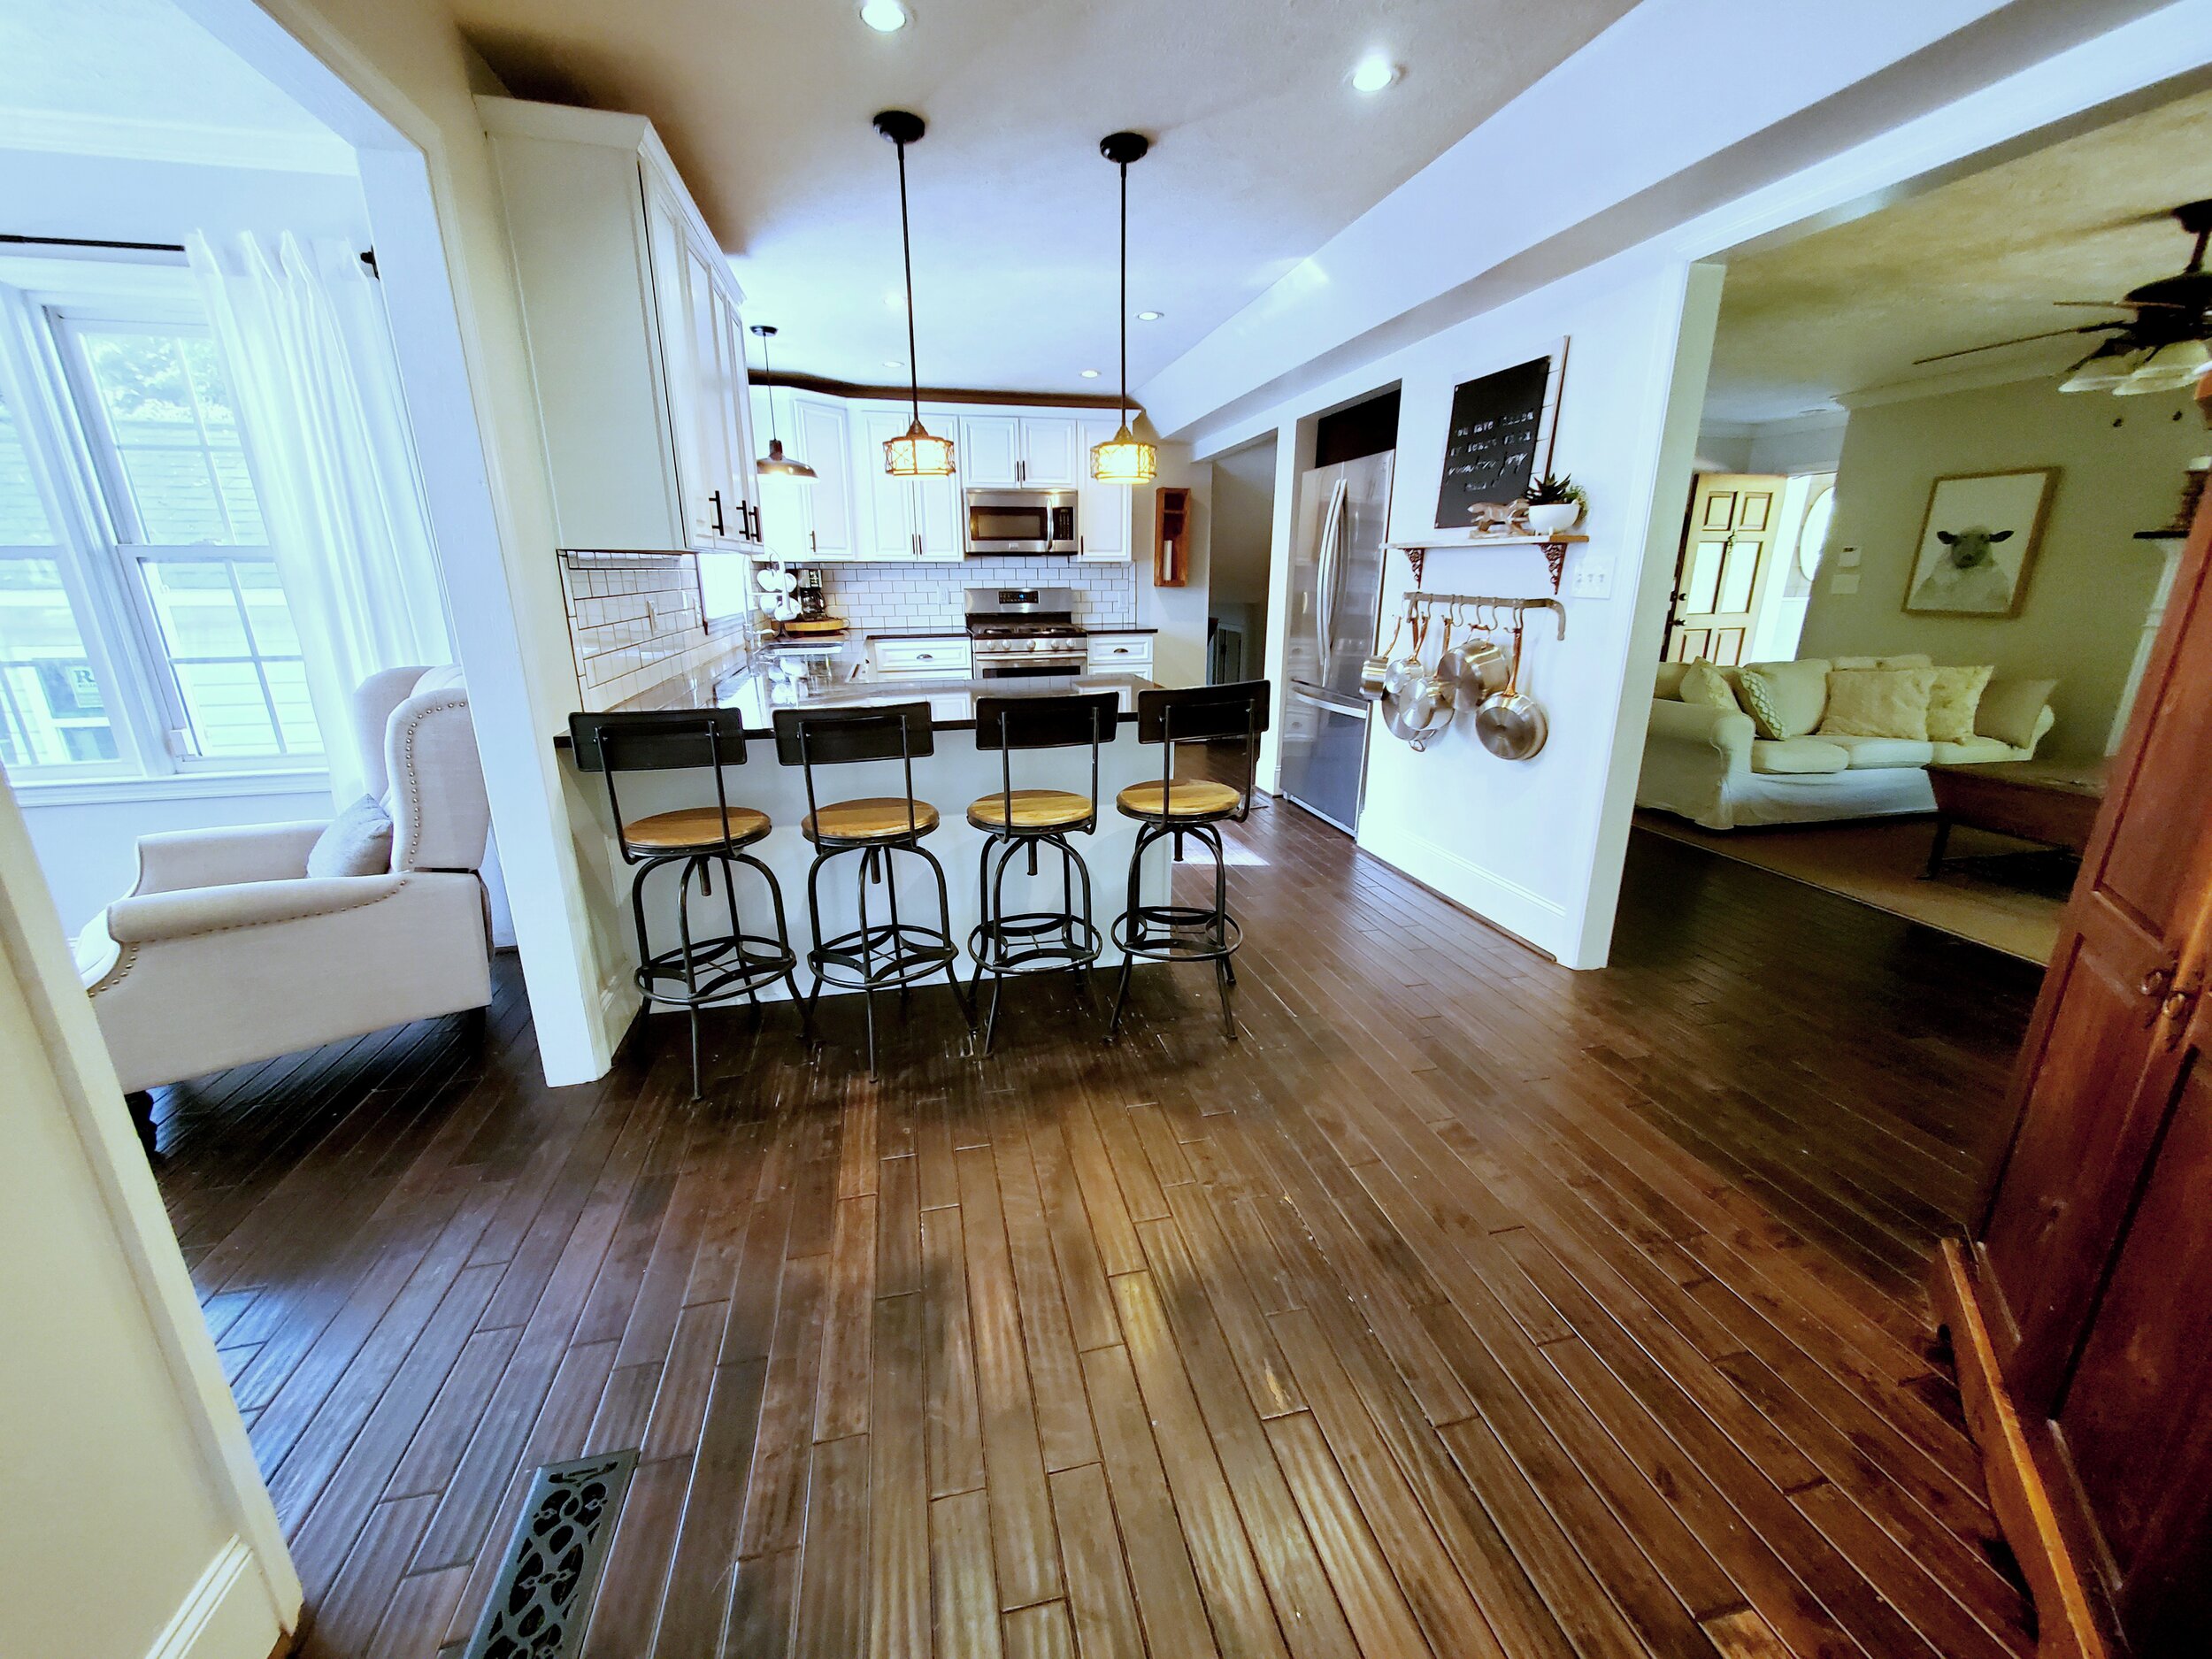
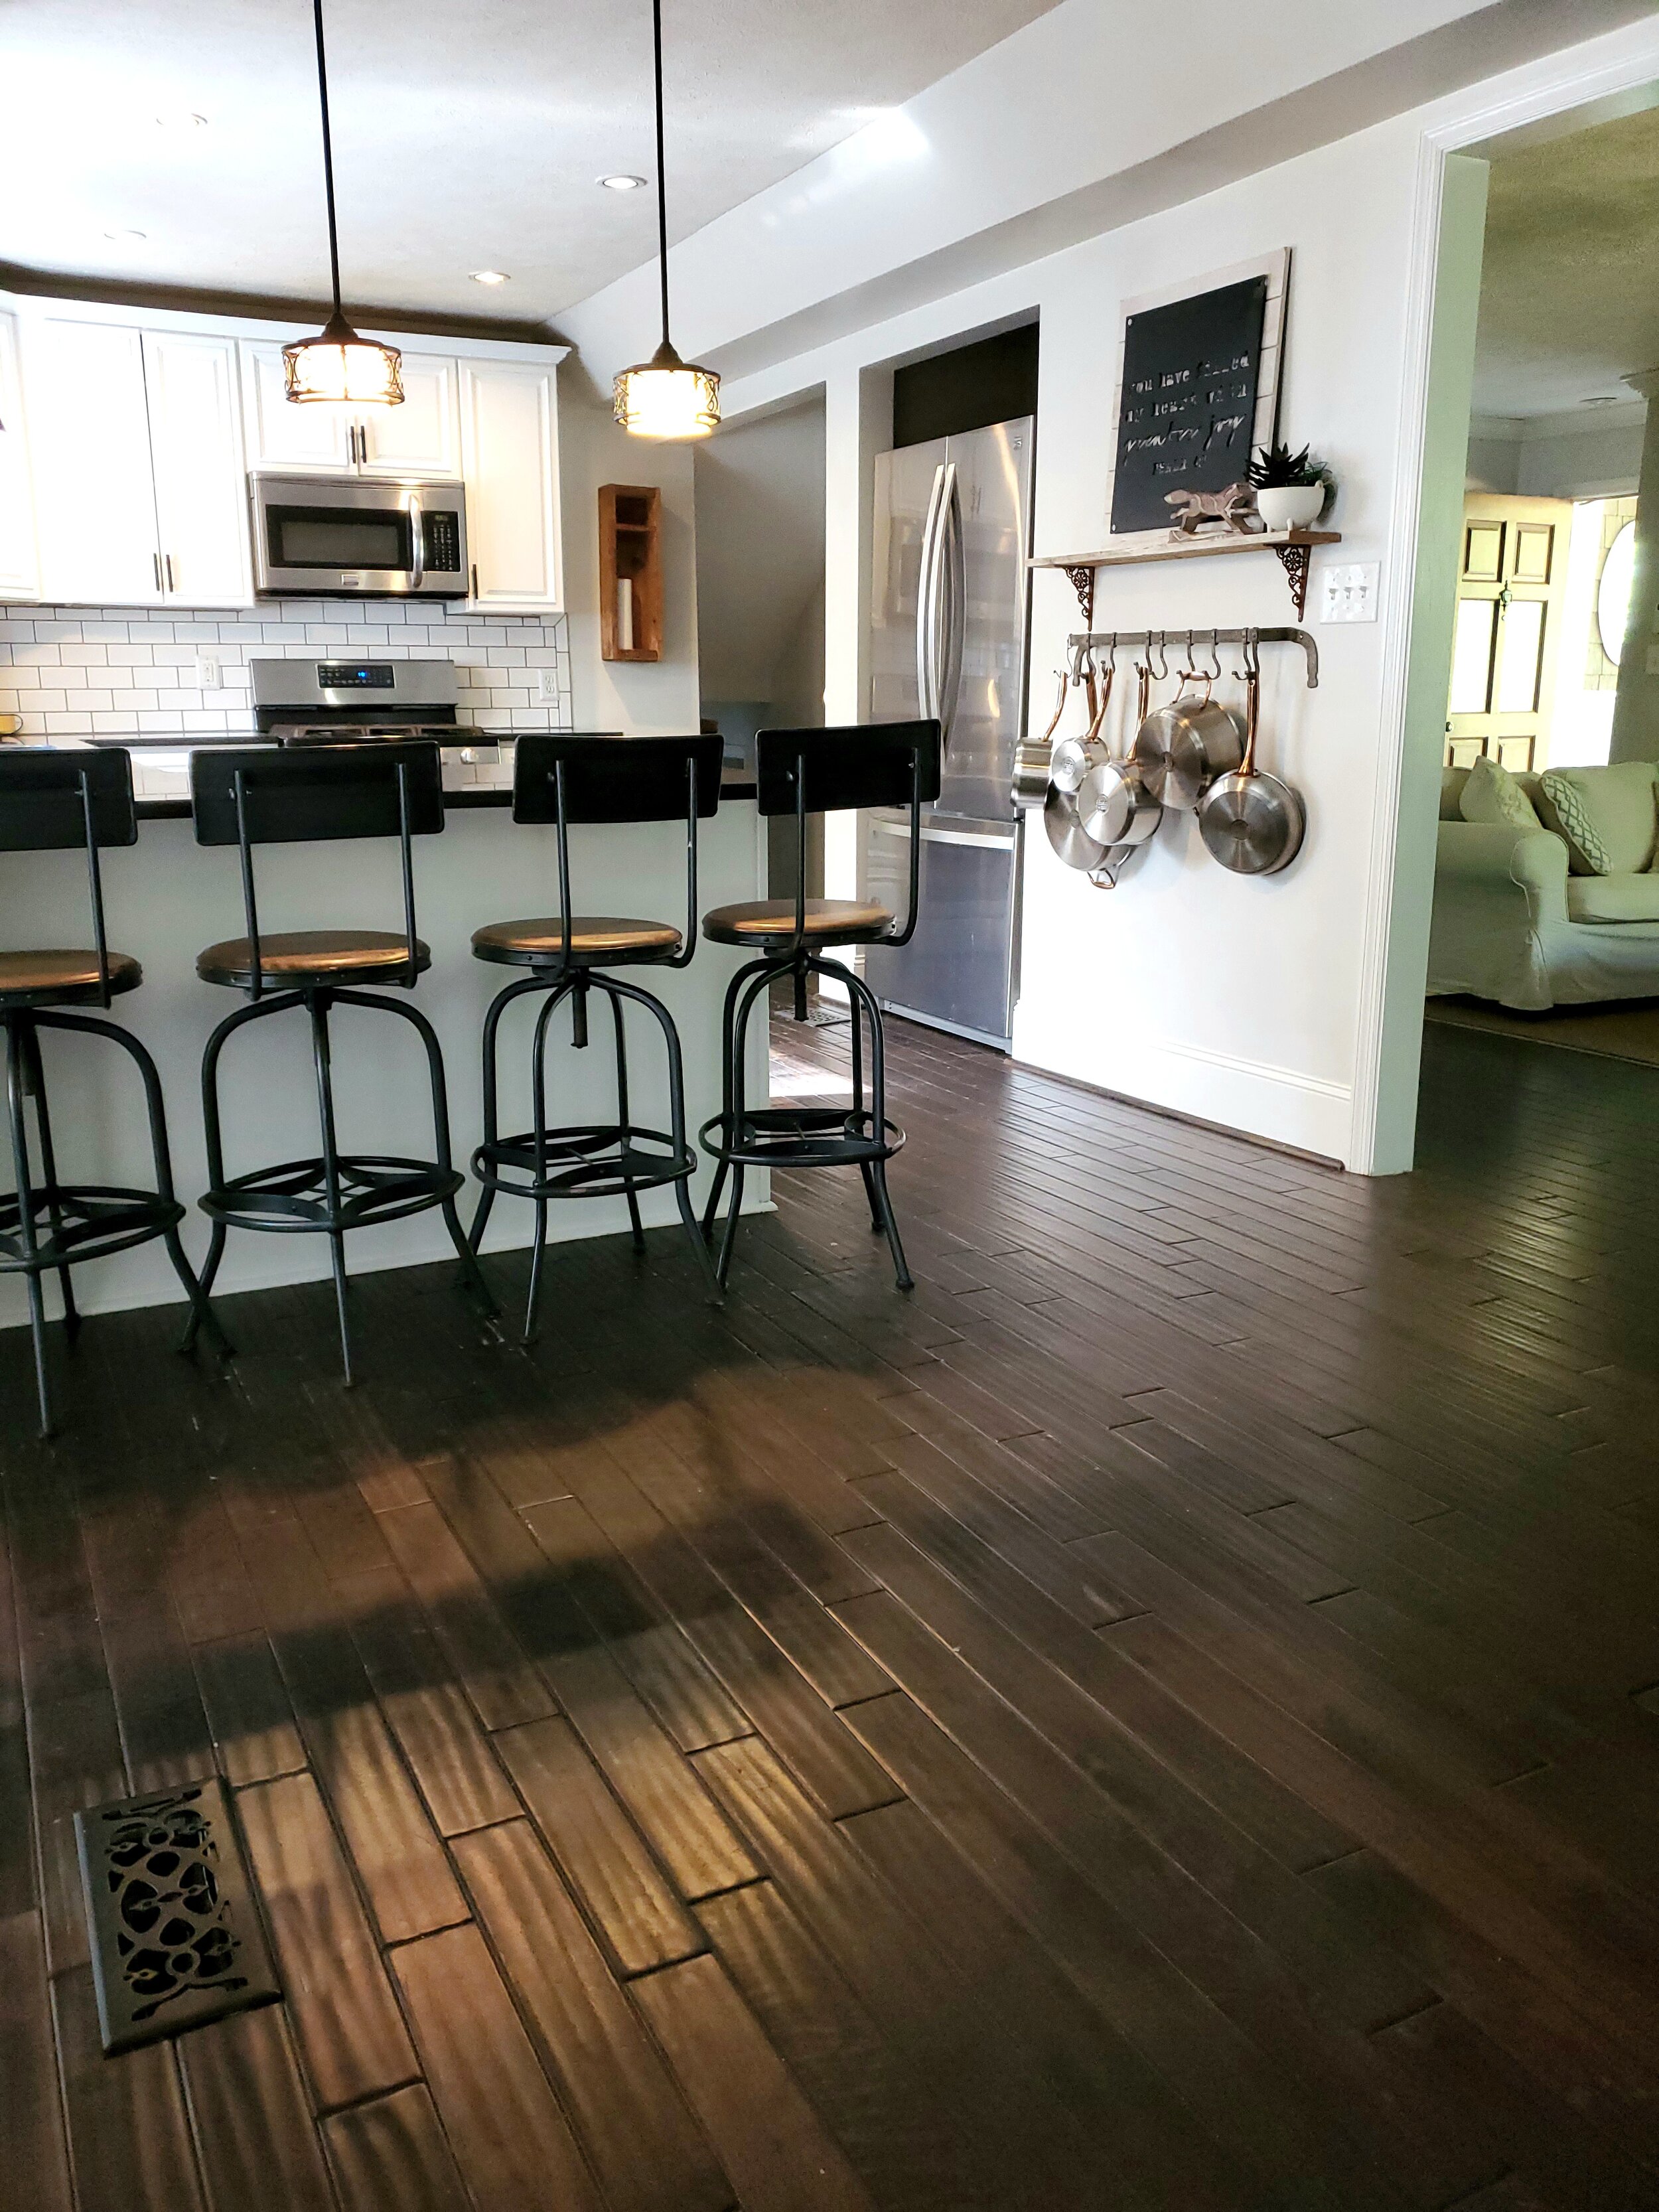
Hillside Renovations Part IV: Before and After Lower Level Living Room and Kitchen (Copy)
Beautiful before and after pictures of kitchen and living room renovation of a 120 year old historic home
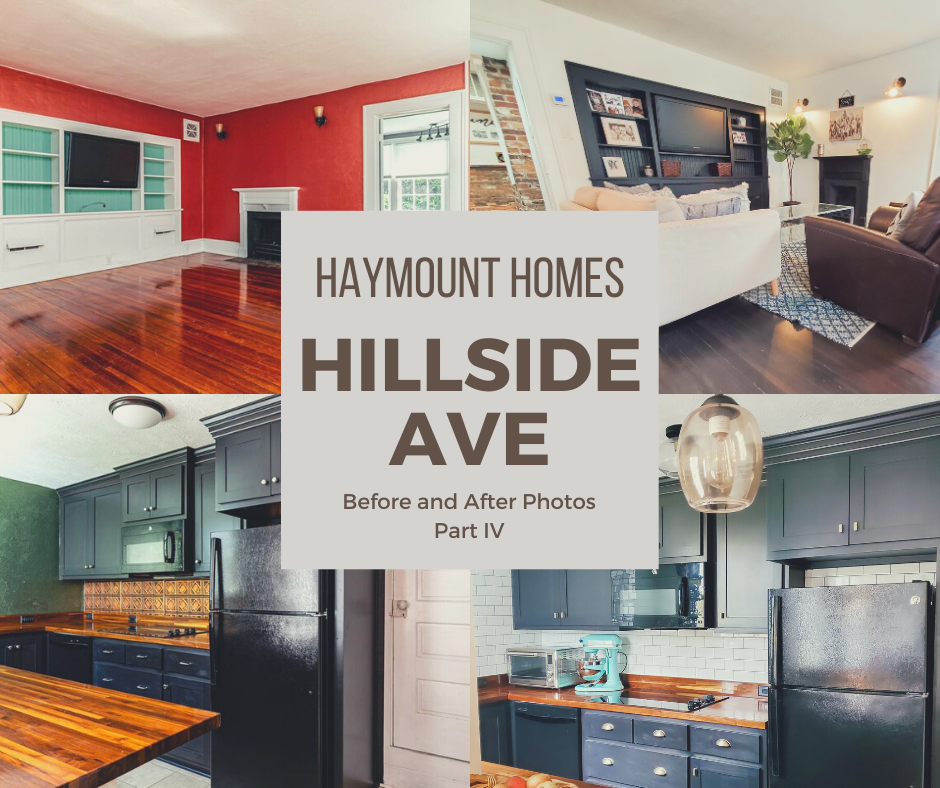
Well….who’s in the mood for some before and after photos? It's been a while since we have updated everybody on the renovations on our Hillside home, so we decided to get moving on a new blog post to show you some of the transformation.
At our home, everything is consistently a work in progress. We just ordered a couple of different runners to choose one for the kitchen (recent obsession Loloi rugs…), and things are slowly coming along on the bookshelves. Despite the lack of finished product, we took some photos anyway!


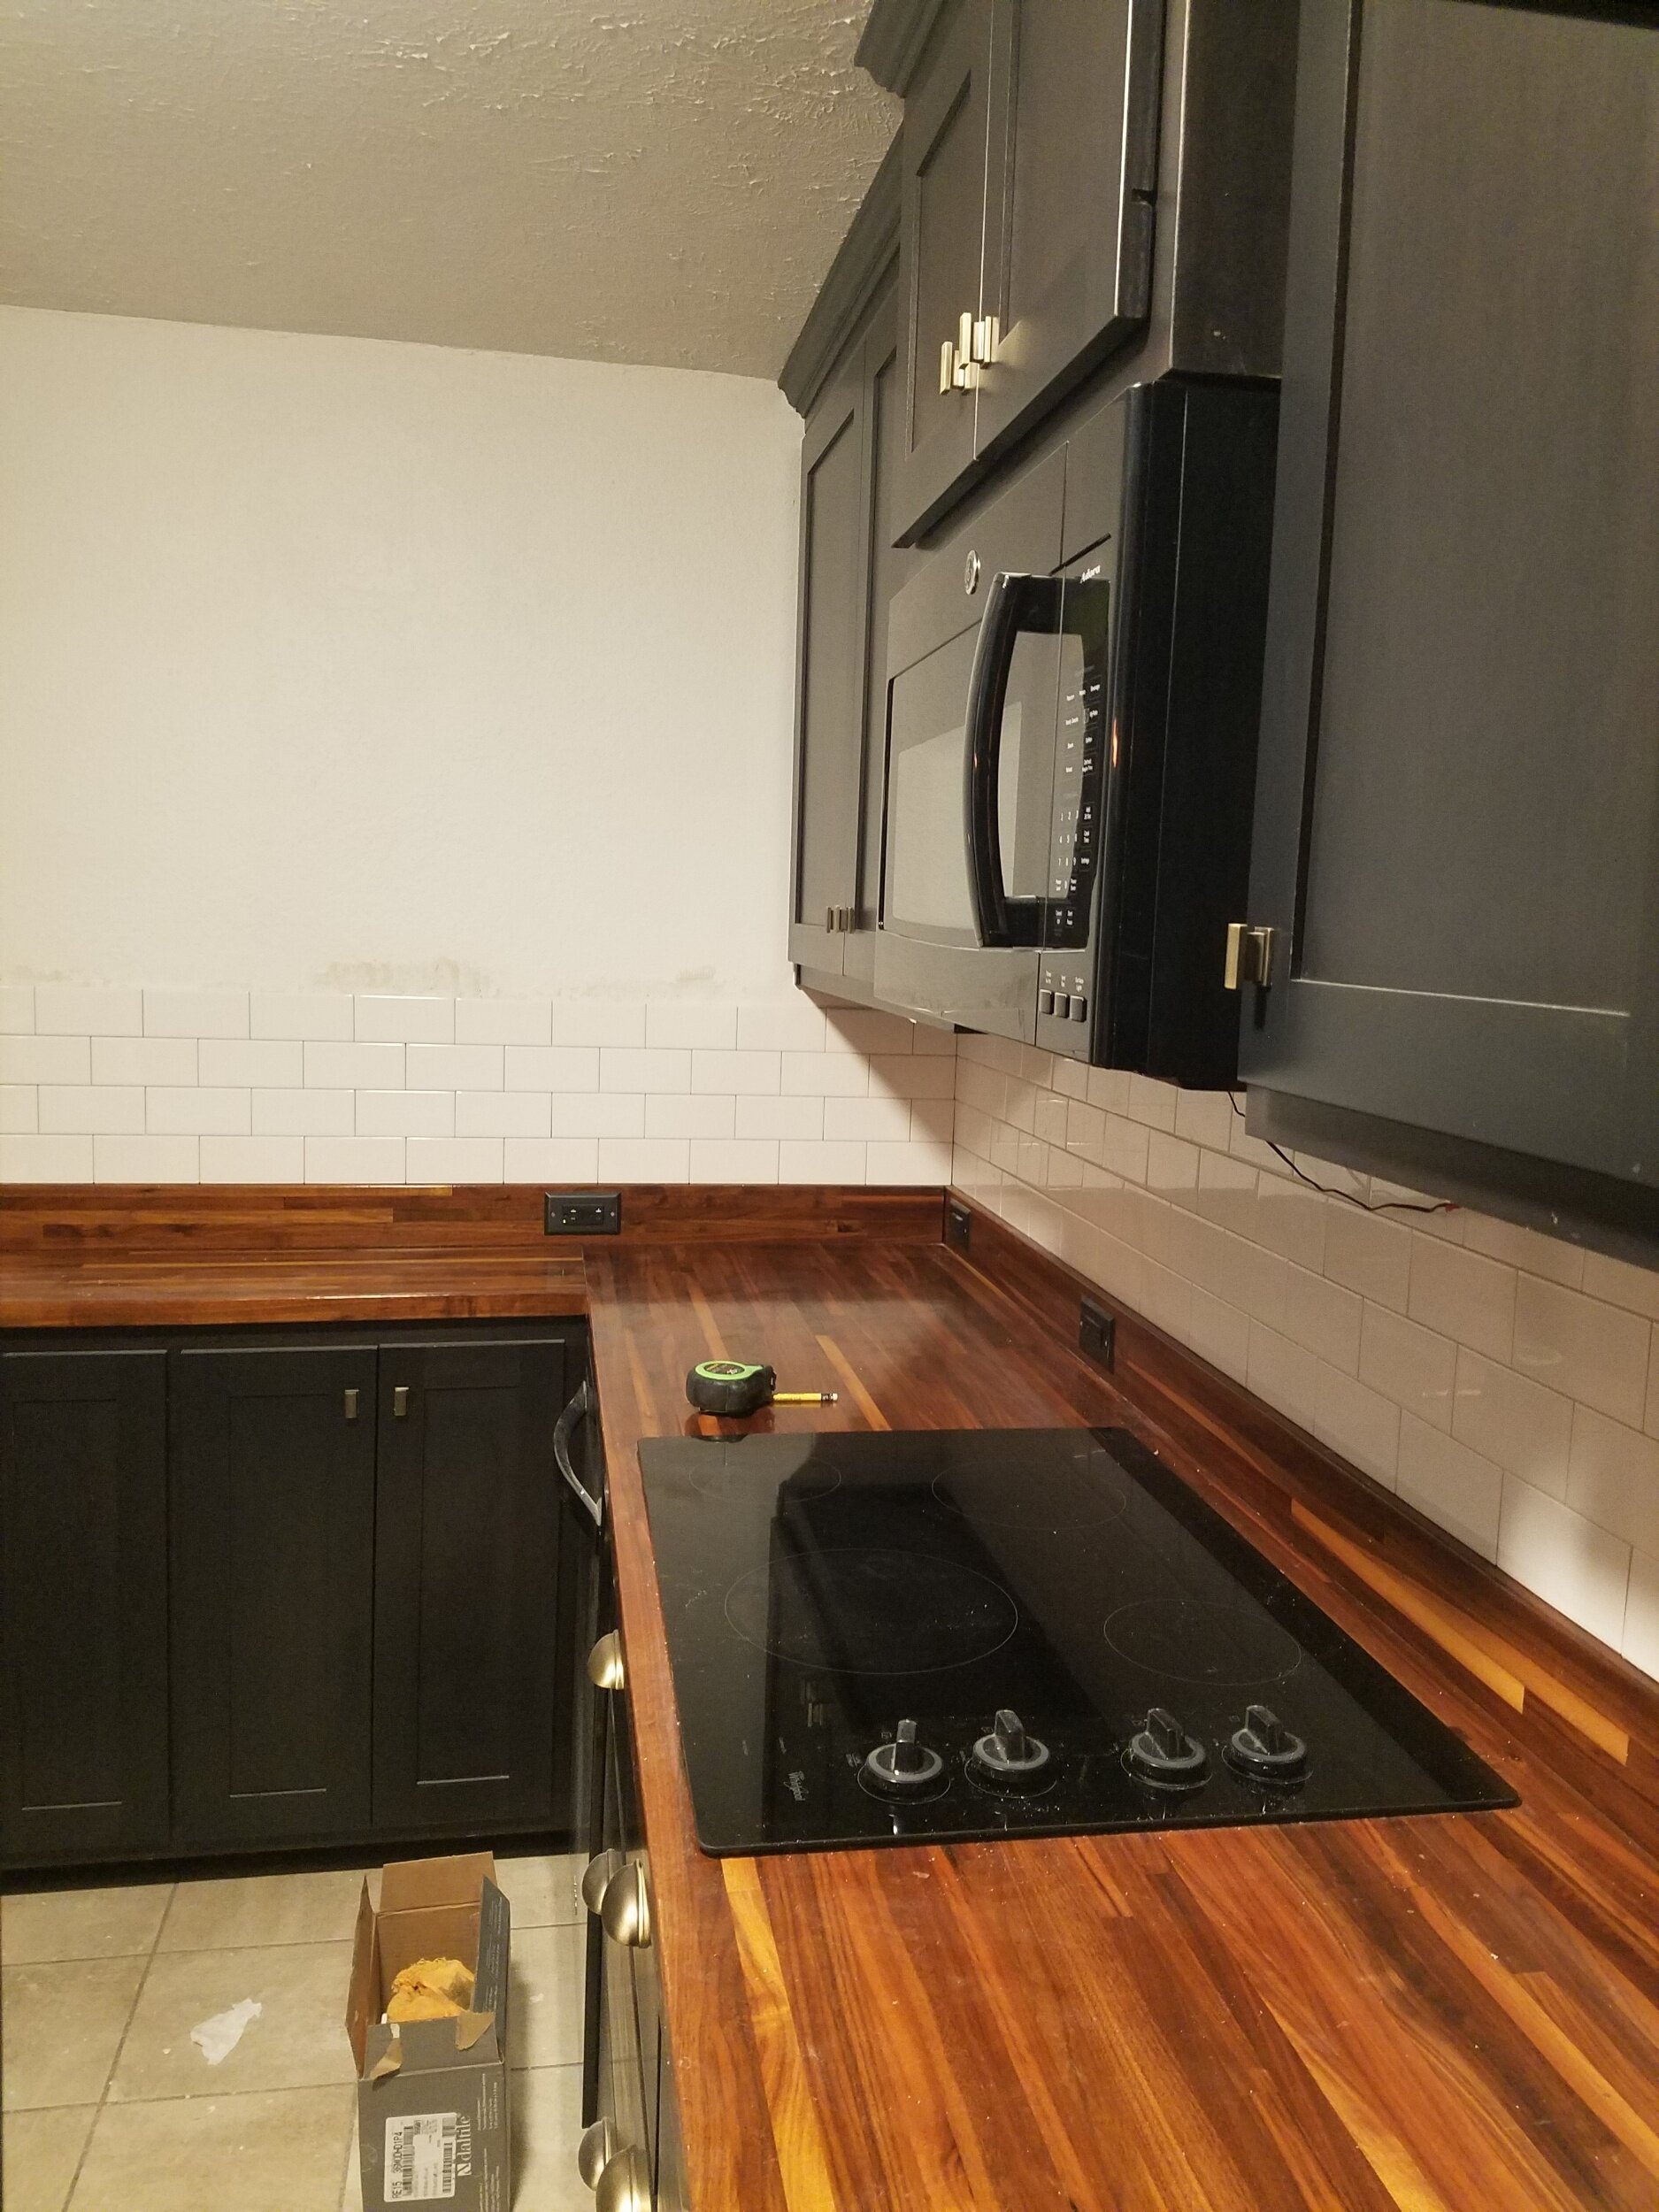


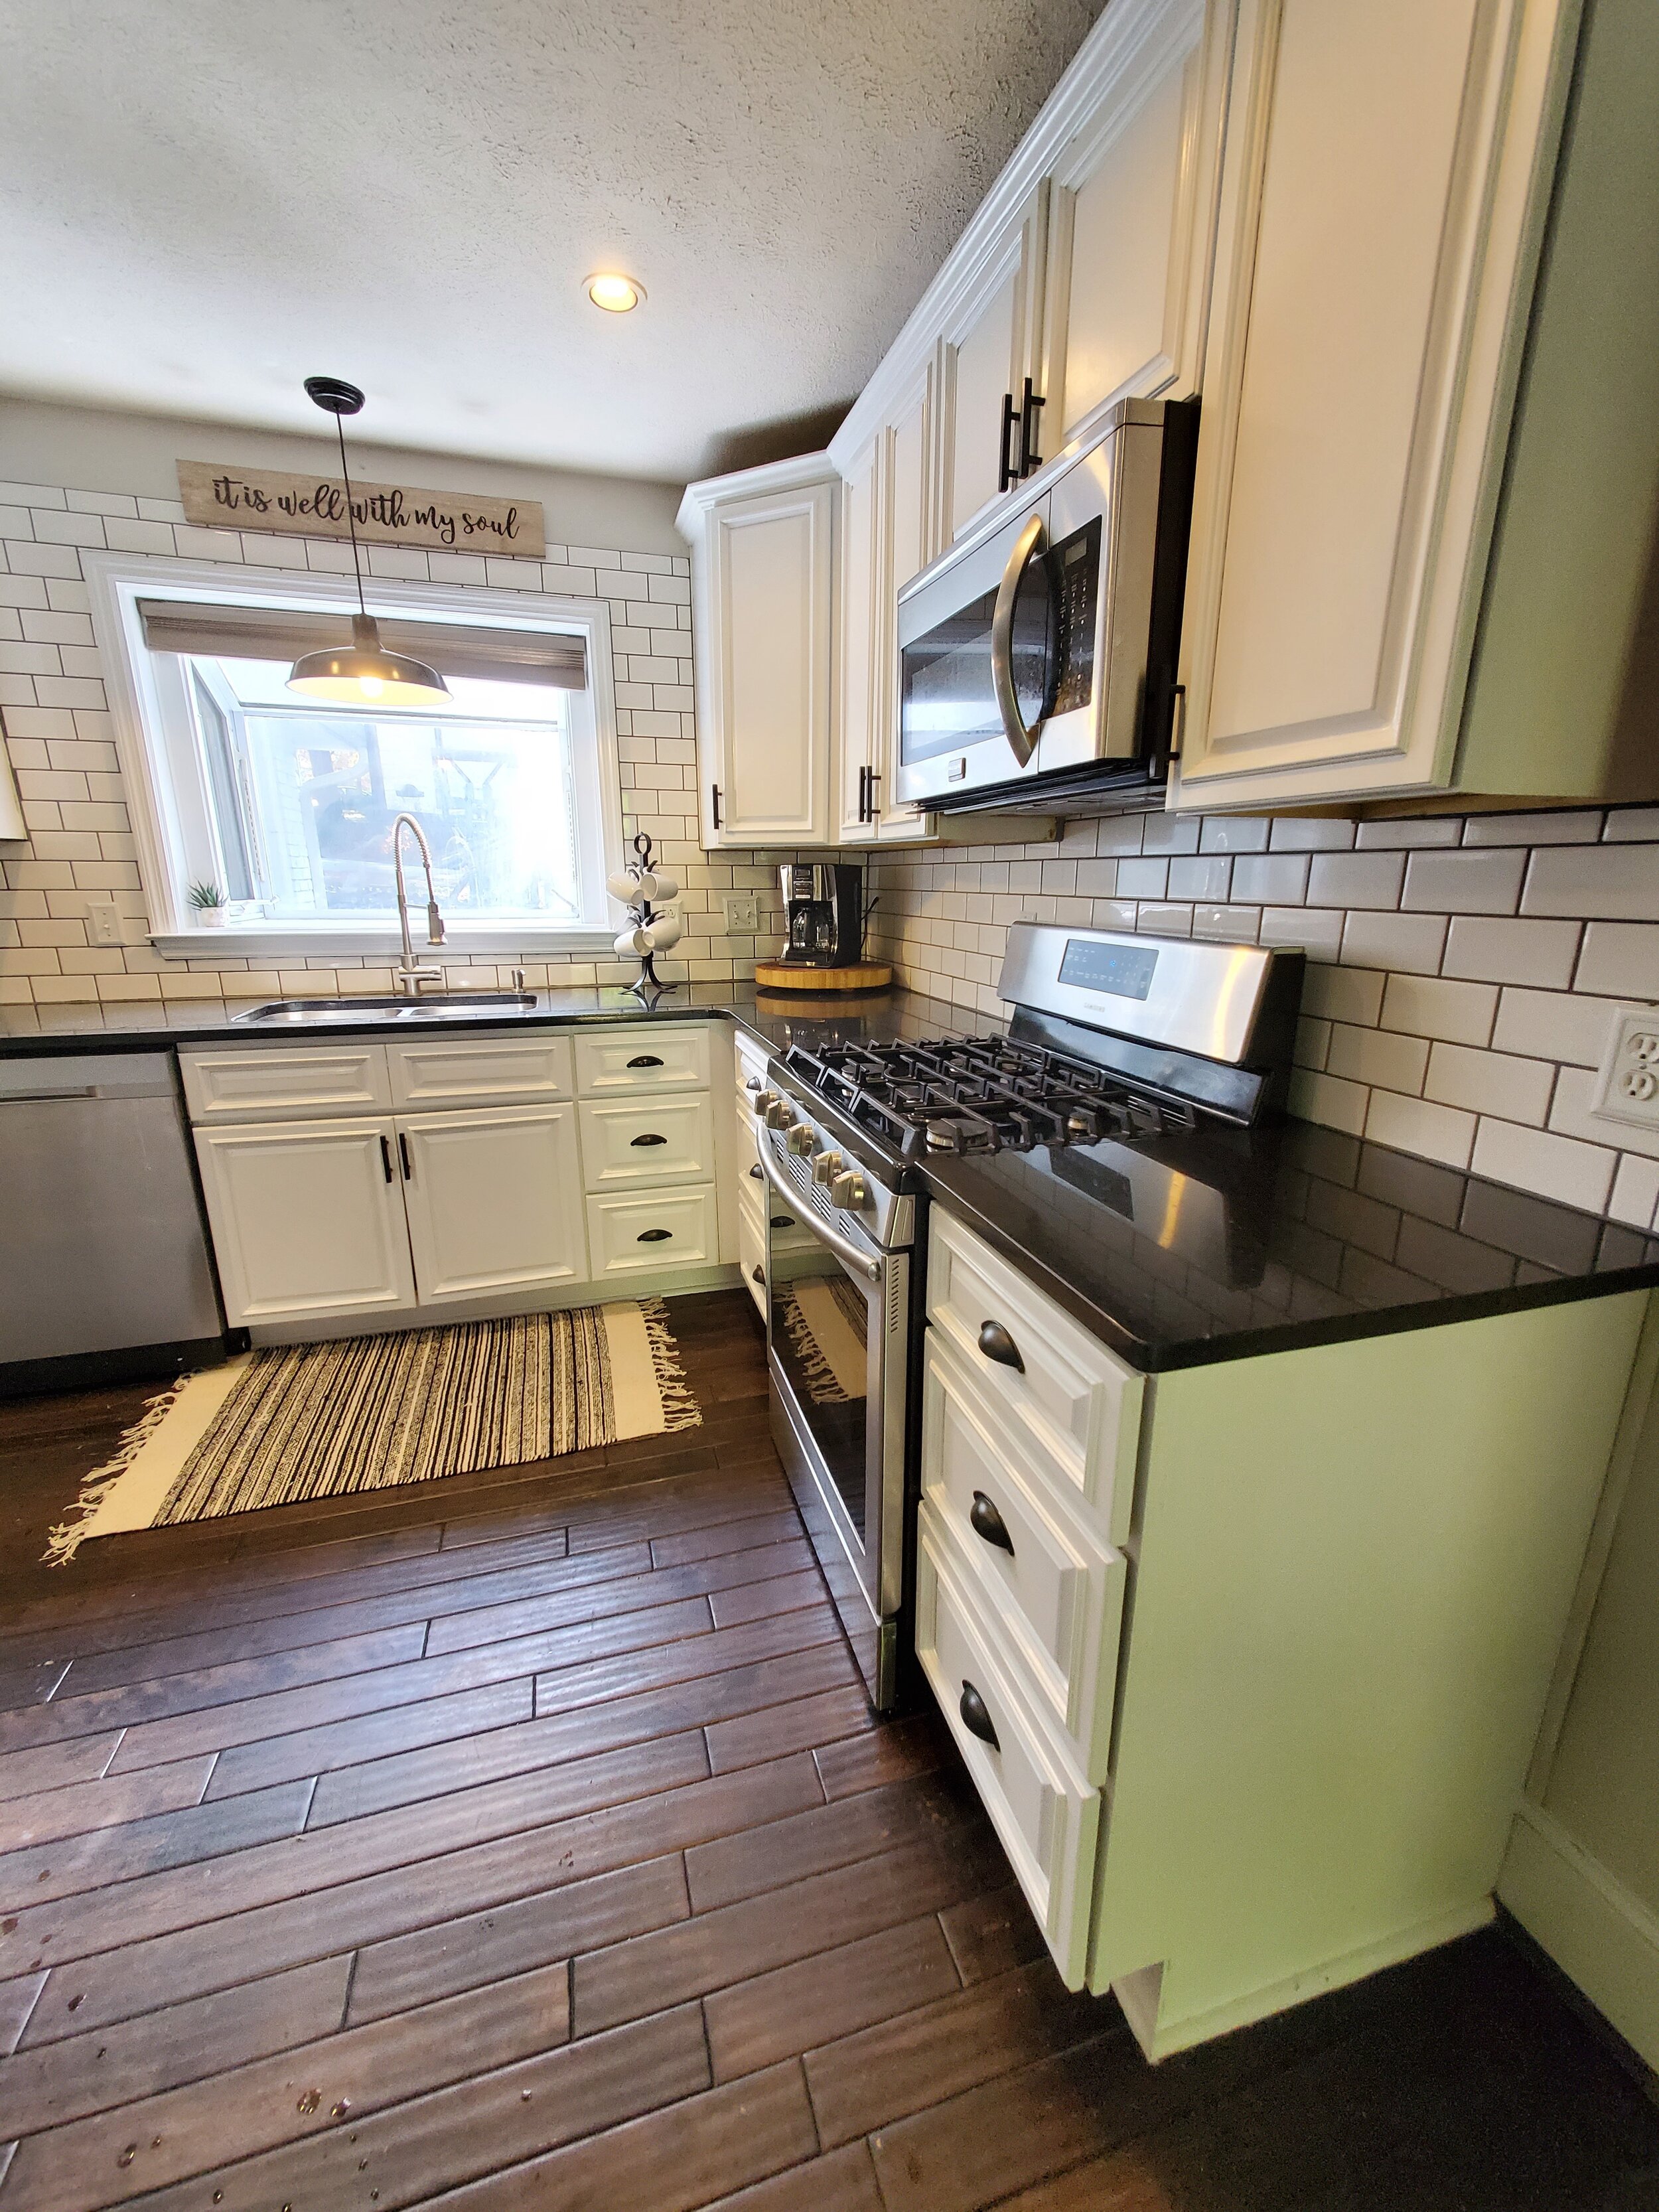
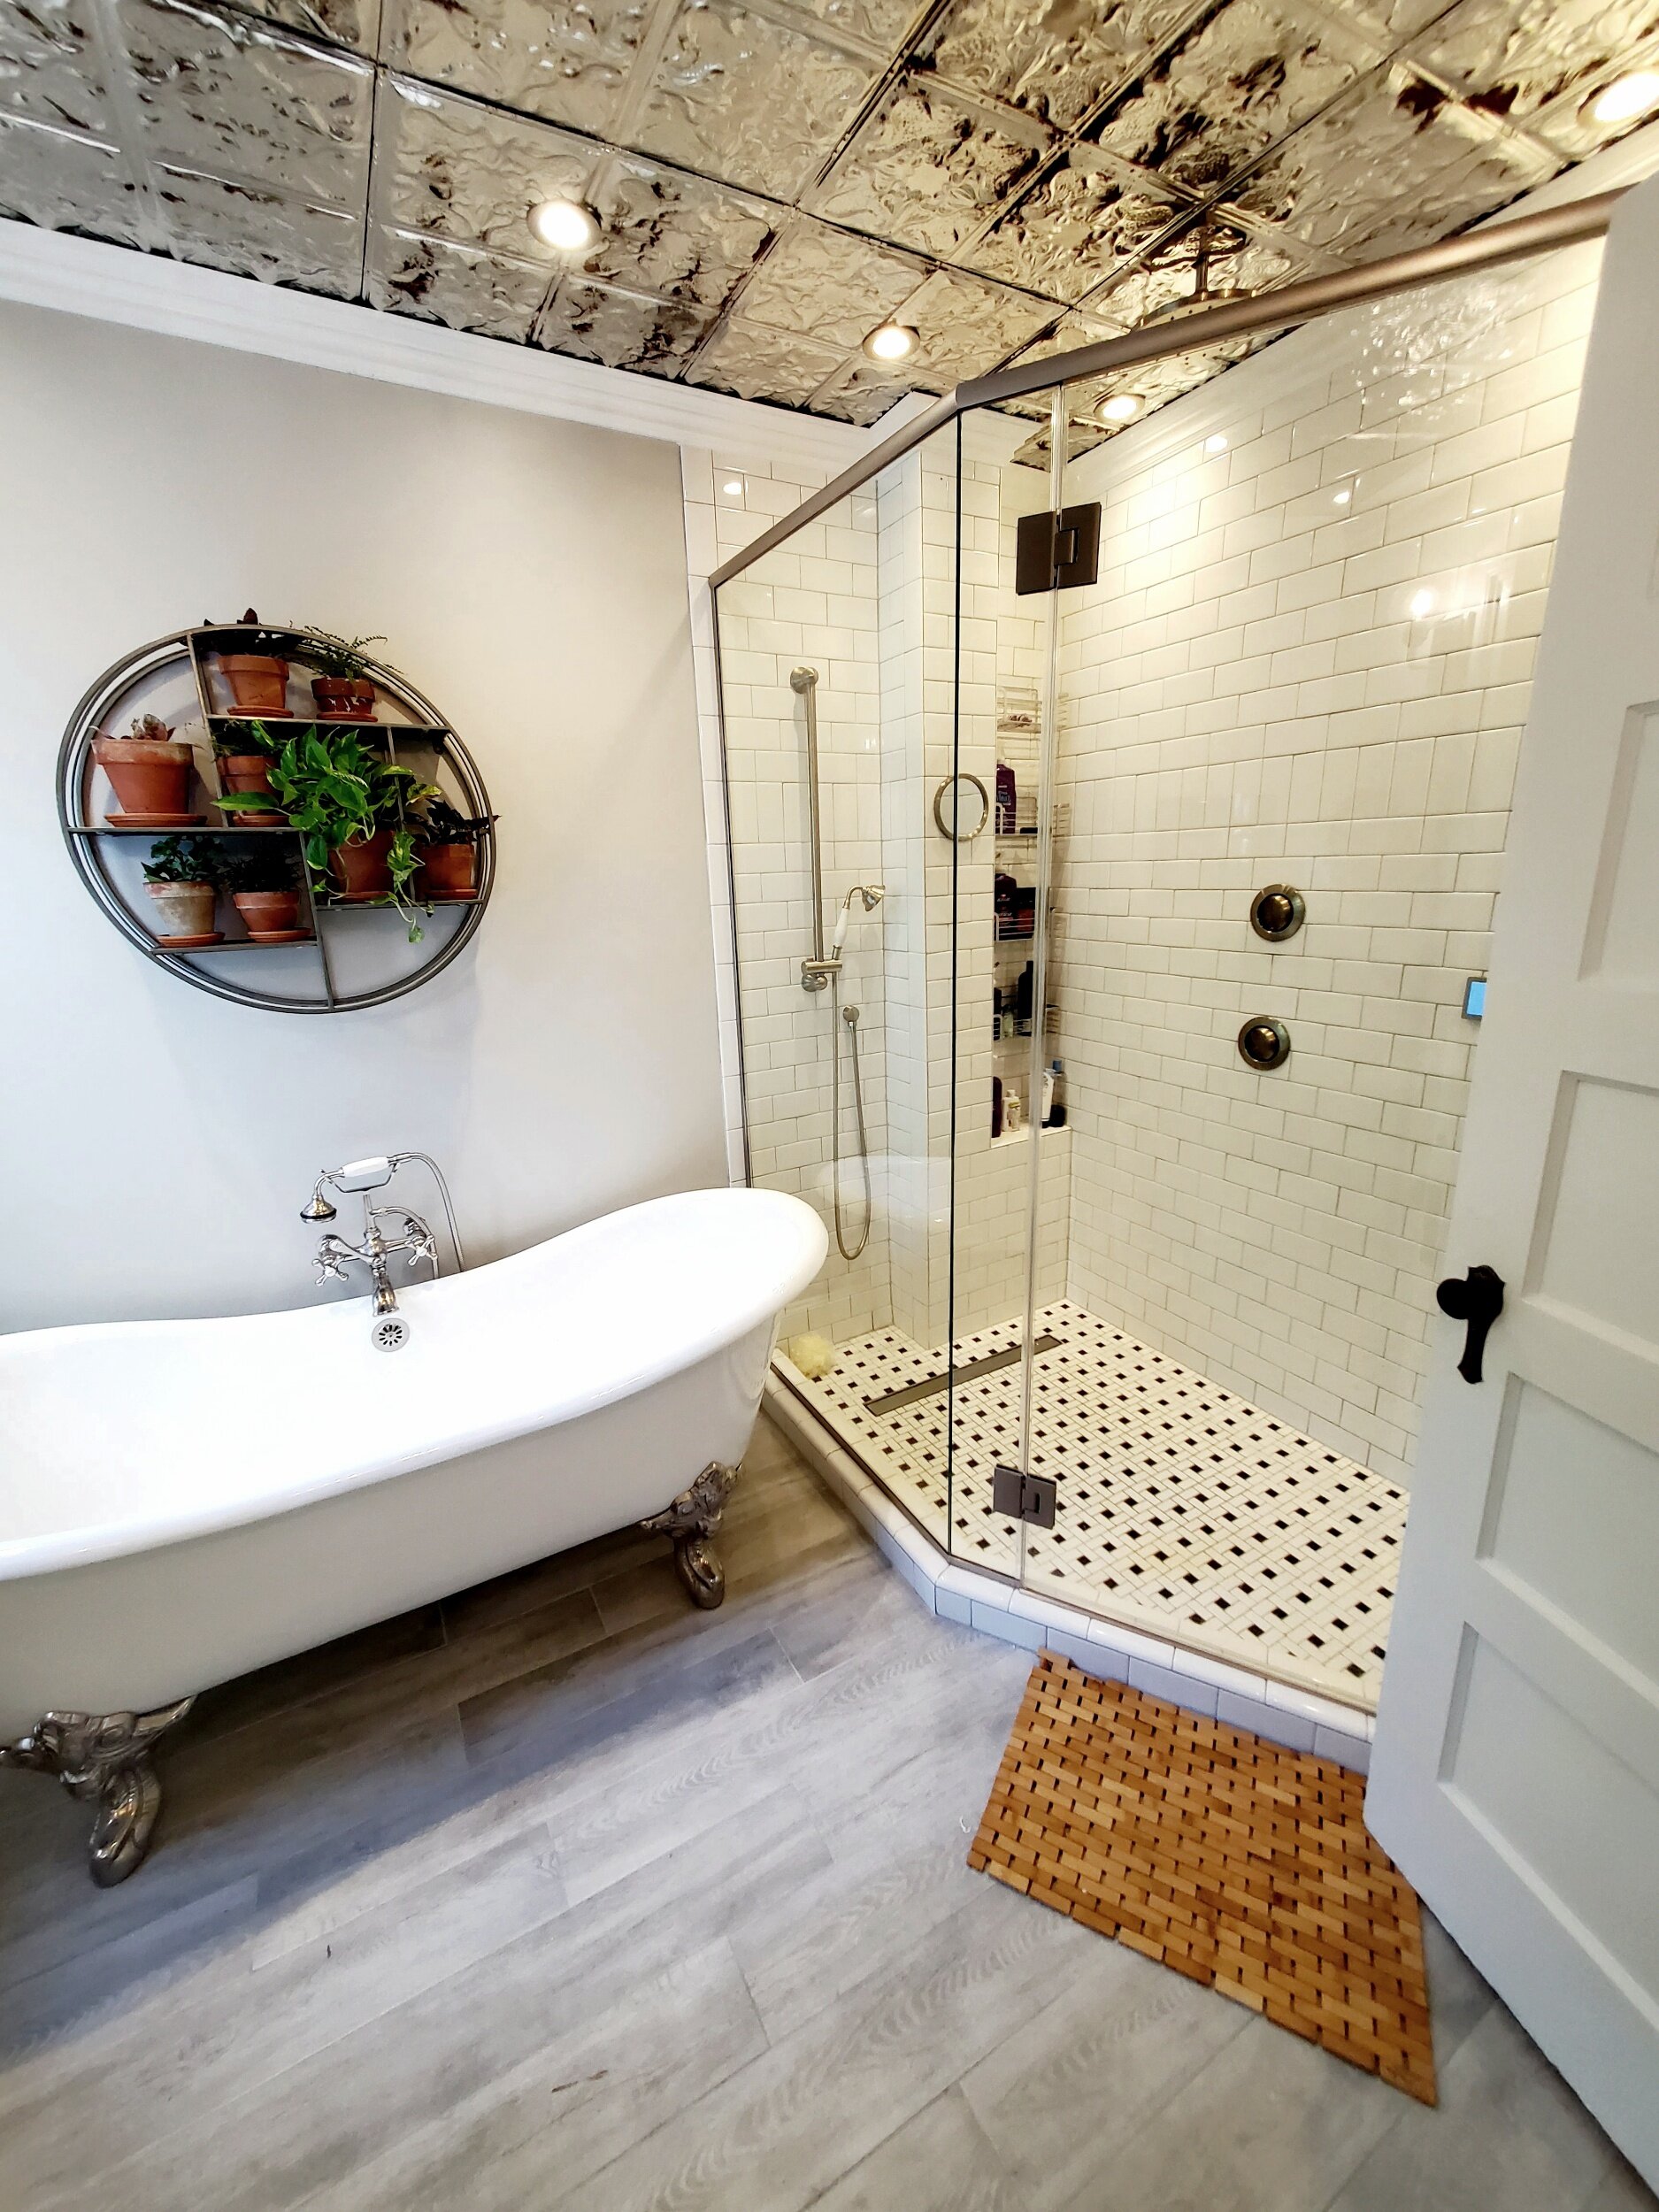
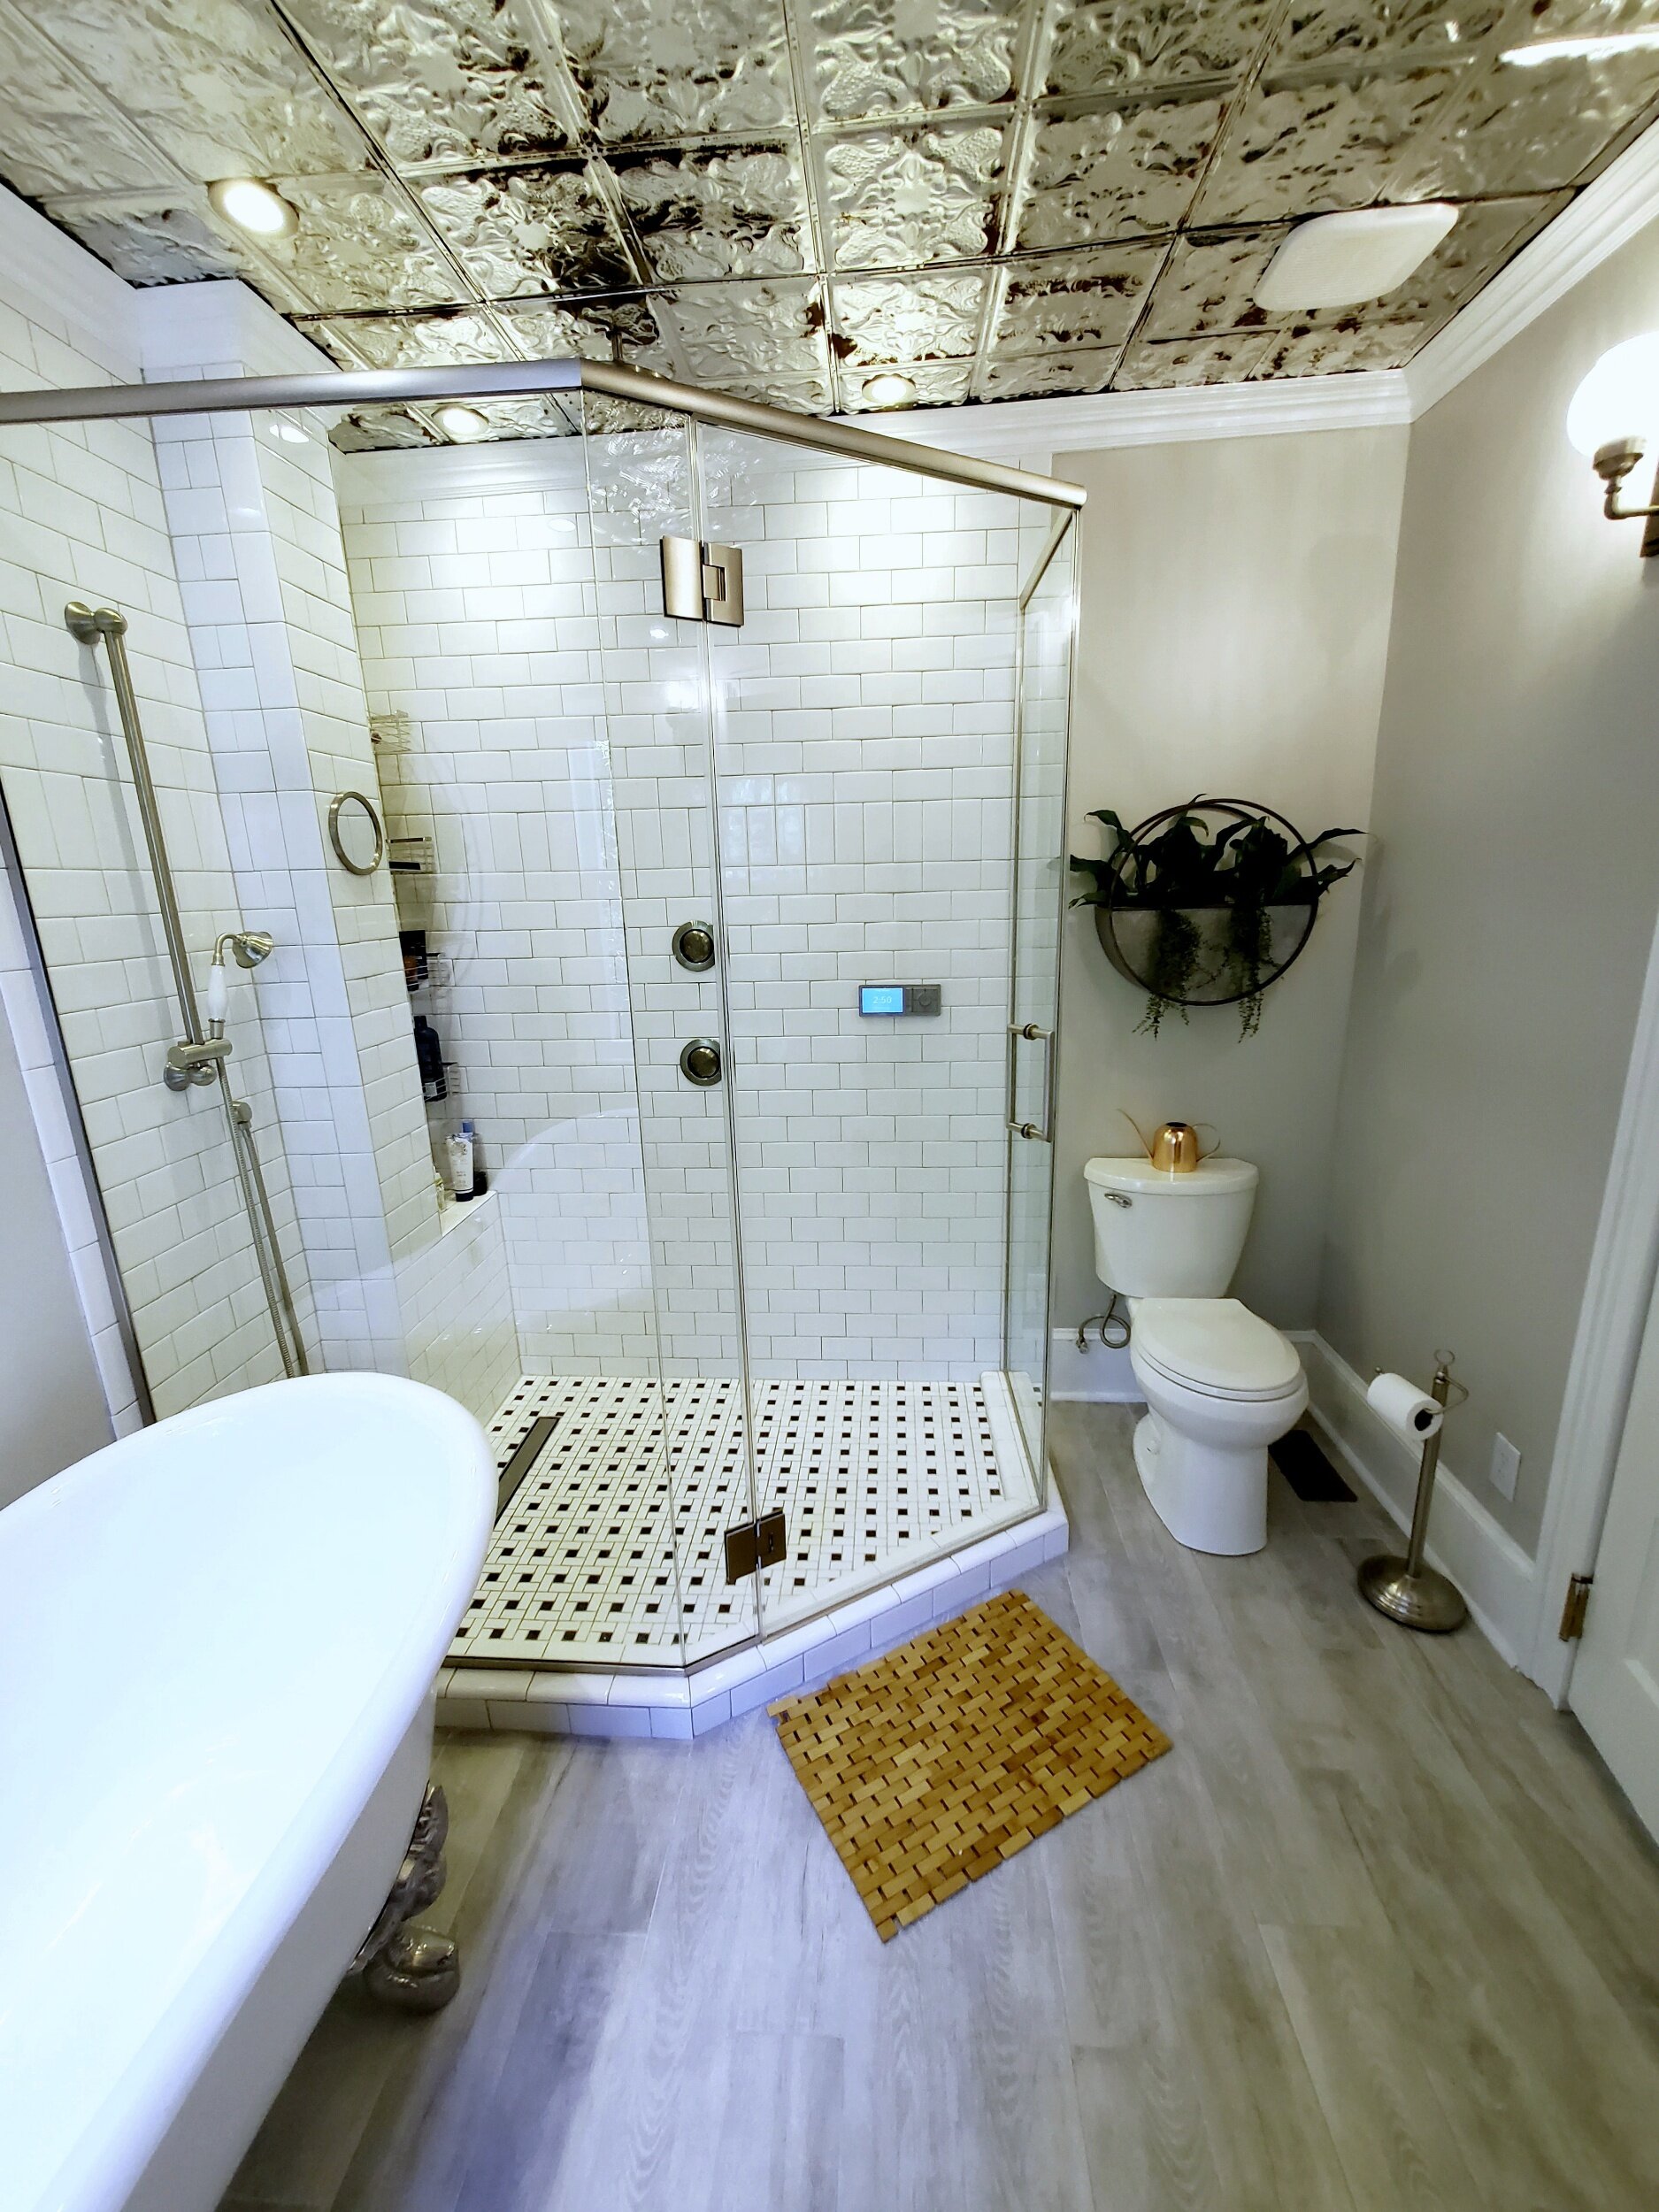
The kitchen was a little bit of a process. We chose to install a subway tile backsplash, changed the hardware out for brushed brass, and added a multi-patterned hexagon gray tile to the floor. The end result feels more like us!


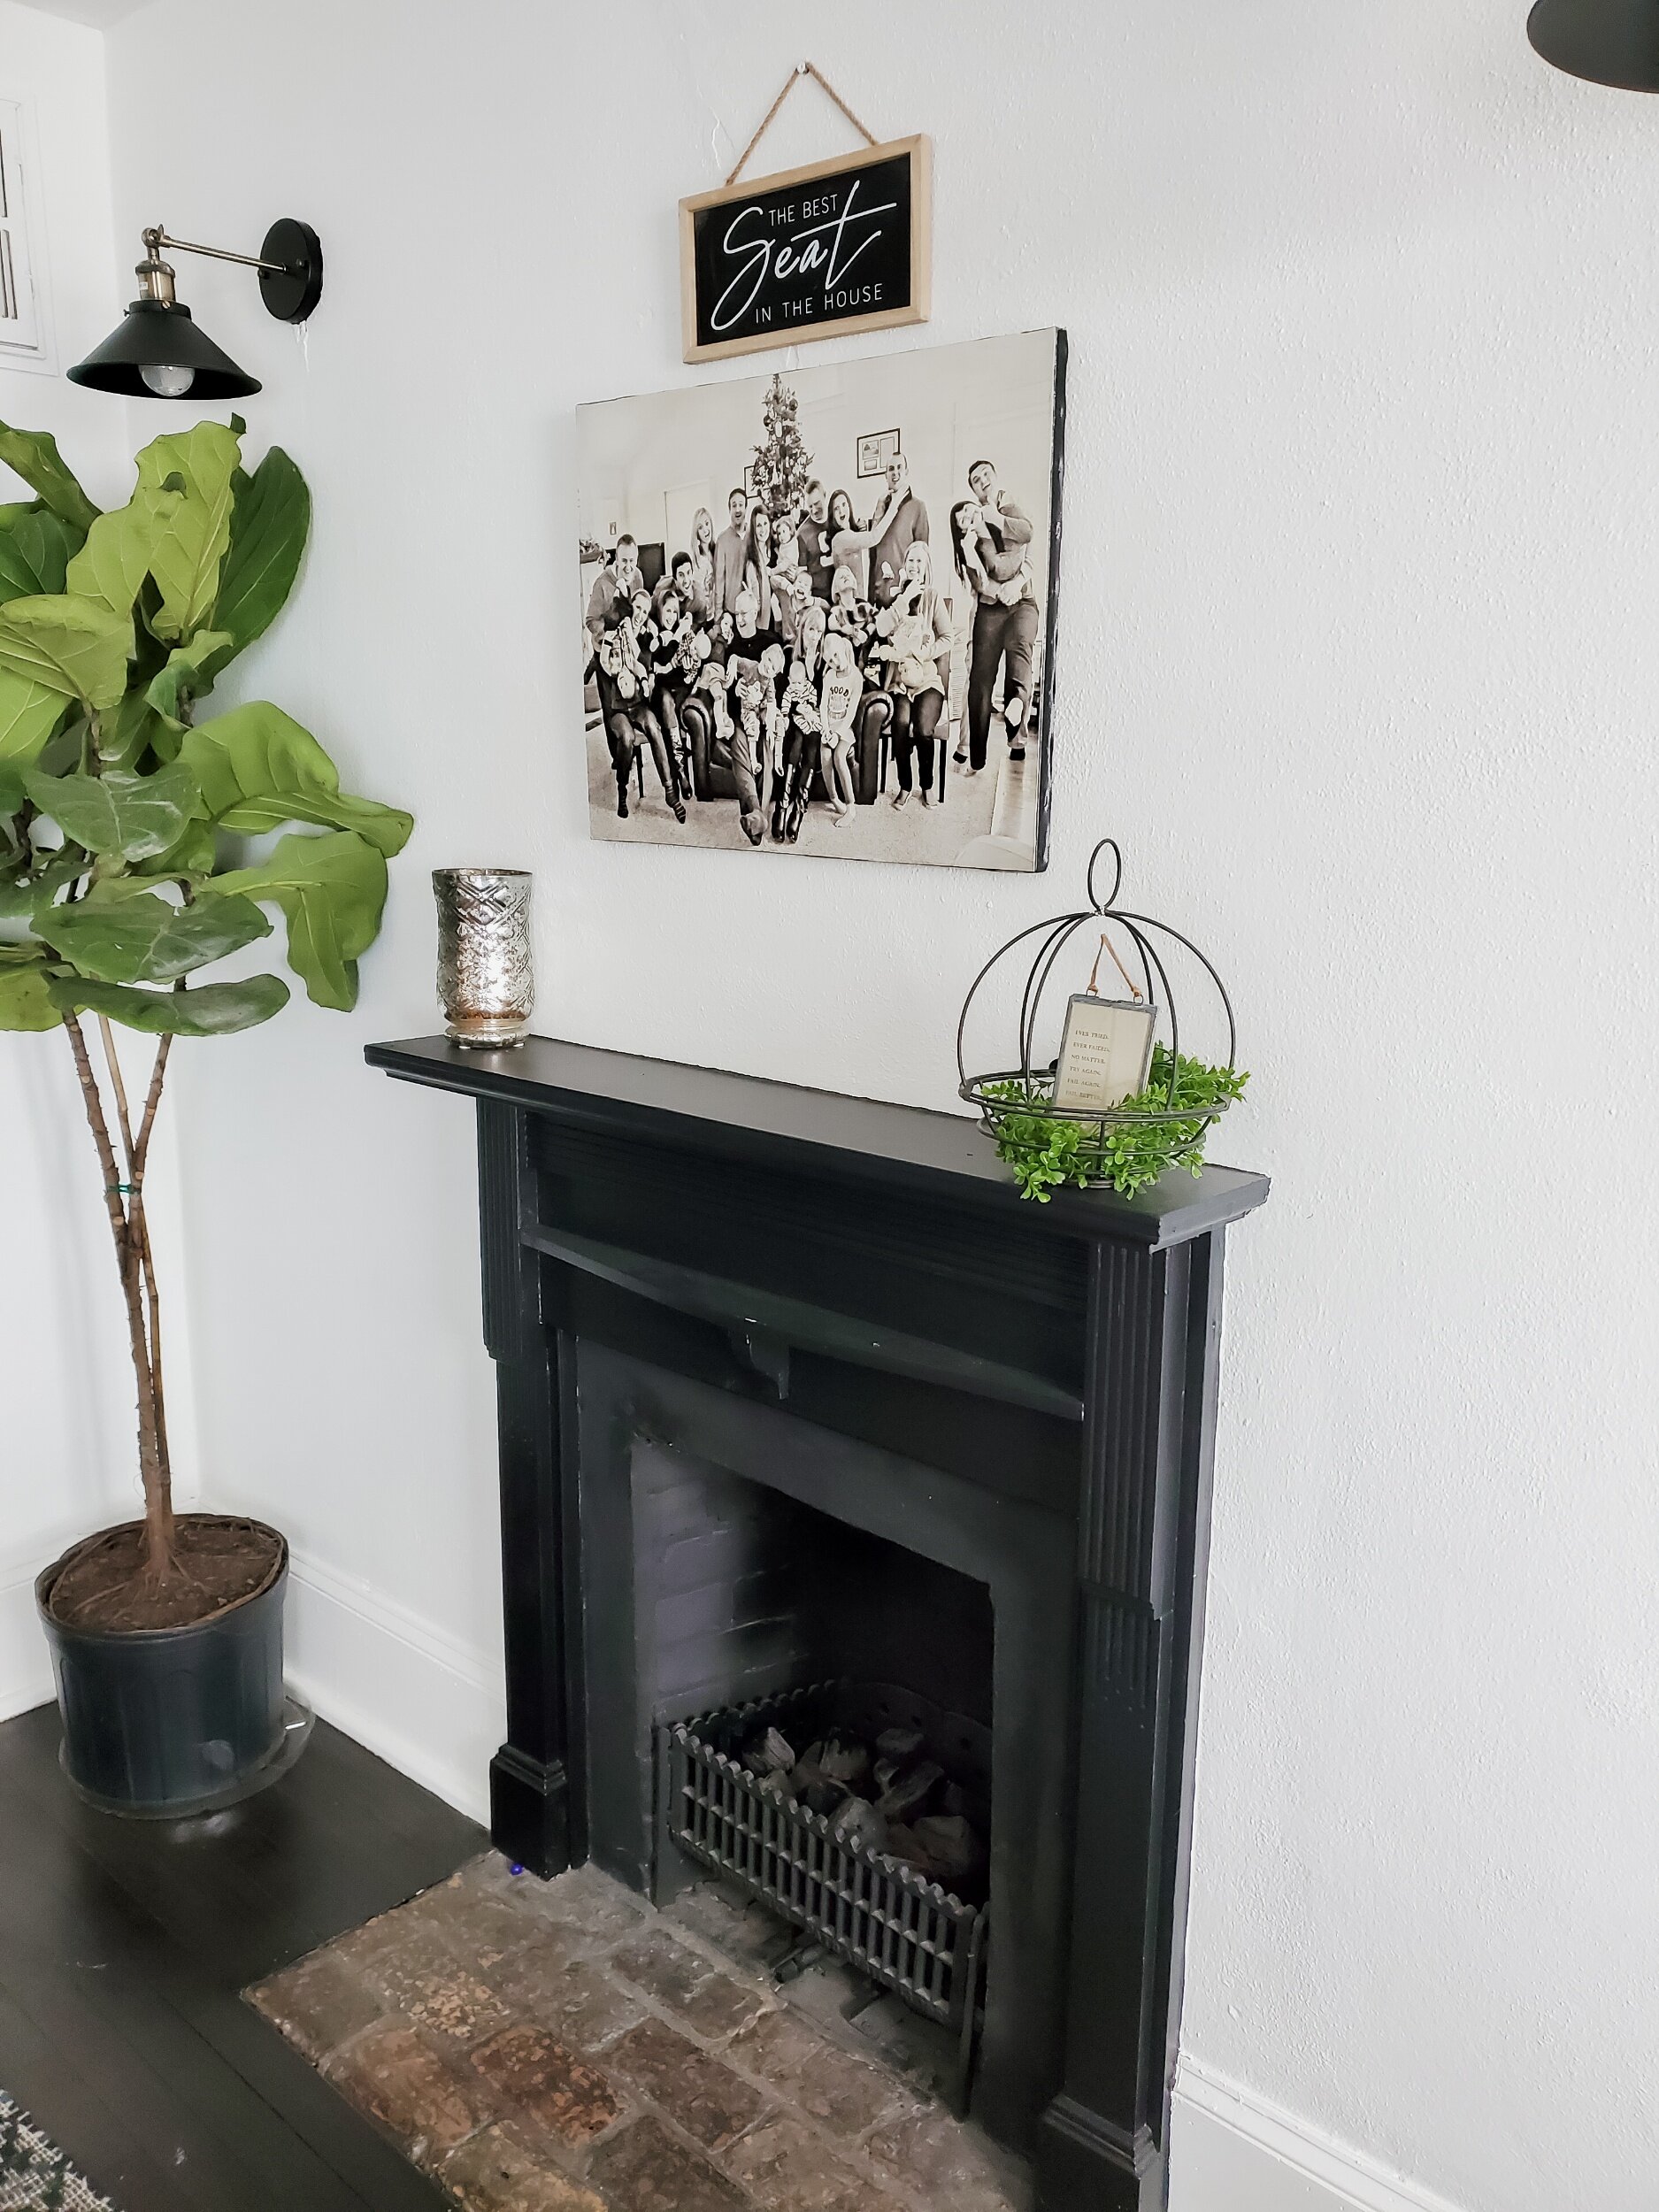


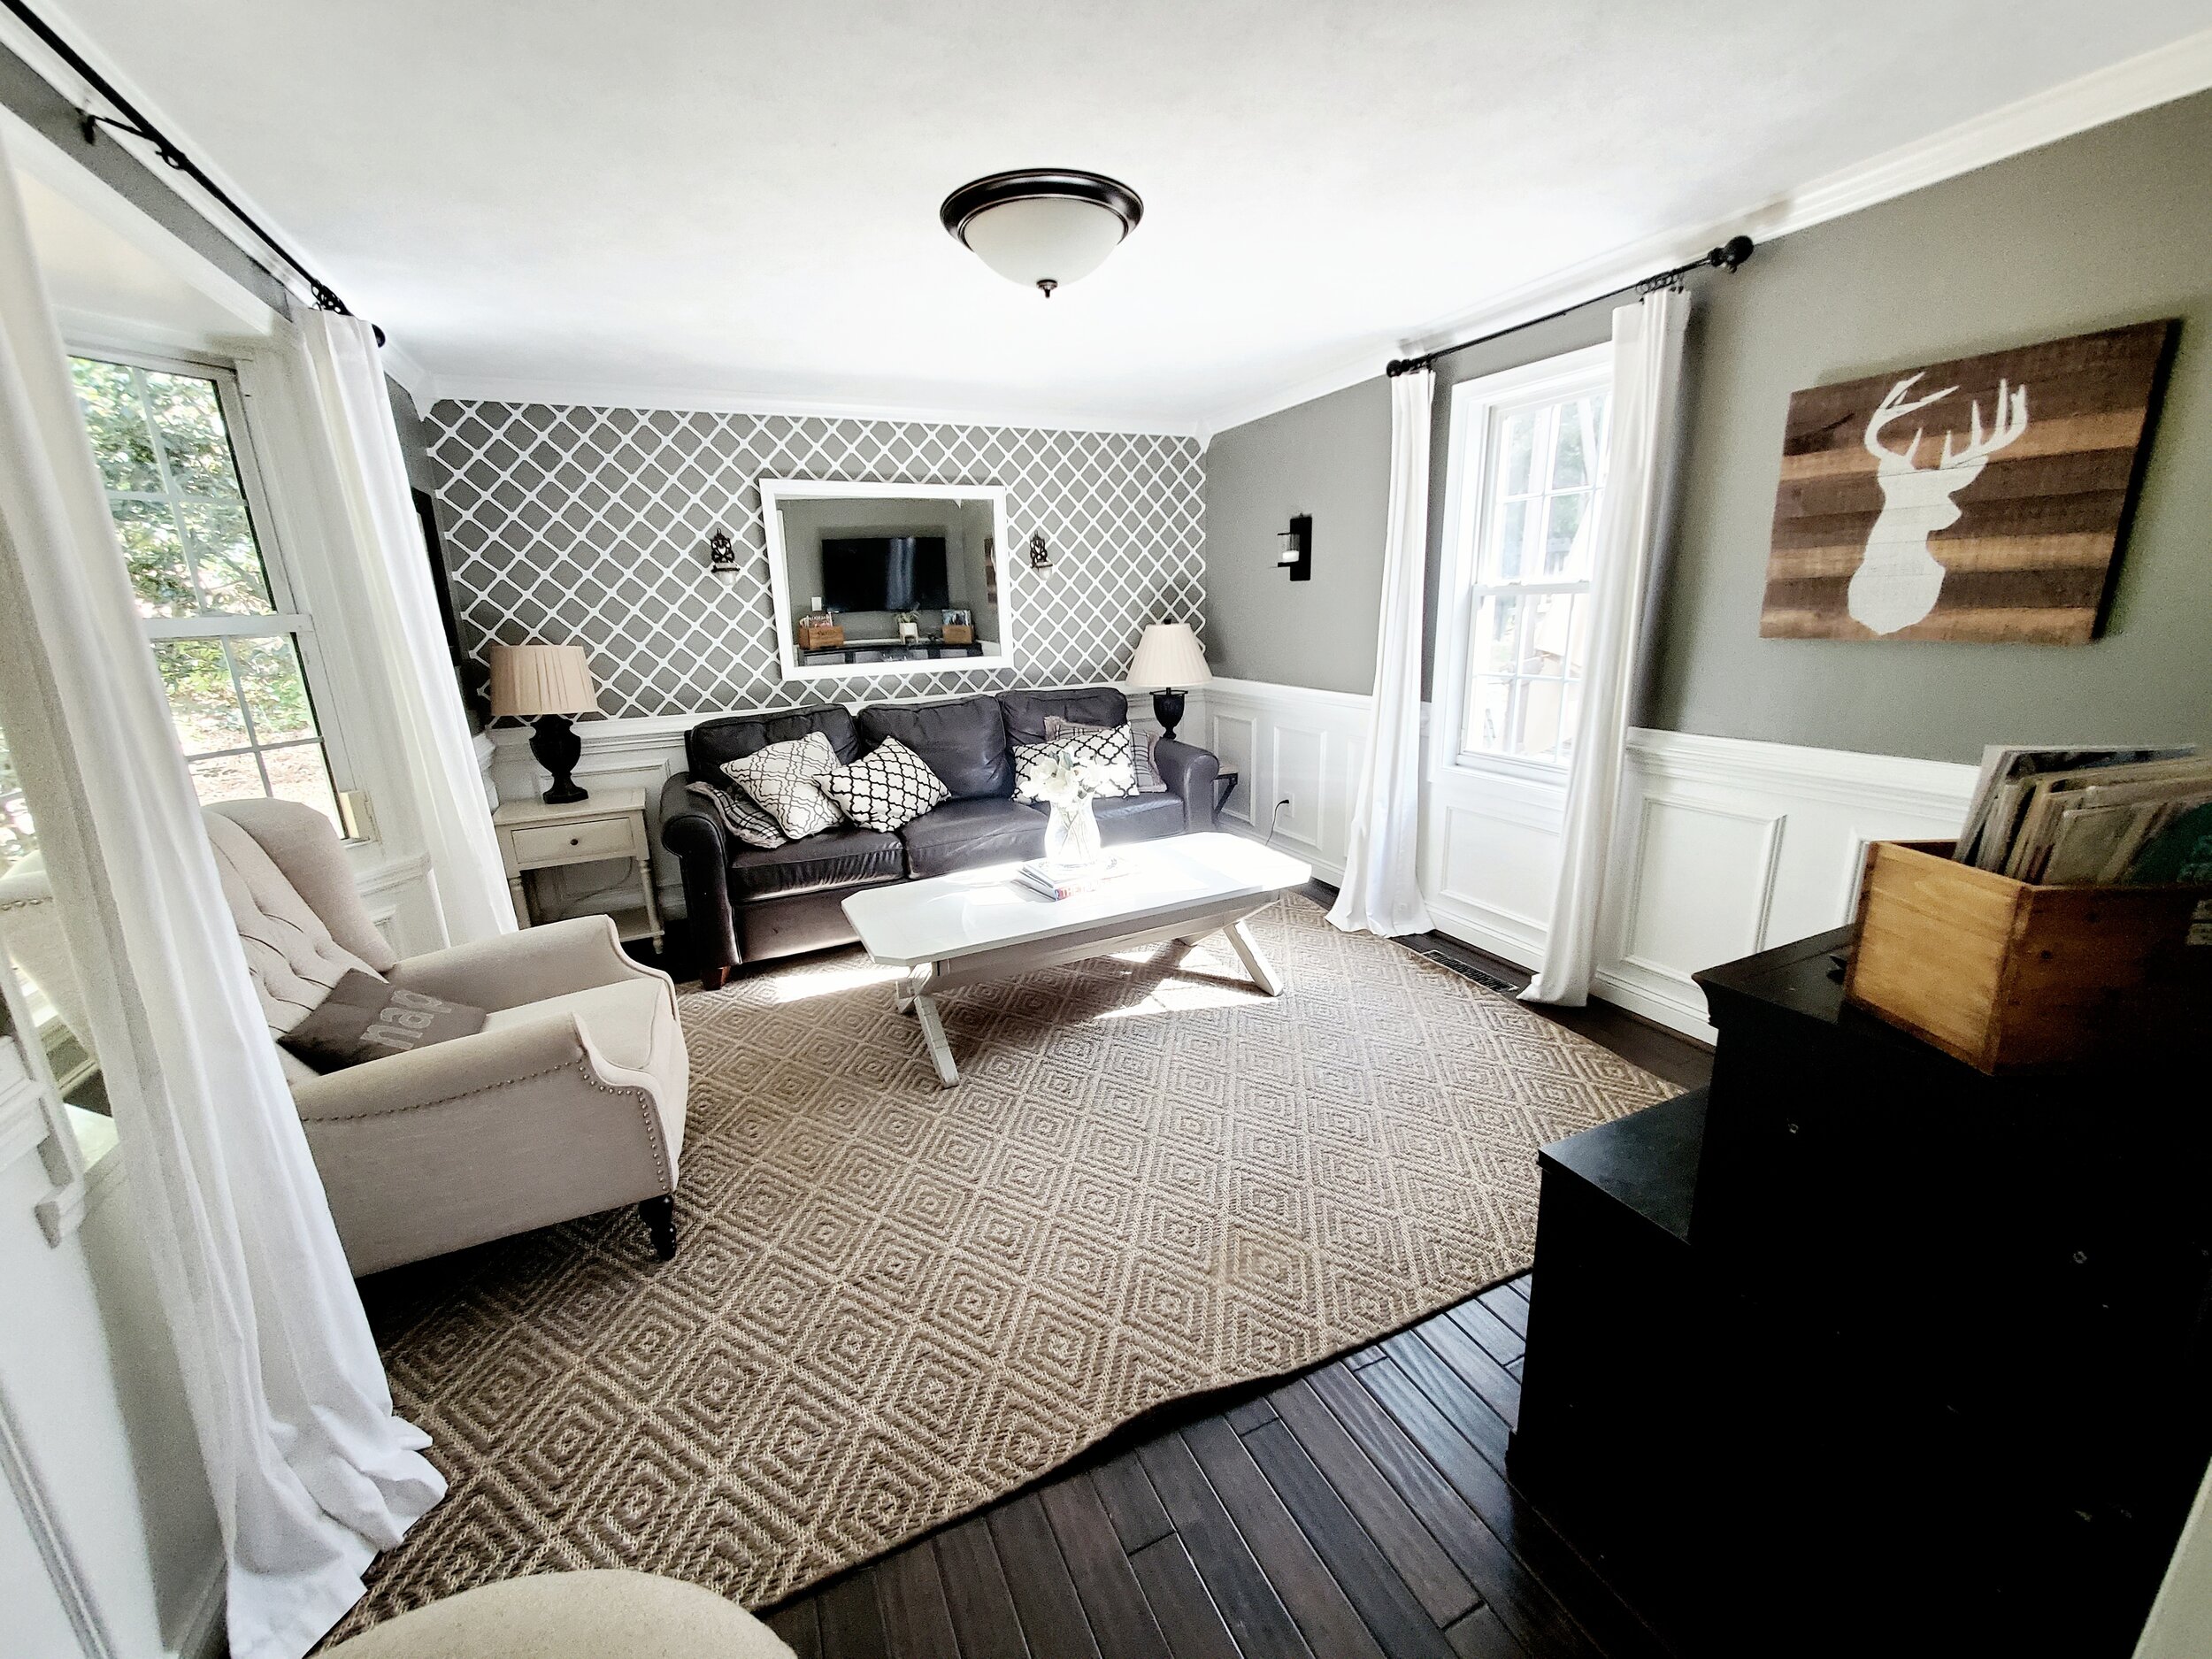
For the den, we painted out the built-in and mantle with Sherwin-Williams tricorn black, added some trim to take it all the way to the floor so that it looked more finished, and then painted the walls with Sherwin-Williams pure white paint. The addition of new sconces with vintage brass touches completed the job!
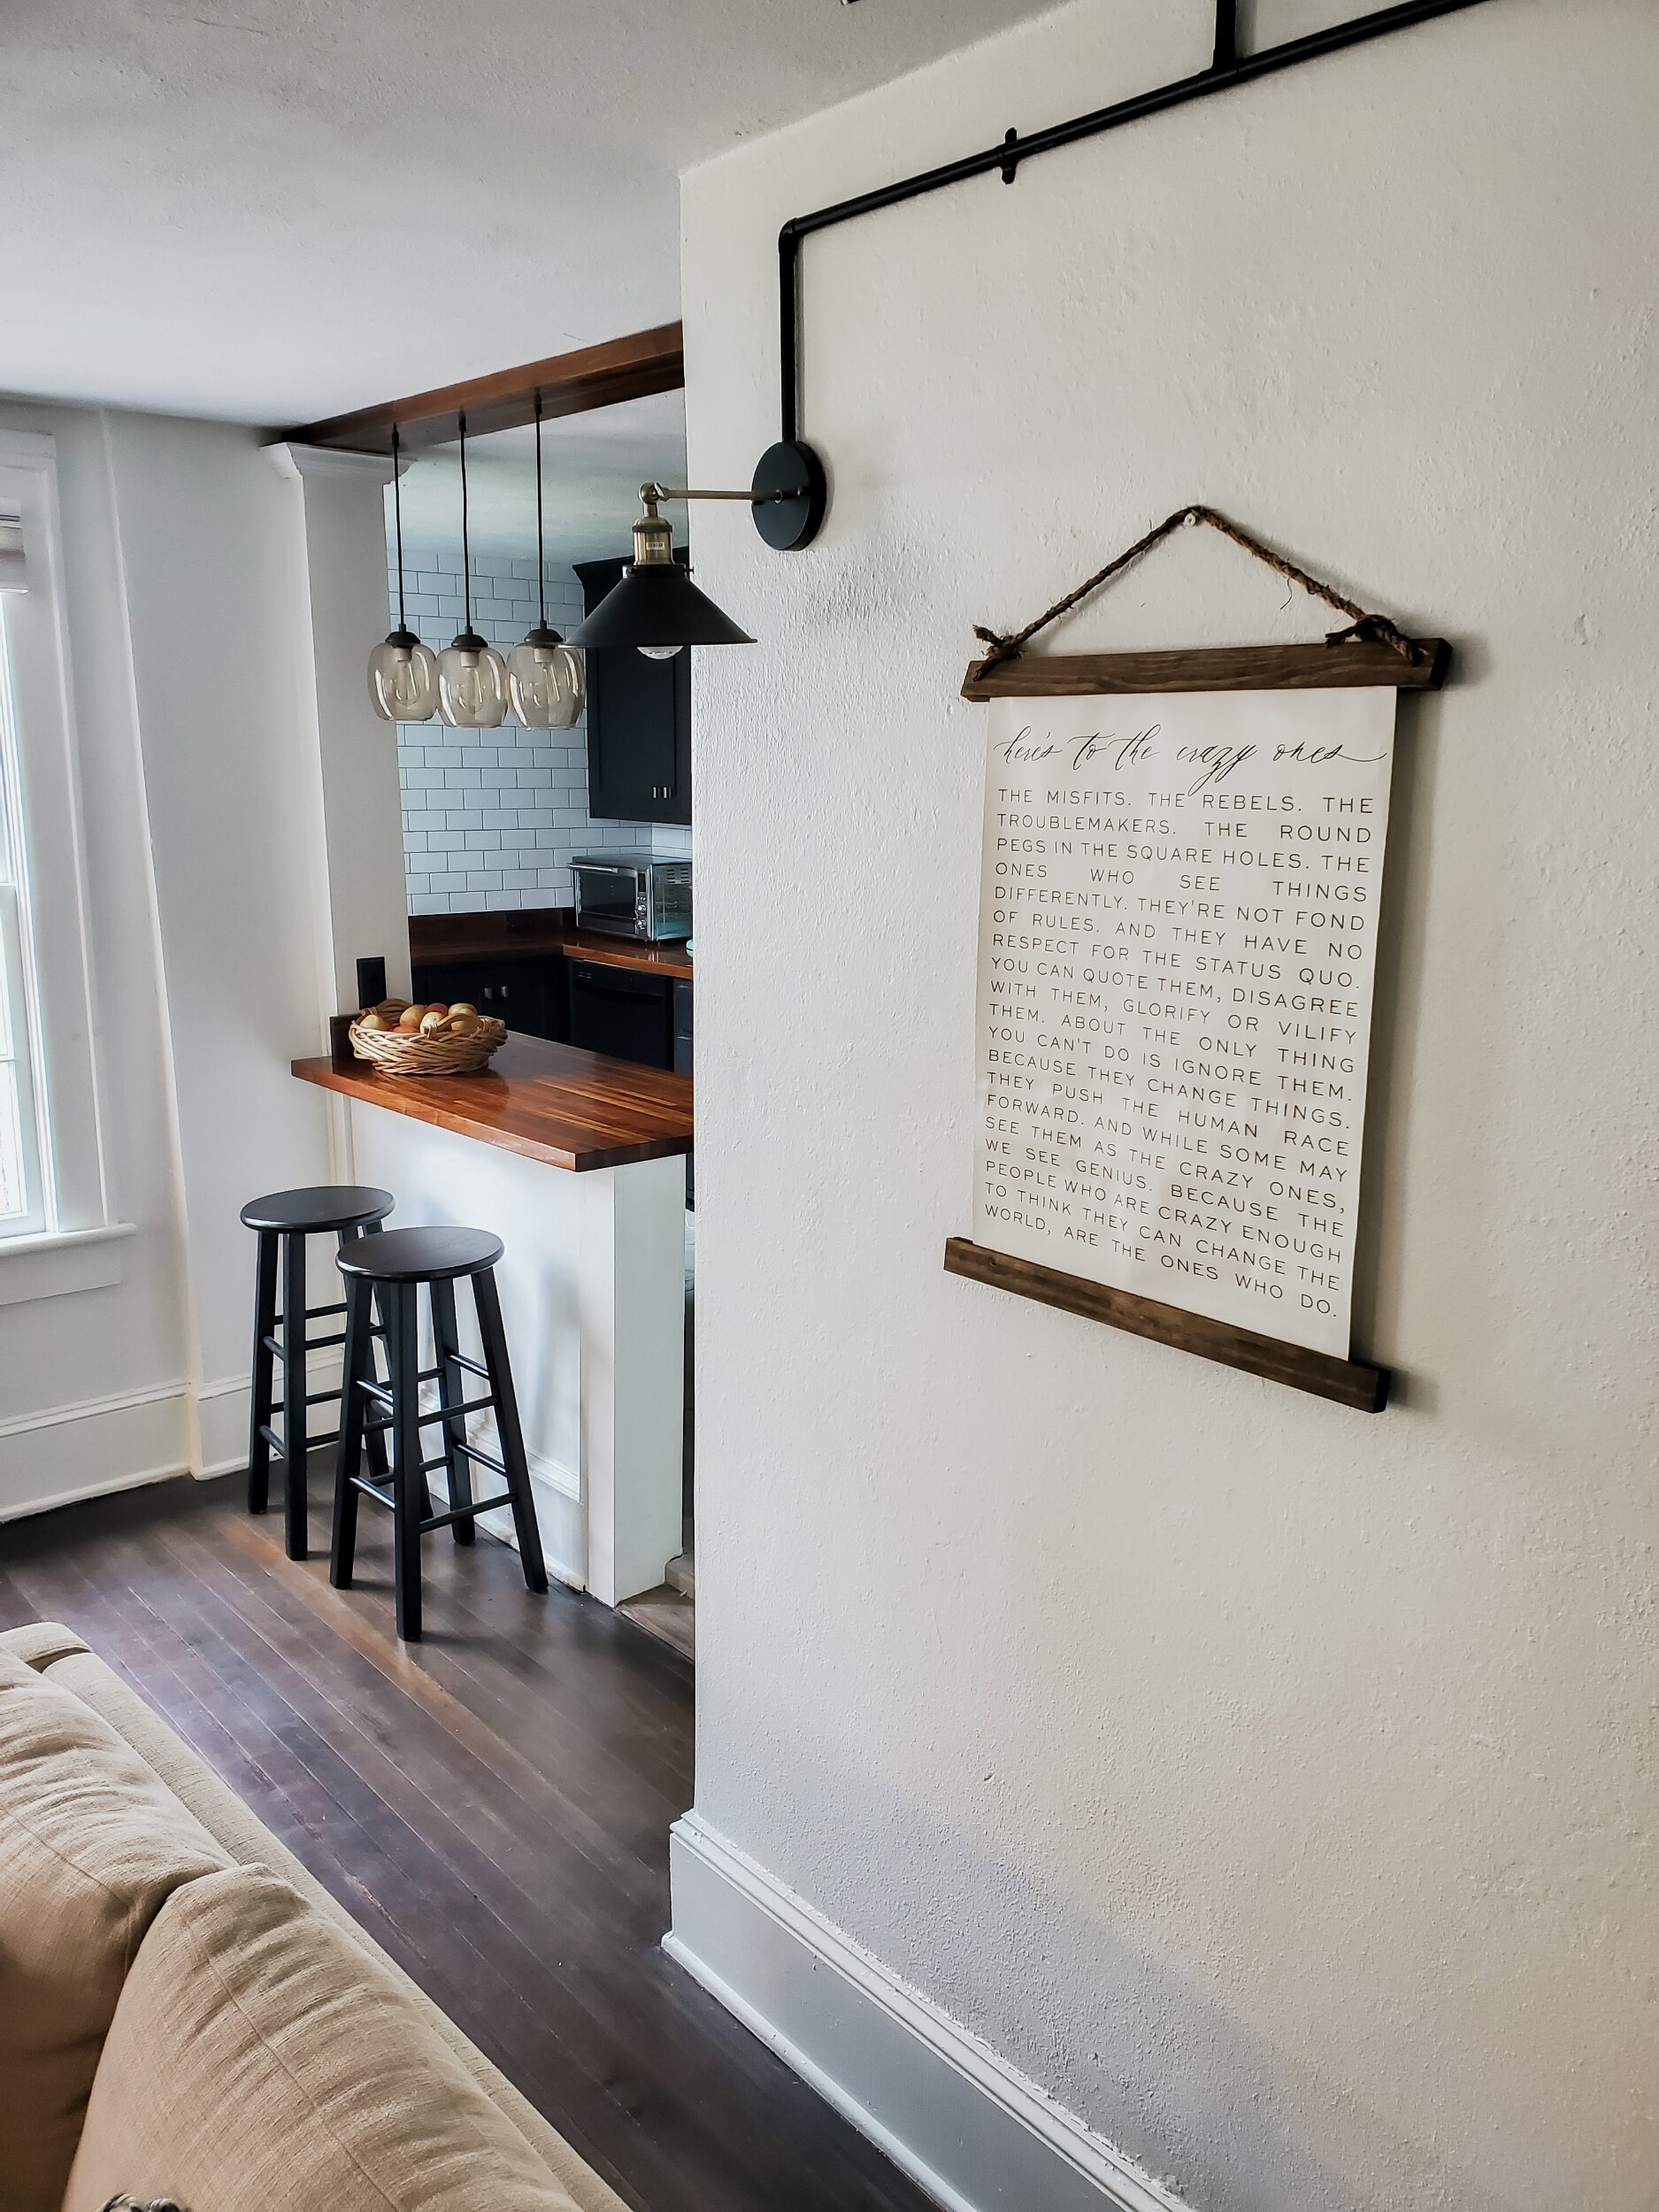
We had the red oak floors refinished with water based black stain to help tone down the red, making it a rich brown color. We chose a diamond leather rug, and outfitted the furniture with some Italian leather recliners (comfort won over style for movie nights) and a great apartment sofa from Ikea….we changed out the legs for a more mid-century turned leg.
All in all, we are starting to love it. The kids often have the popcorn maker and gumball machine going and movies playing. It is a cozy space and we are settling in!

Have you made any updates to your home? We’d love to see them!!
Casey and crew

VALENTINE'S DAY - D.I.Y. FELT HEART POM POM GARLAND TUTORIAL
An easy Valentine’s Day Felt Heart and Pom Pom Garland Tutorial - Kid Friendly!
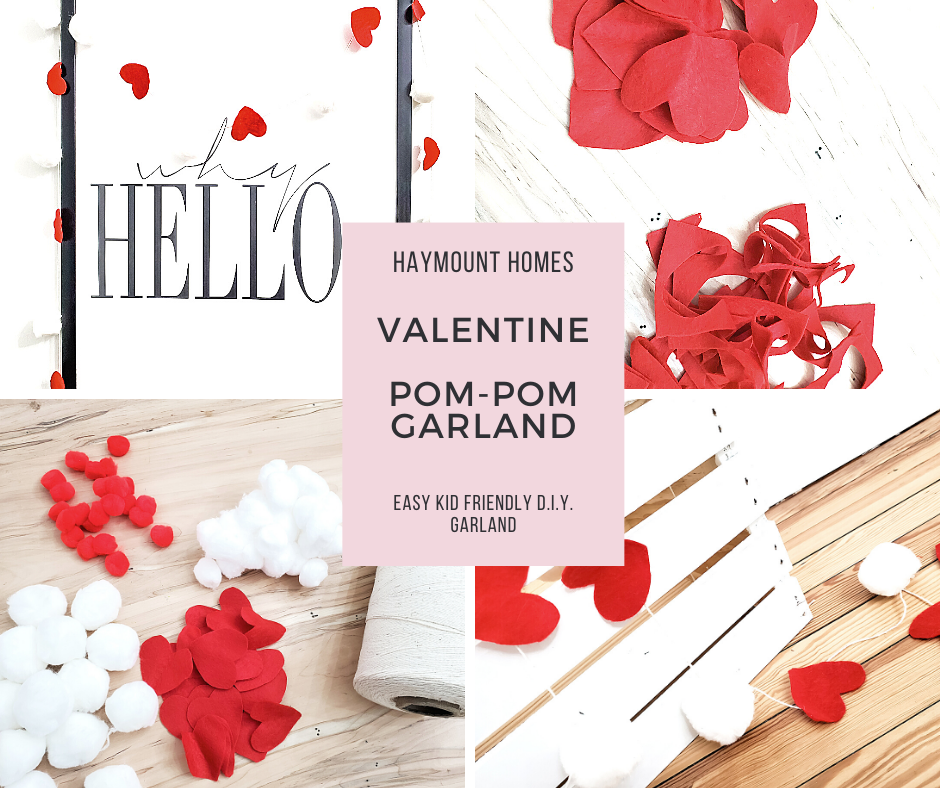
Happy Valentine’s Day!
We hope you are enjoying your sweethearts and filling you day with love. We wanted to share a quick and fun, kid friendly tutorial that we created for some fun Valentine’s Day decor this year: Our Felt Heart Pom-Pom Garland.
This tutorial is easy, can be imperfect, and fun. The only piece of caution is don’t get it tangled like we did when you finish - what was quick and easy became long and frustrating once tangled.

You’ll need:
Felt (color for your hearts)
Pom-Poms (if you don’t have them, use cotton balls!)
String
Hot Glue Gun/Scissors


Step 1: Create your Heart Template - cut out some hearts but folding over the felt and creating a template heart that you like. Repeat this step for each heart, using your template heart as a pattern guide. Enlist some help like I did - tousled hair and straight out of bed but it worked. Don’t worry if your hearts have jagged edges or all are not quite uniform….it sorta adds to the charm. We would argue that all hearts have been shaped in their own ways……


Step 2: Cut your string and start to add the hearts and pom poms, alternating their attachments on the string.


Step 3: Let them dry. Hang your garland and enjoy! If you find your hearts flipping, we just added a little tape to the back to keep them in place where we hung them.

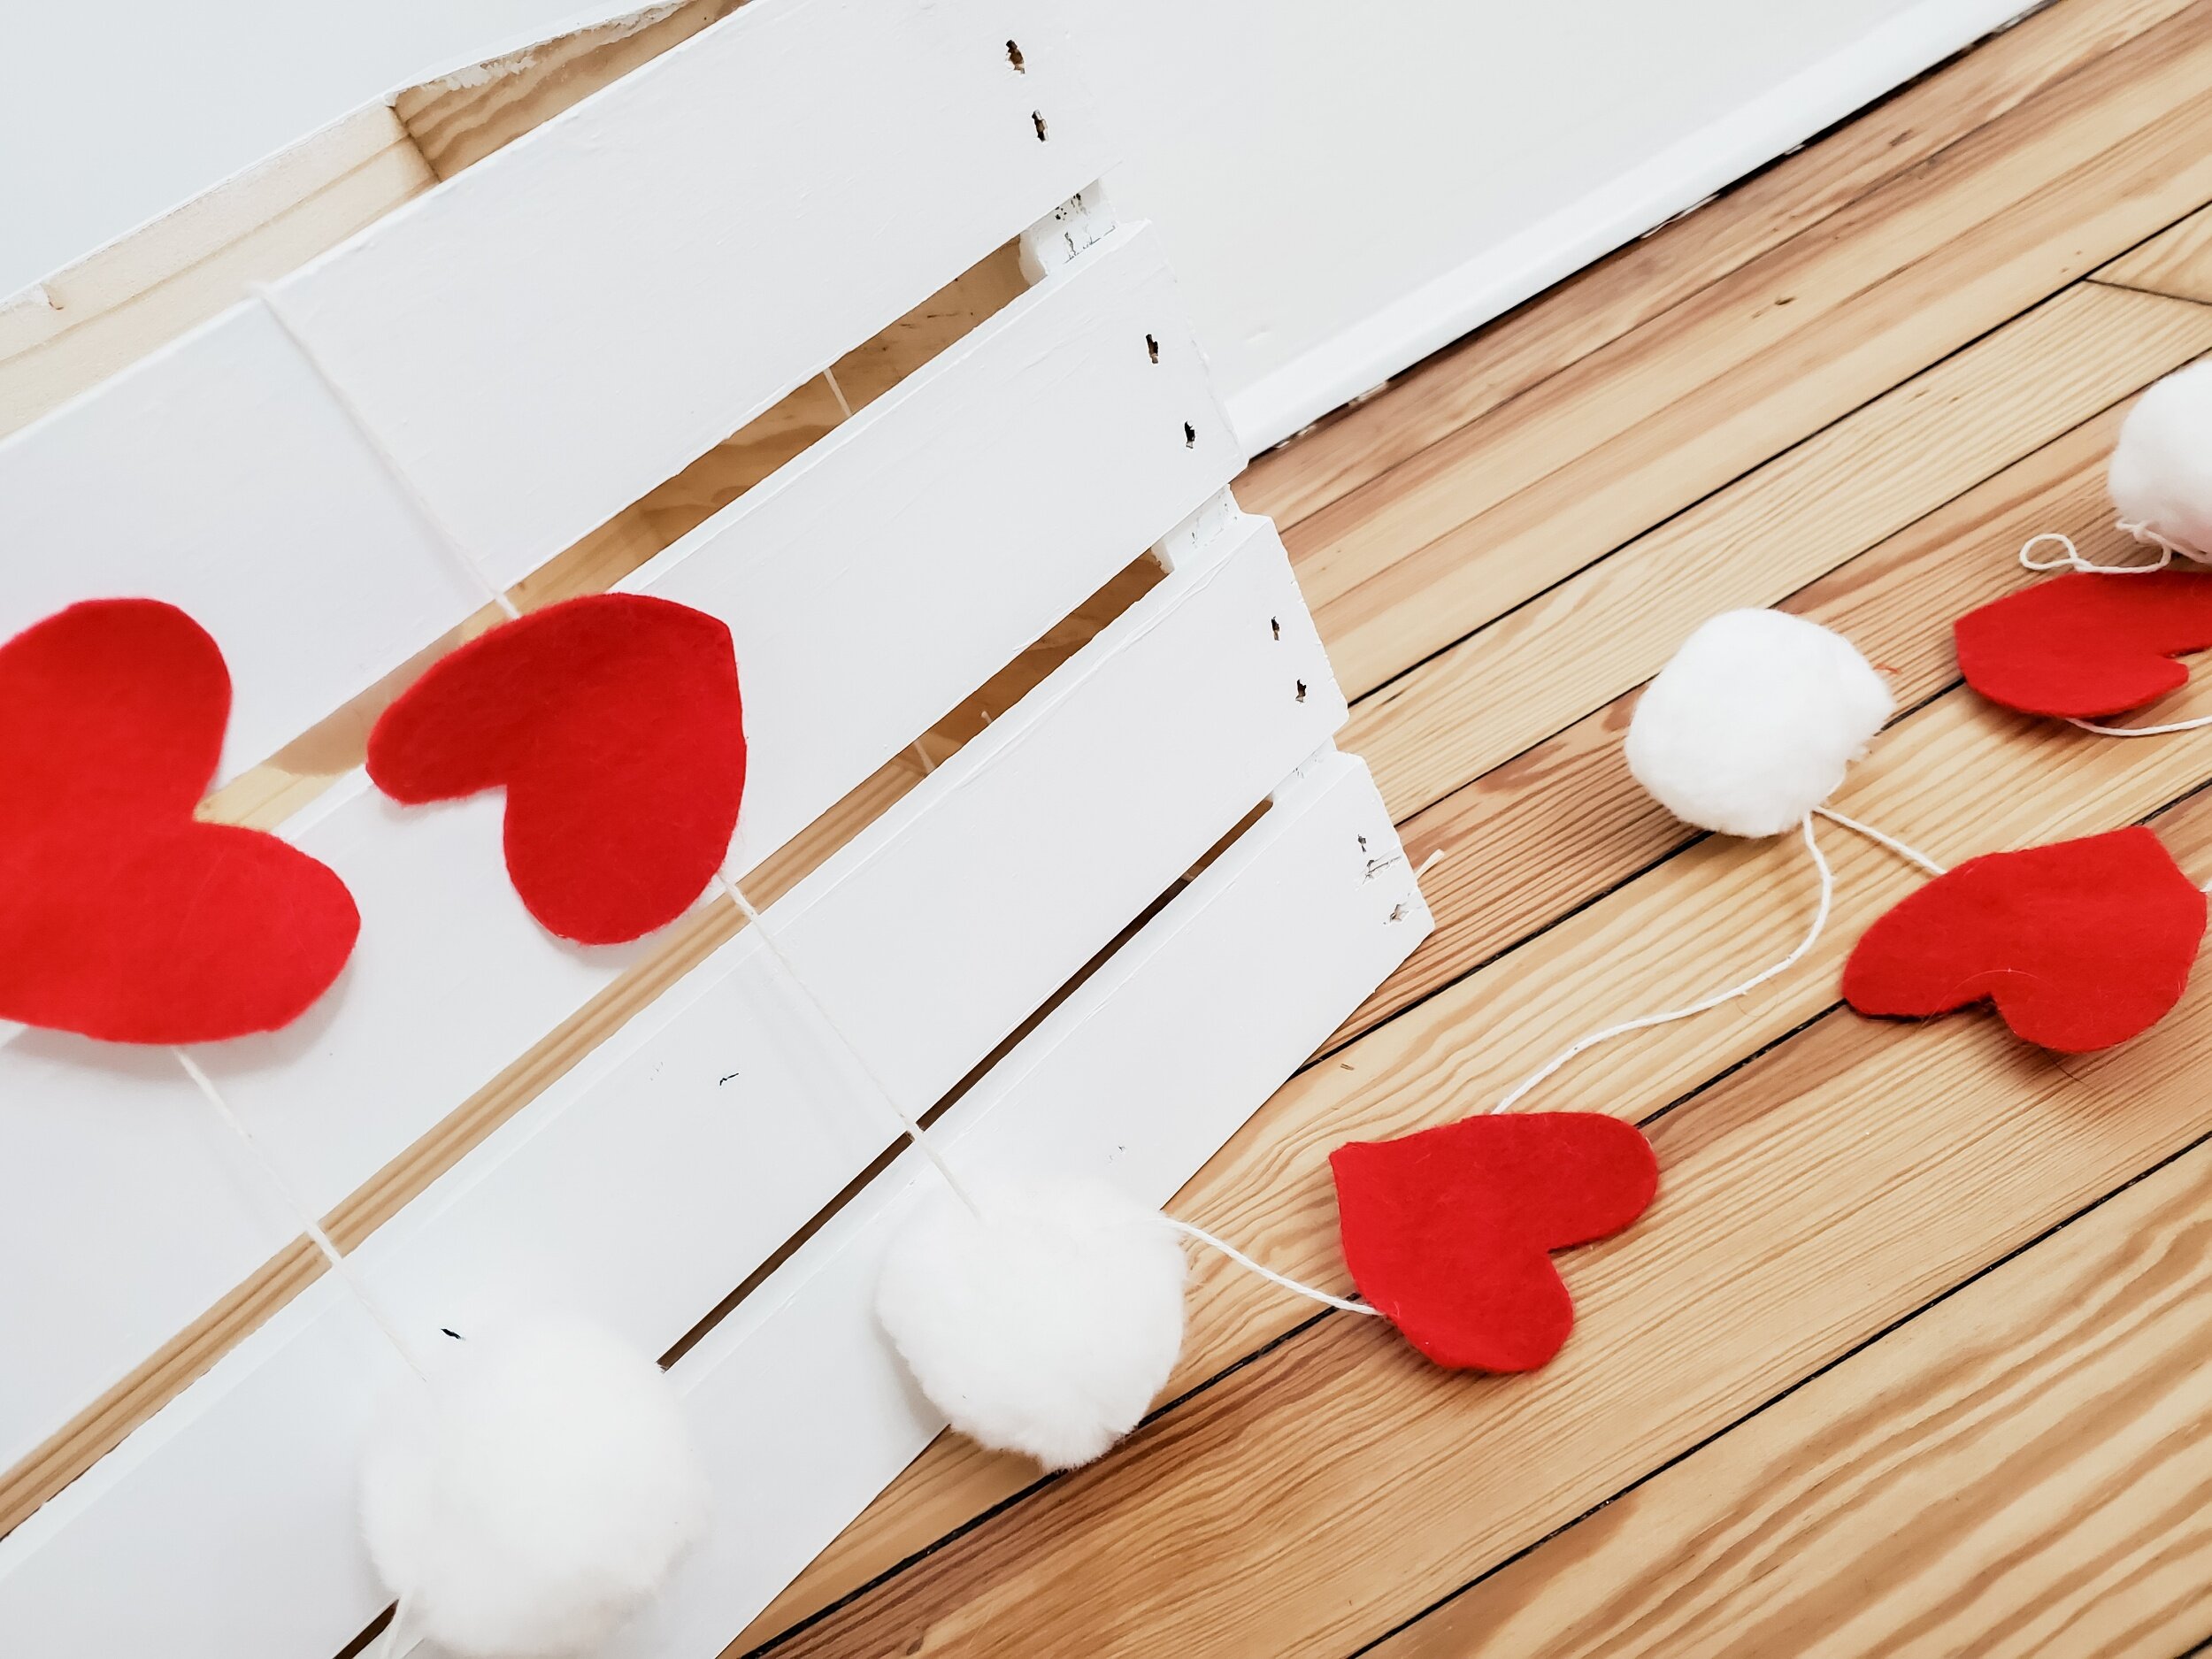


Enjoy this fun garland - it is bright and happy and the perfect way to create more LOVE this Valentine’s Day! Feel free to substitute more colors of pom poms - we never did use the red ones we bought as they did not really coordinate with our felt, but you can change this up so many ways. Post a picture of your creations if you feel like it - share the love!
-Casey and Crew

PREP YOUR HOME FOR SALE DURING COVID - Guest Post

Hello Friends!
Welcome to 2021 - A Seller’s Market! Finally!
Home prices are rising as supply is limited, interest rates are low, building materials are backordered and inflated, and people are restless from staying home! That means it’s a great time to sell….but it also means more people touring your home and more difficulty mitigating the risks for Covid-19. If you are retirement age and looking to move on to your next stage in life, the risk is higher.
Fortunately, Bob Shannon from Seniorsmeet.org, is here to help guide you through selling your home during this hot market, but also provides us with great resources to help prep your home during a pandemic. He also shares market-ready ideas to ensure you get a top offer. Read on for great tips for a great selling experience!
A Quick How-To Guide for Prepping Your Home for Sale
If retirement means a smaller home or moving to a new locale this year, the time will come to put your home on the market. These days, selling a home is more involved than it used to be. And when it comes to attracting potential buyers, you need a plan, one that helps them imagine living happy, healthy lives in your home.
Preparing your home for sale means setting buyers up to have such a pleasurable experience inside and out that they leave feeling like your home is already theirs. If you aren't sure how to go about the process while dealing with the COVID-19 outbreak, then these tips and advice can be a great way to start.
Prepare for Pandemic-Related Challenges
The landscape of selling a home has significantly changed the entire process from start to finish.
How to Sell Your House When There's a Pandemic
Virtual Tours Become the New Norm in Selling Homes
Transaction Guidance During COVID-19
Contactless Buying: Closing Real Estate Deals Remotely
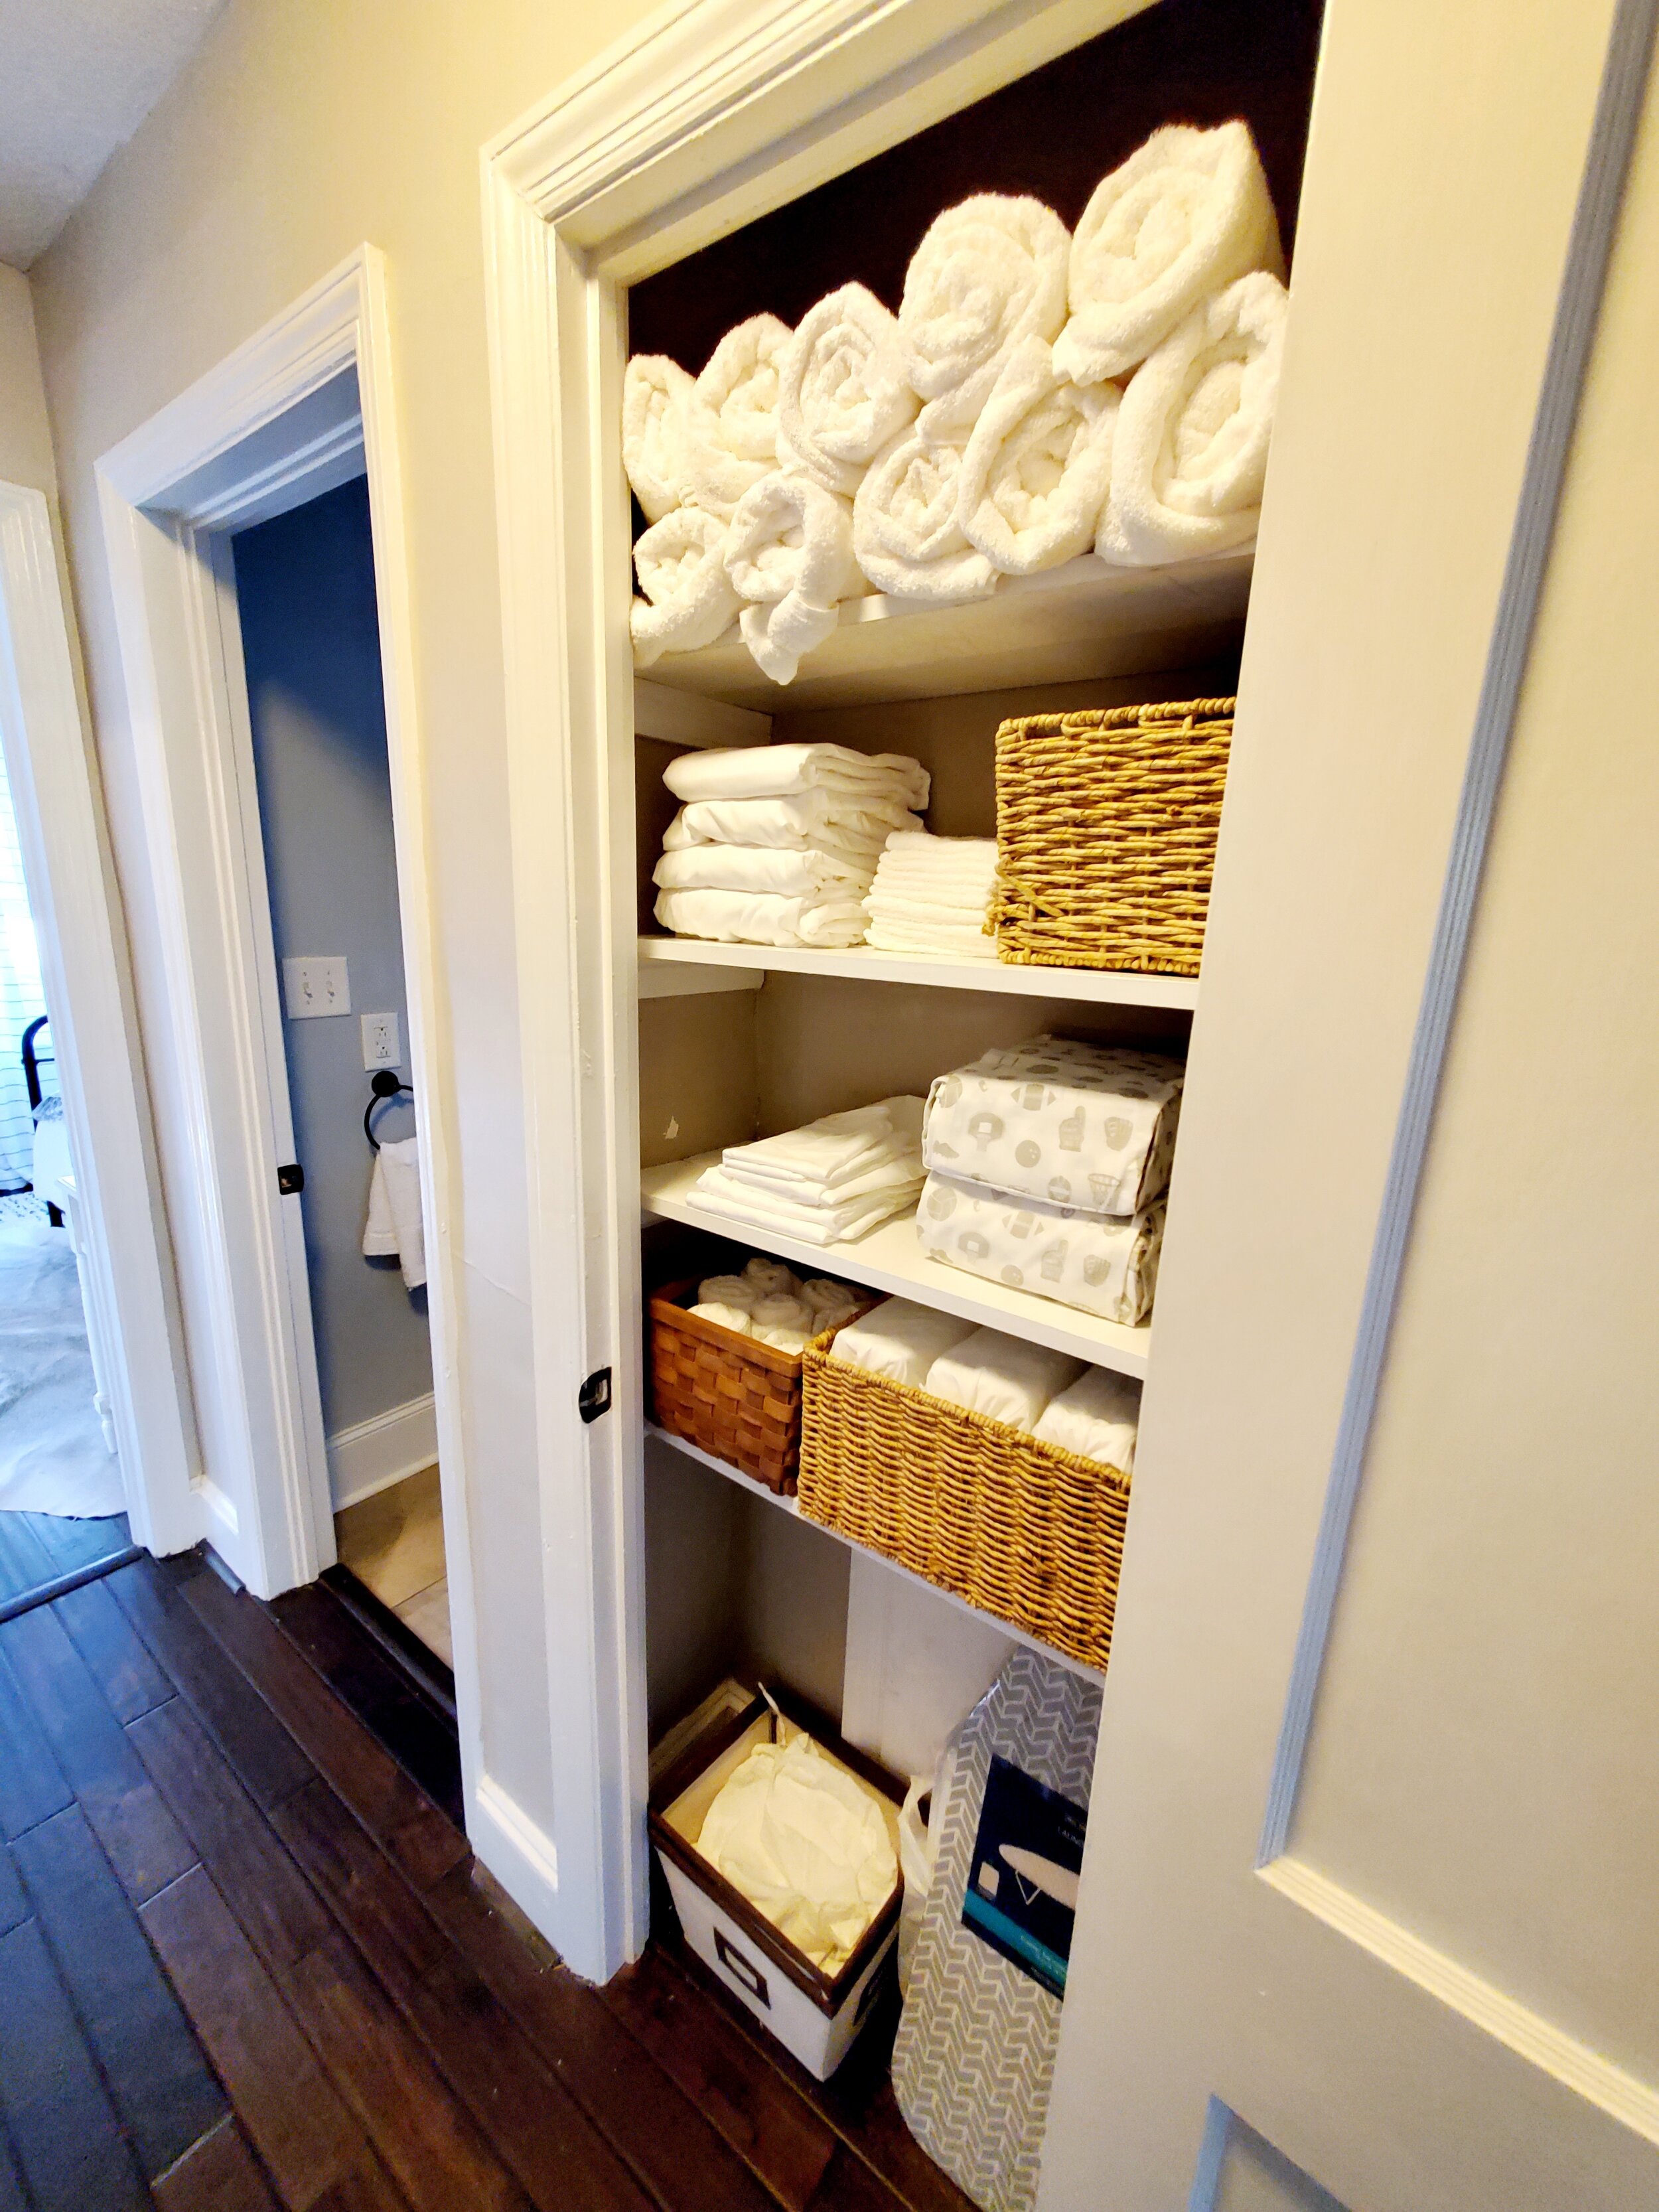
Clean and Declutter
Clearing out your home, staging it and keeping it clean are crucial parts of this process even if you won’t be having in-person showings.
Free Yourself From Clutter | A Simple Guide
Work with Haymount Homes Staging Services
How to Maintain a Clean, Healthy Home During COVID-19
Why You Should Hire a Professional Cleaning Service When You Move
Boost Curb Appeal
Even though people aren’t attending showings or touring homes, they will still drive by, and you’ll want to make a great first impression.
Increase Your Curb Appeal and Get a High Return on Investment
8 Easy Yard Care Tips to Help Sell Your Home
Top 32 Best Curb Appeal Ideas for Every Budget
Outdoor Living Spaces on a Budget
Find Upgrades with Great ROI
If you’re in a position to make updates or upgrades prior to listing, see what people are looking for and discuss options with your real estate agent.
7 Kitchen Trends That Will Takeover in 2021, According to Designers
How a Bathroom Remodel Can Increase Your Home Value
40 Decorating Tips for Anyone on a Shoestring Budget
Use Kohl’s or Macy’s Coupons to Save on Home Decor
Selling your home in retirement can be an exciting adventure, but it’s one that no one wants to last too long. Prepping your home for sale, from remodeling kitchens to landscaping your gardens, is your best chance of standing out in a busy market.
If you’re not keen to sell your home, consider turning it into a rental so you can generate income you can put toward a new home or vacation spot. Haymount Homes can teach you how to be your own property manager, and help guide you toward offering a beautiful rental.
Retire Big For A Simple Life
Haymount Homes REDFIN FEATURE!! “Selling Your Home in the Winter? Here’s How to Stage it While Embracing the Holidays” (Copy)

Don’t miss the recent Redfin article we were featured in: “Selling Your Home in the Winter? Here’s How to Stage it While Embracing the Holidays”
While many believe the ideal time to list your home for sale is in the summer, the truth is that selling your
home in the winter can be just as great. But like any other time of the year, it is in your best interest to
present your home in its best light. This is where beautiful staging and professional real estate
photography plays an important role.

To help you highlight your home’s best features this holiday season, Redfin reached out to staging experts and professional real estate photographers for our advice. To make sure your home stands out in the housing market while still embracing the holidays, check out what we had to say in the article:
https://www.redfin.com/blog/selling-your-home-in-the-winter-staging-advice/


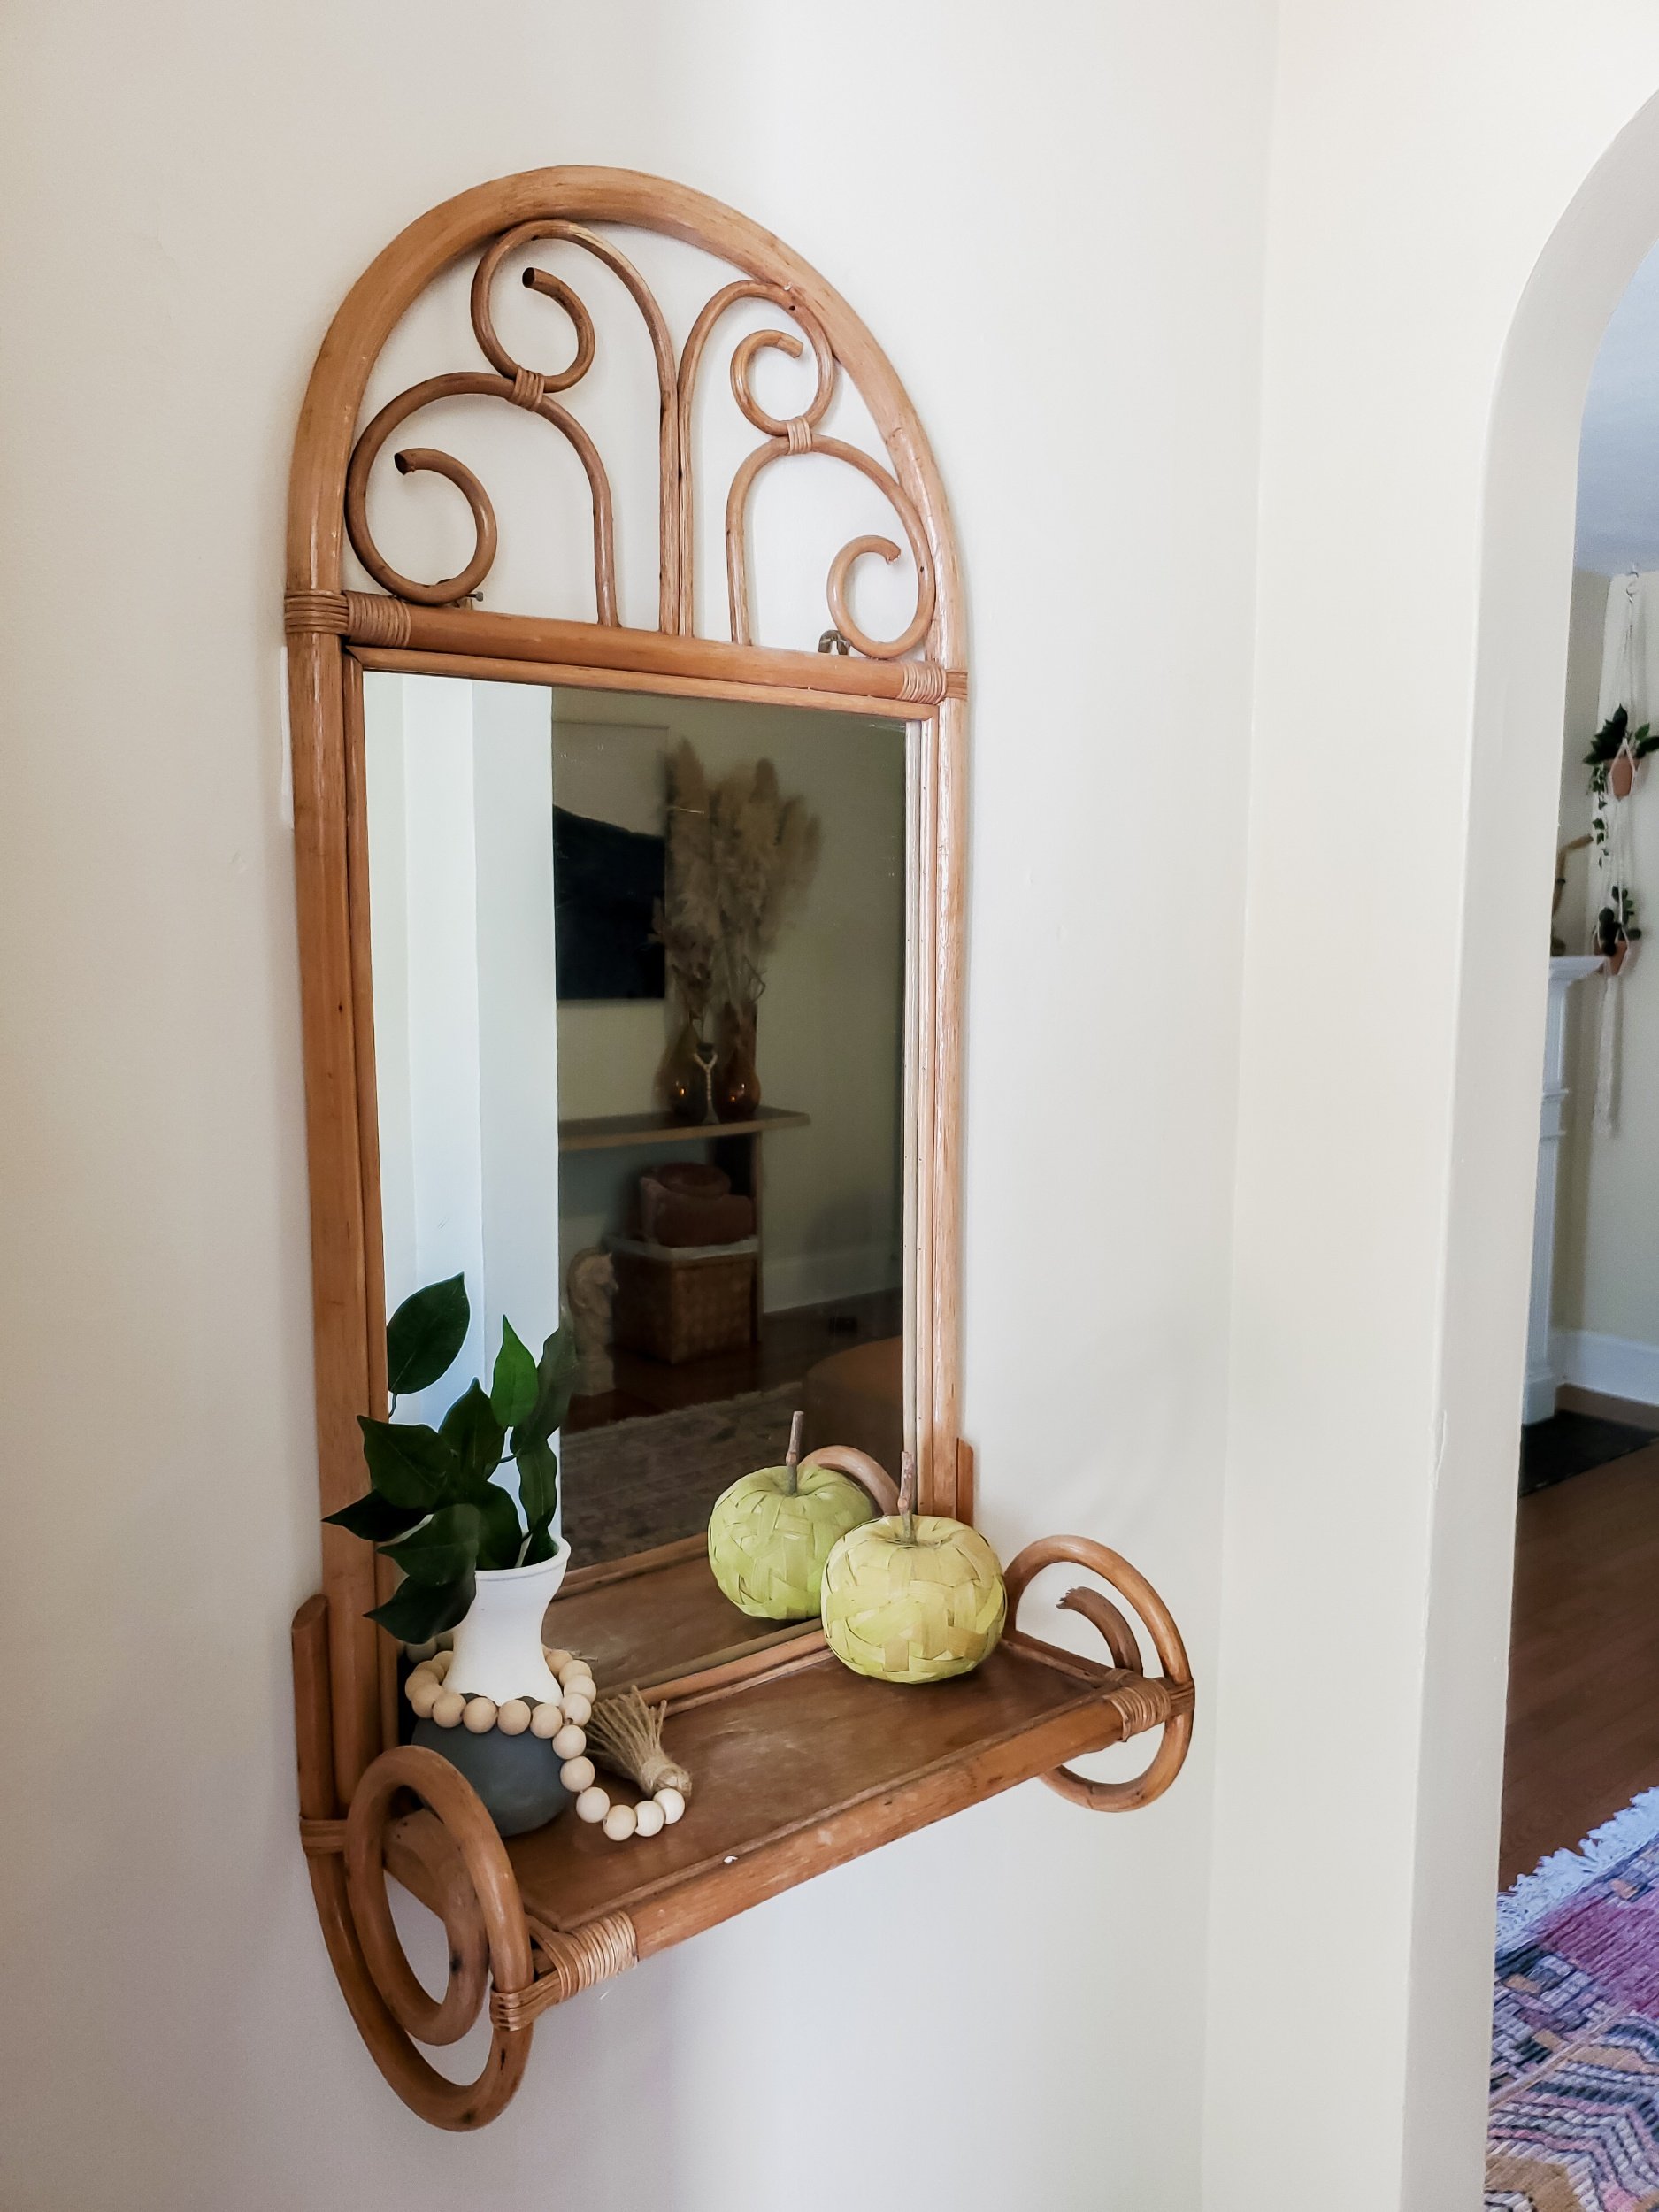
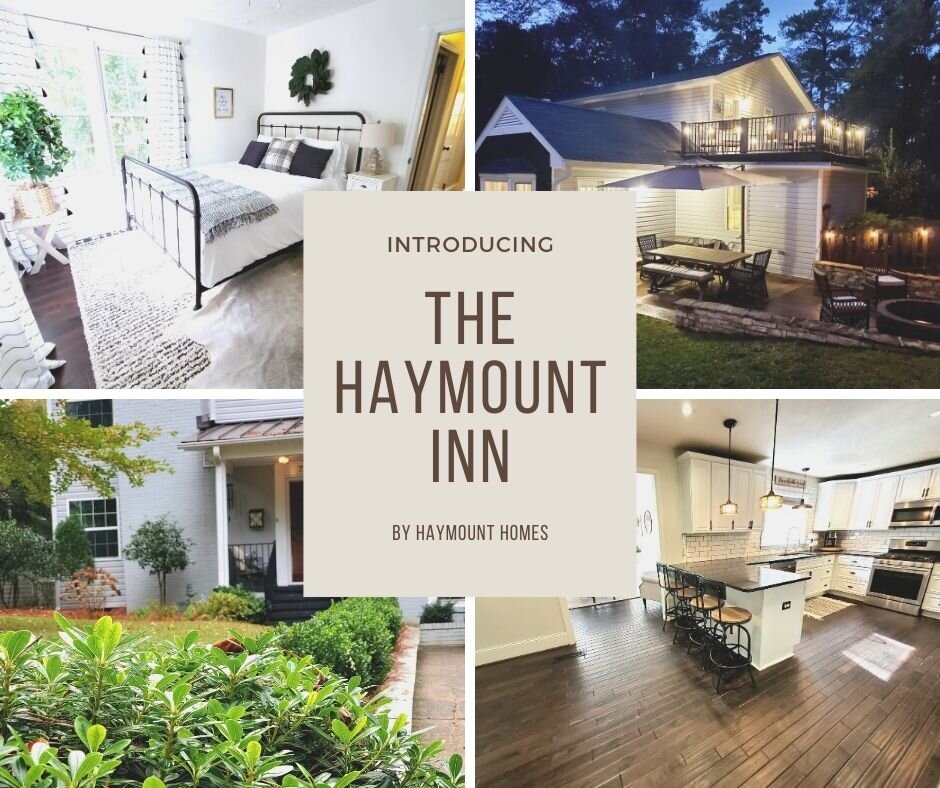
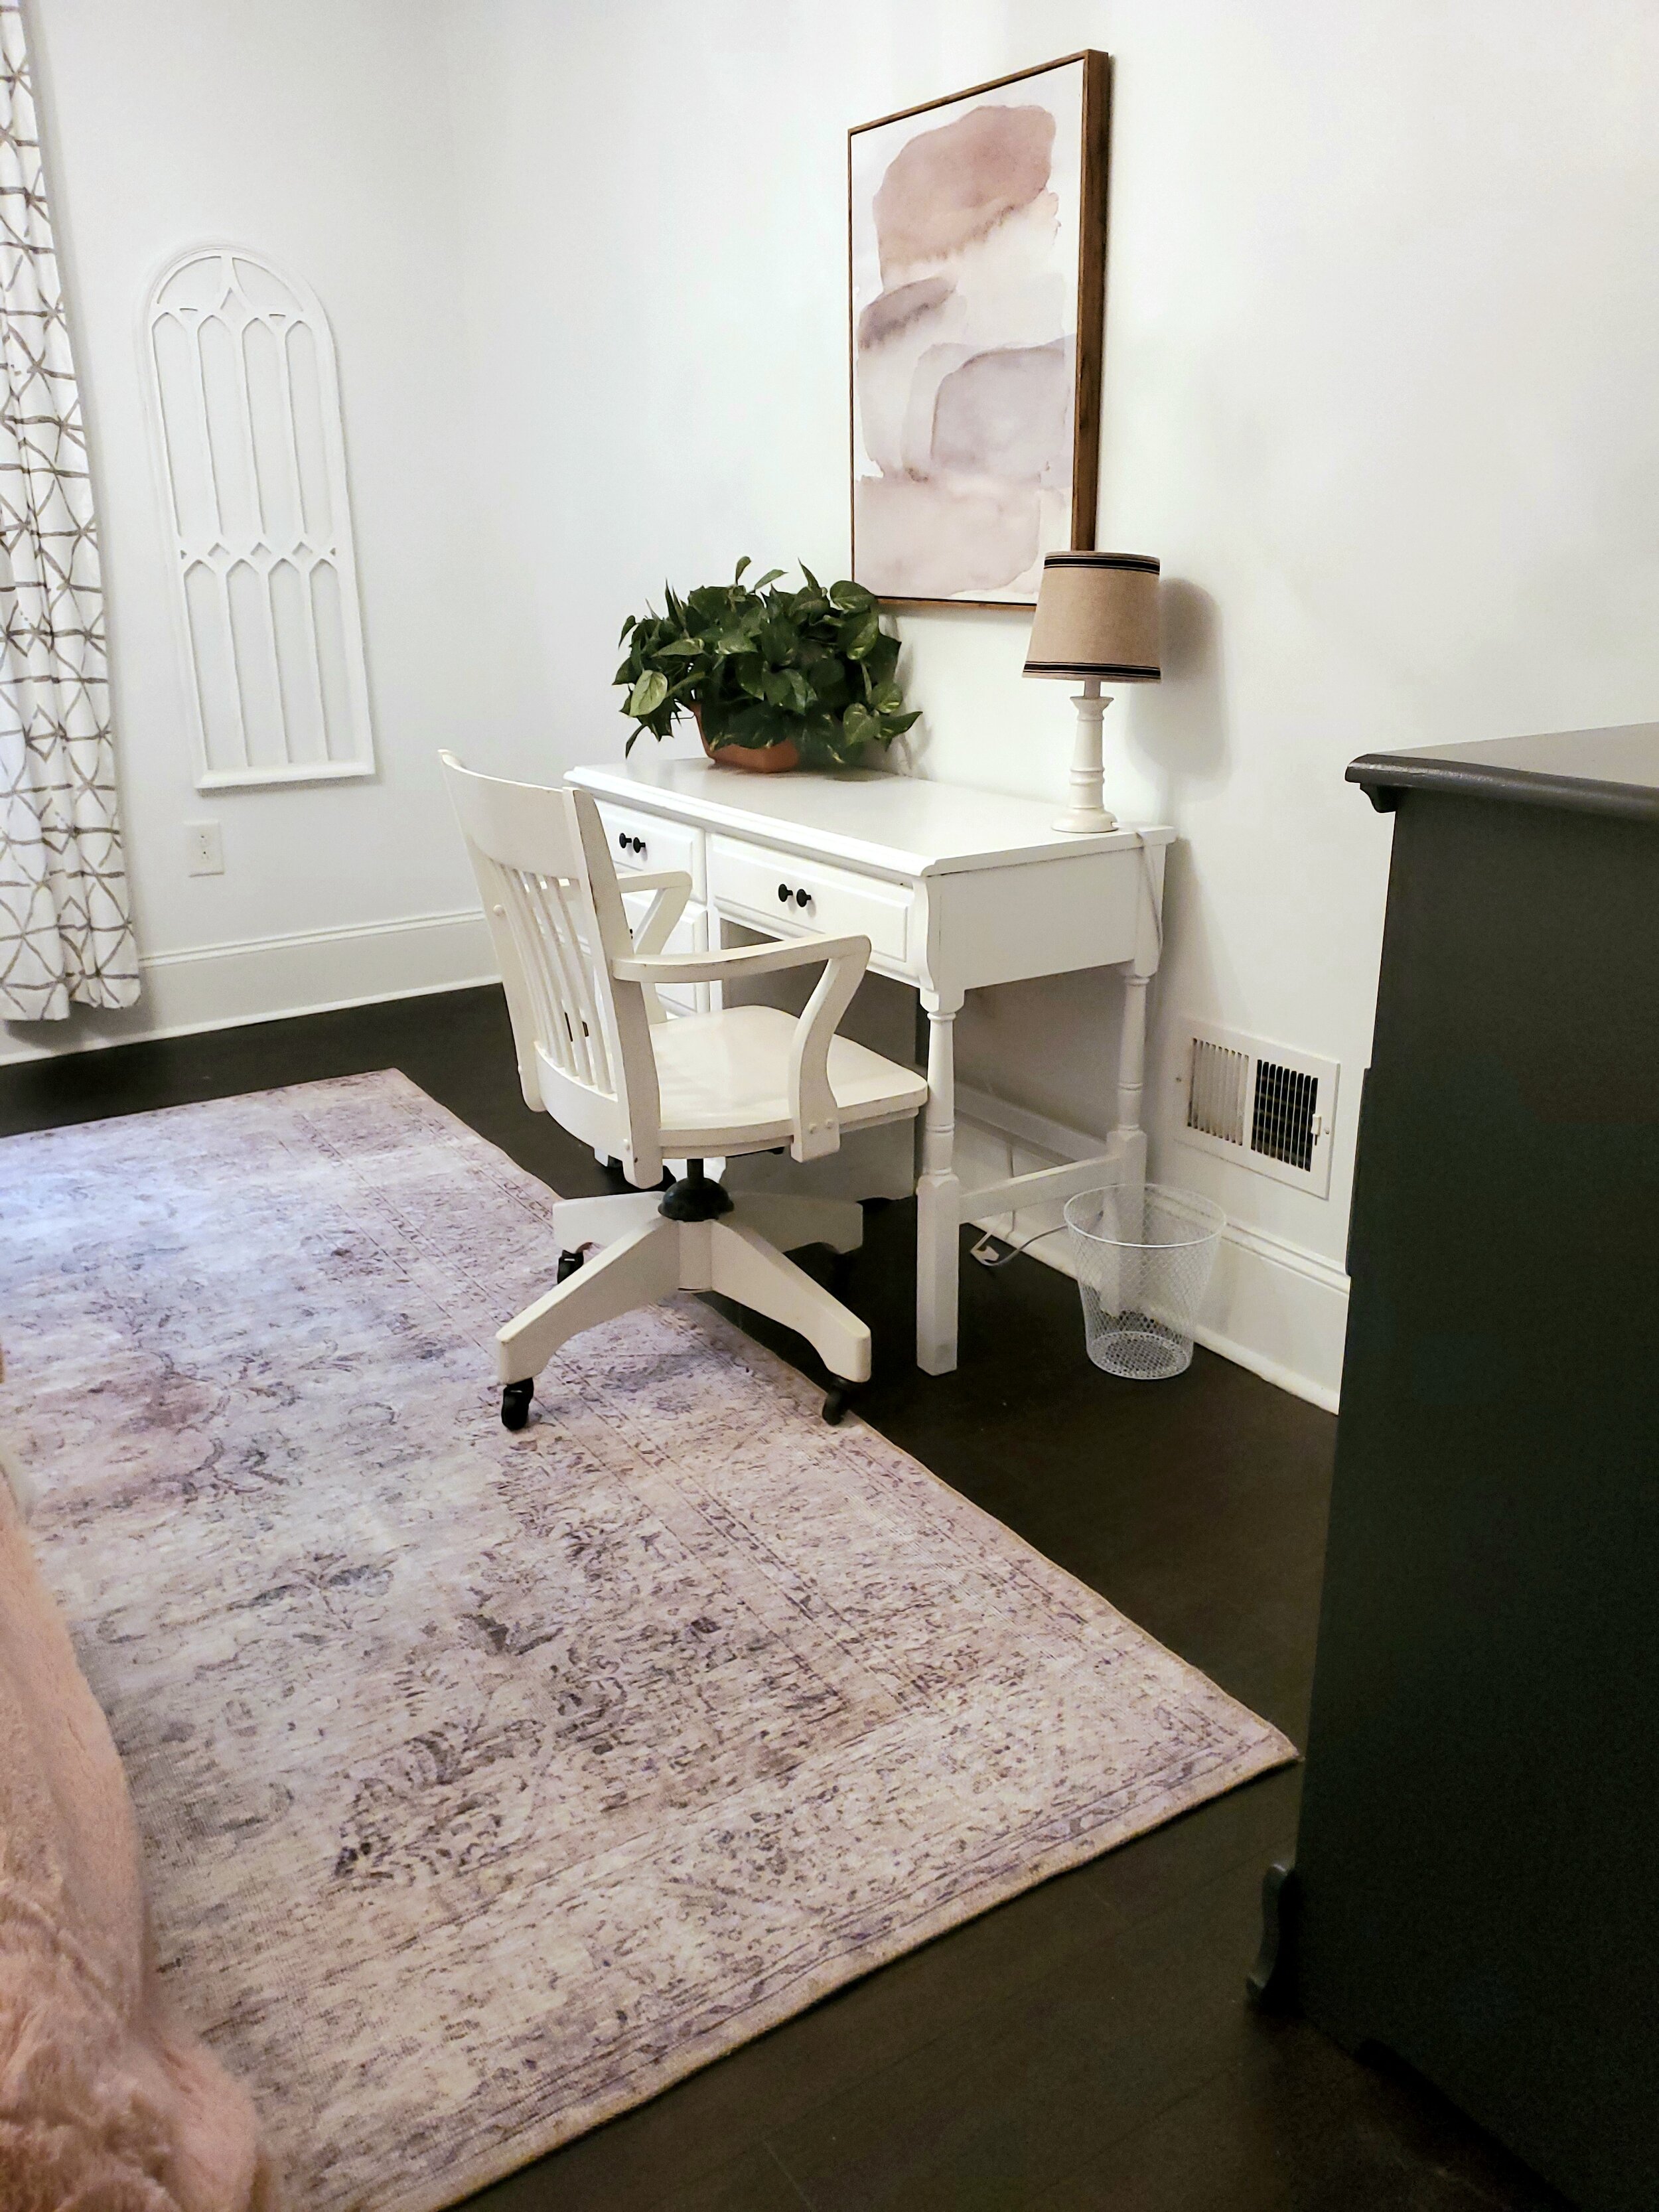
THE HAYMOUNT INN - AIRBNB by HAYMOUNT HOMES
EEEEEKKKKK!
We are excited to announce the opening of our first short term rental option in Haymount:
The Haymount Inn
We loved our first Haymount Home so much that we decided to give it a fresh overhaul and offer it to visitors looking to experience Haymount for themselves. Whether you have family and friends visiting, need a short term place to live in Haymount, or find yourself between moves, we hope you’ll consider our Haymount Inn for your short term stay.
Located in the heart of Haymount, this 2450 square foot home sleeps 10 and has 4 bedrooms and 3 full bathrooms for your enjoyment. Plenty of amenities and all you’ll need for a great stay. Full availability and reservations can be found here: https://airbnb.com/h/the-haymount-inn-by-haymount-homes
You can also look at the information on our website under the AIRBNB link, but scheduling stays is on the link above.
Enjoy the tour (click through the pictures and you will get the full tour of each area) and thank you again for considering our new adventure! We are excited to share Haymount with your guests!
-The Benander Family


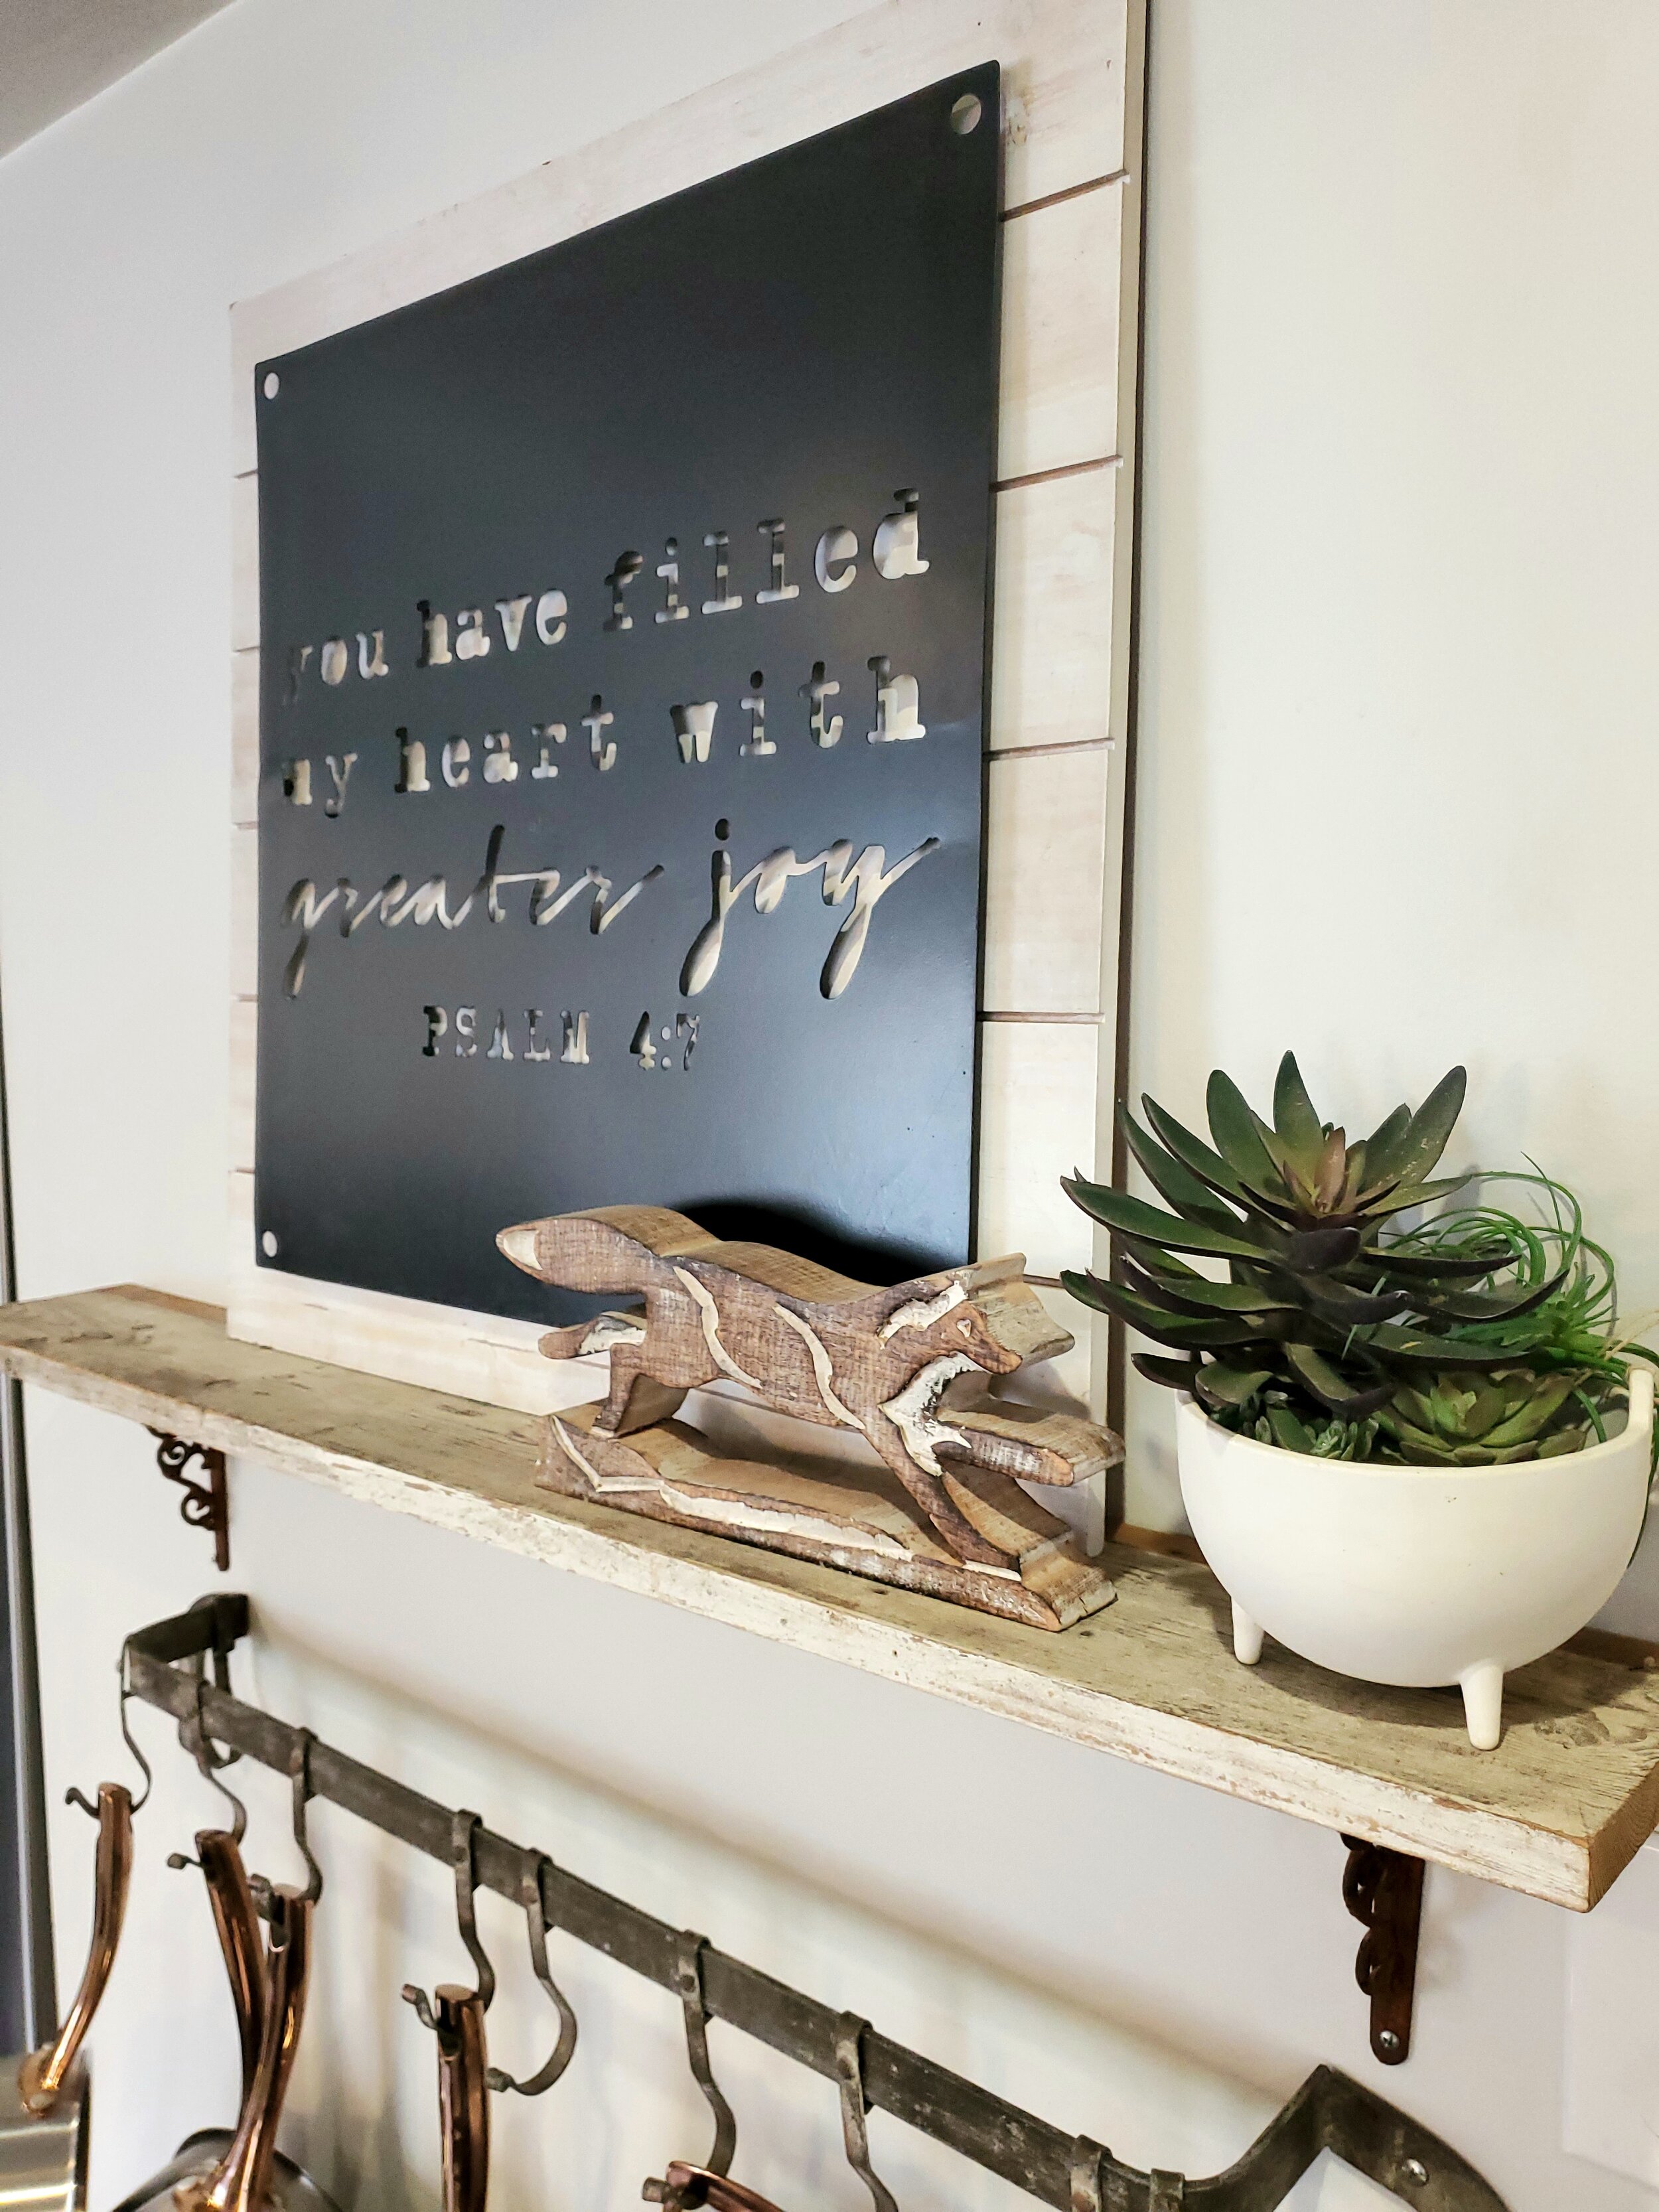
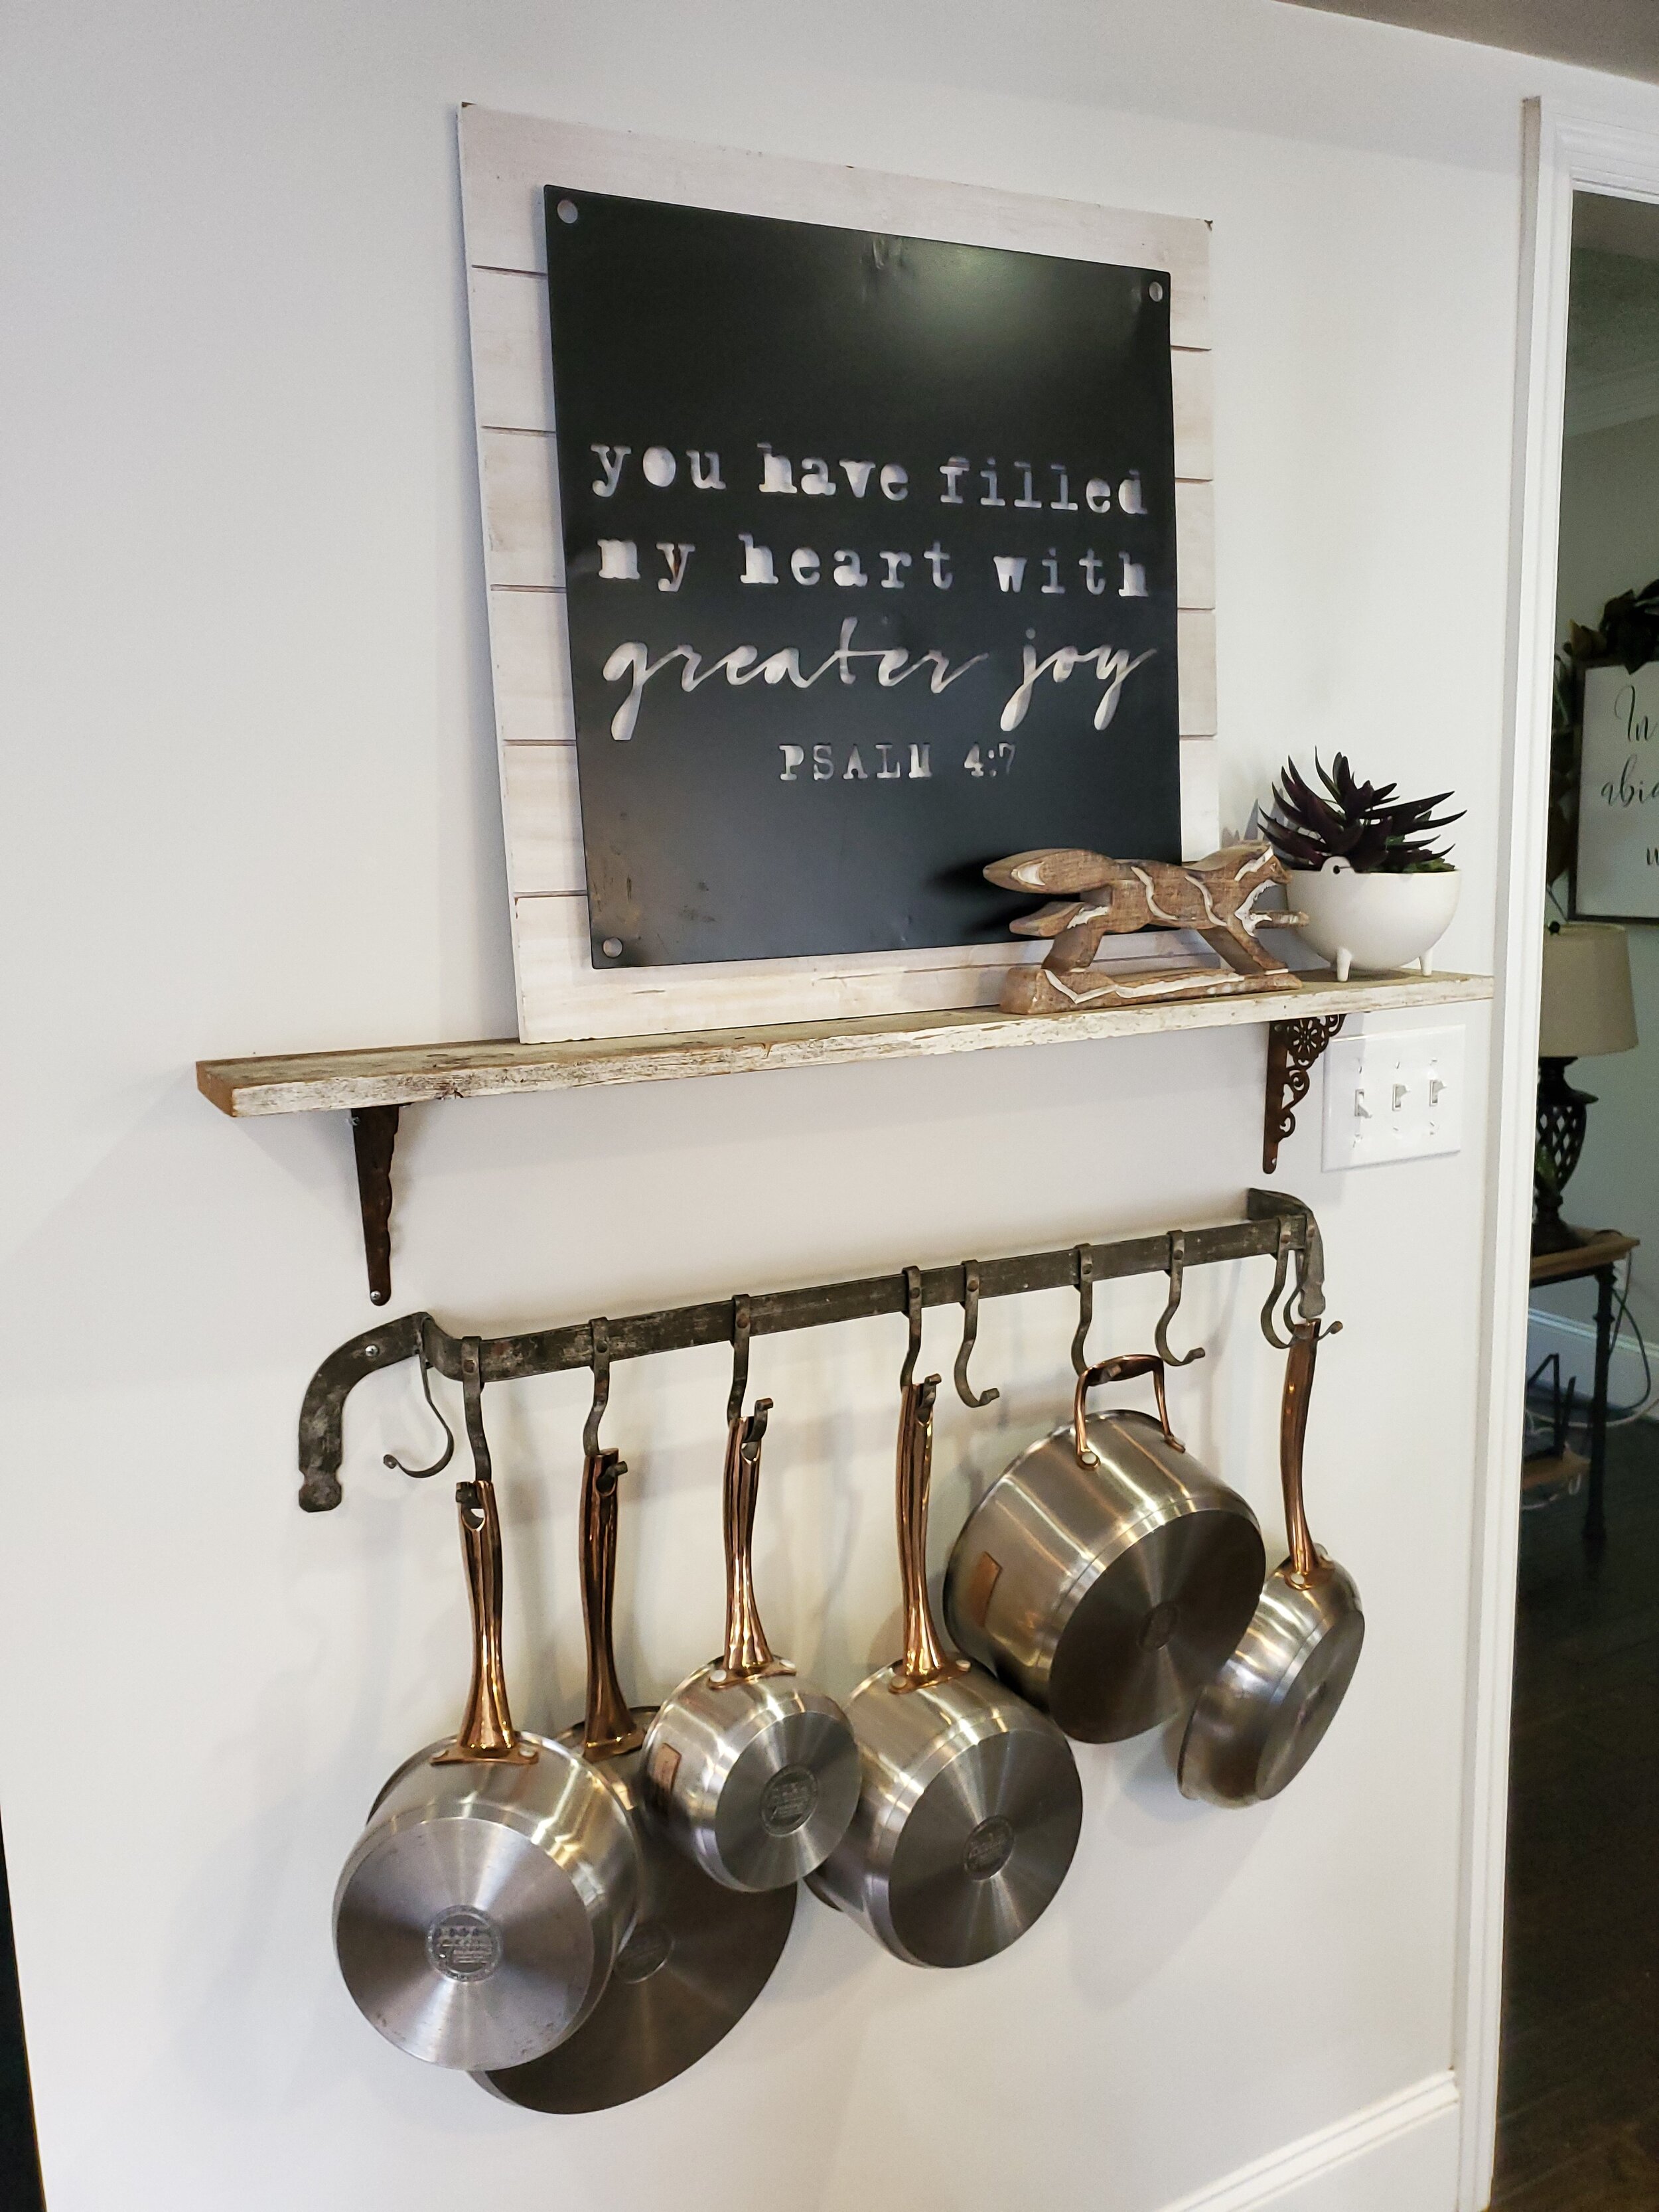
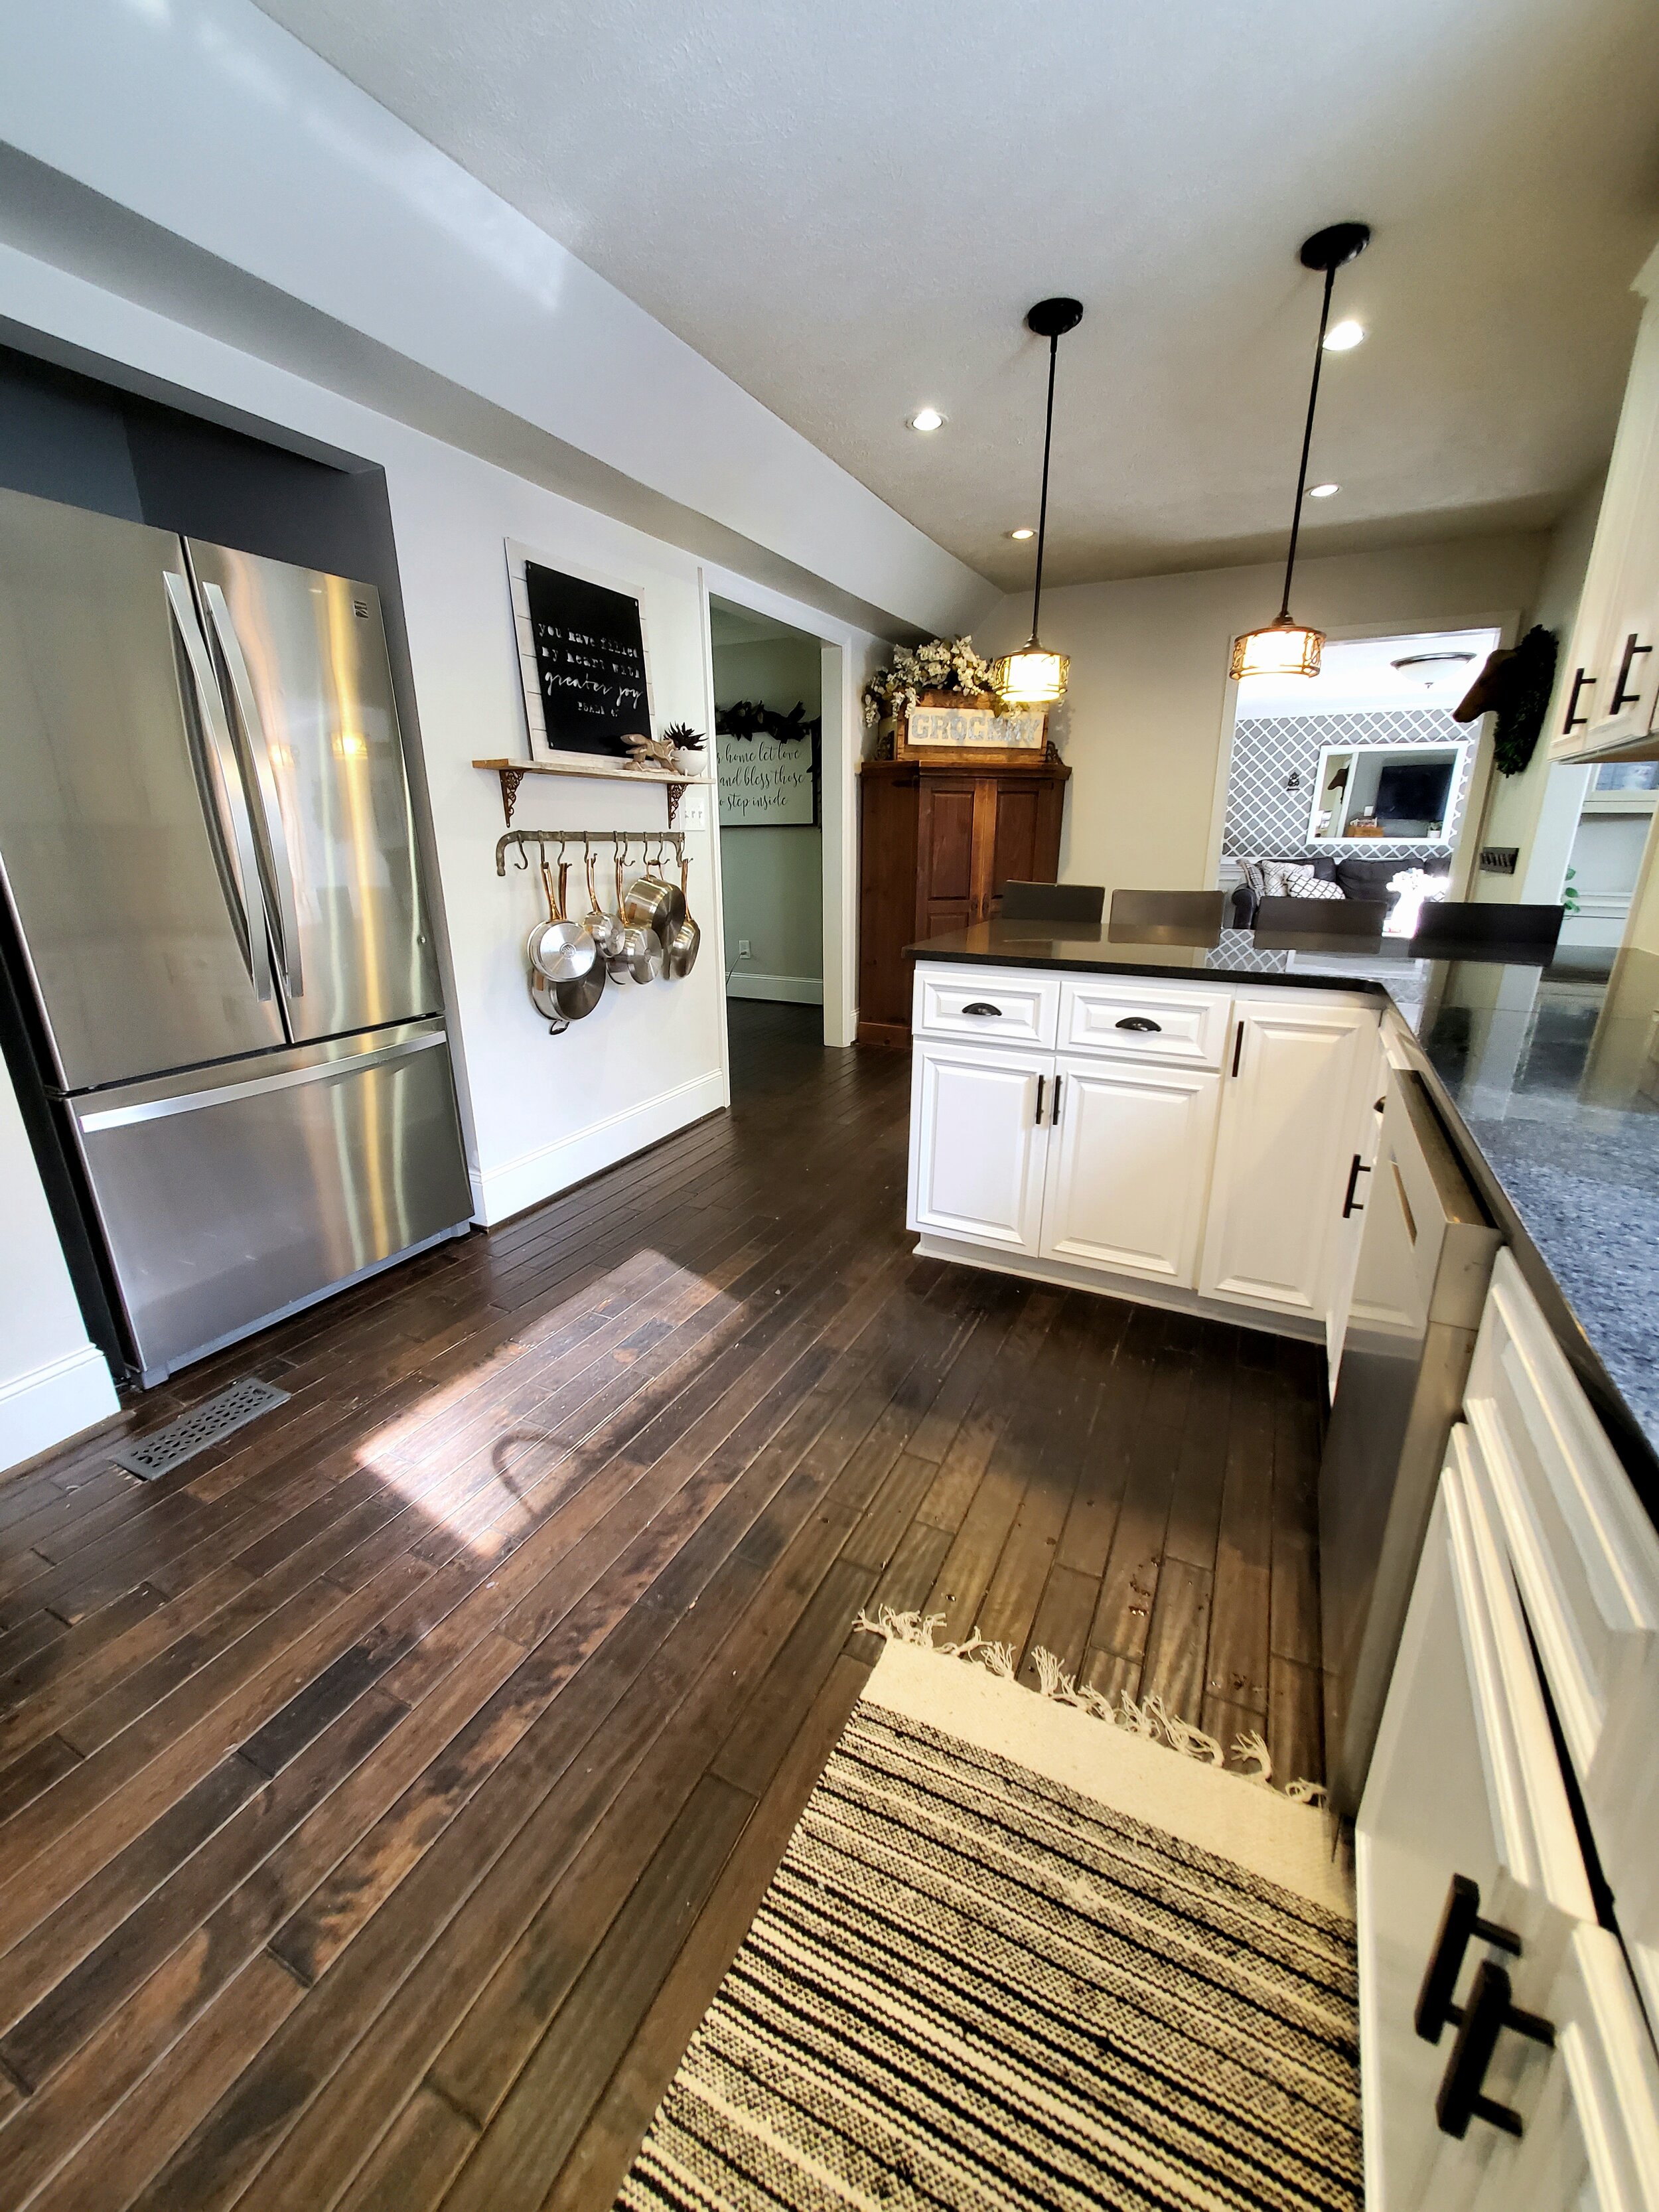


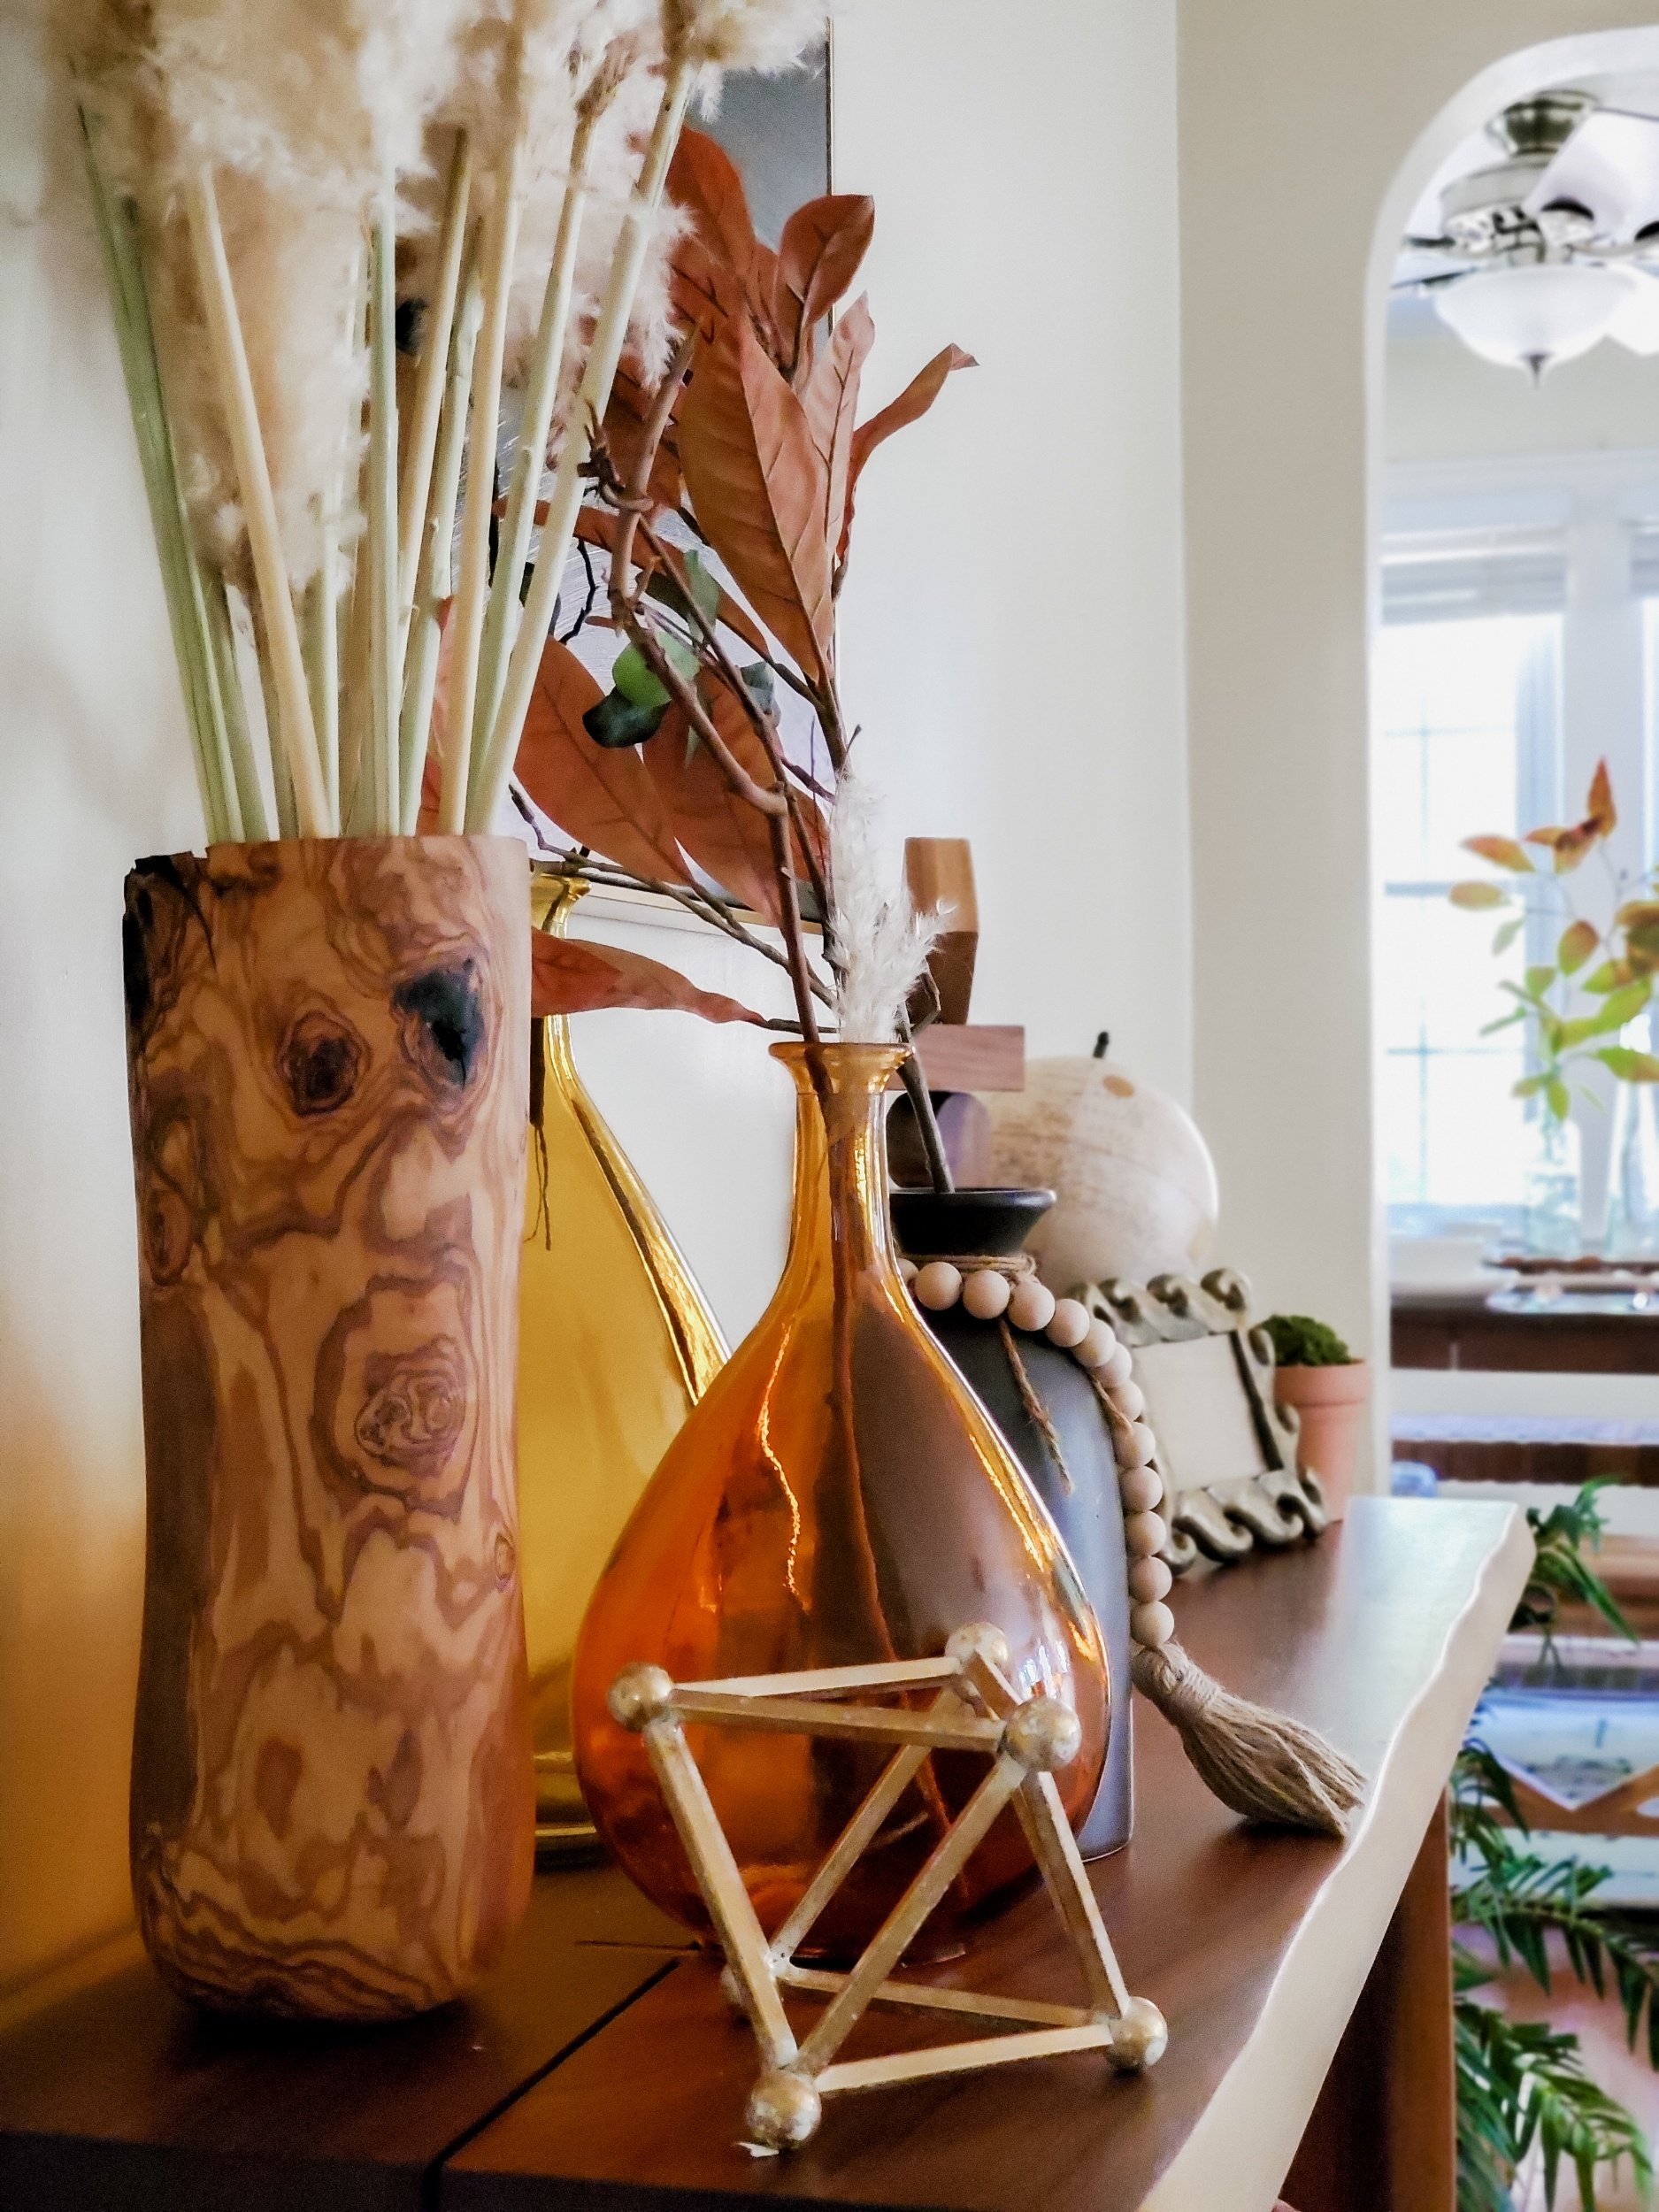
Hillside ave - before and after part two
Enjoy our small photo tour of the music room and bathroom transformation!

Happy Sunday!
Round two of before and after photos are here! We continue to put more ideas into our new home, but I was able to snap a few photos of some of our progress so far. Please ignore some of the randomness and try to see the beauty through the trees!
Some of our touches include great shiplap detail that helped disguise the poorly formed walls. Additionally, our contractors worked their magic on smoothing out other areas and making everything look new again. Refinishing floors and adding new paint made everything come together.
We bought a beautiful new light fixture for what we are now calling the music room, from Mid-South Lighting in downtown Fayetteville . If you need a light fixture, check them out because they are amazing!
The majestic purple bathroom has been toned down. This was not exactly a group decision, and many people told us they loved that deep purple, but it wasn't the calming environment we were looking for. We love the result with our changes and apologize to the purple fans out there!
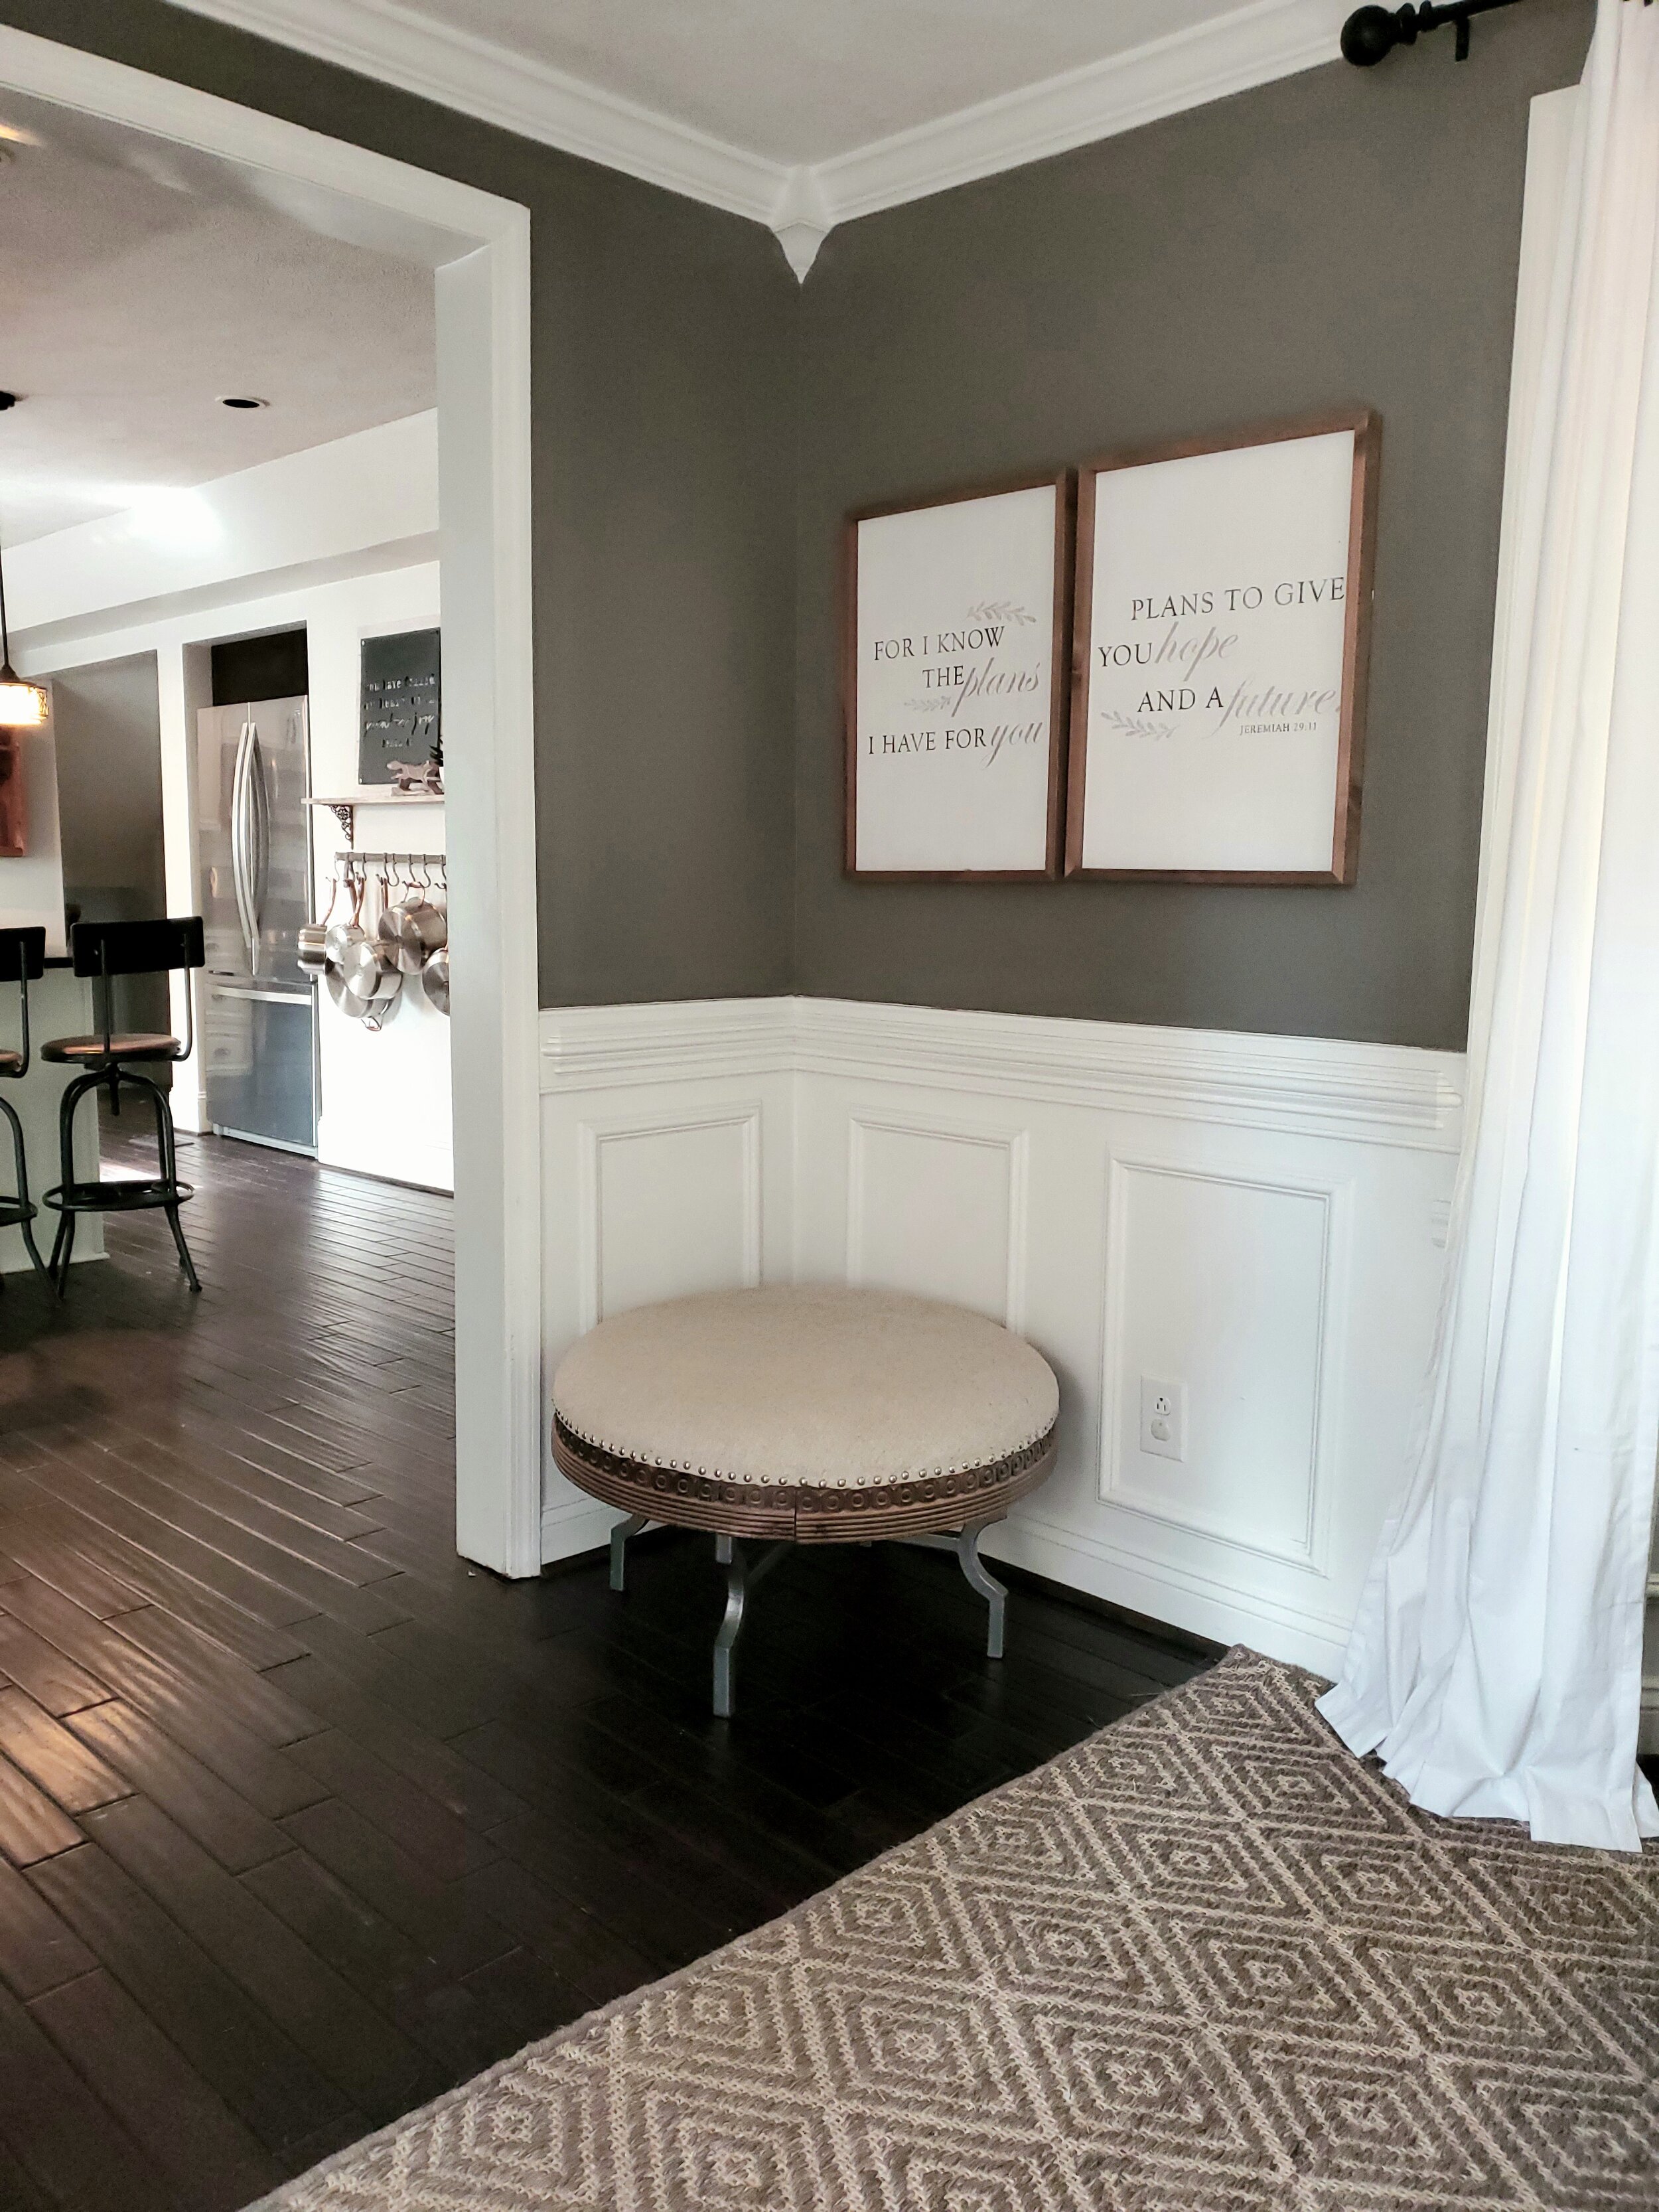
Many people have asked about the colors that we have chosen at Hillside. The white on the walls is Sherwin-Williams pure white, which is one of our favorites to use on our homes. Pure White is slightly warm but still crisp, which makes it feel cozy but not too ivory for our taste. In the bathroom, we have used Sherwin-Williams Big Chill. It has a beautiful mid-range light reflective value and is a wonderful slightly cool gray. In the dining room and entryway, you will find more Pure White and also Sherwin-Williams Tricorn Black.
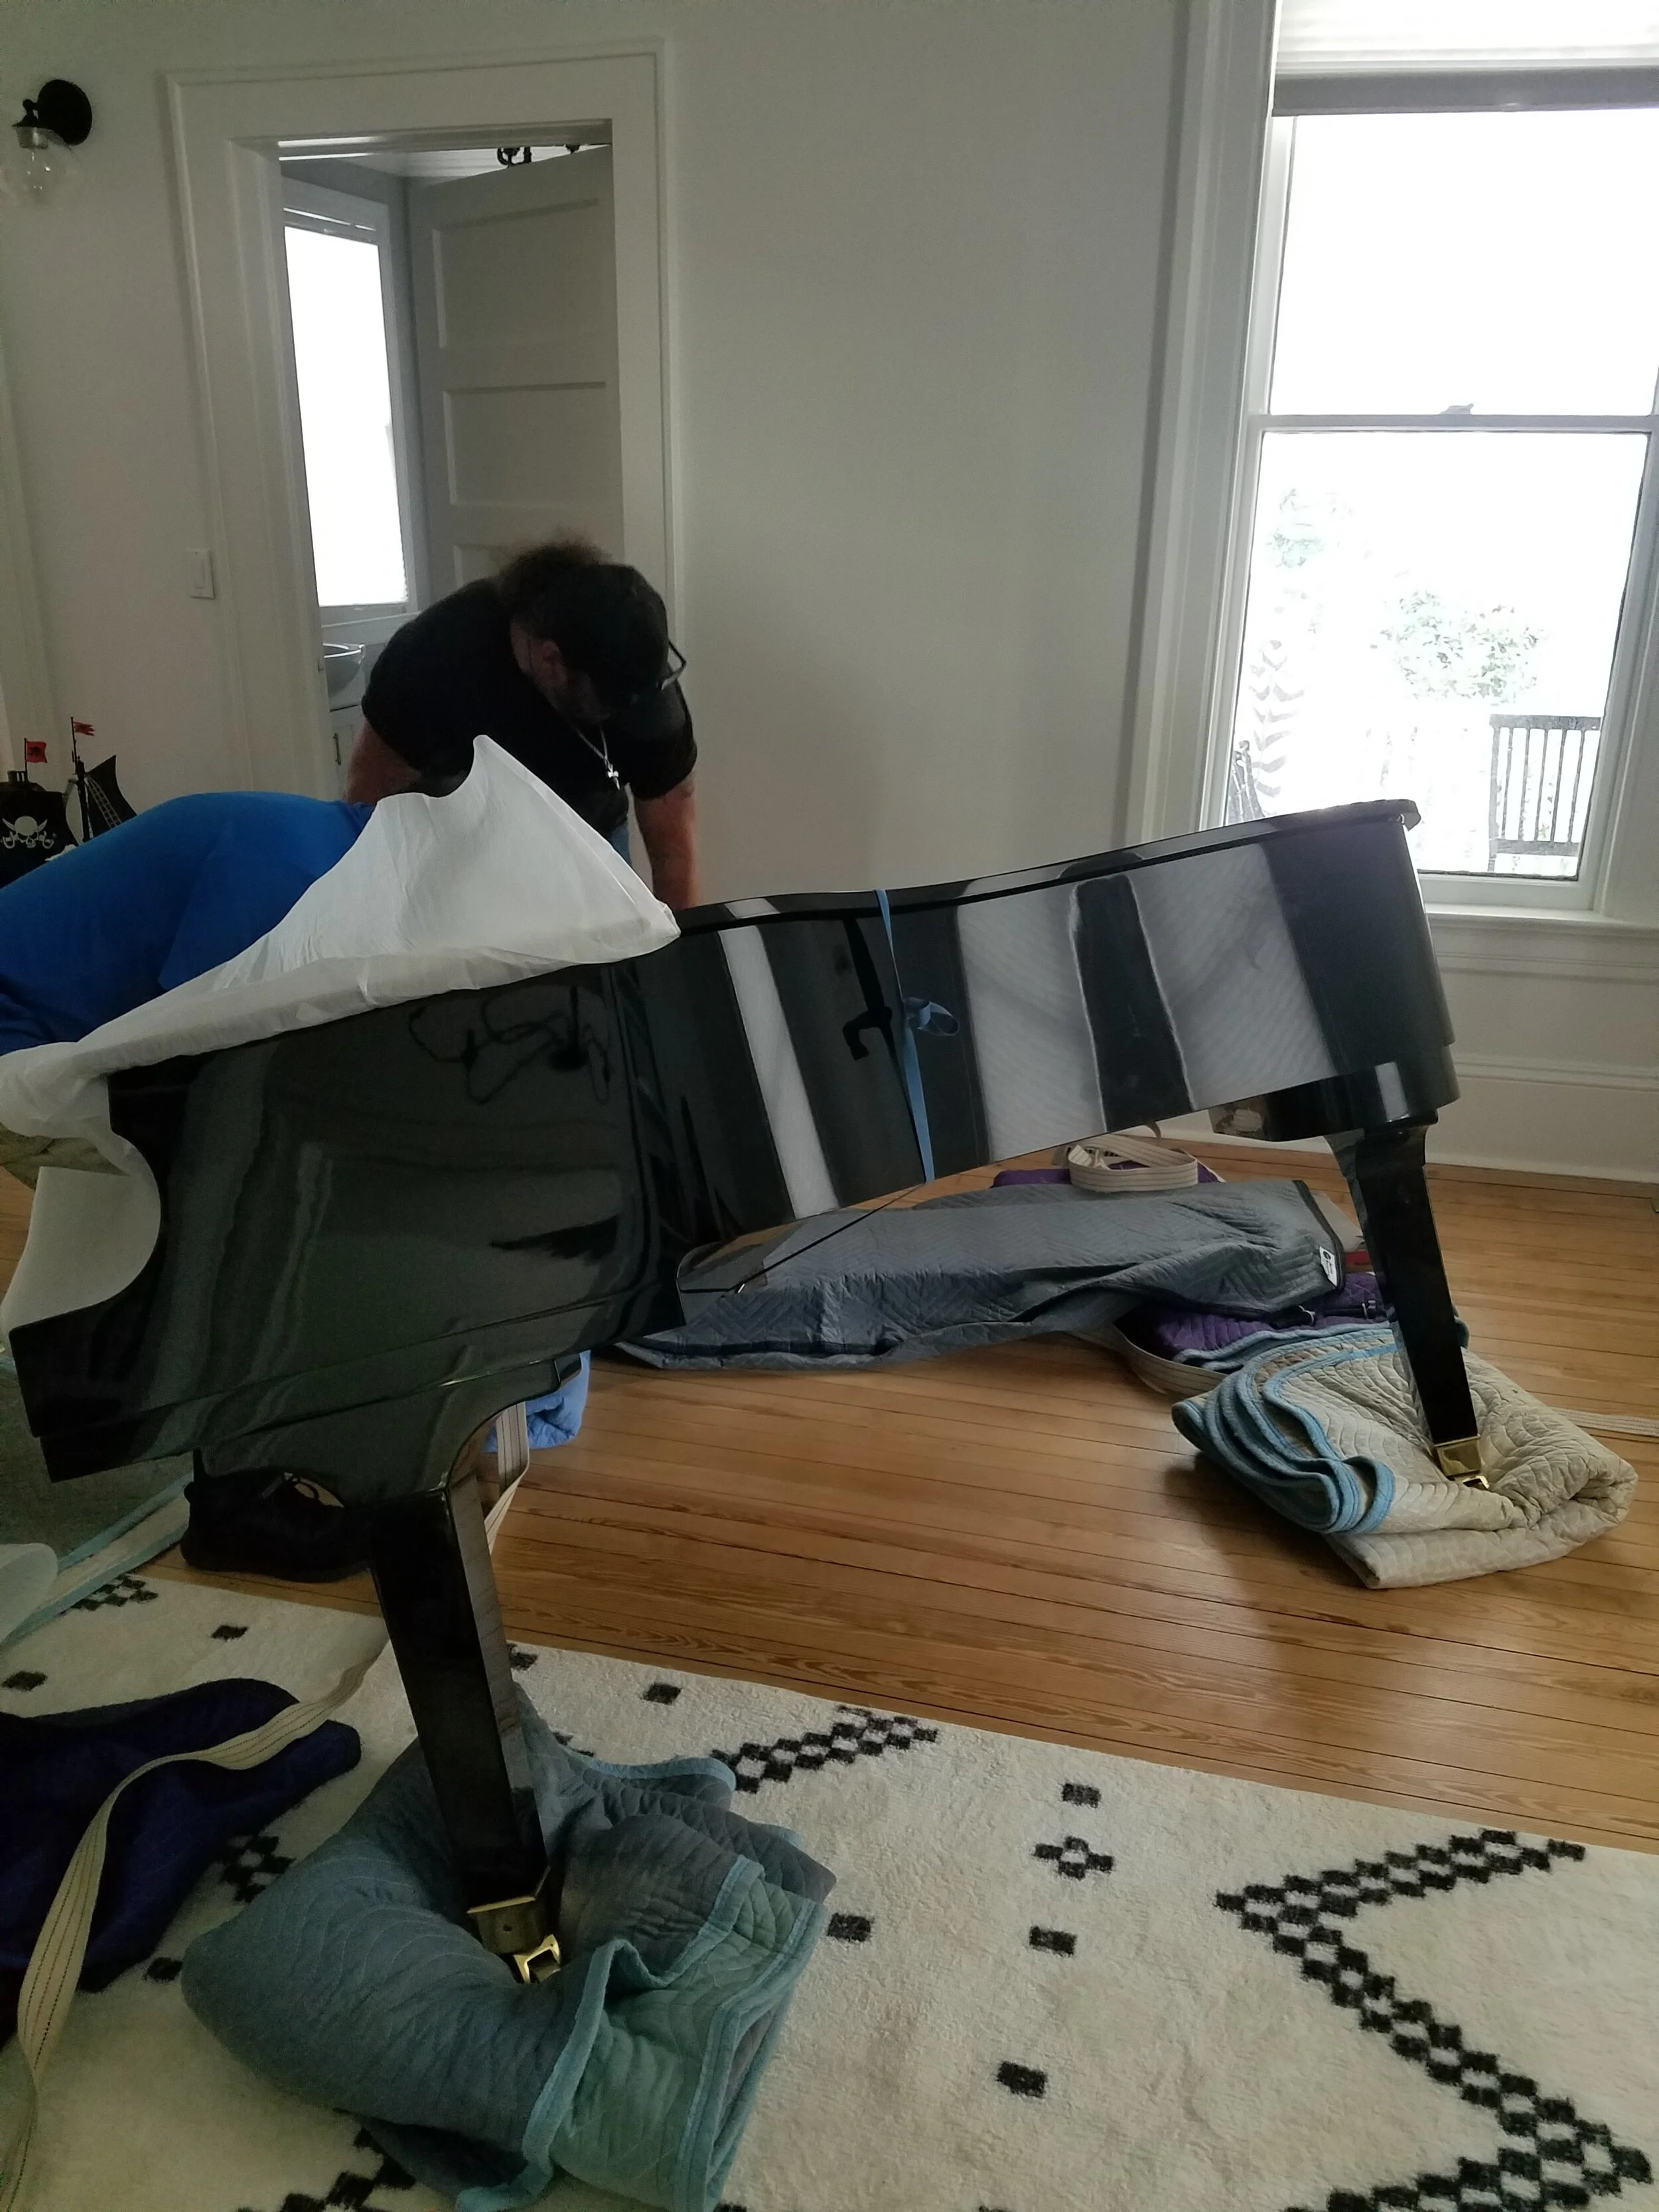
We hope you enjoy the photos. If you find yourself in the neighborhood, stop by for a concert on our “new to us” grand piano. The kids play it every day and it's wonderful to listen to…
Casey and Crew


HILLSIDE AVE - ANOTHER WEEK OF RENOVATIONS

Happy Sunday!
Here is the recap on another week of renovations!
Our neighbors from Weldon are moving after 30 years. We are all sad that they will be leaving. CJ has been their chicken keeper for about 5 years now and they have generously given our family their chickens since they cannot take them along. We are grateful and excited to keep the chicken “farm” alive. Moving the coop, however, was not easy and thankfully we had some great help to make it happen!


Hillside is pulling together. Another really great and exciting moment was the delivery of our grand piano. This was really exciting for all of us. After buying my first electric keyboard in 1999, it has served me and our family very well through countless moves from college, military life, through now. We had vowed that once the space allowed, we would invest in a “real” piano. The folks at JML music really pulled through for us and made this dream come true. For the first time since I graduated high school, I have a real piano to play and it is a dream come true. You can believe the house is already full of great sound and several guest artists have made their debut on it!


We are still waiting on some electrical work and then the painters can return to finish their end of things. Having used nearly 60 gallons of paint, Hillside is definitely getting refreshed! We are turning to the downstairs kitchen where we will start the renovation there of replacing the backsplash, hardware, lighting and replacing the tile floor. That job is exciting but DUSTY!


Things keep progressing and we have made the move over to Hillside, so if you are looking for us, we’ll be there. Living in renovation is always a challenge, but we are hanging in there with the bulk of the work behind us. Annika has been working her organization skills in the kitchen - we are loving more space - even with all the chaos of moving!


It’s a mess, but we are getting there. Hope you enjoyed the update.
Have a great week and we’ll “chat” soon!
Casey and Crew

HOME STAGING SELLS - BEFORE AND AFTER PHOTOS
Home Staging - Before and After photos - See the value for yourself!

We hear plenty about staging a home for sale these days - experts recommend it, realtors beg their clients to do it, and homeowners stew about whether or not it is worth the investment. We get it completely. Staging a home takes important resources: time, energy and money. However, these efforts certainly pay off in the long run.
Staging a home often brings more interest in your home, a higher selling price, more viewings, faster offers (sometimes multiple offers), and quicker sales. In our experience, you will receive every penny you spend in staging your home back in selling your home for more money in less time. Additionally, sometimes staging will just get your home sold when it otherwise has been sitting. Avoiding more time on the market also saves money.
Below you will find before and after photos of a project we recently completed. We also did some light renovations with the staging, but they were mostly cosmetic- painting, flooring refinishing, and recoloring grout. There are a few types of tile that were added and swapped out. Overall, there are big changes with the staging and light renovations, and these changes at a big impact.
Prior to the staging, this home had been in the market for a year. Once staging and light renovation were complete, 12 days later it had a full price offer for over $30,000 more than the asking price when it was removed from the market for renovations.
Enjoy the photo tour before - we all love a good before and after don’t we? We did not have before pictures of the upstairs, so we just included the first floor of this beautiful home. Staging and updating allow a home to shine in its full glory, and give the best impression to prospective buyers. If you need assistance staging your home, don’t hesitate to ask for our help! If you don’t know where to start, we can help you figure that out too!
Enjoy!
The Benander Crew


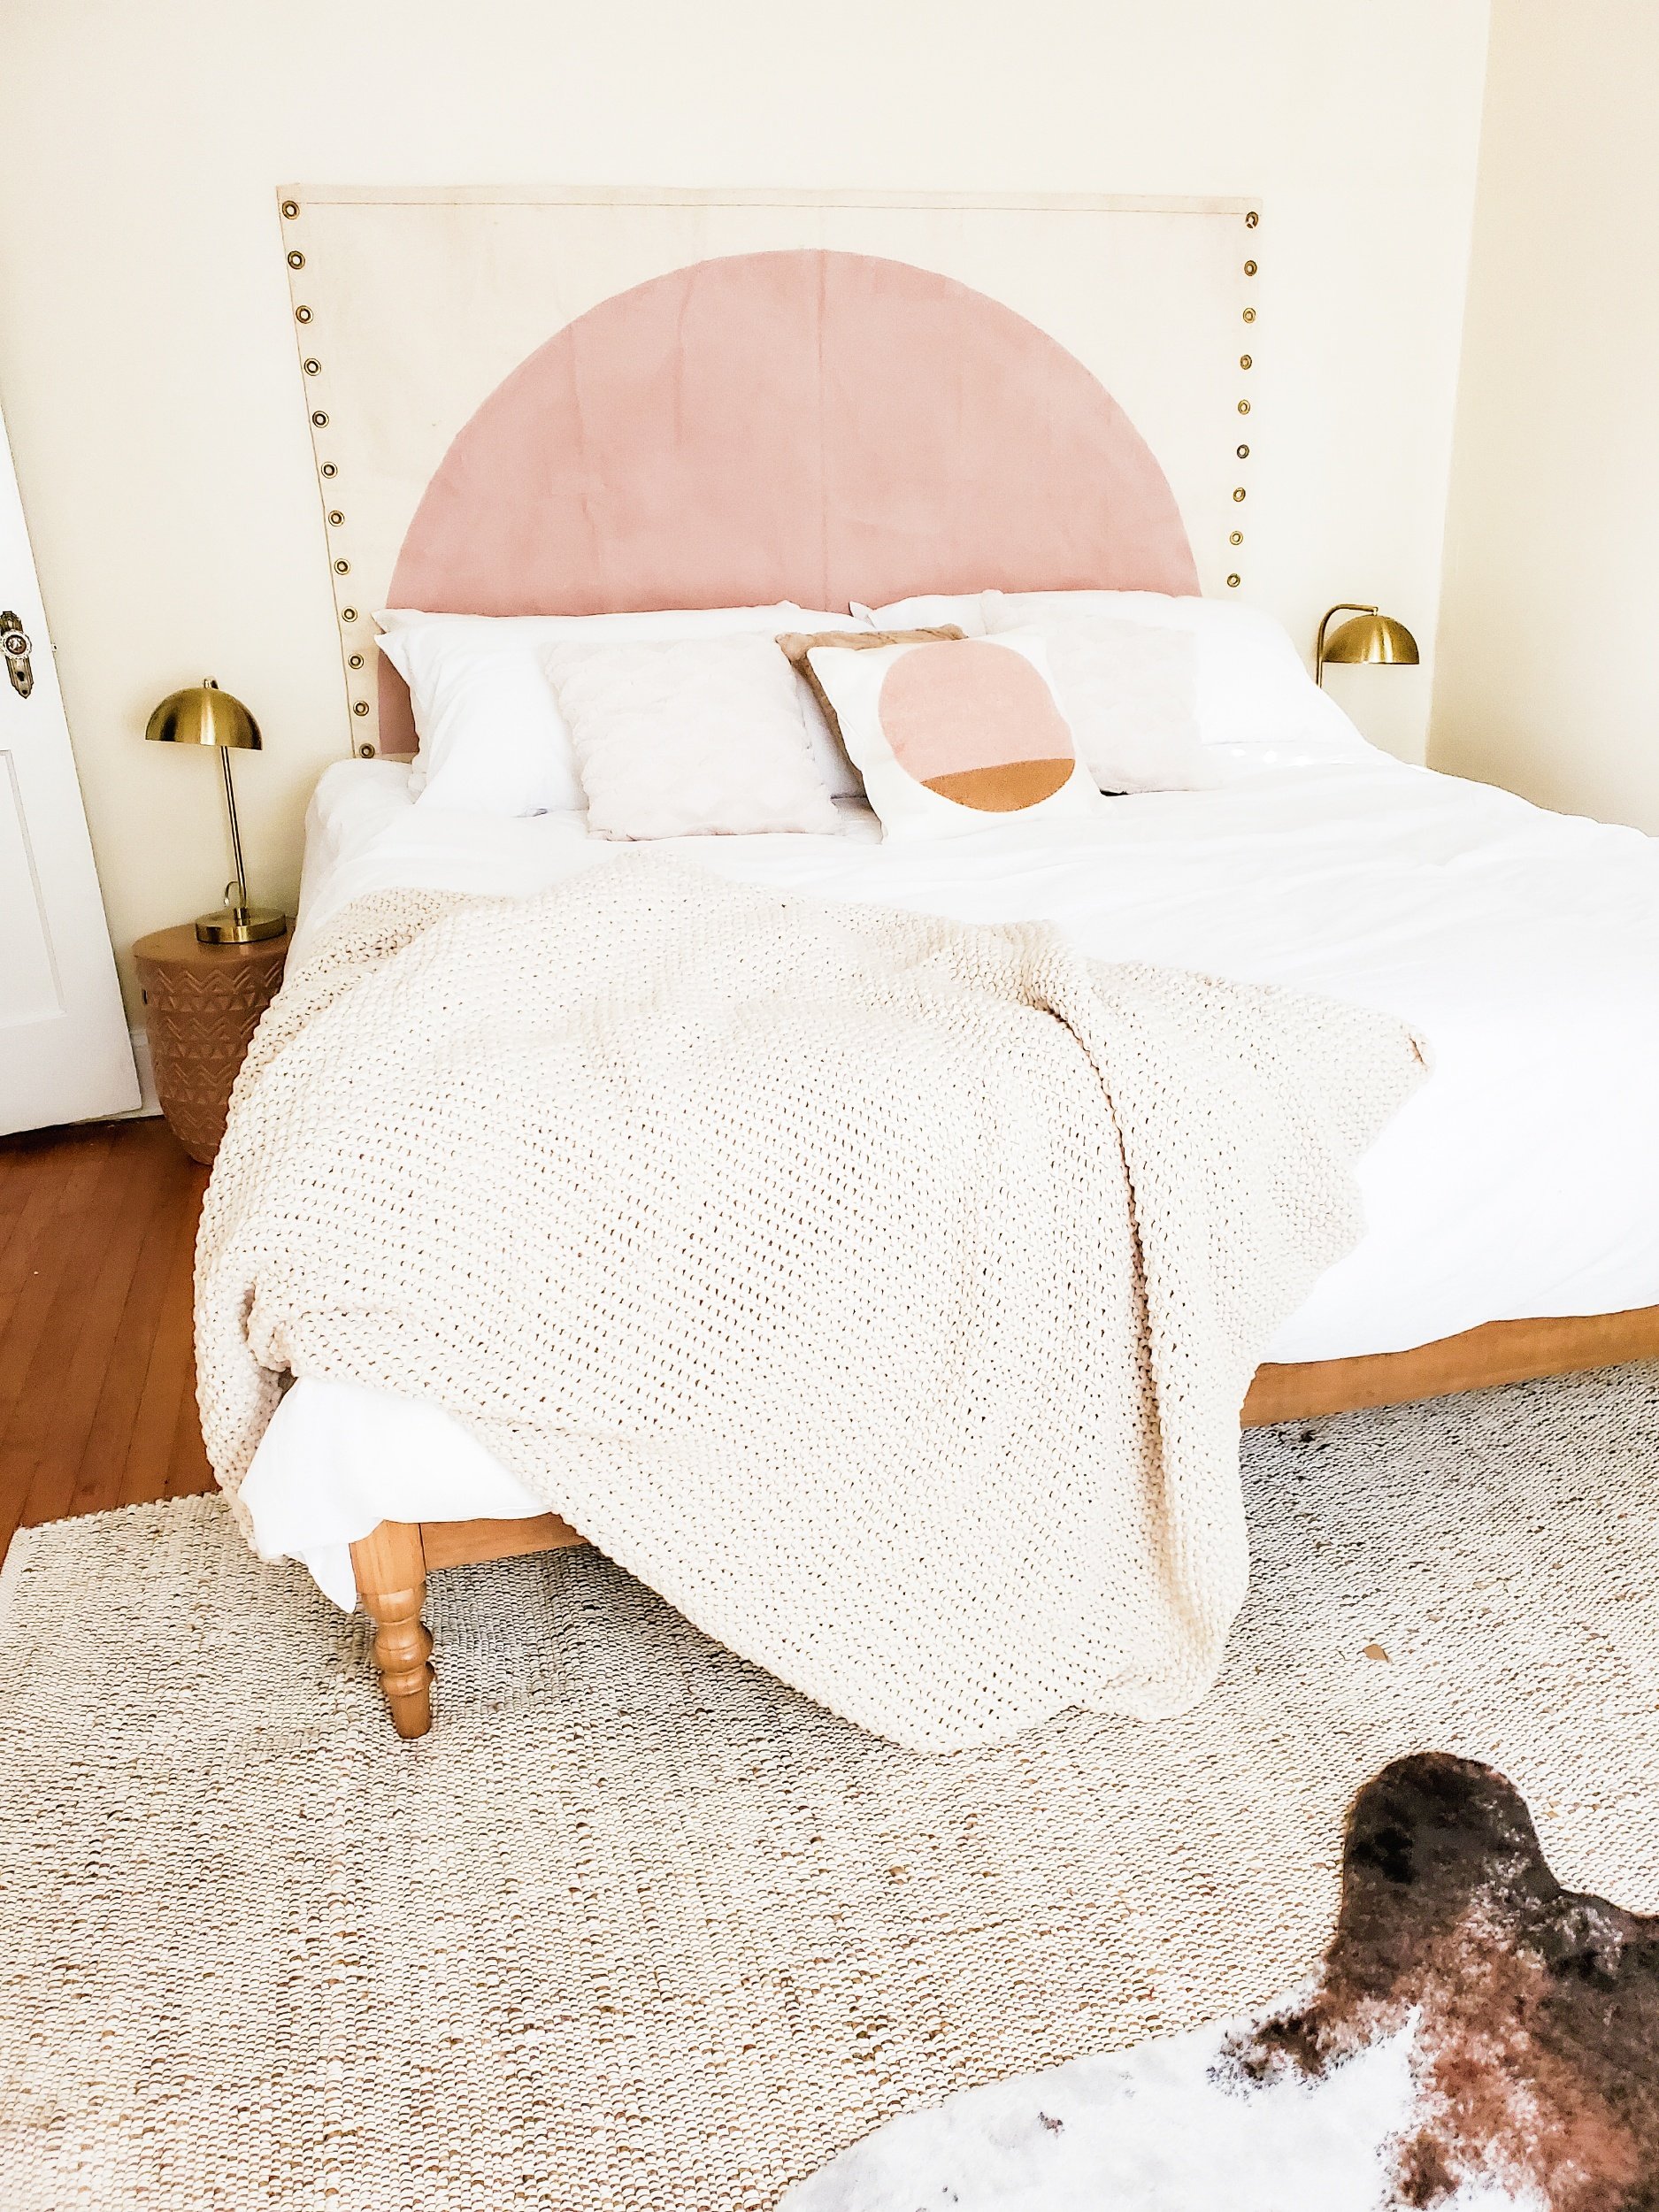
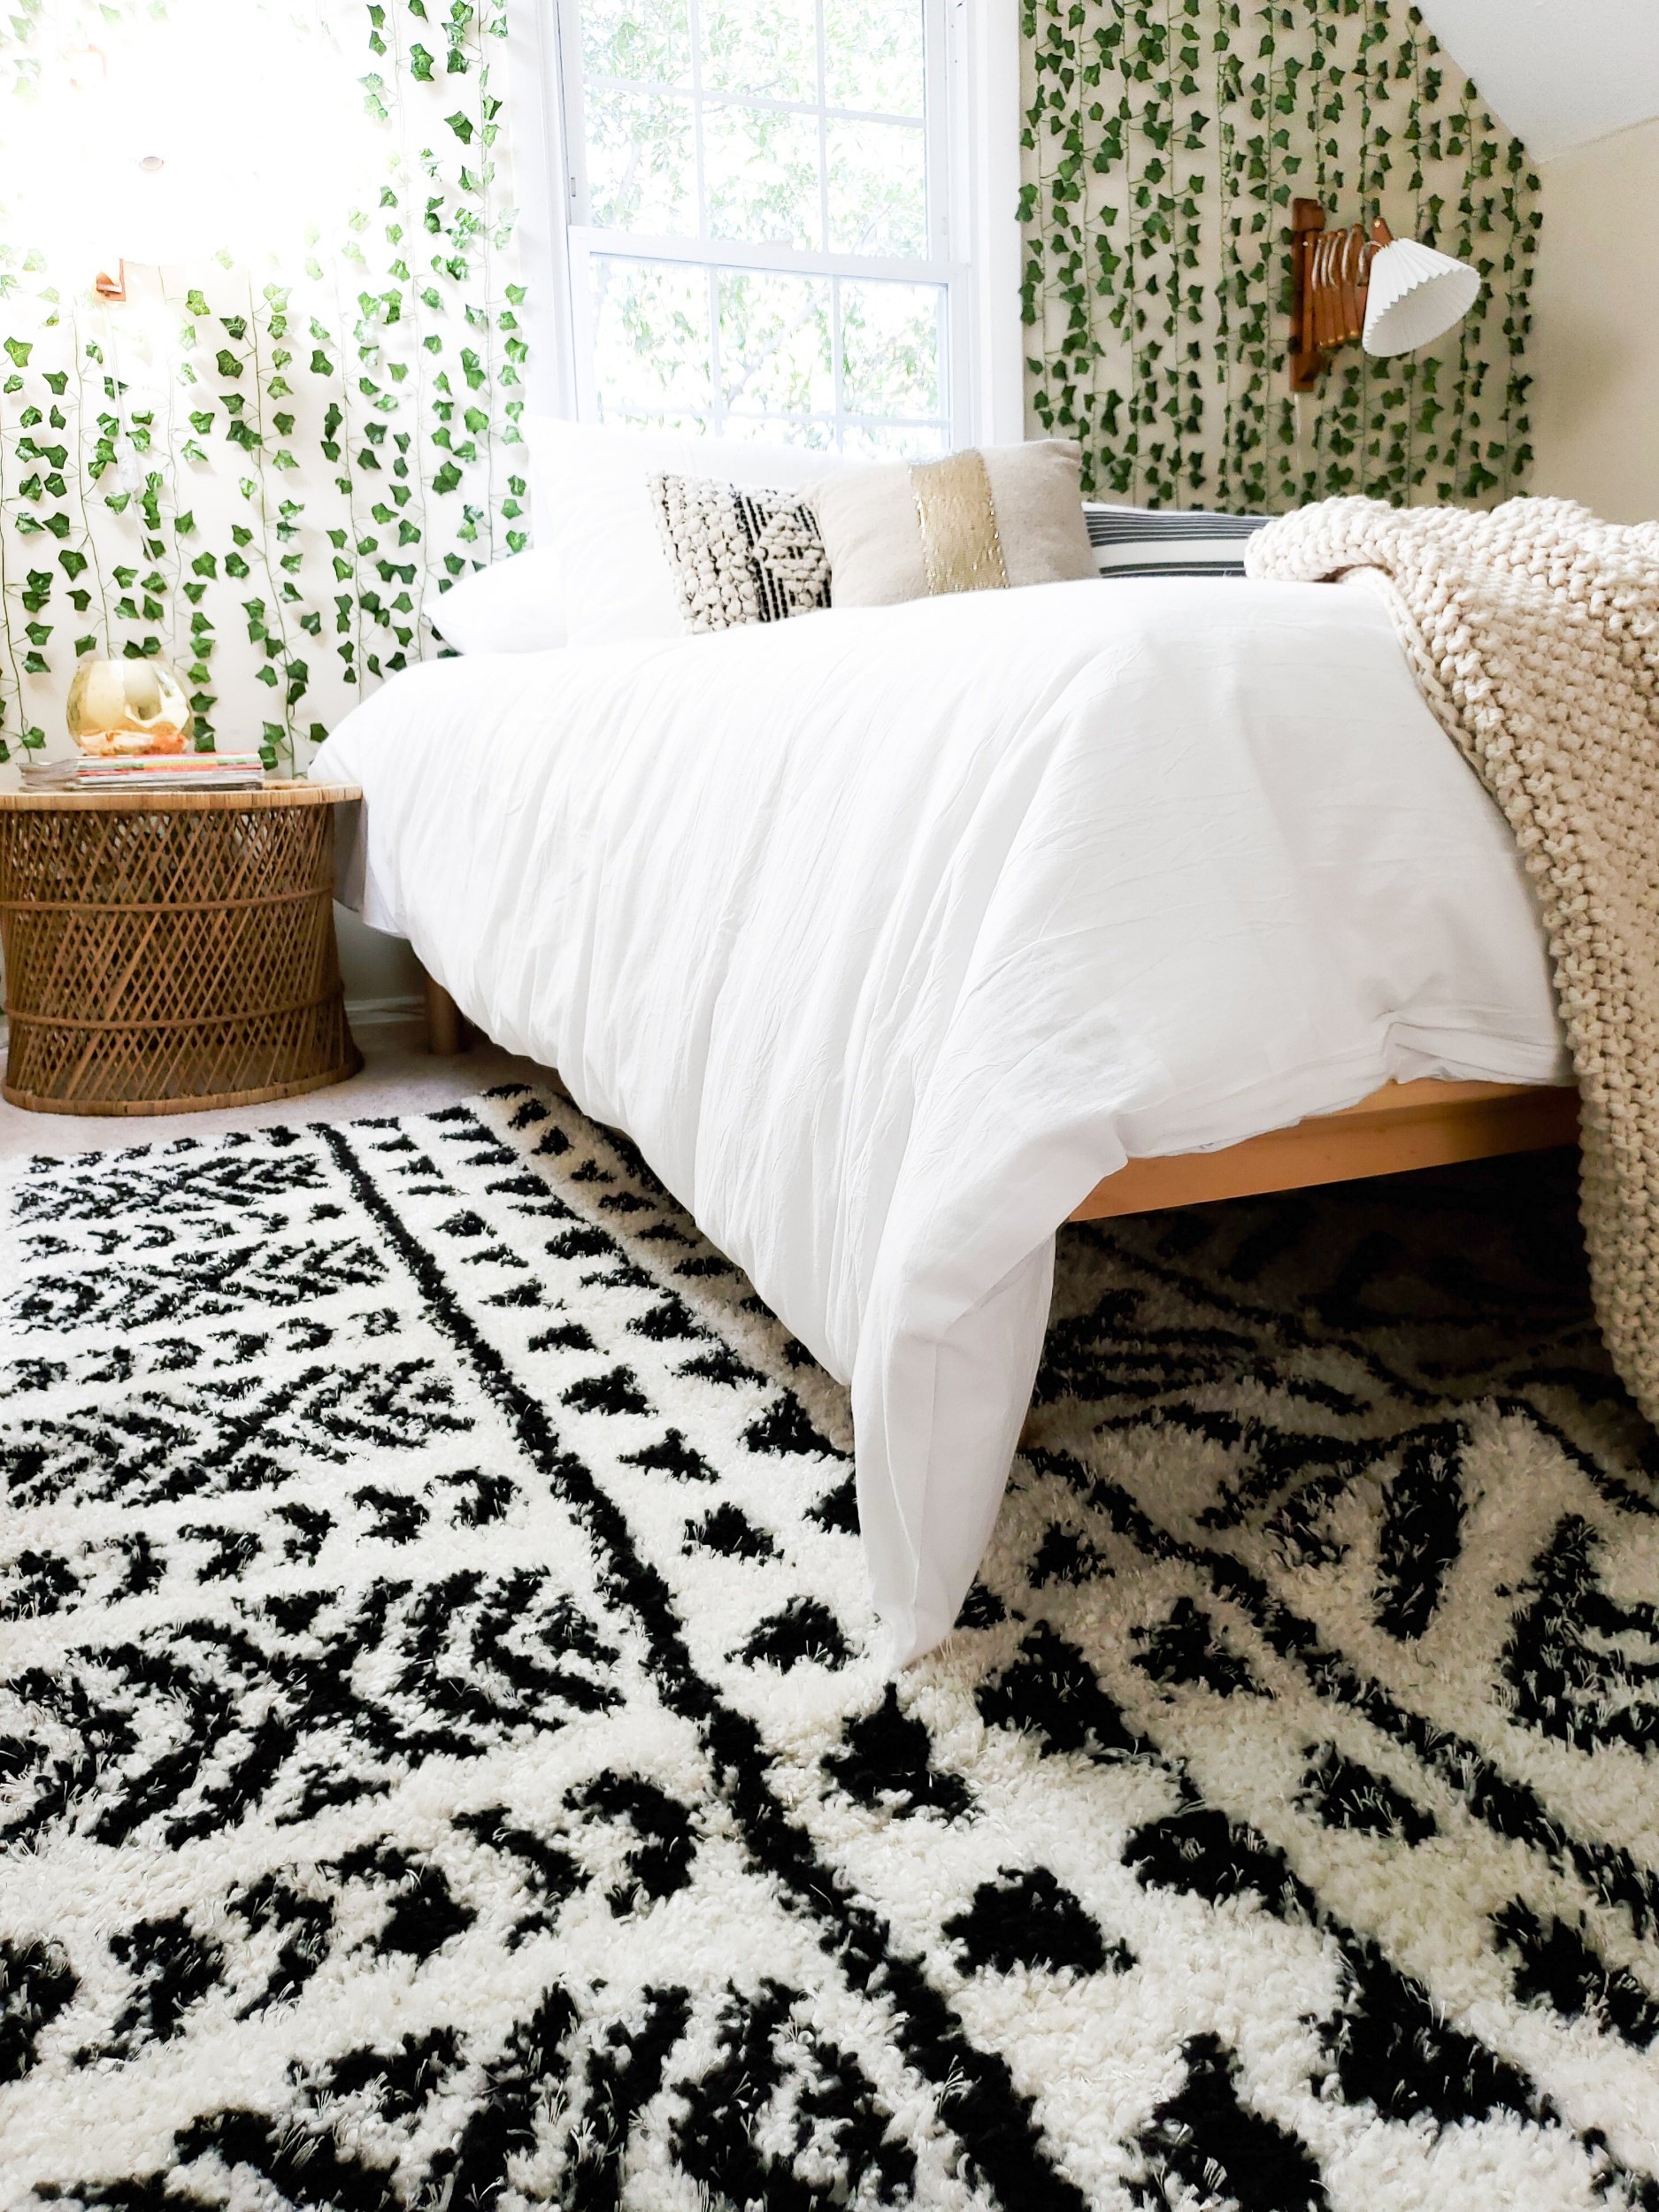
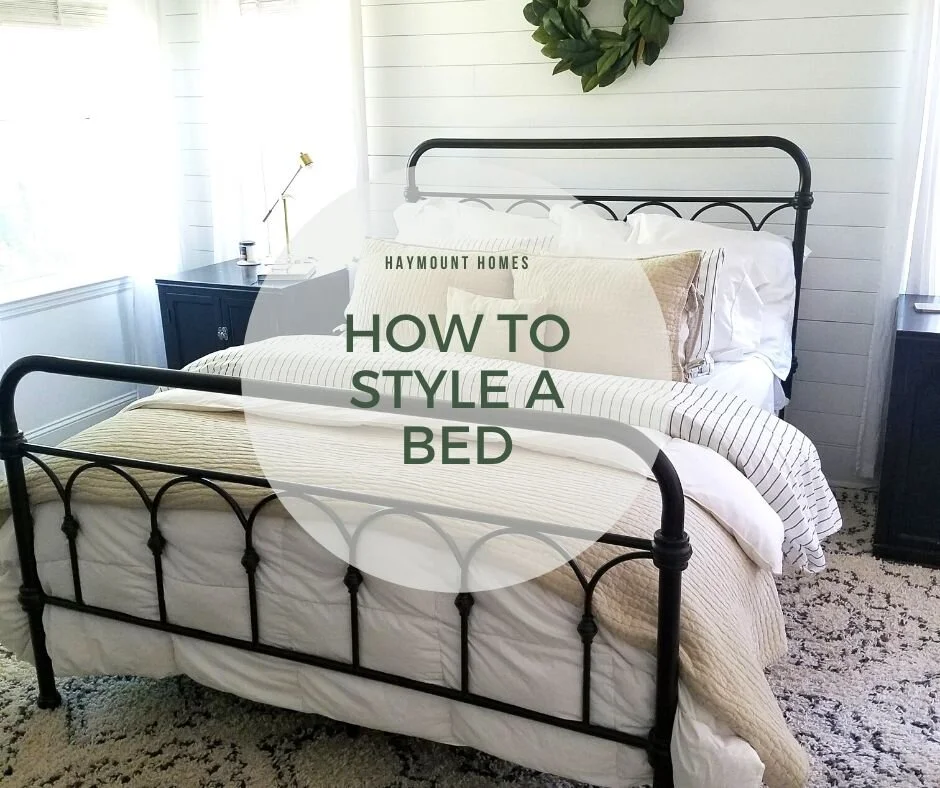
HOW TO STYLE A BED - Design Tutorial
How to style a bed like a pro - learn options for layering, texture and more!
Hey Everyone!!
I don’t know about you, but I am in FULL ON NESTING MODE. We are mostly staying home and doing our best to self quarantine. I have already washed everything down inside and out, and that, of course, has me examining every square inch of our home. This is like a kid in a candy shop to me - making a list of all possibilities of what COULD be rather than what currently IS. The problem? We are all watching our spending and cannot really hit Home Goods for our spring change up! Yes, retail withdrawal is probably a think - got it, a first world issue, but nonetheless a thing running through my head.
Thus, I thought it might be fun to do a few posts on techniques for decorating inside your home - hopefully using things you already have, but trying to give you that freshening up that you are wanting. It’s a nice way to expend that nervous energy and also a fun way to make some changes without leaving your home.
On that note, let’s talk about styling (not making, but styling it for prettiness!) your bed. There are lots of ways to make it beautiful, but I figured I’d share a simple step by step method that I use in our home. Hope this is fun for you - remember, swap pillows throughout your home to update looks and experiment with something new! You probably have more options than you think (note on pillows at the end…)
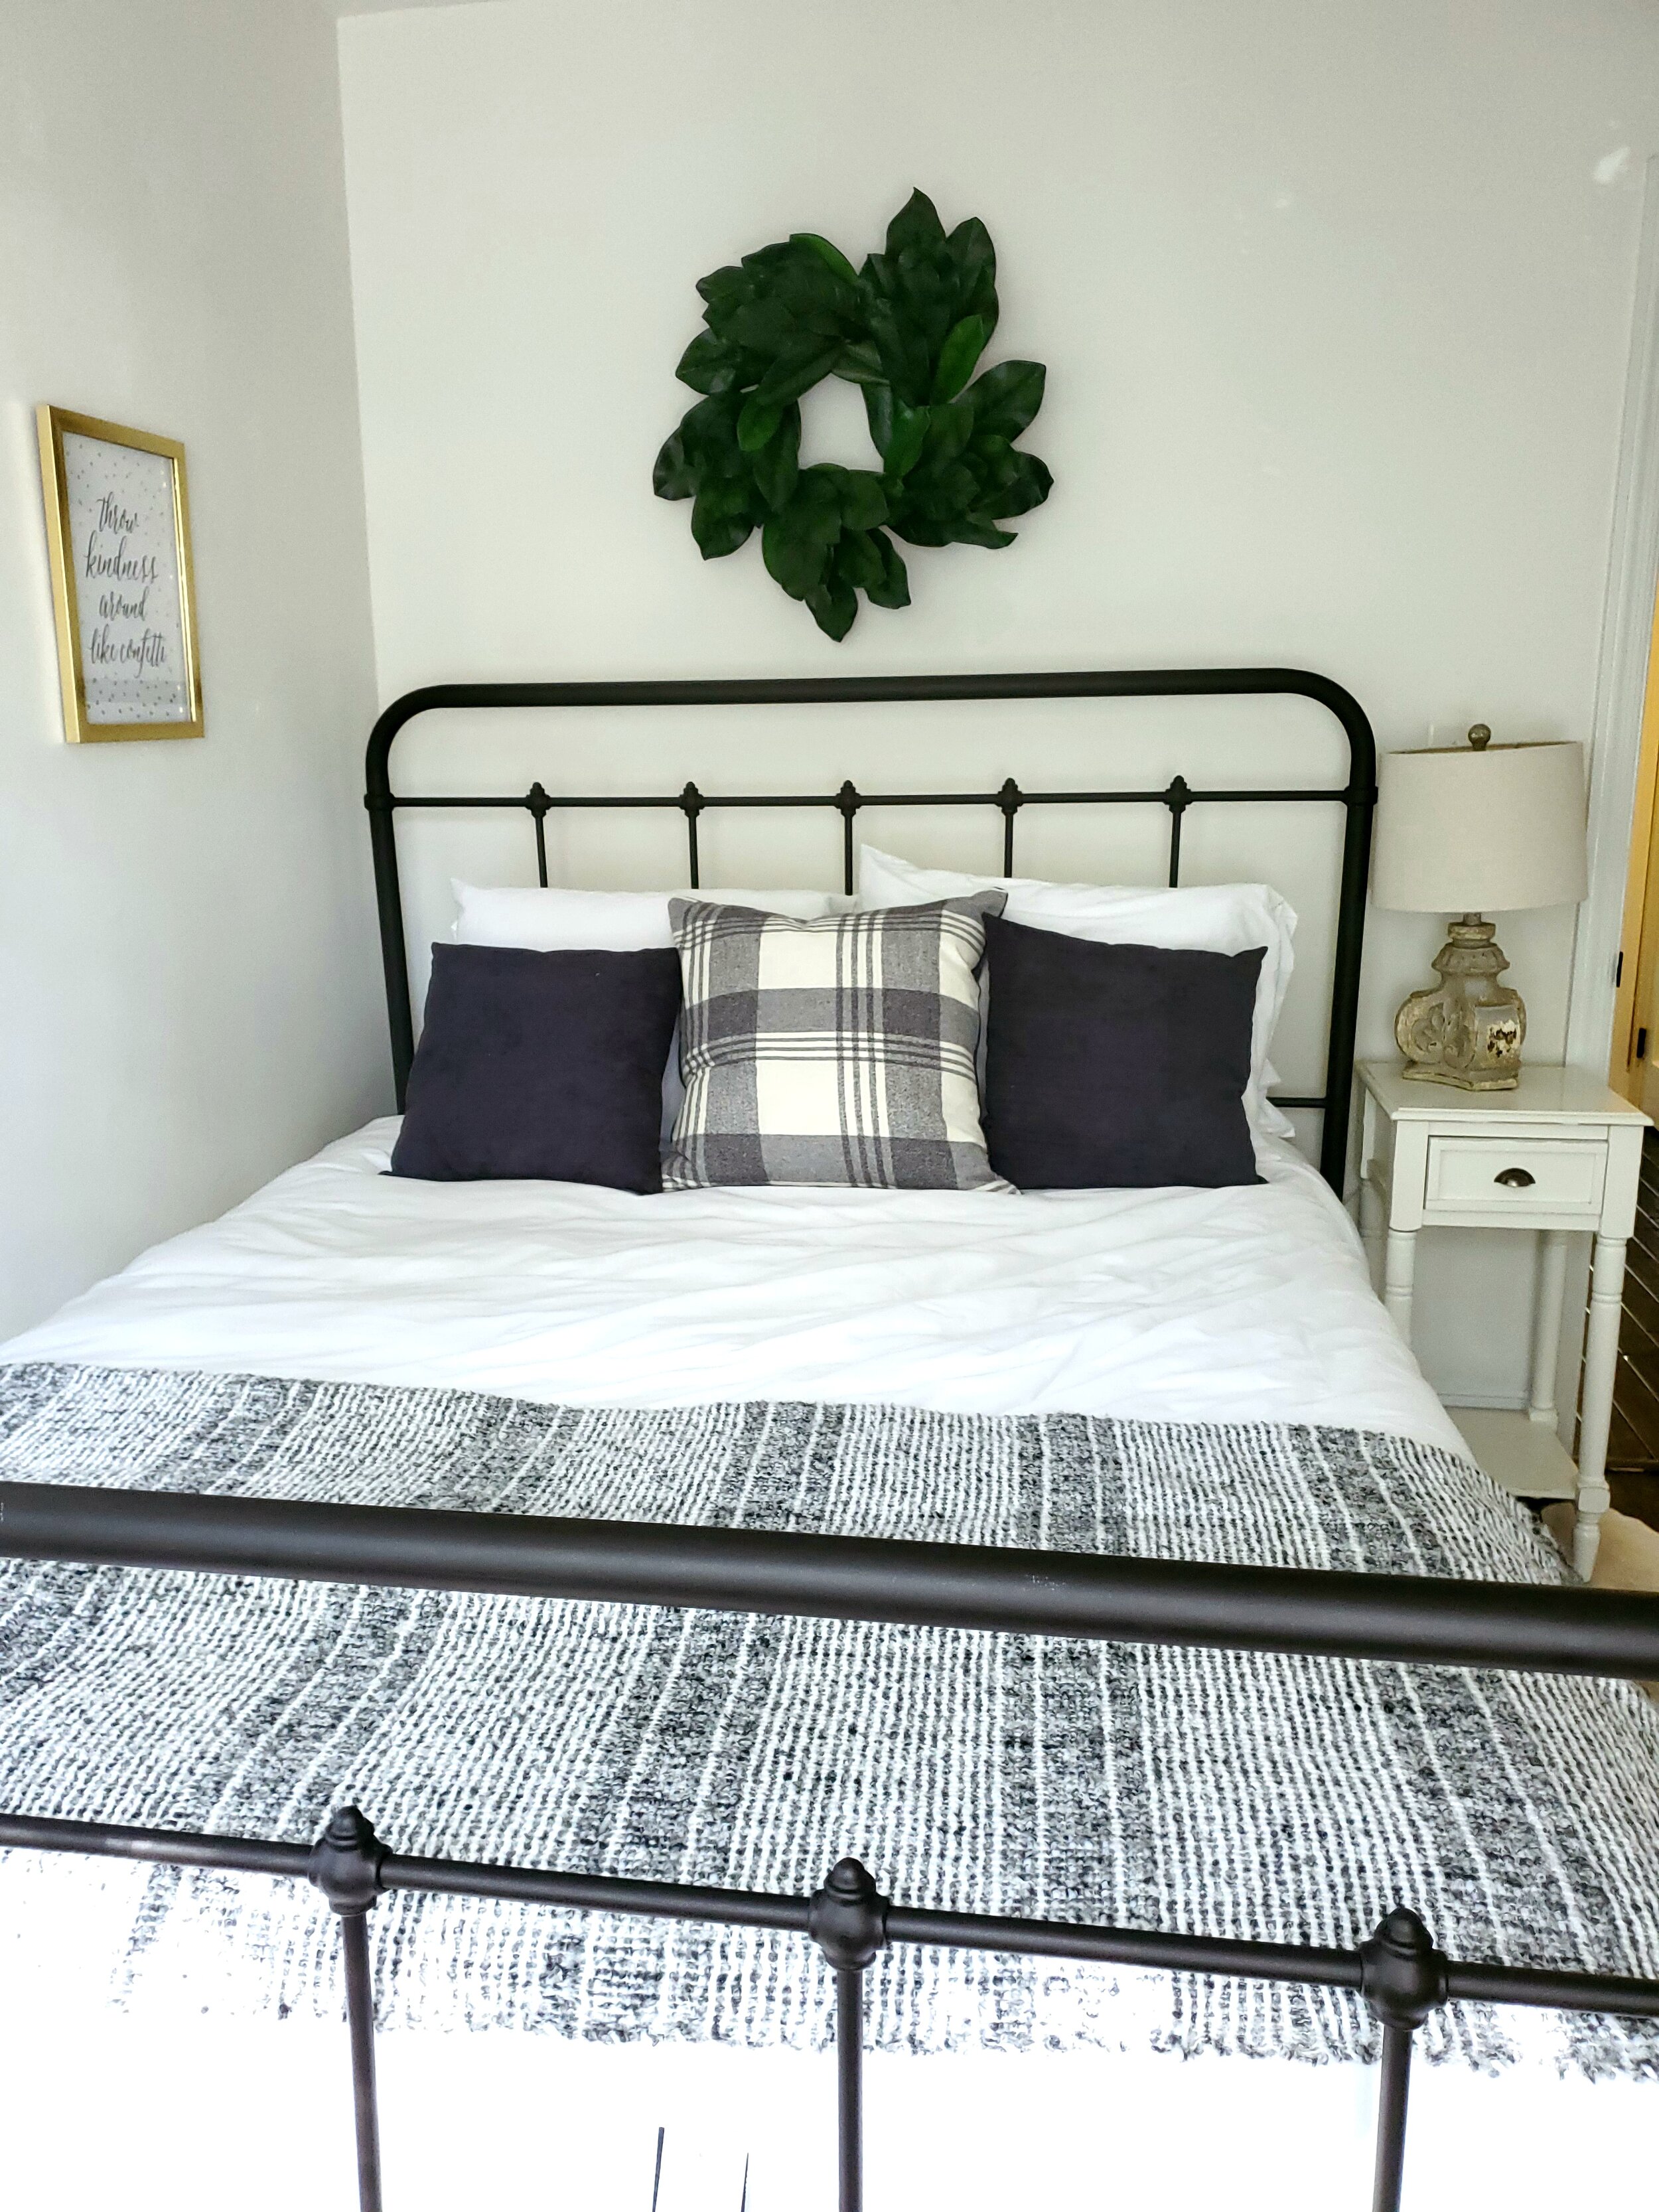
STEP ONE: Build your Basics - start with a crisp fitted and flat sheet, pillowcases, and pillows for sleeping.

STEP TWO: Add a duvet and duvet cover. Don’t be afraid to mix patterns - stripes against the boho print rug - adds interest!

STEP THREE: Optional - Add another duvet and cover for added warmth or texture/layering and fullness.

STEP FOUR: Add EURO Pillows- square shaped - can layer them behind or infront of the sleeping pillows.

STEP FIVE: Layer additional pillows. Mix patterns, sizes, and styles. Think of making a reverse pyramid - wider base at the back (near euro pillows) and start to build them into smaller layers as they move forward to the front.

STYLE NOTE: Don’t be afraid to mix whites and creams- seems scary, but it works - I have white walls and bedding, but an ivory rug and beige/ivory pillow shams and blankets. It creates imperfect cozy!


STEP SIX: Add a blanket or throw - for added layering, texture, and interest! Feel free to mix up colors, patterns, and textures!


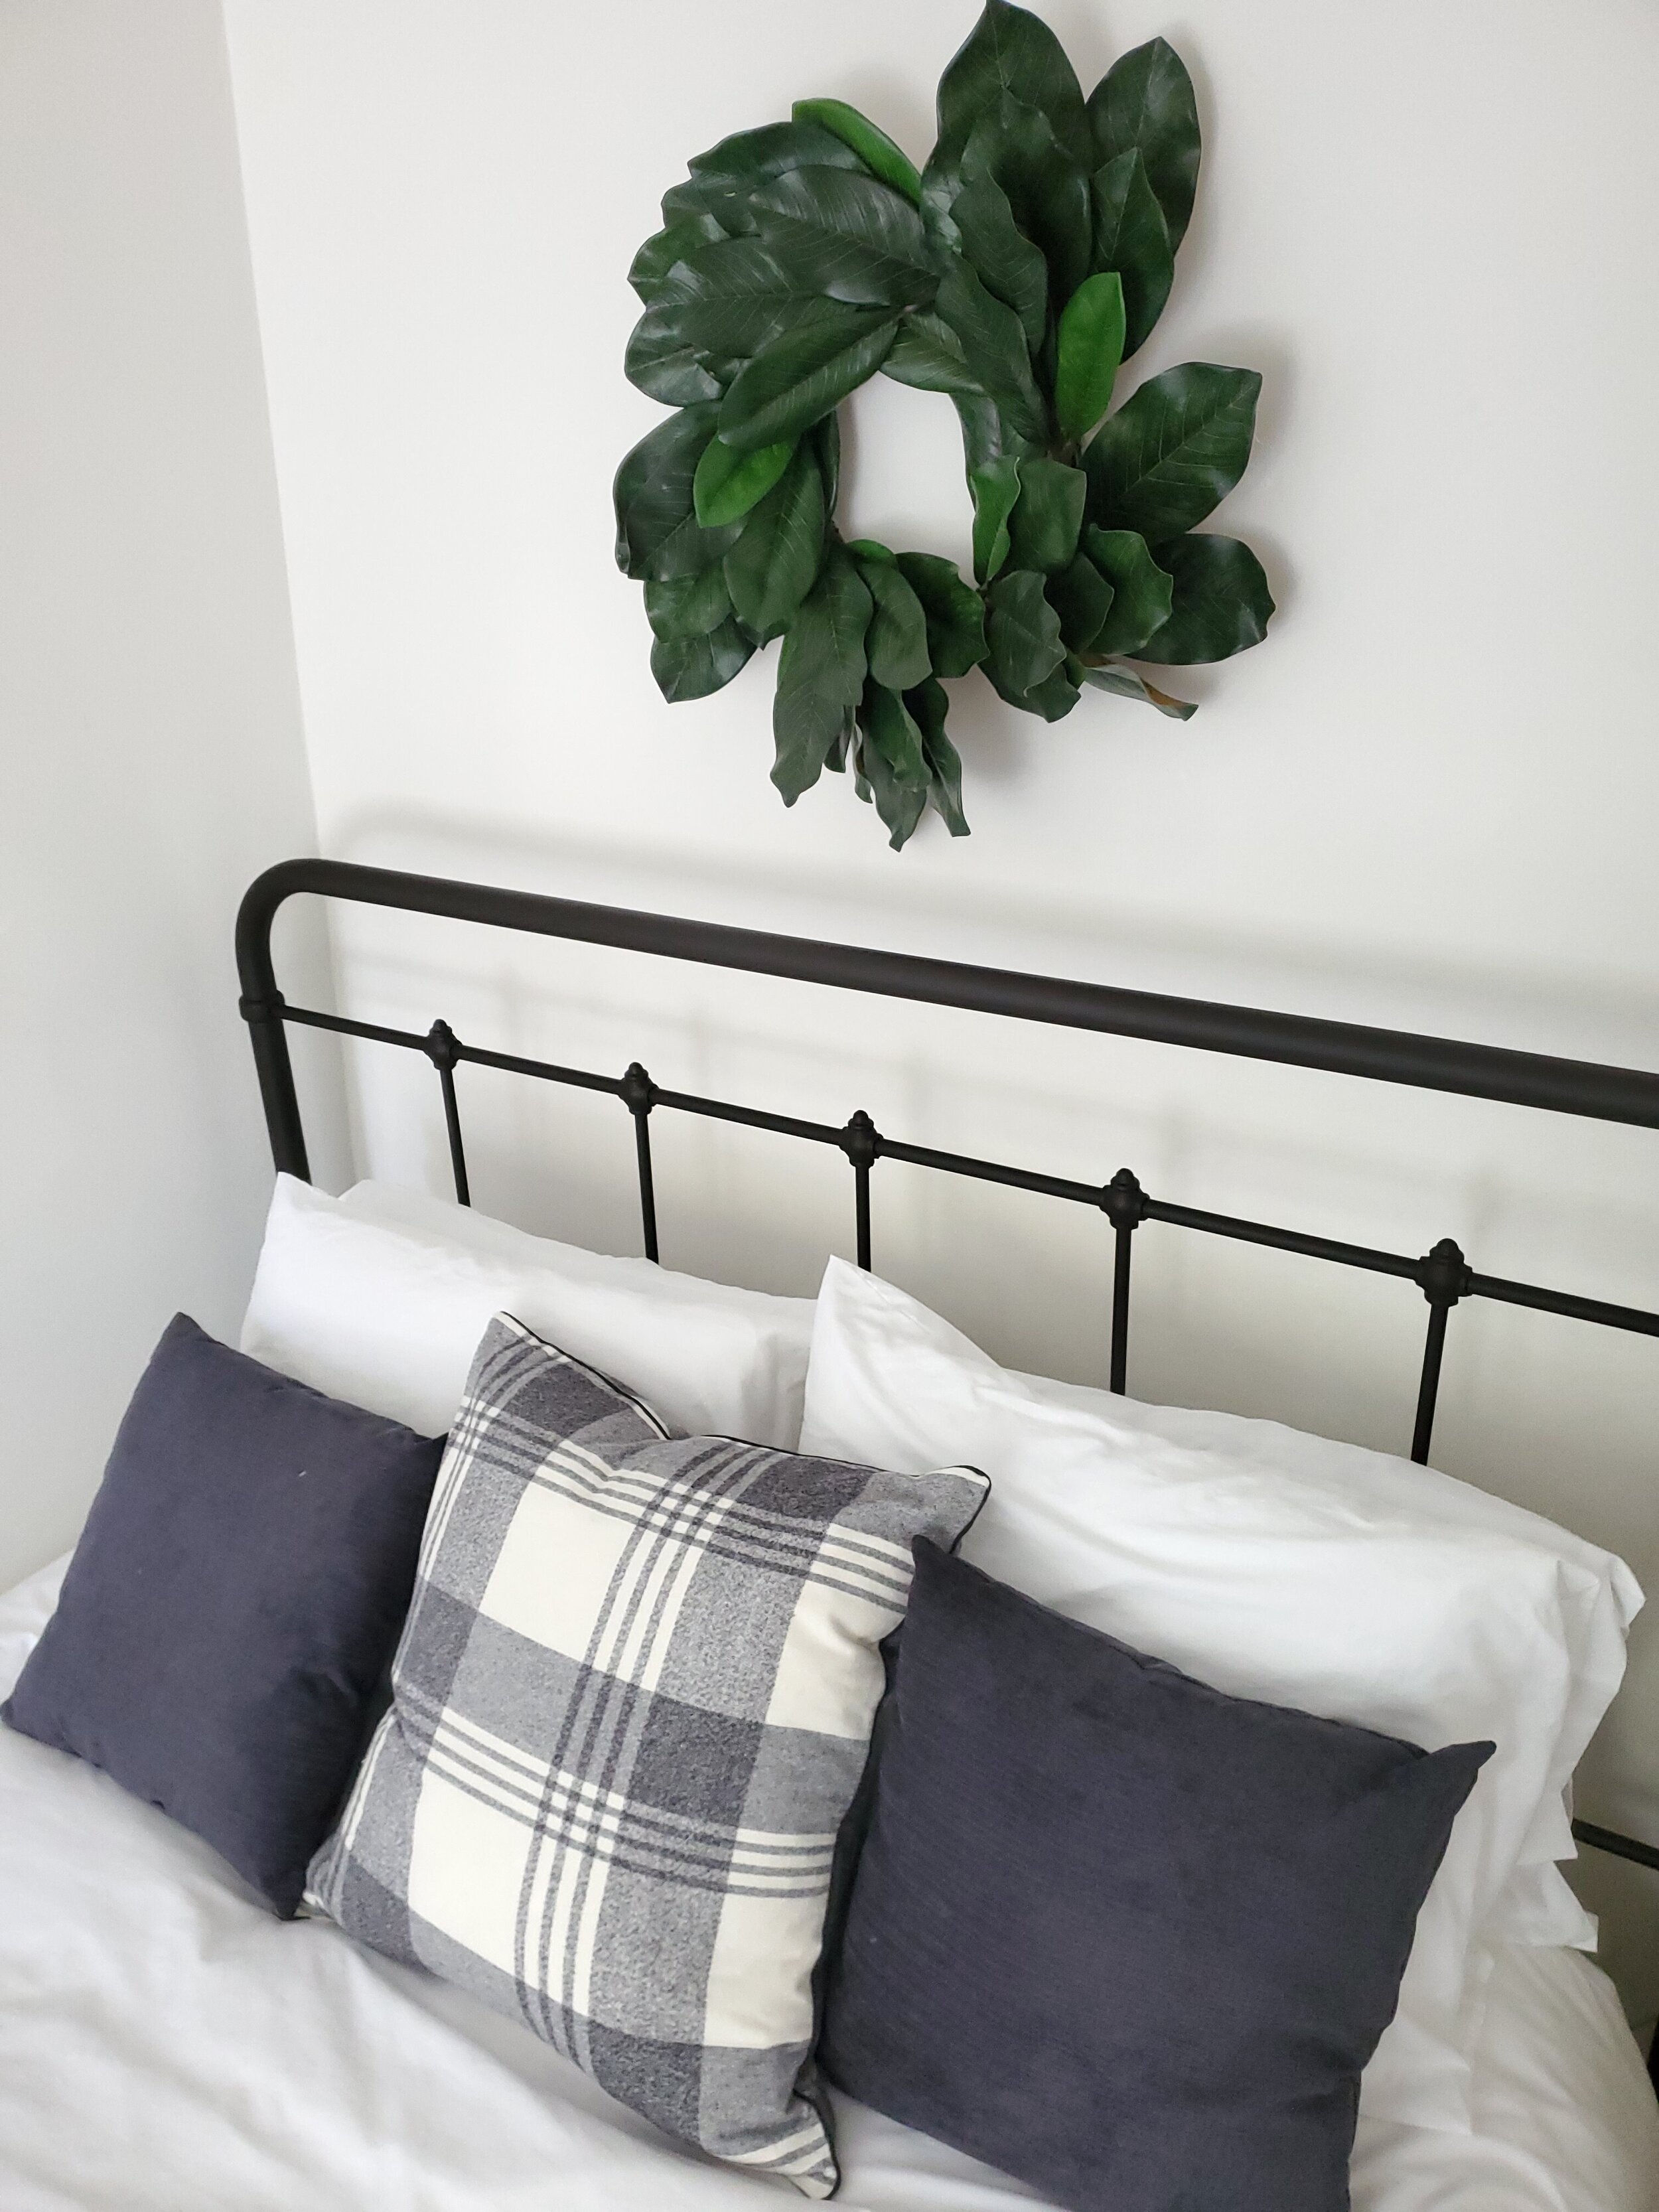
STEP SEVEN: Balance the top with wall decor - I love a circular wreath to balance the rectangle of the bed. You want to help ground the art by placing the bottom of it about 4ish inches from the top of the bed. That will give it all balance. Another option is a large rectangular piece hung lengthwise, or a group of three smaller square pieces. See what you have in your home and swap it in!

STEP EIGHT: Enjoy! Have fun mixing and matching until you get the right combination!! Challenge yourself to use things already in your house.

One final note on pillows, Carl and I are at odds with pillows. In my head, the more the better, and he is not quite on board, feeling that he spends too much time arranging pillows each morning. Do you remember the moving, Along Came Polly? Here is a clip that pretty much defines it:
https://www.youtube.com/watch?v=OJcOHqyk5dY
Well, pillows might be decorative, but they are inviting, cozy, and appealing - they are visually pleasing and make me want to jump into my bed and stay awhile :) Thus, he knows they make me happy and deep down, he also knows that I am right :) So, to that, my quote:
“Throw pillows are the stuffed animals of grown women.”

Happy Nesting - Be well!
-Casey

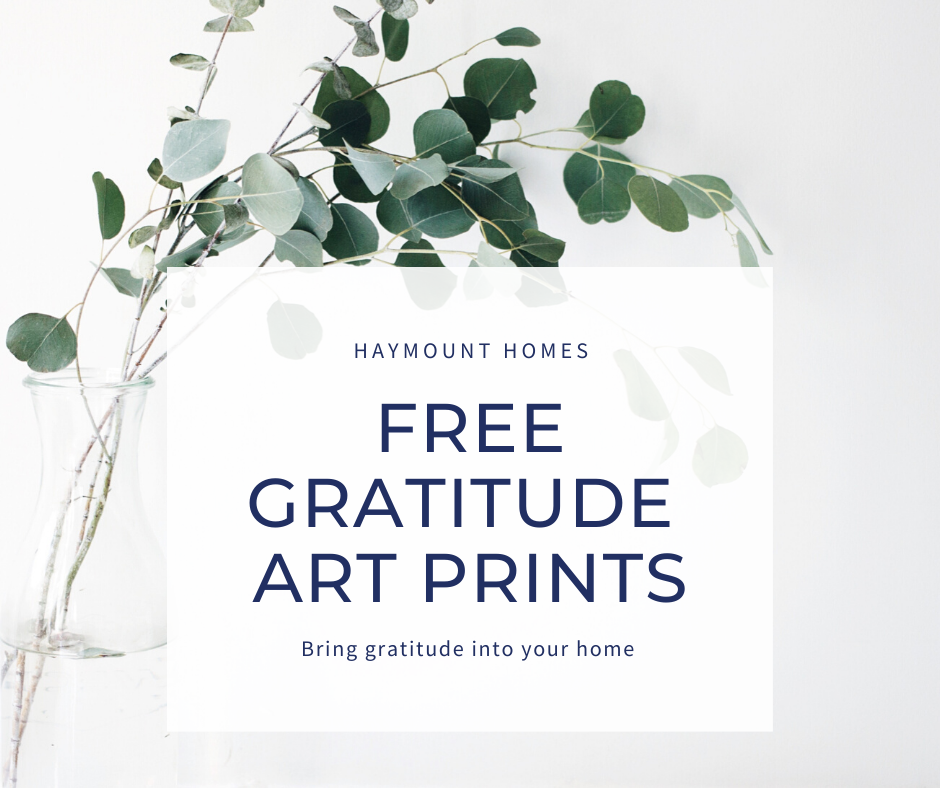
GRATITUDE - FREE Gratitude Art Prints
Free inspirational downloads for your creative use!
It has certainly been a troubling week for our nation and our world. The concern of the spreading global epidemic is scary and unsettling. During these times, I find myself pulling back and trying to ground myself in what blessings we are surrounded by. We don’t know what the future holds, but we know our attitude toward whatever comes our way will guide our perspectives.
While recently on our family vacation, I visited a local boutique that I fell in love with. The boutique was filled with inspiration and wonderful words of wisdom. While shopping, I picked up two tea towels that featured quotes that inspired me. I had intentions of framing the towels, but decided instead to include them as part of a wedding gift for a young friend of mine.


Because I loved the quotes, I created art prints to keep for our home, and I wanted to share them with you. Please feel free to download the PDF Files or the JPeg Files to create designs or art prints for your home.
We need to continue to do good in the world, even during times that cause us to fear tomorrow. We need to be thankful for what we have, and share with those who need us the most. The more we can reach out to one another, the stronger the world becomes. While we have to be careful and smart, we need to remember that we need one another to make this world work.
I hope you find as much inspiration in these quotes as I did. Please enjoy them, share them, and live by them.
- Casey


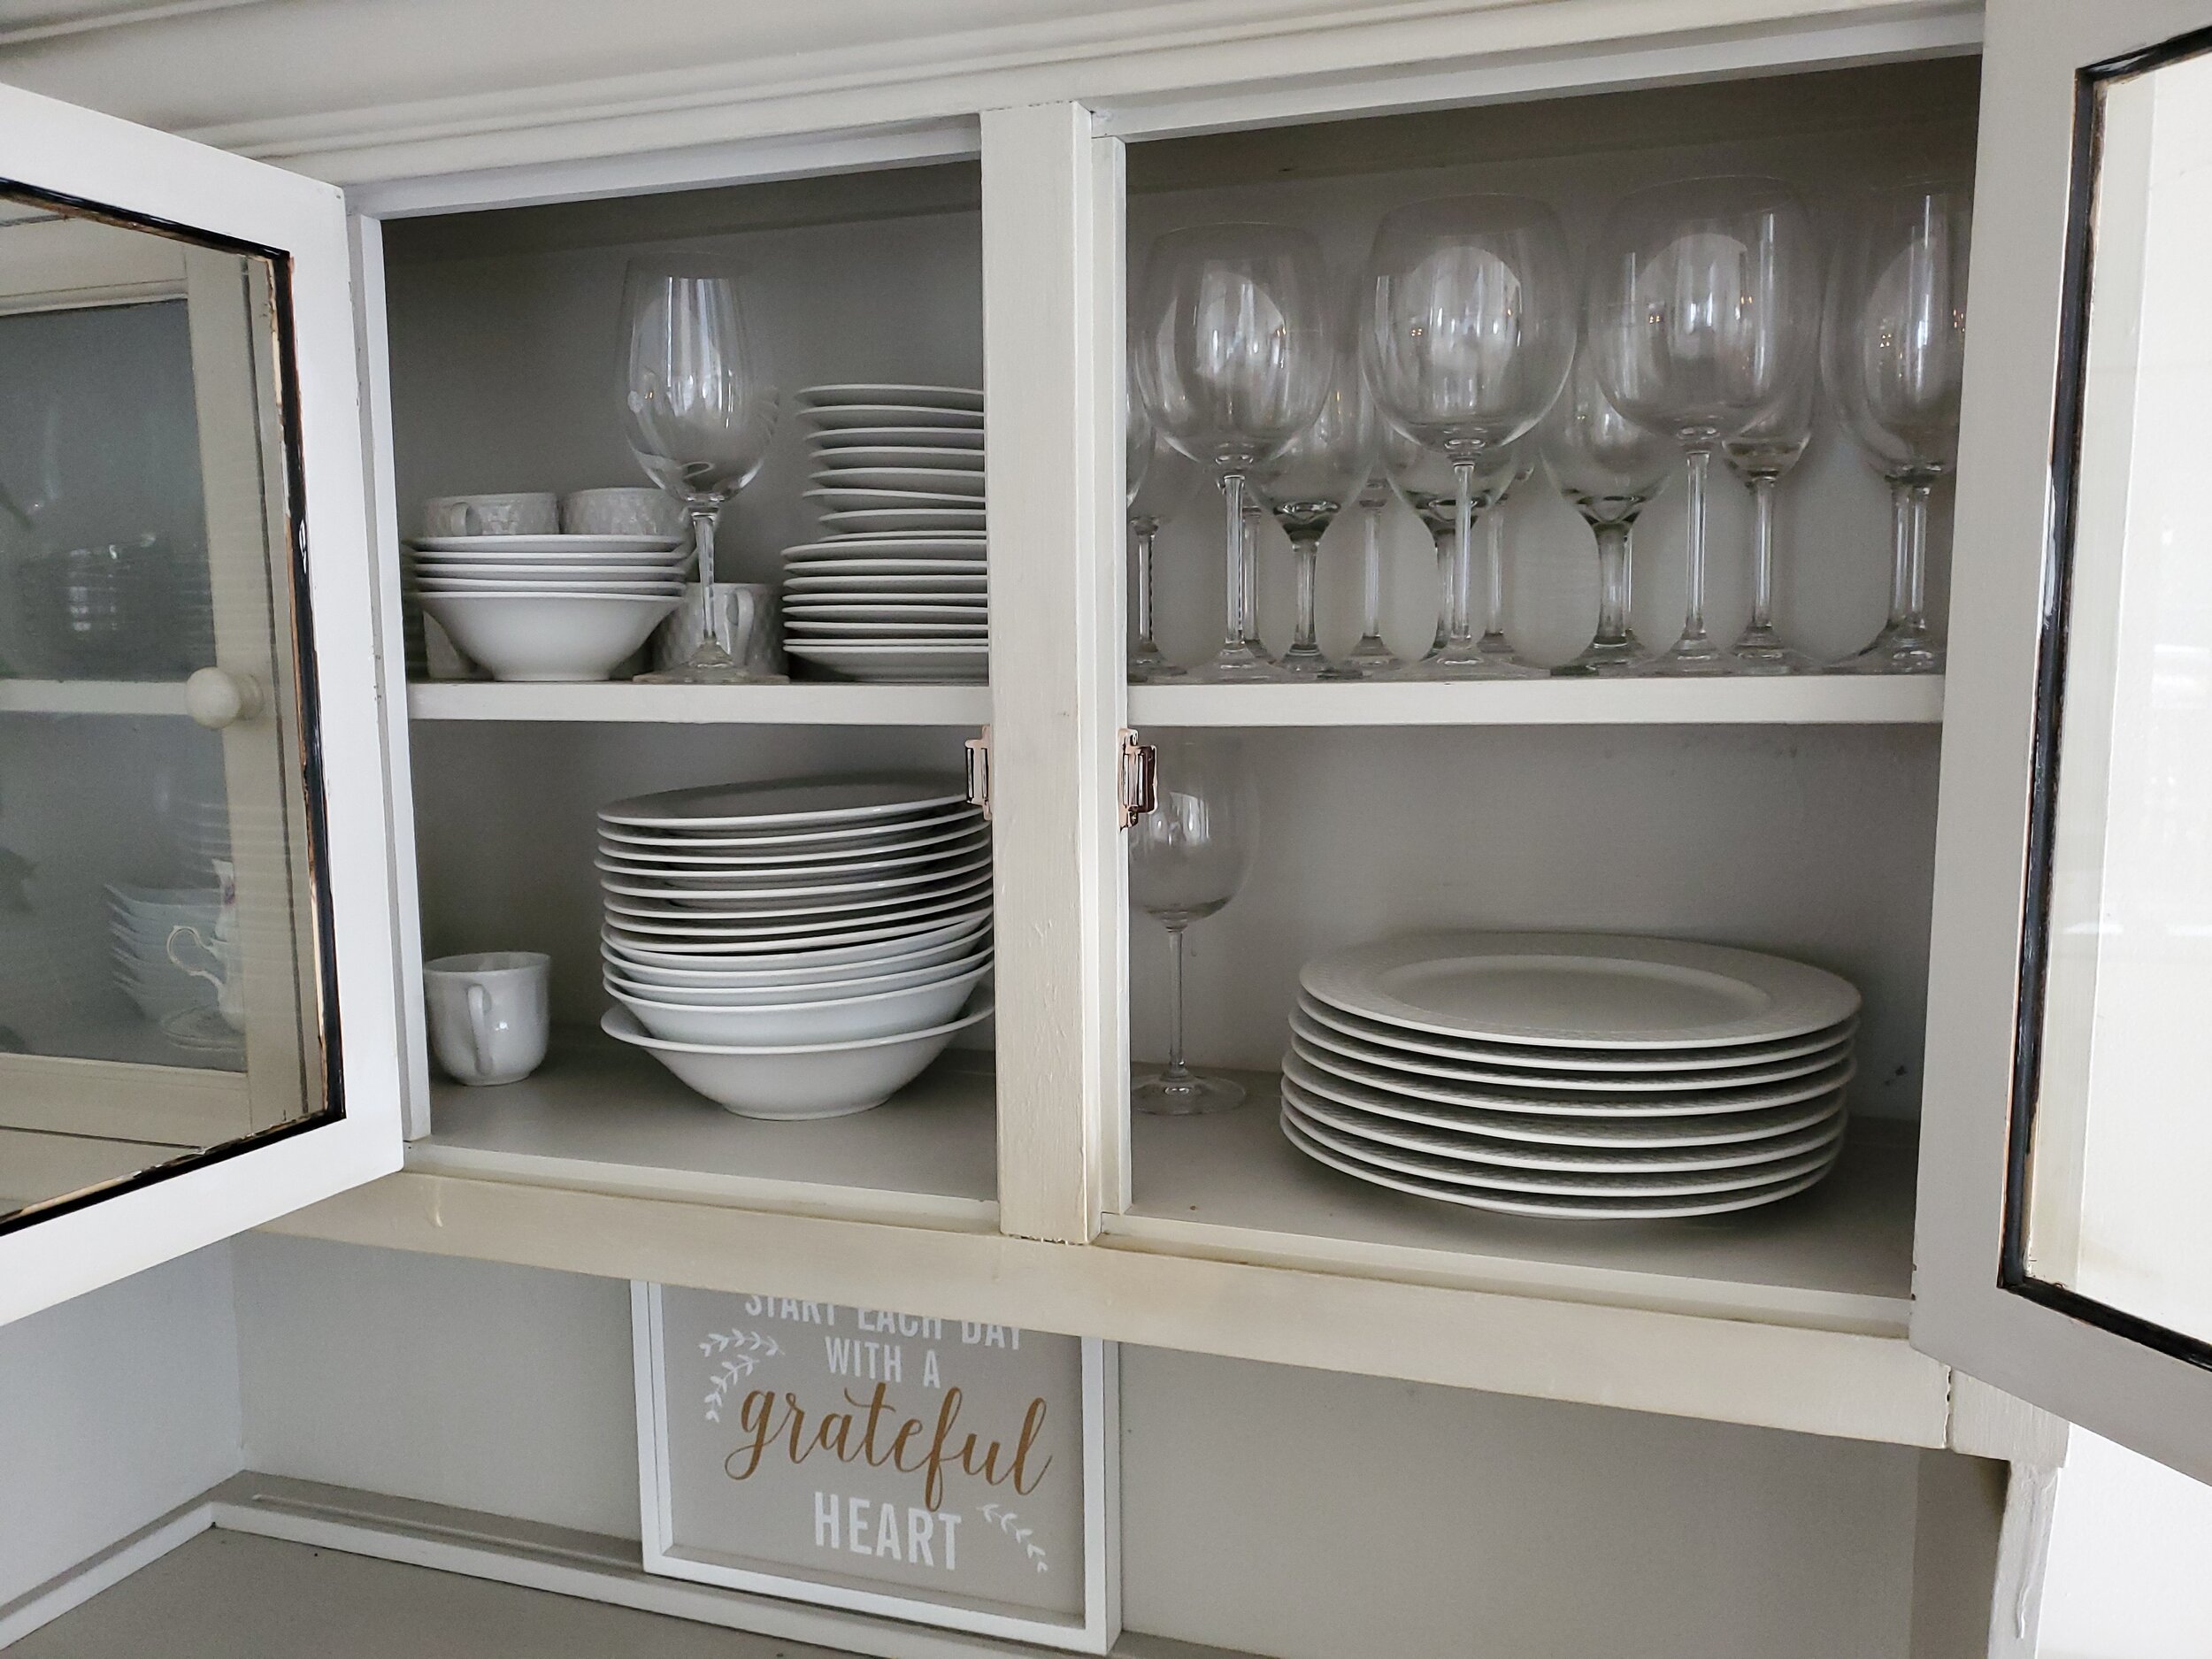
HOME STAGING DECOR SALE
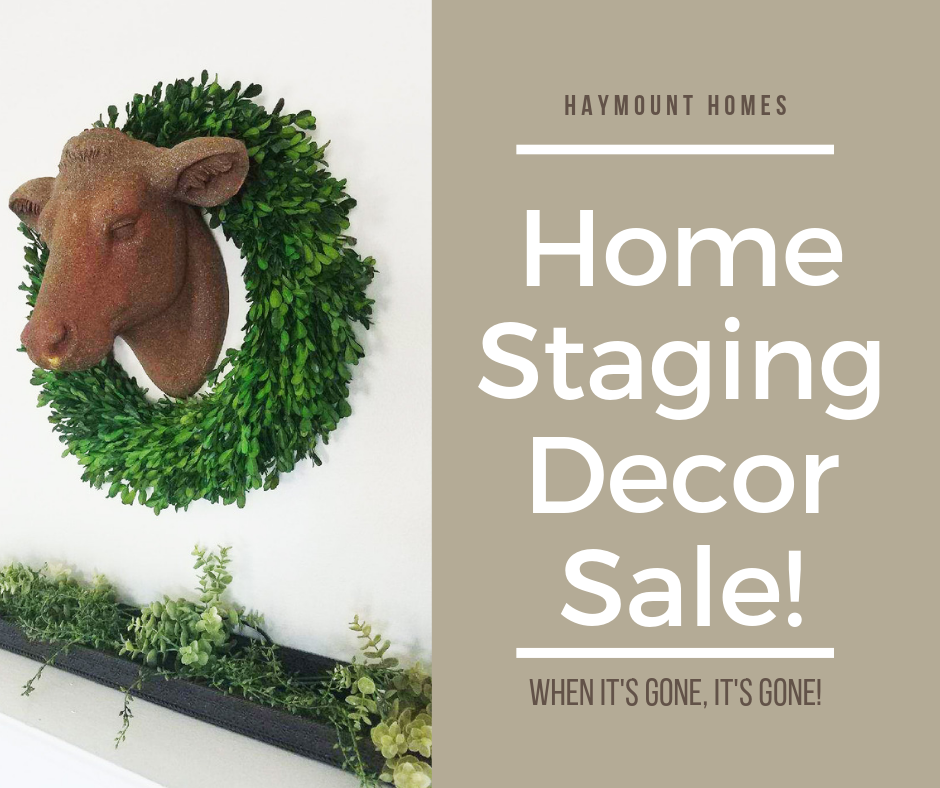
We are excited to announce our first ever ONLINE home decor staging sale!
If you were eyeing some of the items from our newest rental, you are in luck! We have decided to formally have an “online” sale of some of the home furnishings that we used in completing the Greenland Home!
We will be listing our items on the facebook marketplace and also on craigslist. If you are interested in them, please reach out via messaging or email to let me know you’d like something. We only have ONE of everything for the most part, so when it’s gone, it’s gone! Several of the items are vintage and do have some signs of wear, but that does add charm to them!
If you see something you like, you must be able to transport it yourself. Many of the items are currently being stored at our next rental home project and I will meet you there during pick up!
In the past, our items have not lasted long, so be sure to let me know if you see something you’d like right away. We have never one this “virtually” online, so it will be a bit of an adventure for us - we’ll all work together to get you great deals and us some space to complete our newest project.
Hope you enjoy browsing the sale and thank you for stopping by! Keep checking back as I might have more to add as I continue to go through our stash!

RESTORATION HARDWARE CAST IRON GLASS TOPPED COFFEE TABLE - $150

SOLD - GRAY TUFTED SIDE CHAIR - $150
YELLOW, TEAL, WHITE THROW PILLOW - SET OF 7 - $50
HYDRANGEA FLOWER ARRANGEMENT - $15
SOLD - IRON BED AND MATTRESS AND BOXSPRING SET - USED FOR STAGING AND THREE NIGHTS OF SLEEP ONLY - $400
BLACK PEDESTAL SIDE TABLE - $25
GRAY BLUE 5X7 RUG - $70

SOLD - VINTAGE UPCYCLED FRENCH INSPIRED WOODEN BENCH - $175
ANTIQUE FLEA MARKET SIGN - $15

IRON WALL SCONCES - $30


FARMHOUSE THROW PILLOWS - $10 EACH - BLACK,WHITE CHECKED, BURLAP STYLES

SOLD - ROSE GOLD HAIRPIN SIDE TABLE - $20

POTTERY BARN METAL CANDLE WALL LANTERN - $12

ALEIA NAY FRAMED FARM SHEEP ART BOARD - $75

TIERED HOME SERVING TOWER - $25

PIG CHALKBOARD - $20

EXTRA LARGE, MEDIUM AND SMALL STORAGE JARS - $70 FOR SET OF 6 - ALL CLEAR GLASS (ONE IS BEHIND THE SECOND LARGE ONE)

RATTAN MARKET BASKET - $15

PIER ONE HAMMERED METAL PEDESTAL - $15
SOLD - FRAMED WOODEN SIGN - $8
SOLD - METAL DISPLAY LARGE CENTERPIECE BIRDCAGE - $20

WALL DISPLAY THERMOMETER - $10

DESK LAMP - $10

BROWN LEAF CURTAINS - 84” - SET OF 2 - $20

SOLD - WOOD AND METAL STOOL OR SIDE TABLE - ADJUSTABLE - $40

SOLD - SHIPLAP BIRDCAGE 3D WALL SIGN - $15

PARIS FRENCH WALL SCONCE - $12

GREENLAND DRIVE - BEFORE AND AFTER
See the amazing before and after pictures of our newest rental home - Greenland Drive!

We hope you enjoyed the Greenland drive home tour. As mentioned, it was a labor of love for many people involved in the project. If you are anything like us, you love the see the before pictures to help give perspective on what has been achieved.
We are not the best at remembering to take a lot of before pictures, so we need to improve on this. However, we will give you what we have so you can see how far our Greenland home came. It had been neglected for quite some time and we are so happy it has been restored to a home you can love!
Without more chat, here are some before and after photos for you!!


As you can see, Greenland has come a loooooong way! From rotted flooring to unlevel fireplaces, from wild and uncontrolled yards and trees to long past their prime roof and windows, it has been nothing short of a job. With each part of its renovation, a little more of the home’s personality came through. It was almost as if it wanted to be loved.
“Everything has its beauty, but not everyone sees it.”
It is so much fun to restore beauty to our neighborhood and haymount continues to give back to all of us. Thanks for looking at this before and after photos. We hope you they inspire you to create beauty around you!
-Casey

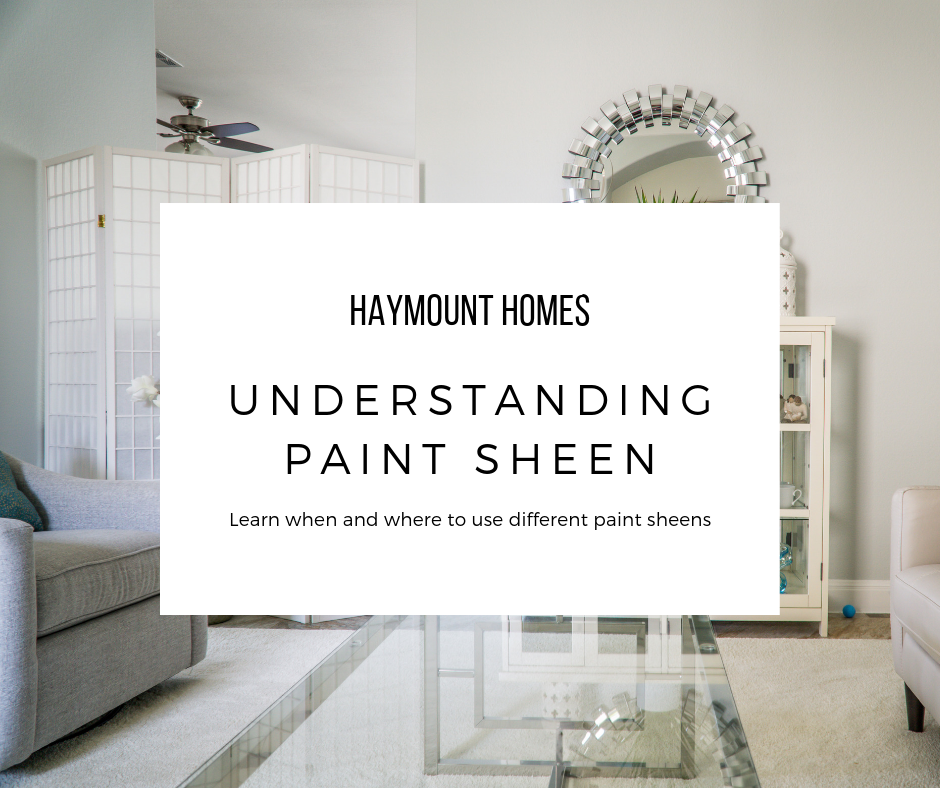
UNDERSTANDING PAINT SHEEN
Understanding the different sheens of paint - and where and when to use them!
Happy Spring! There is something about spring weather that inspires change. I think it is the season turning over and the new life of spring replacing the dreariness of winter. Don’t get me wrong - I love the coziness of the winter season, but there is a turning point where I am ready to move beyond the dark nights and into the fresh air and sunshine of spring.
Spring brings the energy of change…and with it comes spring fever. For me, that means cleaning house. The funny part is, once my house cleaning train begins, suddenly I am inspired to do more. I see a transformation of decluttering and a space seems new all over again. So, I start thinking about refreshing the space, which usually leads me to my most economical and high impact solution - paint. It’s kind of like the “if you give a mouse a cookie” book. If you give me an hour and a trash bag, I will eventually want to paint a room :) It’s a small disease I have; unfortunately, it’s a chronic illness!
Paint means a lot of things - you find that out the minute you step foot in a paint store. Once you have chosen your paint color, the next question is going to be about what paint sheen you will choose.
There are lot of reasons to choose certain sheens, but I wanted to provide a quick overview on what benefits each each provides, how it is most often used, and when to use each type. Hopefully that will be helpful to anyone out there that is having this question themselves.

Most often, paint can be found in the following sheens:
Flat
Eggshell
Satin
Semi-gloss
Gloss
This can get more complicated by each brand. For example, Sherwin Williams adds additional names to their sheens like Low-Lustre, Pearl, flat Enamel and Matte. Understanding the type of sheen you need will allow you to enter any paint store and ask for the sheen you want and they can provide you with their brand’s equivalent. While there are variations on each type of sheen, this should give you a basic overview. Let’s begin!

FLAT
Flat paint is your most inexpensive paint. It is the most basic of the bunch and is the most economical. For this reason, flat paint is often used in new construction. It costs less, covers easily and is easy to use. Flat paint also tends to hide imperfections and flaws in surfaces. Flat paint is often popular in older homes because walls are imperfect and the paint does not have a reflective quality that highlights flaws.
The drawbacks to flat paint is mostly durability and sheen. It is exactly what it says it is - flat. There is no luster or warmth to the paint, and there is also very little durability. In fact, you can scrub the paint right off the walls if you use water and a rag (or we found out with Mr. Clean magic erasers!). Thus, if you have a low traffic area with some imperfect walls and are on a tight budget, flat paint will likely get your job done. As for me, I almost never use flat paint. If I am going to spend the time and money painting, I am going to do something that will be more durable and warm.
The only place I do consistently use flat paint is on the ceiling. It is almost never touched and I don’t usually need the reflective quality of the paint there. There are times i have made exceptions to this, but typically, you can do flat paint there with little difficulty.

EGGSHELL
Your next step up in paint is Eggshell. Eggshell is like flat paint with a hint of sheen. Eggshell paint has about 10-25"% sheen in it, depending on the brand. The sheen adds a touch of warmth and durability, without being super glossy. It can handle a bit more scrubbing and traffic, but is still not considered a high durability paint. Because it is not super glossy, it still hides imperfections fairly well.
If your budget allows, I would make this your basic minimum paint level for most walls in your home. If you have a high traffic area, then I would upgrade to satin and here’s why….

SATIN
Satin paints are usually about 25-35% sheen. That is a great combination of durability and warmth, without being high reflective and shiny. A satin finish allows a great level of durability (think good solid scrub on the wall), and will not fade as easily. Satin finishes will show imperfections a bit more, but they offer forgiveness for marks and spots which can be removed.
If you have higher traffic areas, pets, or kids (or maybe you are just rough on your living space!), then satin paint is a great happy medium. It does cost more than its little sister Eggshell, but usually lasts longer, can be cleaned, and offers great warmth to a space.
If you are painting a kitchen or a bathroom, this should be your minimum level of sheen. You can also incorporate some anti-bacterial paints into satin for these areas, that is often a good idea since these types of room seen a higher level of moisture.
SEMI-GLOSS
Anytime you see gloss in the title, we have moved into “shine” zone. Gloss paints have more gloss in them. Like in our other paints, more gloss means more durability, but also higher sheen. Now you are going to see more flaws in whatever surface is covered in semi-gloss paint because the gloss will reflect the imperfection when light hits it.
Though it does highlight imperfections, the trade-off is great durability. I like to use semi-gloss paint on cabinets, trim and baseboards because they see heavier wear.
Semi-gloss paint can come in a variety of sheen percentages - anywhere from 35-70%. The higher the sheen, the more durable and shiny the surface will be. There is a recent trend to paint semi-gloss on walls, but for me, it is too reflective.

GLOSS
Gloss paint is glossy (shocking, right?). When you open a can of gloss paint, you’ll know it. Even in the can, gloss paint is thick and shiny; it’s actually quite beautiful. Gloss paint is my favorite for a front door - bright, shiny, and thick. High gloss paint is durable and can be scrubbed and scrubbed. It is also the most expensive since you are paying for that gloss. Some people really believe in high gloss for all cabinets and trim, but I prefer a slightly more matte look. High gloss will highlight any type of surface flaw, so remember that when applying. It is also a little more difficult to paint with as it is very thick.

OTHER CONSIDERATIONS
Room Position
Natural light and also the size of the room can help you decide on your paint sheen. Rooms that are filled with natural light will tend to throw more sheen and color throughout the room. You can safely choose a lower sheen paint (like eggshell) and probably have the same level of warmth as a satin painted room. The inverse is true as well. Poorly lit rooms often benefit from a higher sheen. What little light there is in the room, can more heavily bounce off the sheen and warm up the space.
Wall Texture
Walls that are textured or imperfect will look better in a flatter sheen; it will help smooth them out. Just remember your trade off for the sheen is lack of durability.
Moisture Level
Rooms suspect to higher moisture often benefit from a higher sheen paint as it is more durable and less suspect to moisture retention. The sheen can help reflect moisture.
Room Size
Higher sheen paints allow light to bounce and help make rooms feel larger. It sounds crazy, but can really help ‘open up’ a room visually.
Same Tone, Different Sheen
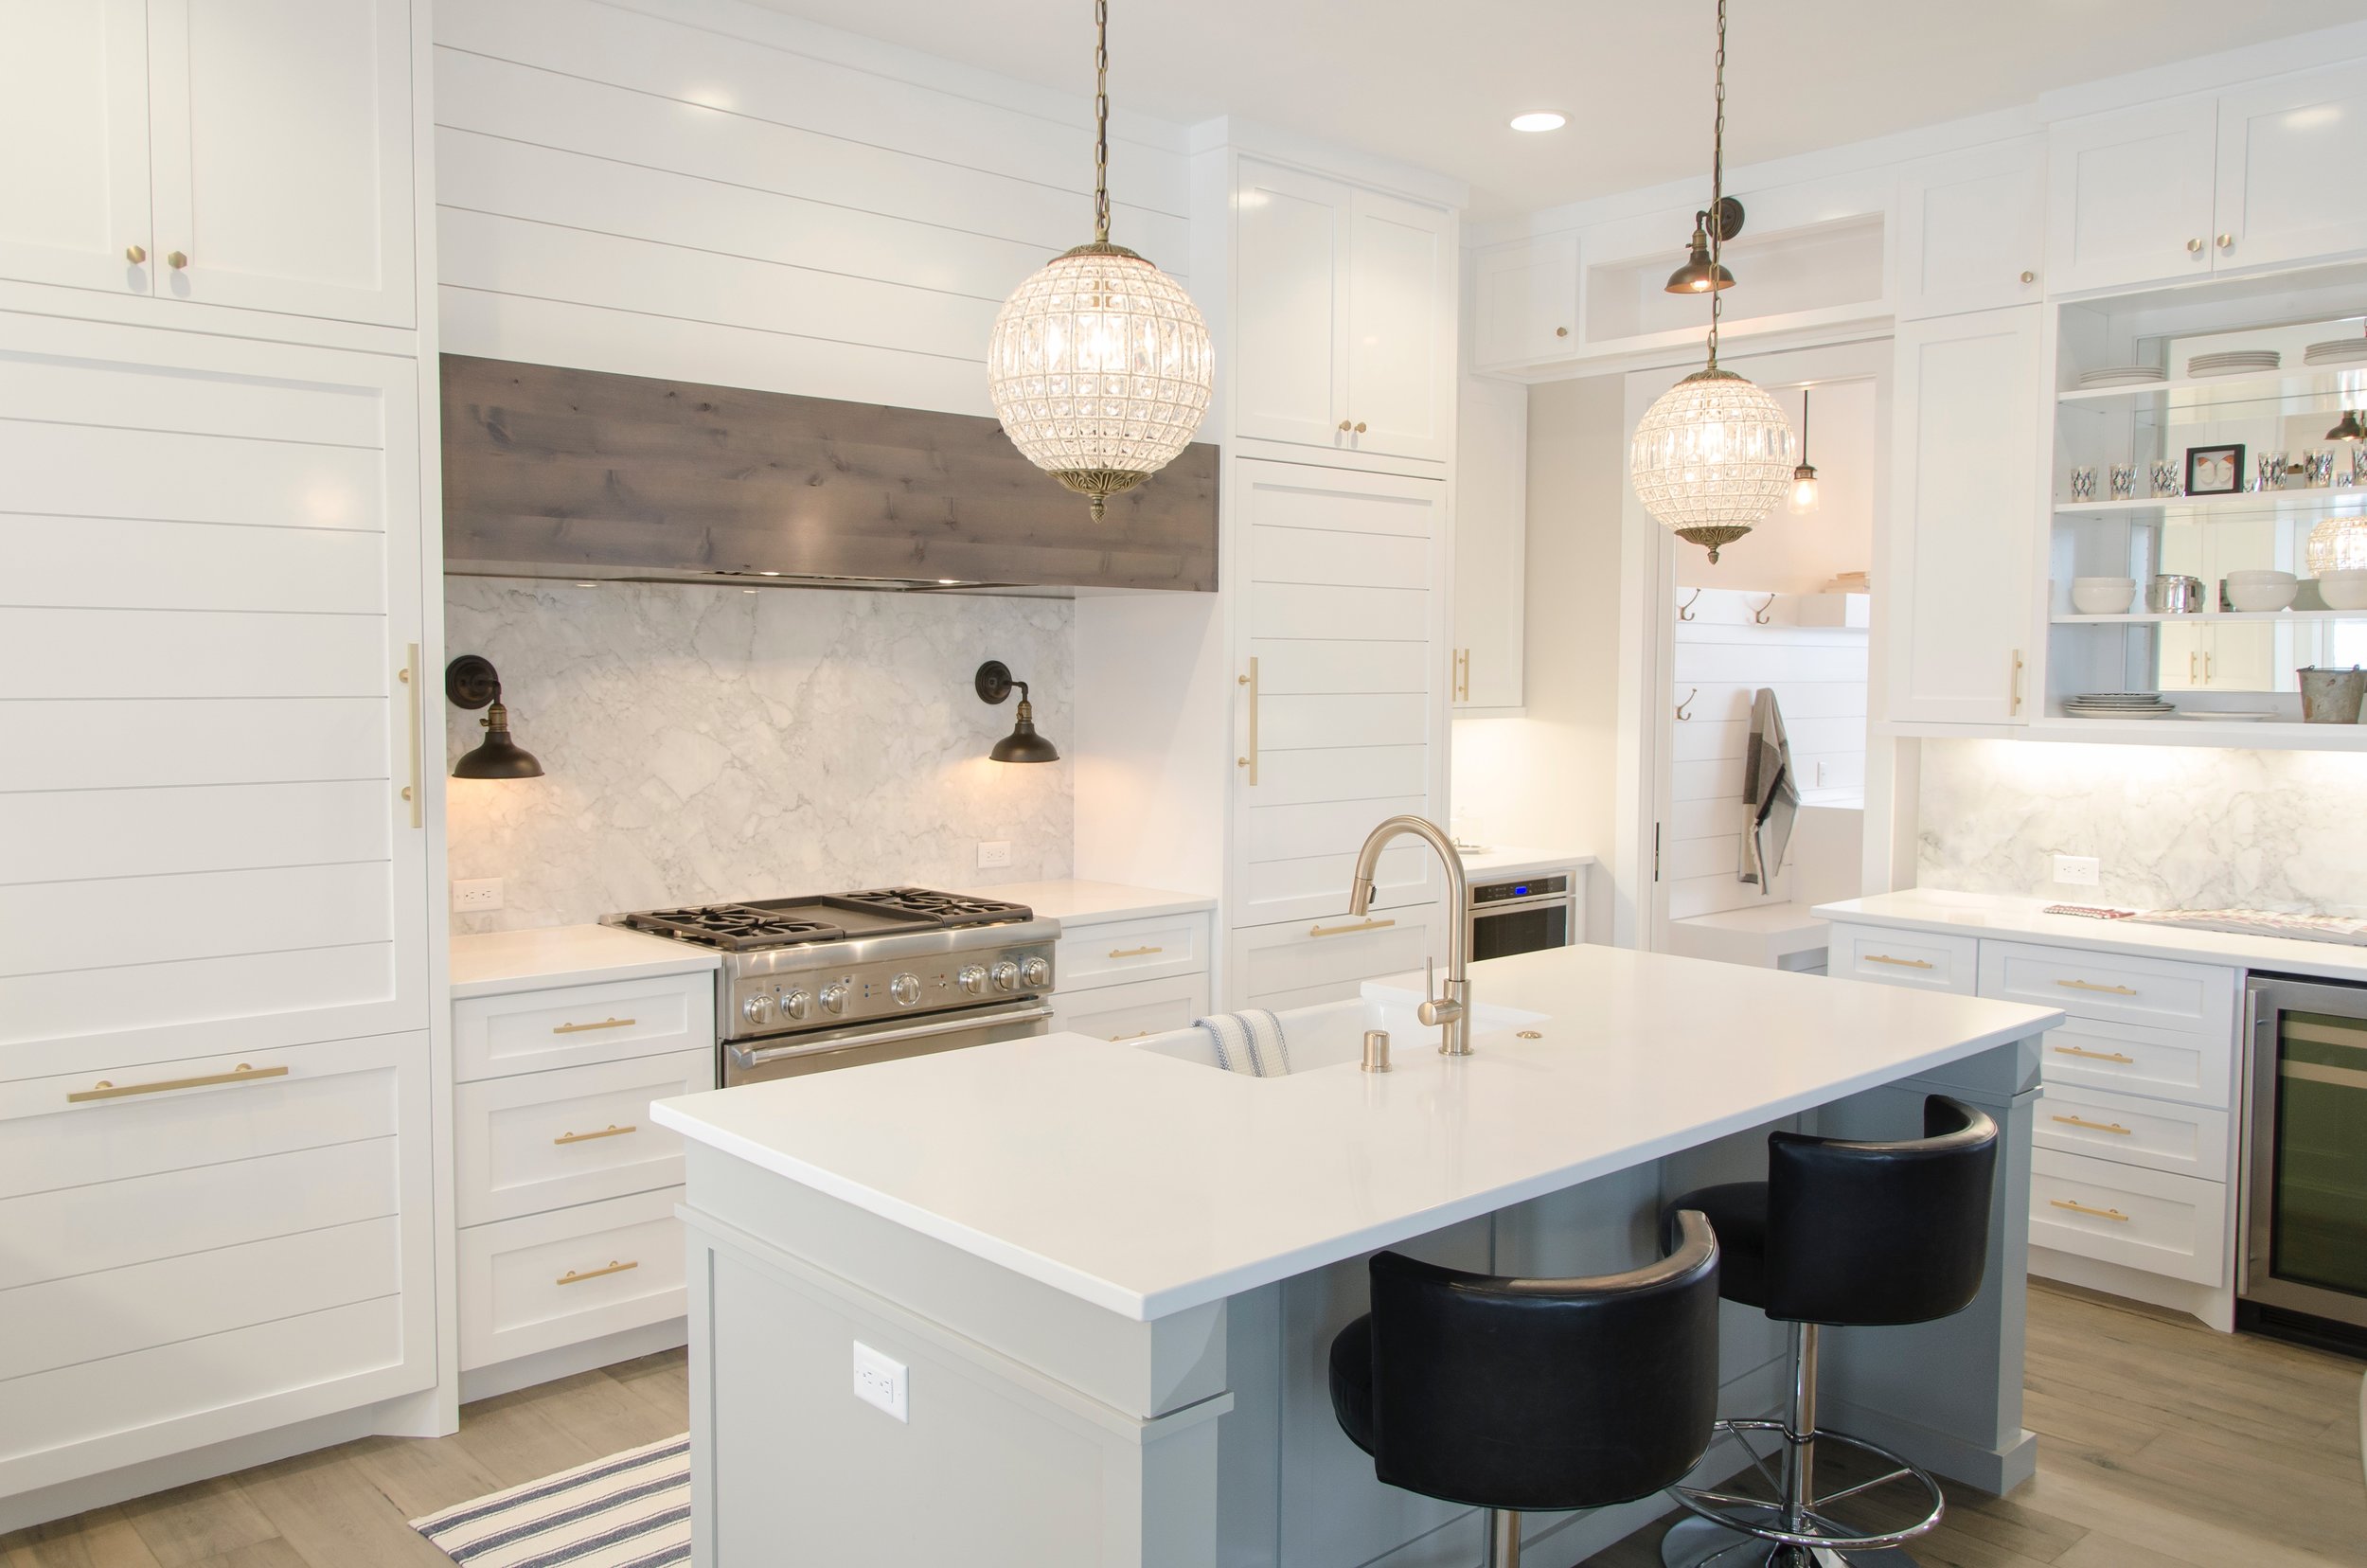
One of the most popular trends right now is painting the trim and the walls the same color. This look is seamless and really can open up a room, giving a larger visual appearance. The best way to achieve this look is to paint the walls in a lower sheen paint, and then paint the trim in a higher sheen. You want a nice level of contrast here.
Depending on your taste, you might consider an eggshell wall with a semi-gloss trim. If you don’t mind spending a bit more and having a bit more light bounce in the room, then going to a satin finish wall and high gloss trim can work as well. The result is really stunning! The picture above this section with the fireplace illustrates this technique.

“All you need to paint is a few tools, a little instruction, and a vision in your mind.”
I hope that this helps you determine what type of paint sheen is best for your space. Remember to consider cost, lighting, room size, and surface texture when choosing your sheen. Again, my catch-all favorite is satin for walls and semi-gloss for trim, but you should feel free to experiment and find out what appeals to you!
Happy painting!!
-Casey

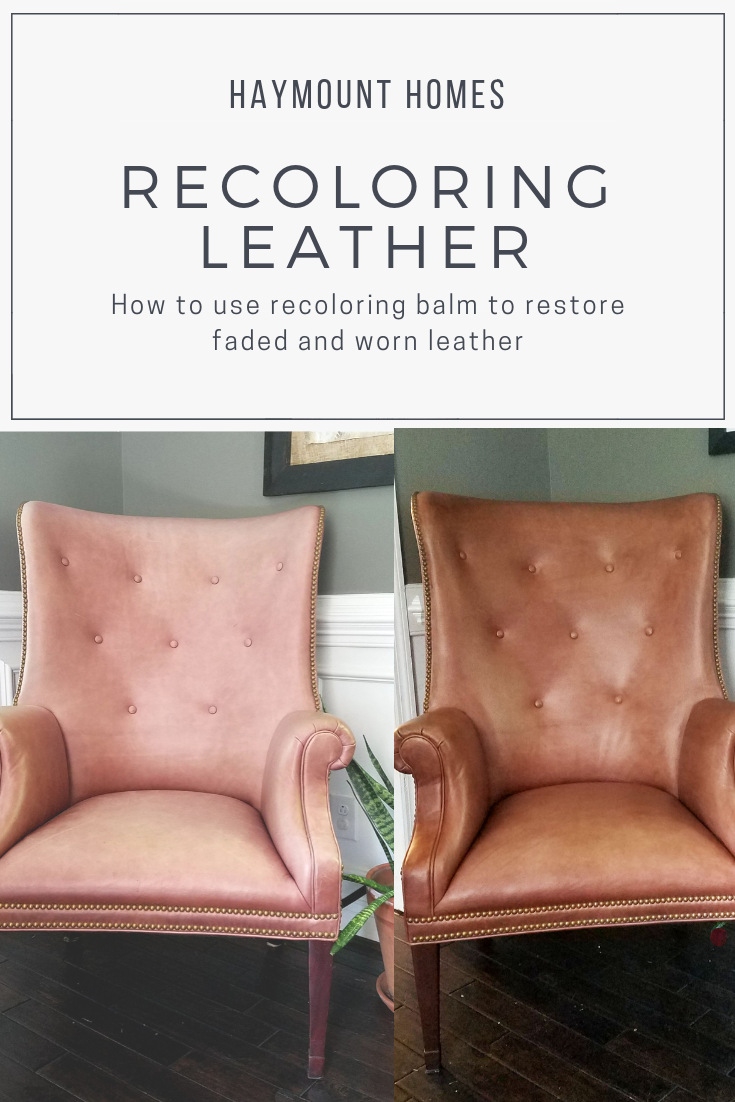
Restoring Worn and Faded Leather
How to restore faded and worn leather using recoloring balm
Hey y’all! Can you believe it is December? It seems that time flies faster each year. Last night we had a Christmas potluck and it was wonderful to see so many friends. One of the topics that came up was about our two leather chairs (that currently have no actual home) so I snuck them into the dining room. Like most things that have snuck their way into our home, these two chairs had a story behind them. Also, you have to promise to excuse my unswept floors in all my photos. Alas, it’s true….my floors get dirty and I often don’t feel like dealing with it (especially during a project).
I am a craigslist junkie. There. I said it. I love to look for furniture and other household things that someone is no longer needing and see if we can give it a new life. Just like fixing up our homes, I love to fix up something that has been worn and forgotten; it gives it a new lease on life! Not only does it keep landfills from filling, it gives me a fun project with the kids and it is a great creative outlet. The sense of pride from fixing something is really fun!
That stated, Carl is convinced I am going to die someday by meeting someone on Craigslist. Thus, I have to control my habit to the extent that I know he is going to have to get involved to participate in the exchange. This is NOT his favorite thing to do (I know, right? He just doesn’t quite understand the thrill like I do :) Therefore, I have to be picky about what I have him do.
My two leather chair babies were born onto craigslist a few months back. They were out on a horse ranch in Southern Pines (which is a good hour from us) near Pinehurst. In the photos they looked amazing and I thought they would be perfect for staging our next home. They were priced at $300 for the set. Although they were not a “cheap” craiglist buy, they looked like they were well made and actually real leather, so knew they should be worth the gamble. I tried to pretend I did not want them, but I am a poor actress in that respect. Carl sensed he was about to get roped in and offered to go get them (yes, he is awesome).
Now, the only real issue with Carl going to get something I want on craigslist, is that he doesn’t quite share the shame discerning eye that I have. Therefore, you can imagine my surprise when my two leather chair babies showed up at our house…..completely faded and PINK (like 1980s mauve pink!!!). !'?#& was the word shouting in my head the moment they arrived. Of course, Carl, who had just driven three hours to get them for me, was less than thrilled that I was less than thrilled (that is the lot of a husband, right?). He even offered to take them all the way back for me, but I could not bring myself to do that. My sunk cost of time and money was too high to just scrap all of it. $300 is not crazy high, but it was high enough that I could not just give them away.


So I had two pinkish faded leather chairs on my hands. What to do???? I could tell they were very well made, so I new that they were likely worth keeping if I could figure out how to salvage them. I considered my options
Just leave them alone. Terrified me. I did not want pink faded chairs. That was out
Recover them. Holy pricey.
Paint them. Seemed like a horrible waste of leather.
Hire someone to fix them. I had no idea who did that or what to even look for.
Stain them. This was the only thing I could figure out to do….so I went with it.
Staining leather? Yes. I figured leather was stained by manufacturers to gain its original color, so it must be the best thing I could do. I actually even considered using minwax wood stain or shoe polish, but then I stumbled across this:
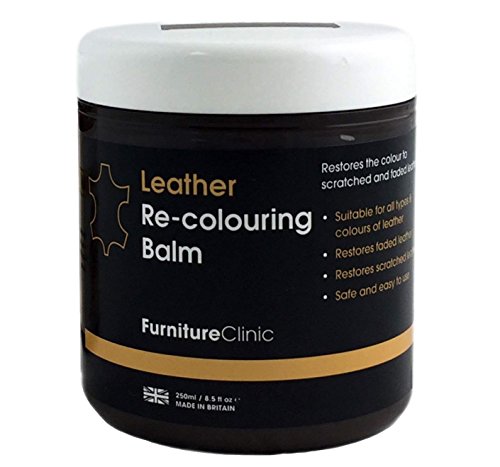
I was intrigued. I figured it was a gamble worth taking. You use this balm to gradually stain back the leather colorization to the material. I did not really know what color the chairs were supposed to be, so I took a gamble on the camel color…..which ended up being wrong. Fortunately, this amazing company allowed me to order a second color free of charge. This time I nailed it with Medium Brown.
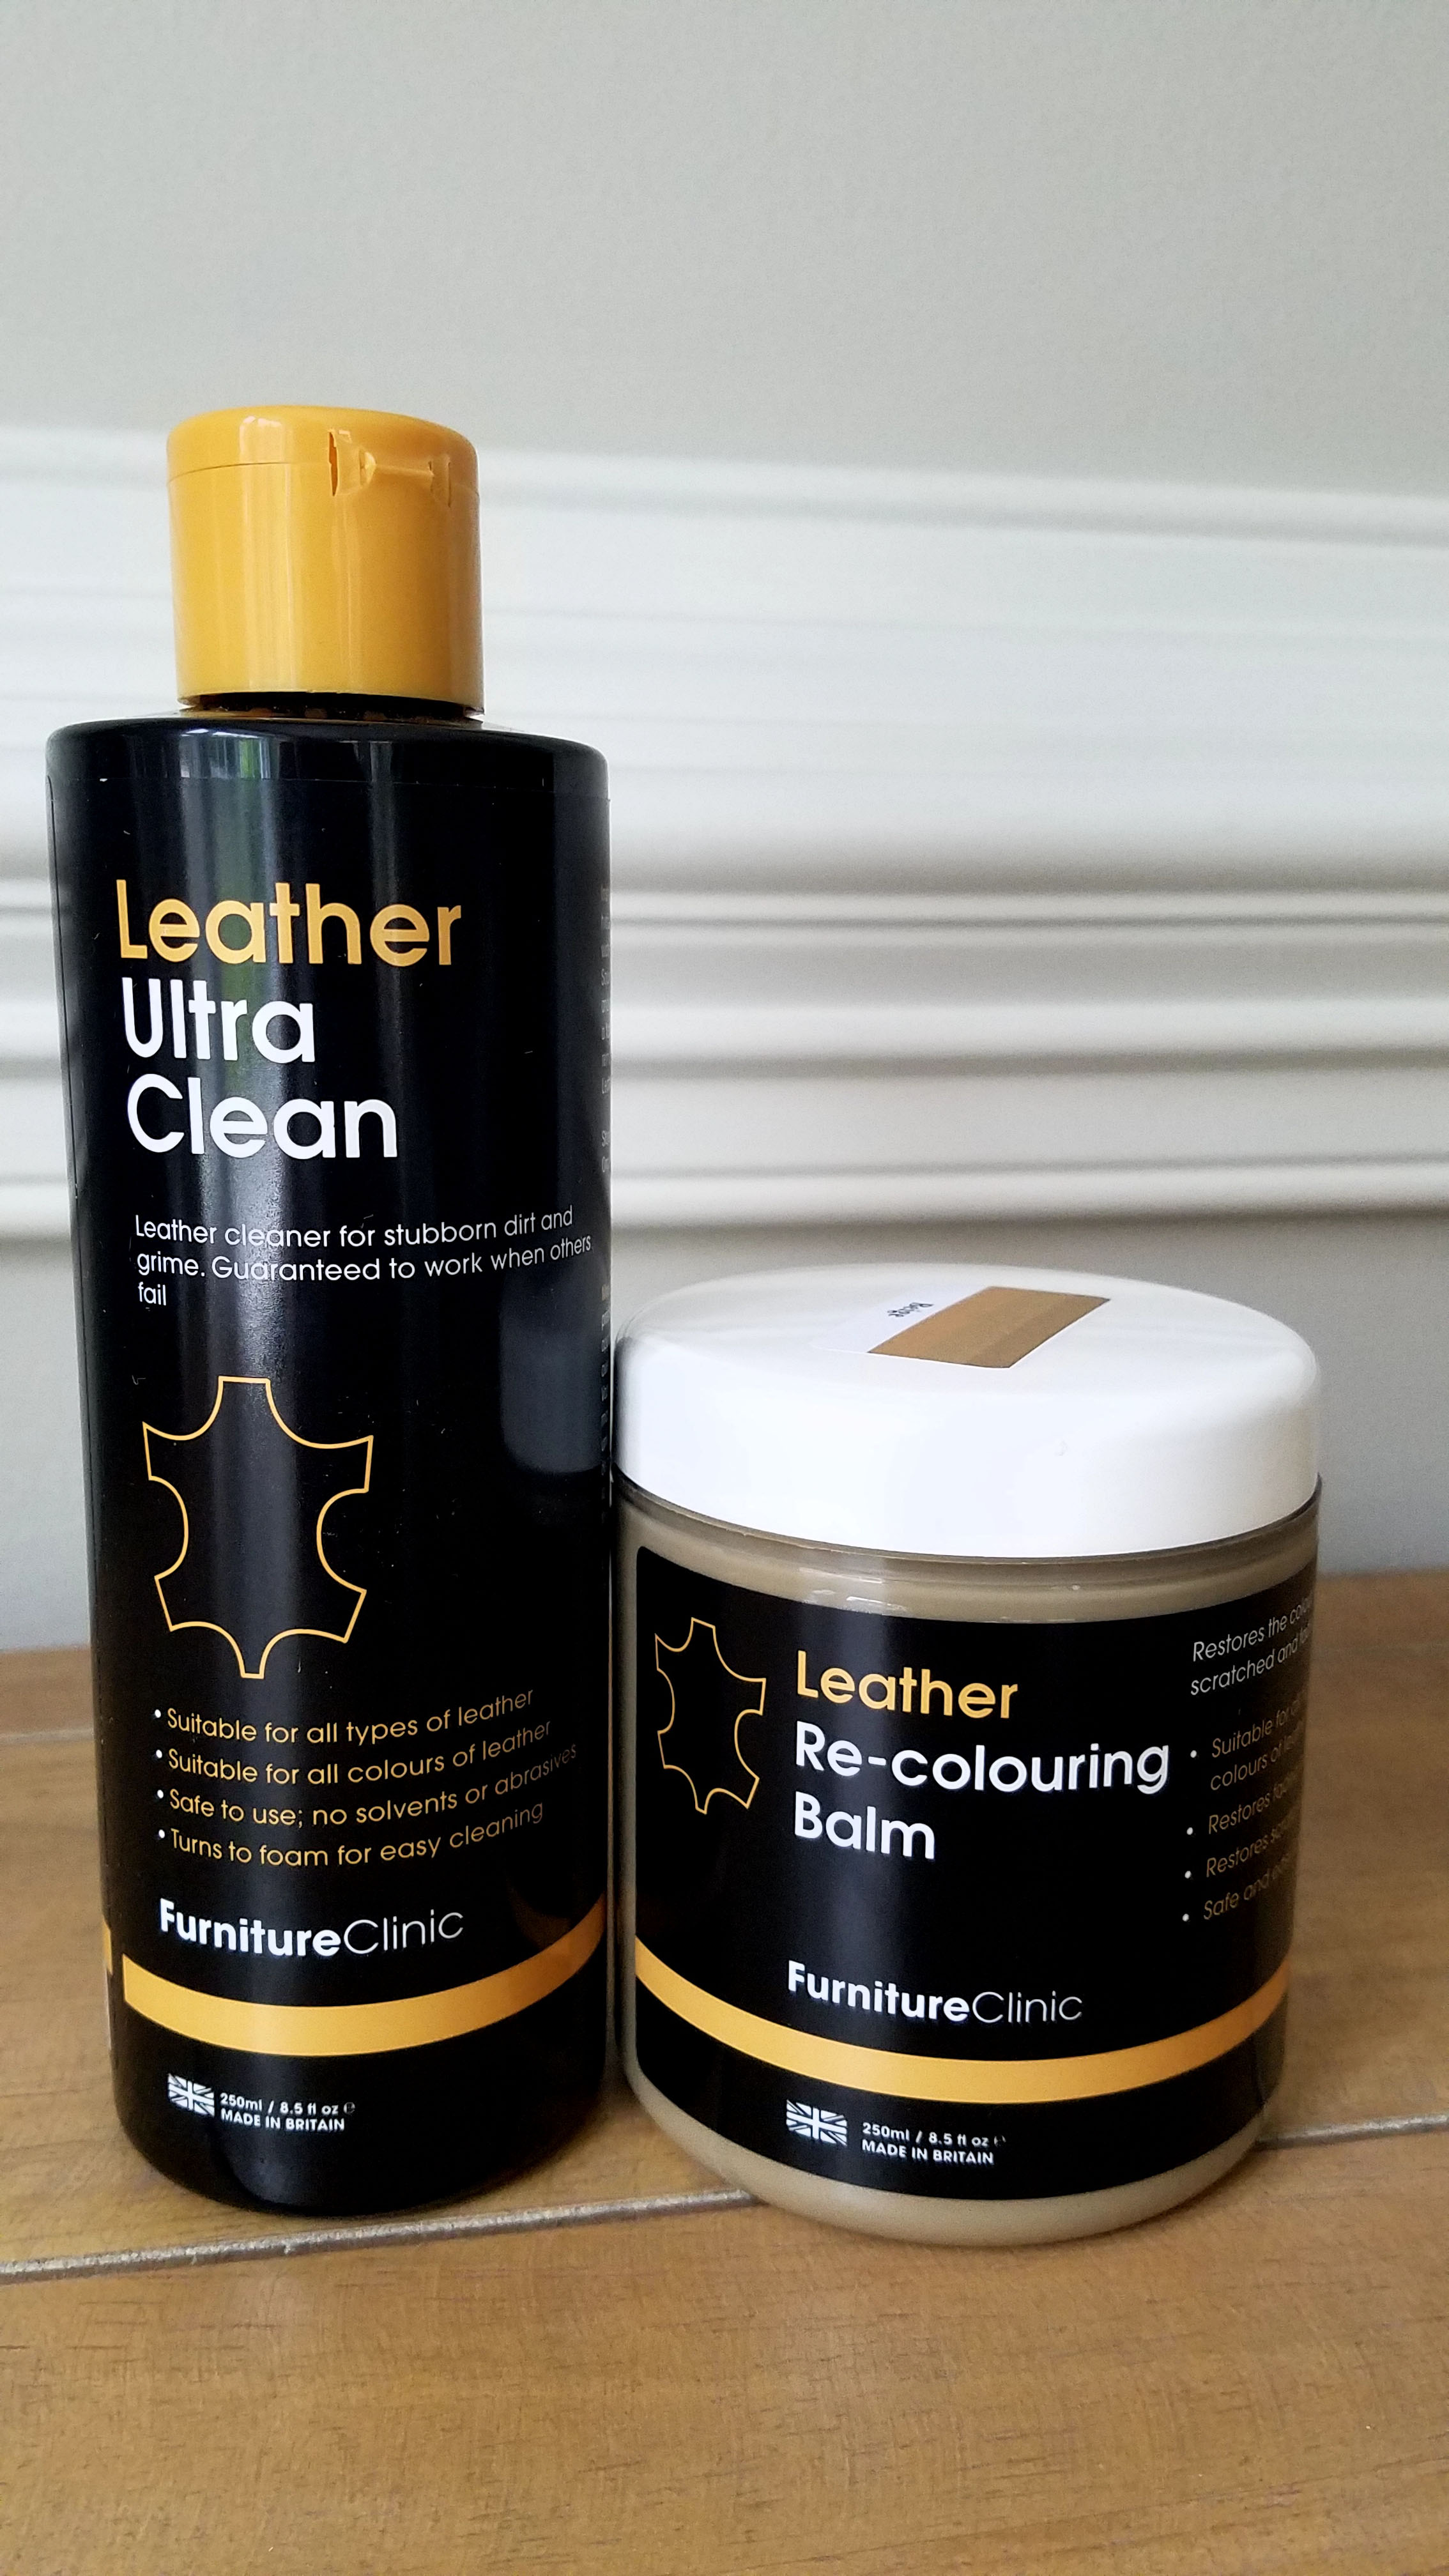
The interesting thing about the balm is that you can apply it in layers and it gradually richens in color. That was handy since some of the parts of the chair were more faded than others. It was simple to use. I also started with the leather cleaner to make sure that the leather would absorb the color properly.

Here were the steps. Pretty simple:
Test the leather for absorptive qualities (water drop on the chair and see if the leather pulls the water in. If you have a protective coating on the leather, then the balm cannot absorb)
Clean the leather and allow it to dry (took about 20 minutes)
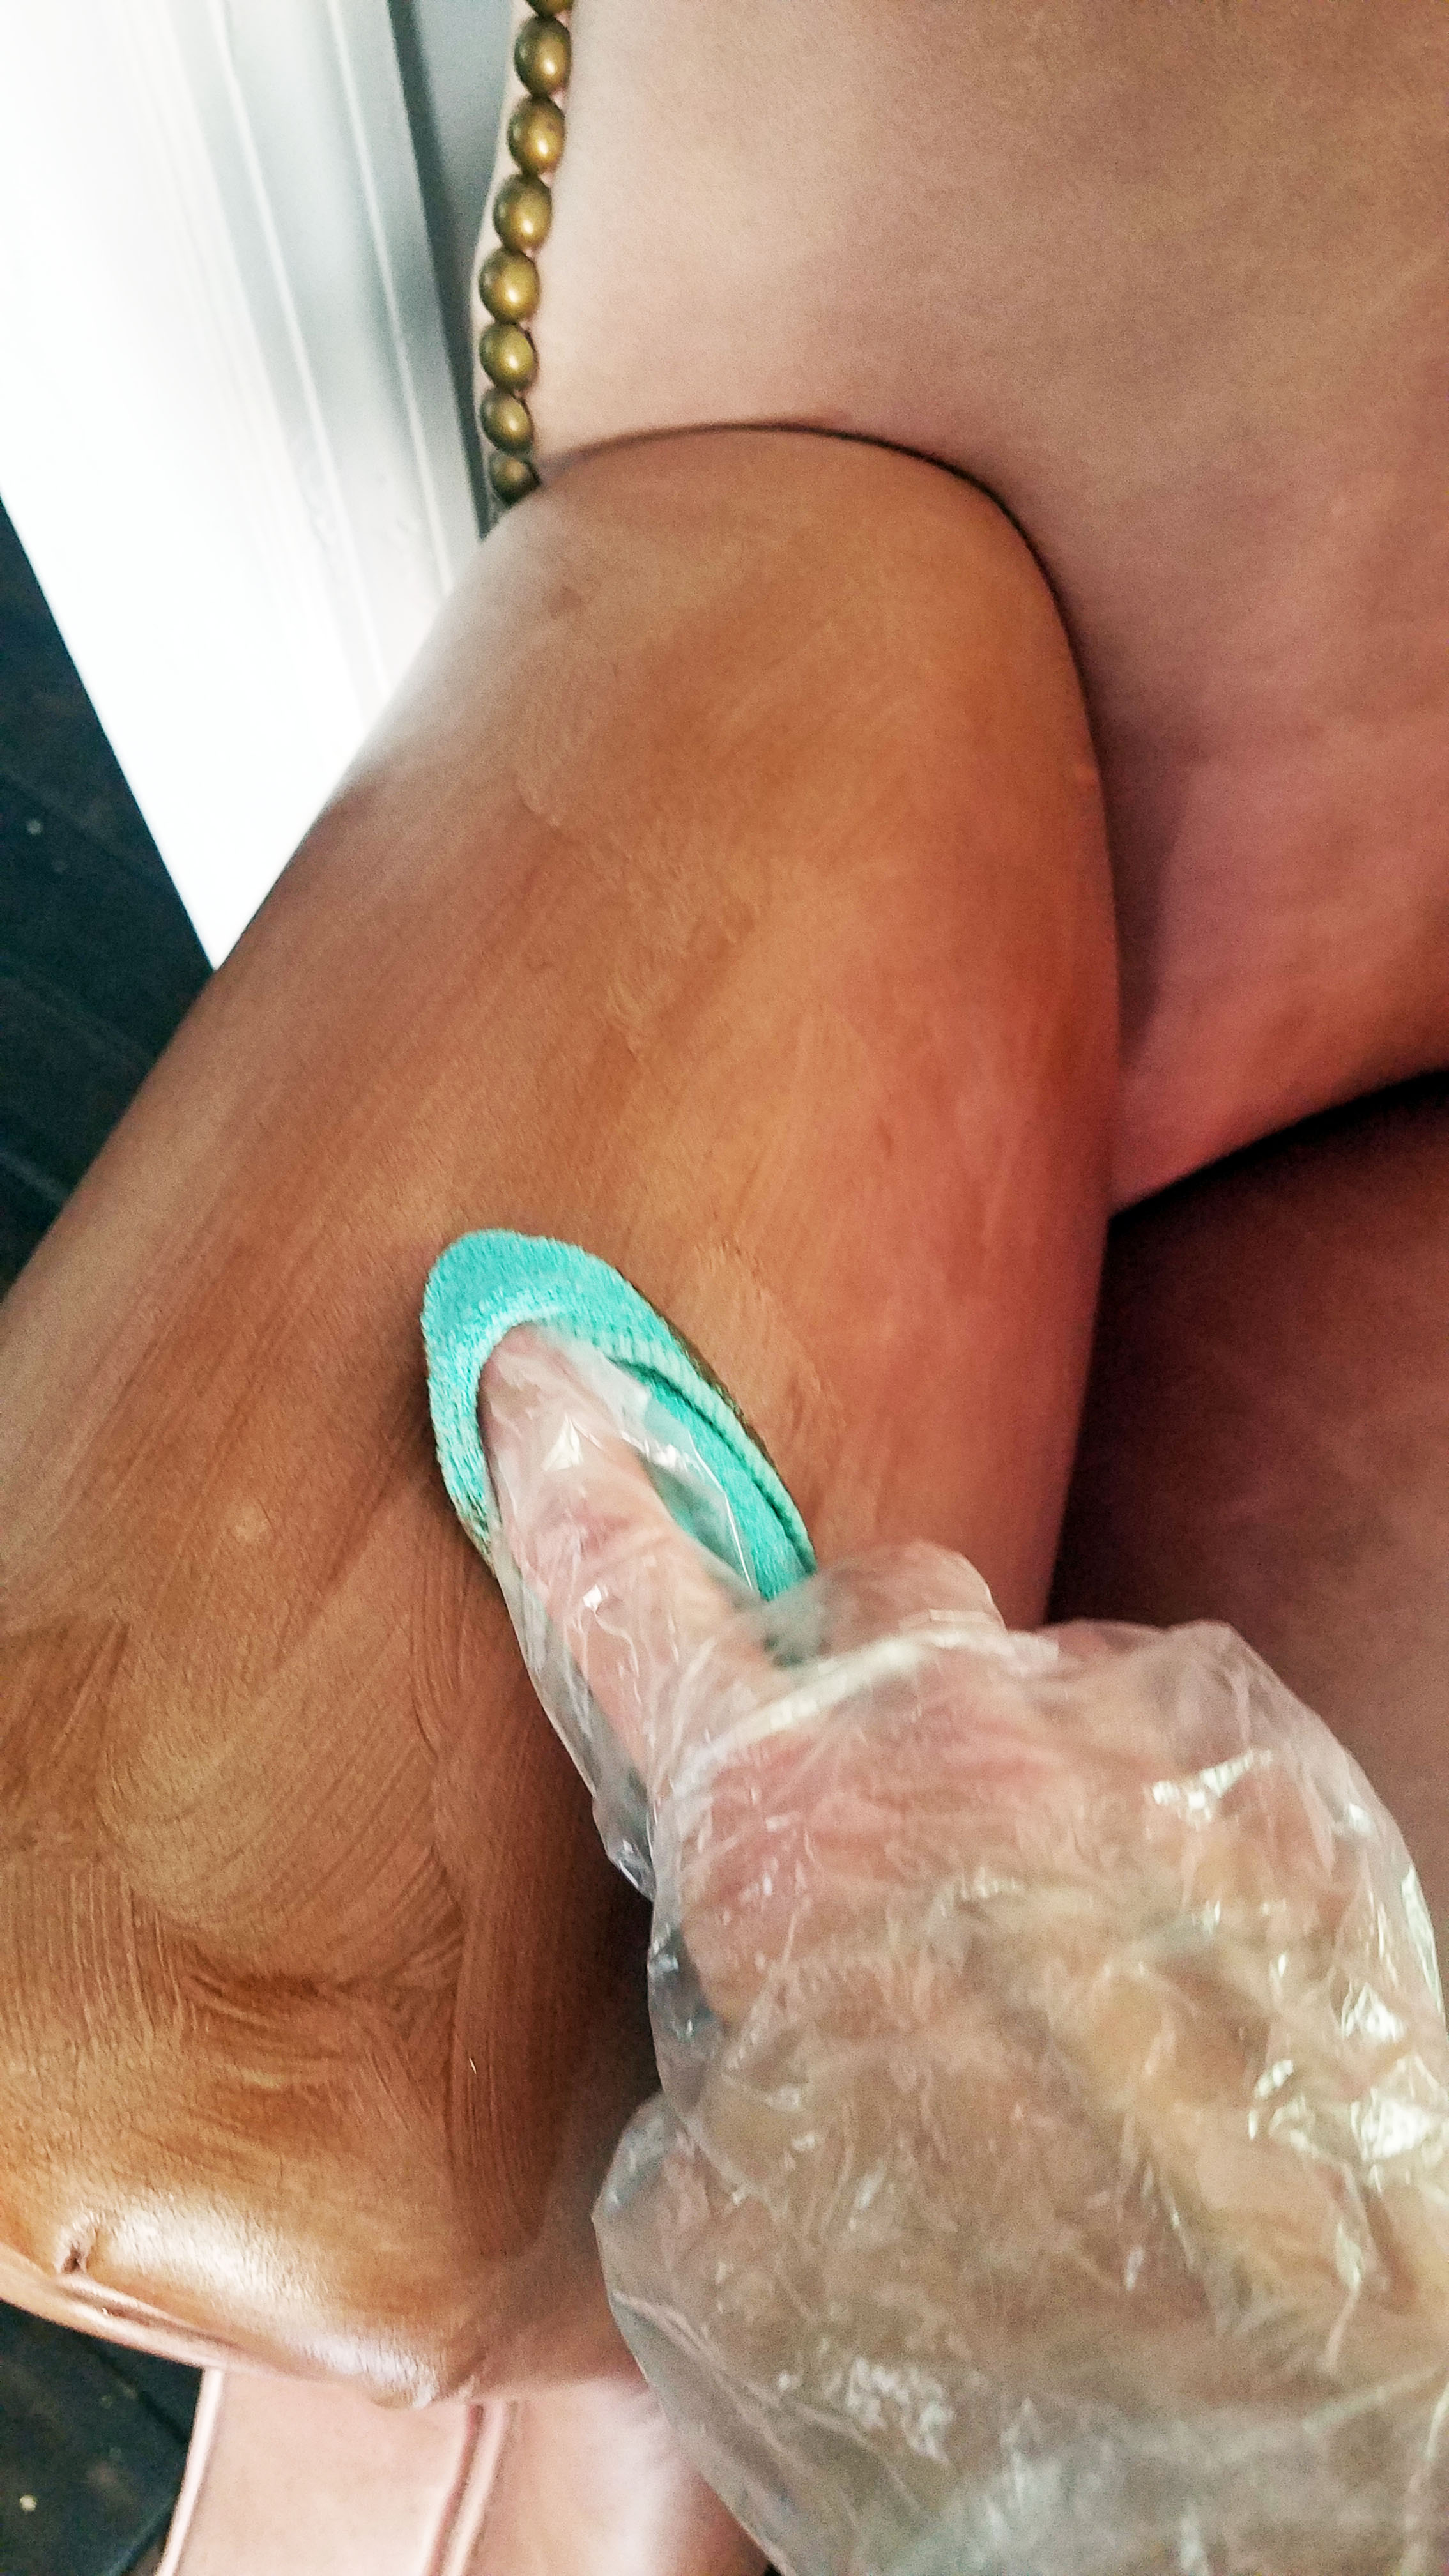
Start rubbing in the balm. Think about polishing something. If you have ever applied a wax to furniture, it is a similar process.
Allow to dry and then repeat coats (it dries fast)

Clean the leather
Apply stain
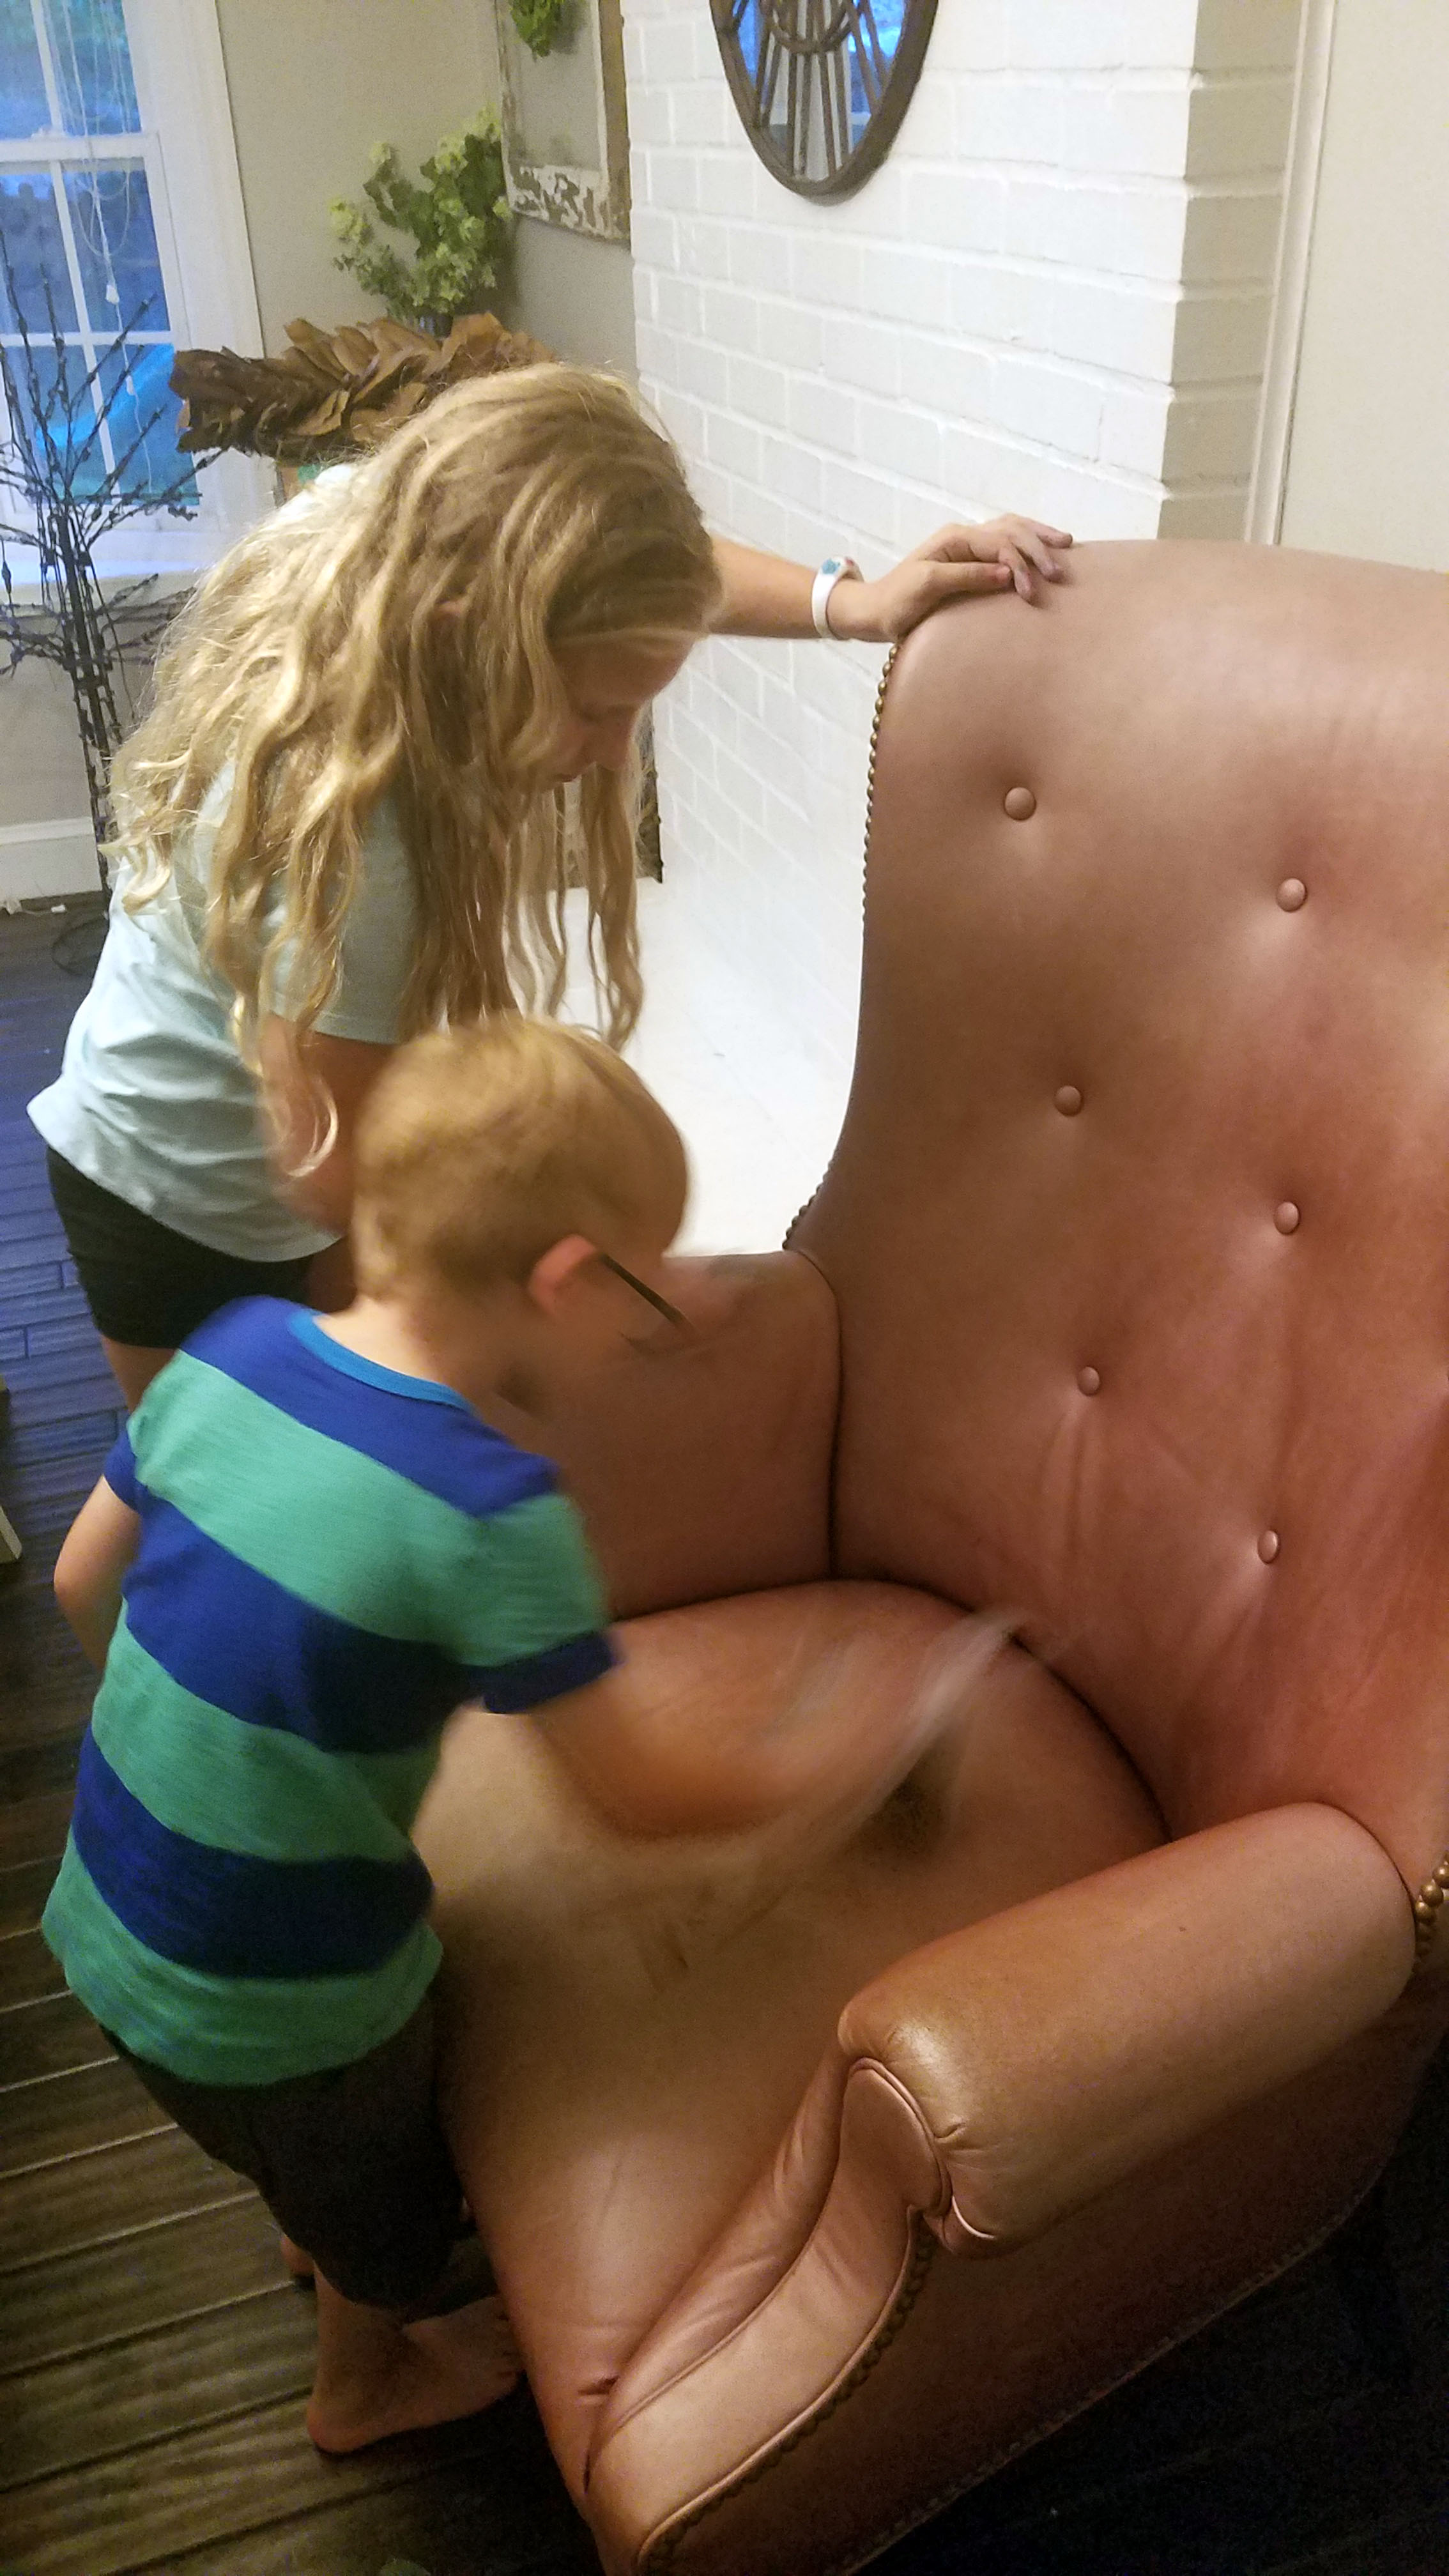
Recruites! Even kids could do it
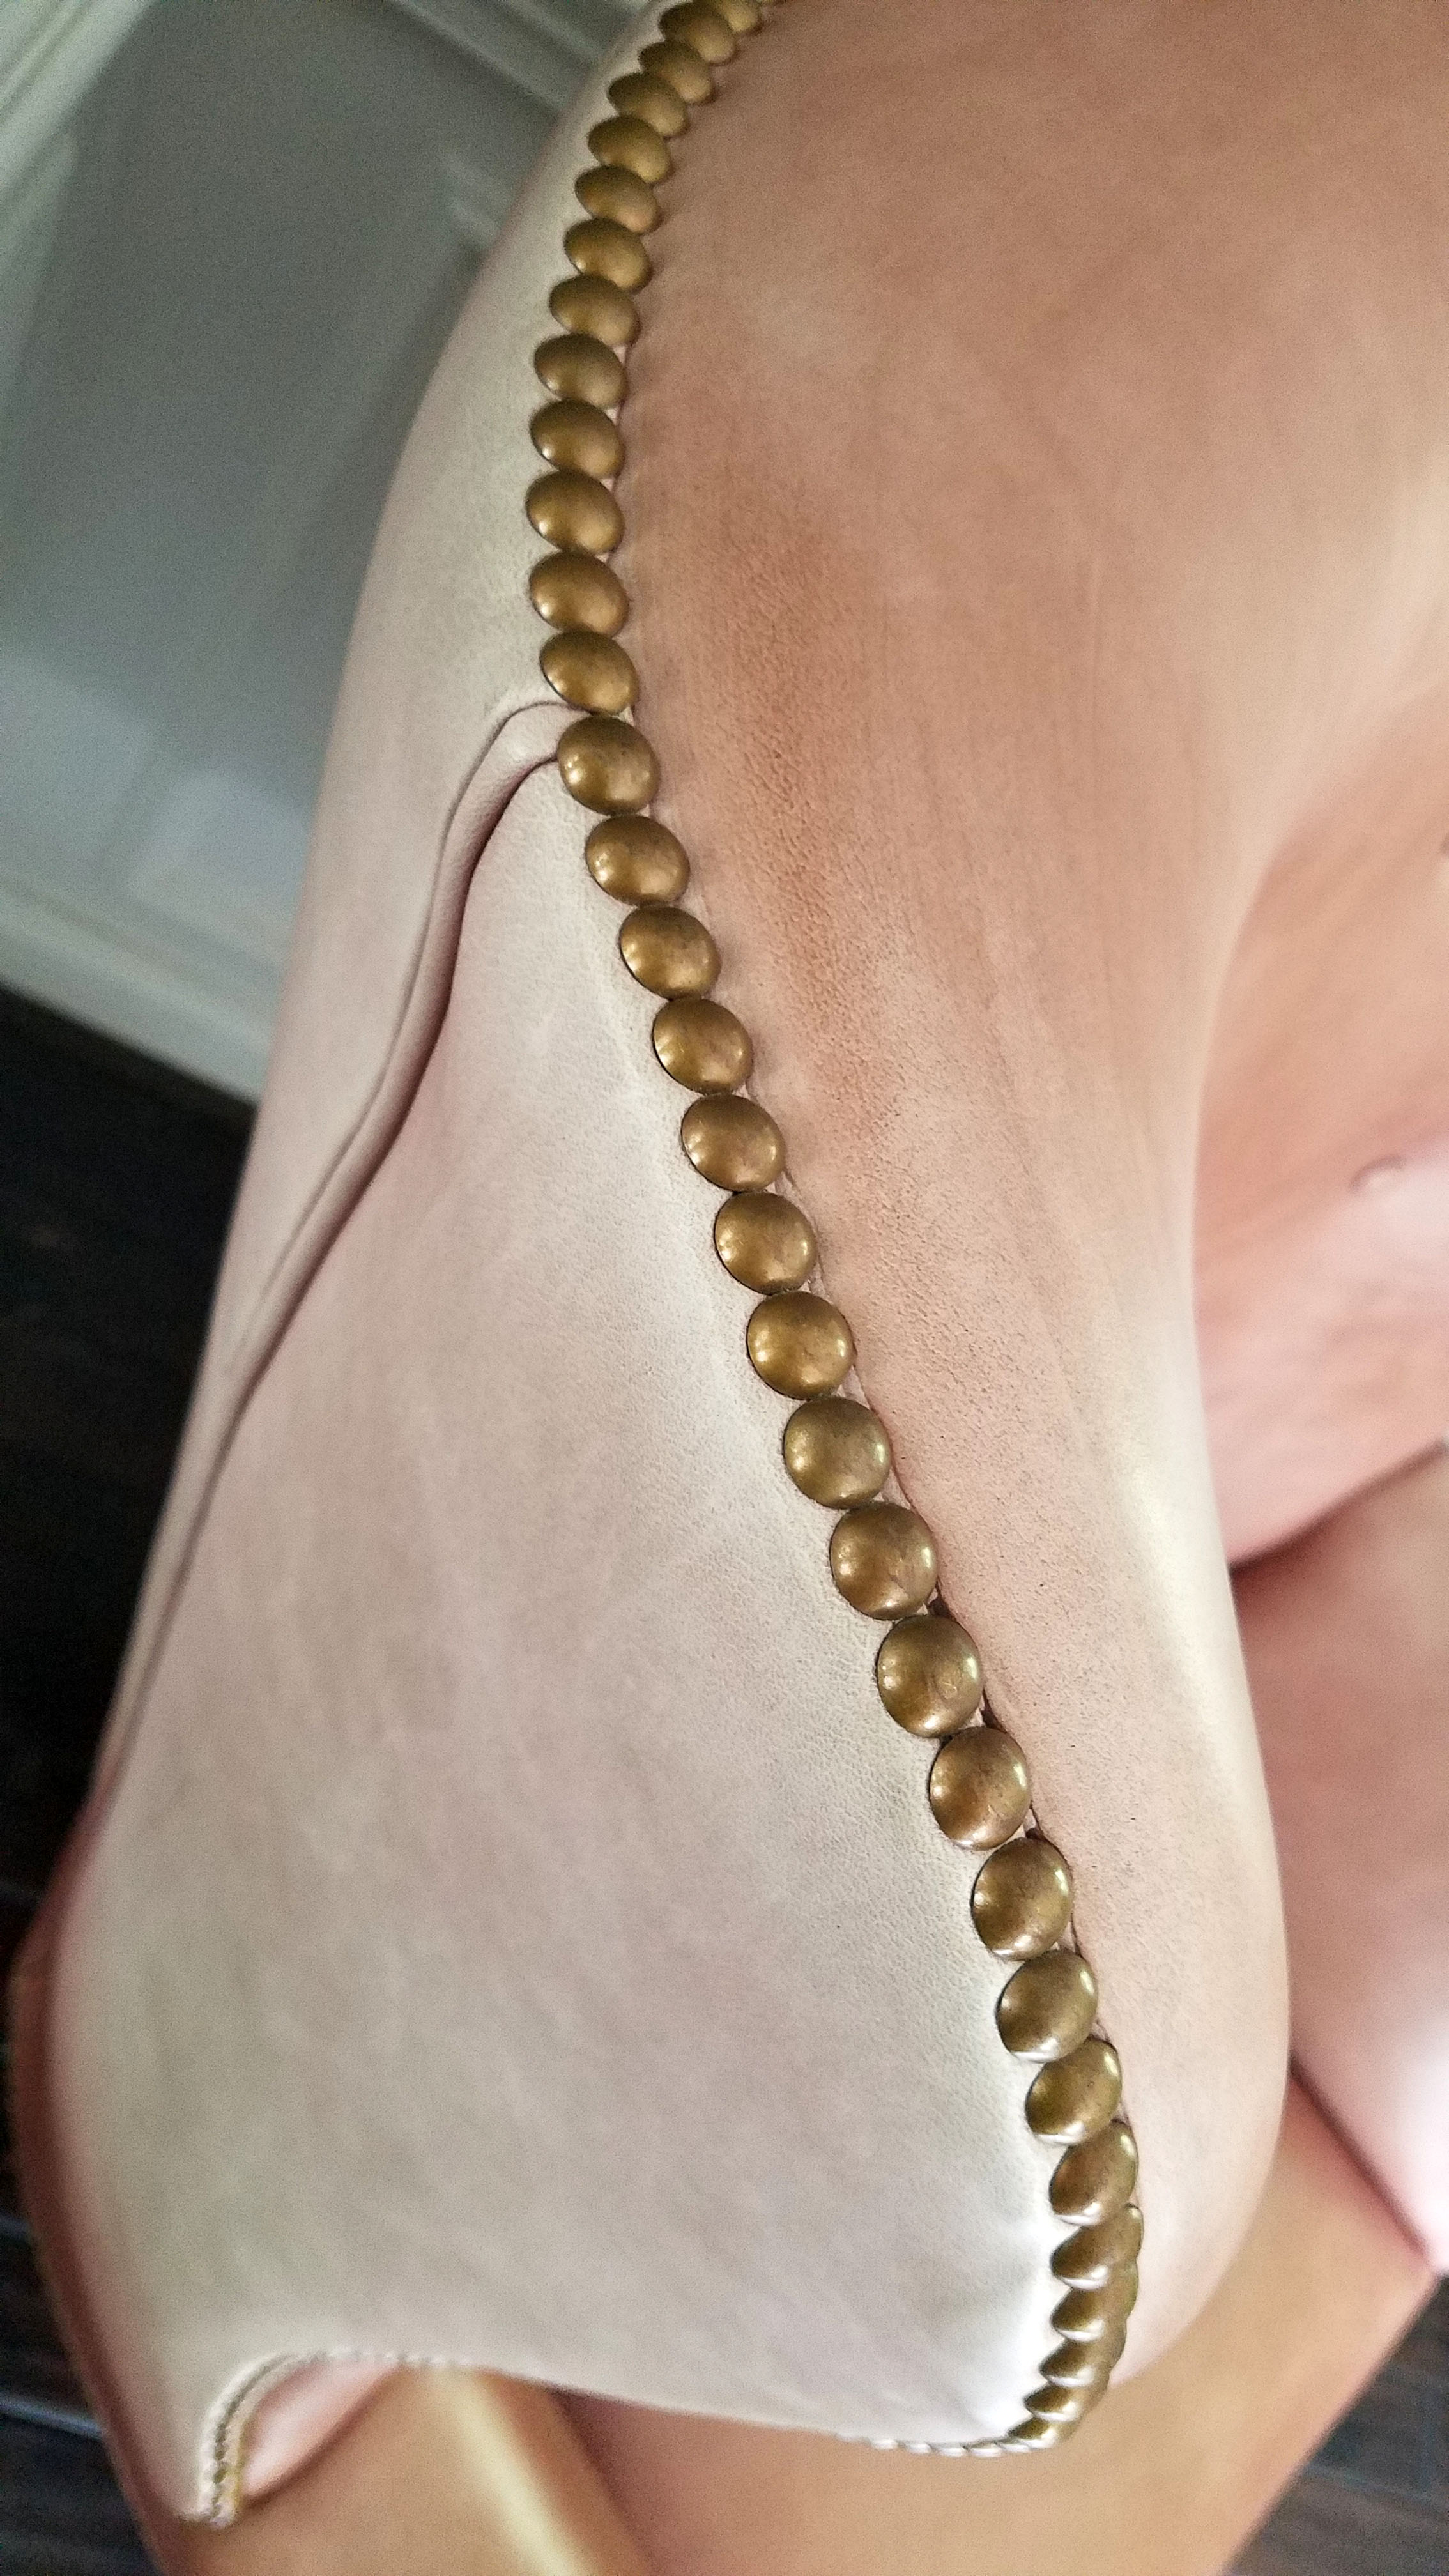
See the difference after a coat or two?
So my next fear was colorfastness. I just figured that the stain would transfer to clothing (and subsequently that I would have unhappy friends!). I let it dry for 24 hours and then I tested the chair by wiggling everywhere on it in a crisp white shirt (gutsy, right??) Guess what? NOT A MARK on my shirt! I could not believe it.
Now, let’s talk cons. This is not perfect. There are some areas that are a bit streaky and imperfect, but leather does sort of lend itself to imperfections. Also, when you consider the fact that the chairs would have been well over $1000 each to recover, I think I can handle my $40 dollar fix.

Are you ready for the fun part? I found out that the chairs were made in Hickory, NC. For those of you that are unfamiliar with that, High Point/Hickory NC and the surrounding area is one of the most high end furniture markets in the world. They manufacture some of the best made furniture you can find. I managed to find out that each of these chairs can still be ordered from Hickory…..to the tune of nearly $3000 per chair! My all in cost on these chairs was $340. I will take that.

I was now hooked. I started to think about shoes and purses in my closet and when I get around to it, I will likely stain those as well. The balm refreshes the leather and brings it back shining!
Also, for note, this tutorial is just from me. I was not paid or given anything by Furniture Clinic. When I was looking at the product, I was hoping that there would be an in depth review or blog post that had used it, but I could not find one. I figured I would post one to help out the next panicked craiglister!! This post does contain affiliate links to the products so you can find them and try them on your next project!

Are you going to try it? I think you should! It was fun and easy, and it really worked pretty well. That is NOT good news for Carl; it opens up waaaaaay too many more options on Criagslist!
We’ll talk soon!
- Casey

GLENVILLE AVE BECOMES A HOME
Our newest home is transformed!

Yippee! Our newest clients are happily settled into their new home and they are in love with Glenville; that is worth celebrating! I have to admit, it makes my heart happy to know that they are pleased with their decision to choose Glenville as their new home. I love the feeling of coming home to a place you love. These clients are amazing and did not waste a minute decorating. They were gracious enough to give me a peek when I popped in with my mom this weekend (only a week after they moved in); they had already made Glenville a beautiful home.
I had to snap some photos quick - their decorating style, which they termed “bohemian farmhouse”, is whimsical and fun; much too cute not to share. Everything seemed to fit perfectly in place. I had to snap a few photos to show off their great design. Forgive the quick photos taken with my phone - they don’t really do the space the justice it deserves :)
Enjoy this Glenville home tour! Make sure you get to the bottom of the photos to enjoy a smile - their very creative bathroom letter board sign!


Super cute, right? We continually have so much fun with our clients; they are all so creative and really enjoy dressing up their homes. Thank you to our Glenville crew for the amazing home tour and sneak peak! More renovation before and after photos coming soon!
“Coming home is one of the most beautiful things. ”
- Casey

GLENVILLE RENOVATIONS - THE KITCHEN
How to maximize the space of your galley kitchen
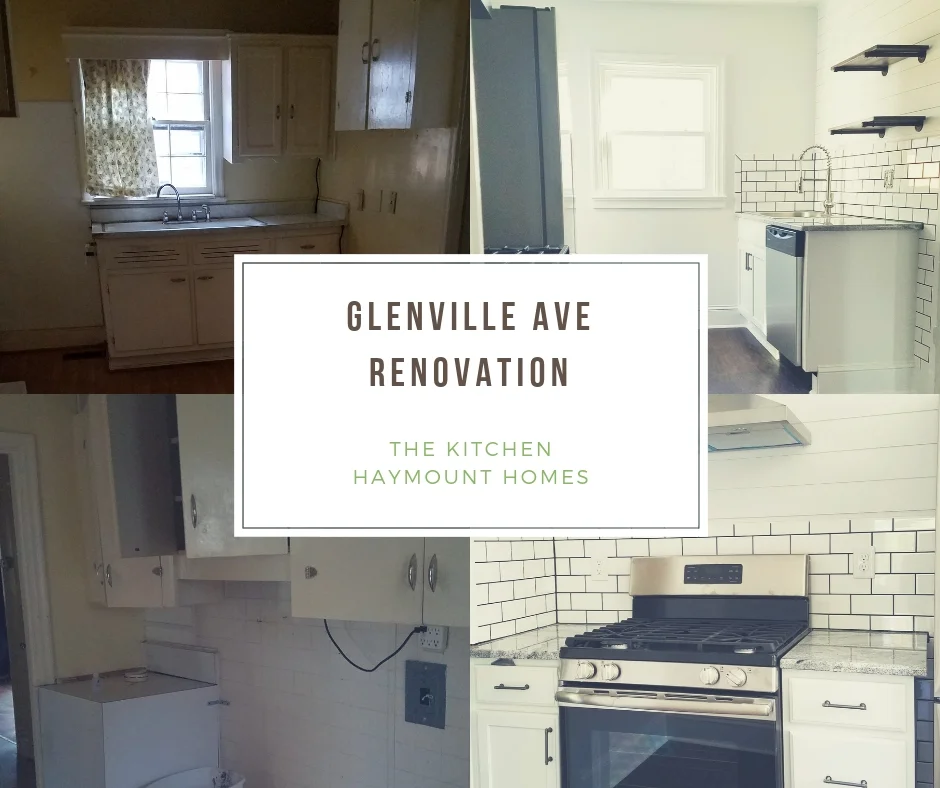
Welcome to the kitchen renovation for Glenville!
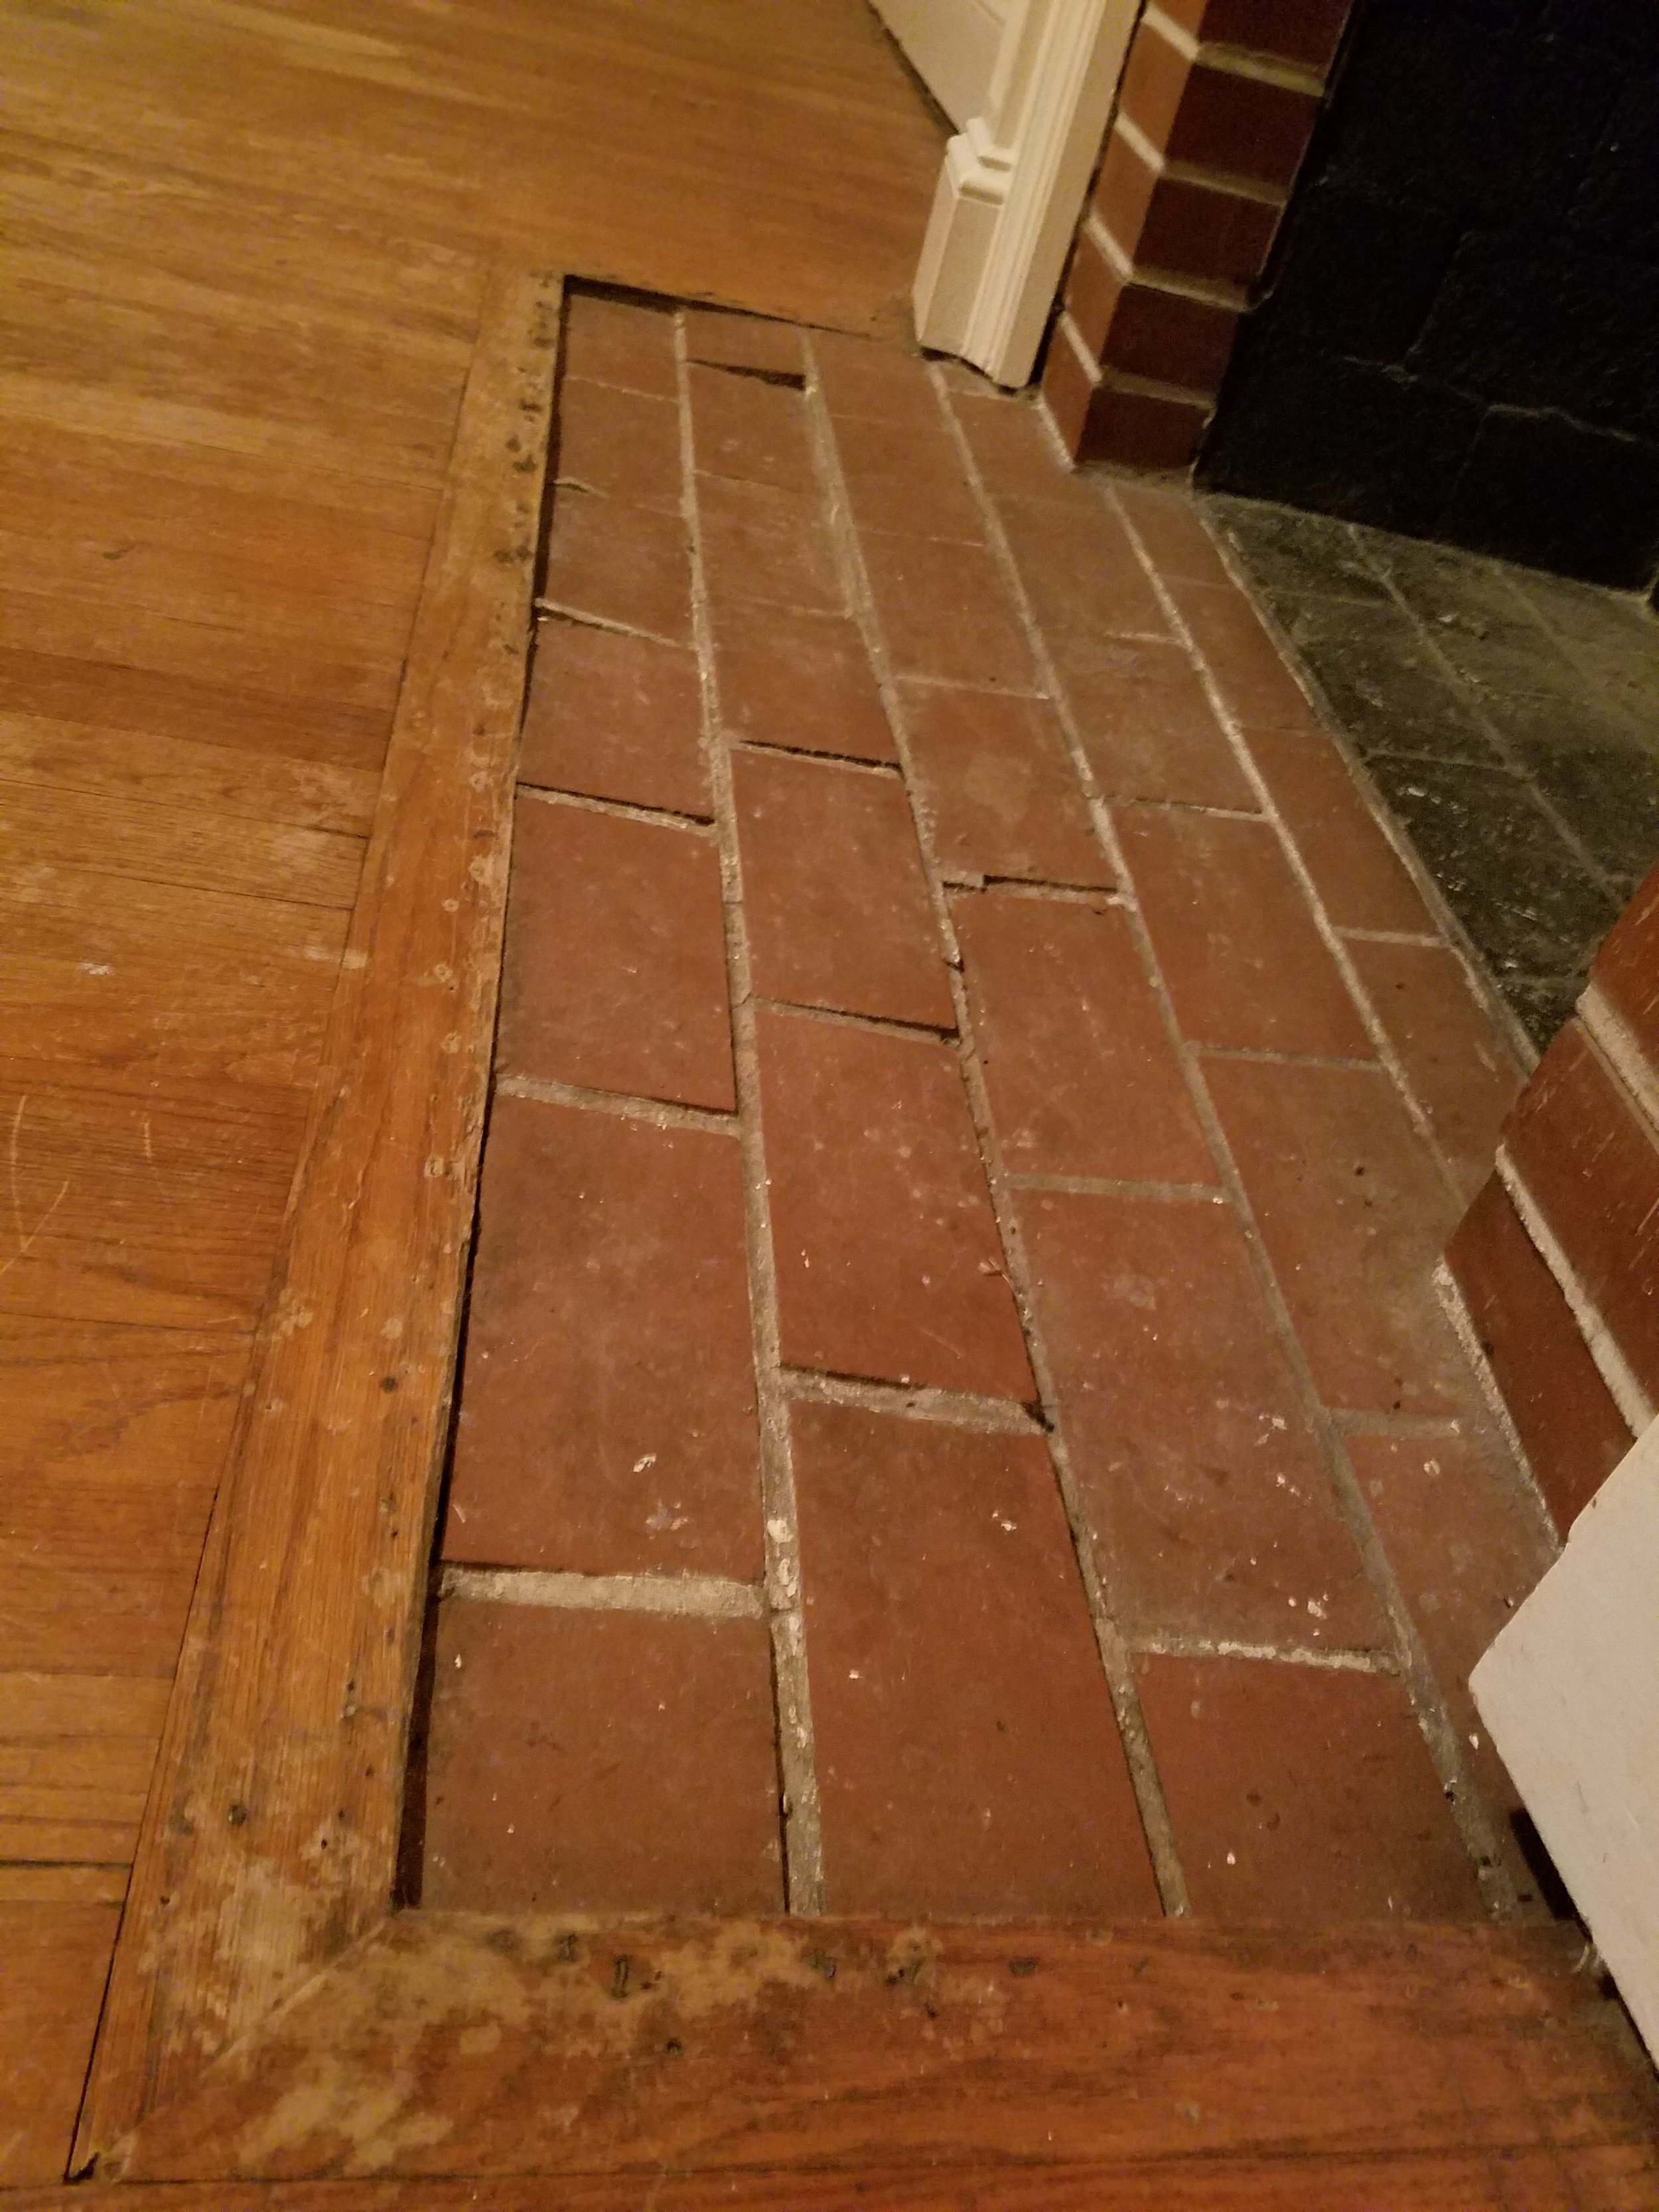
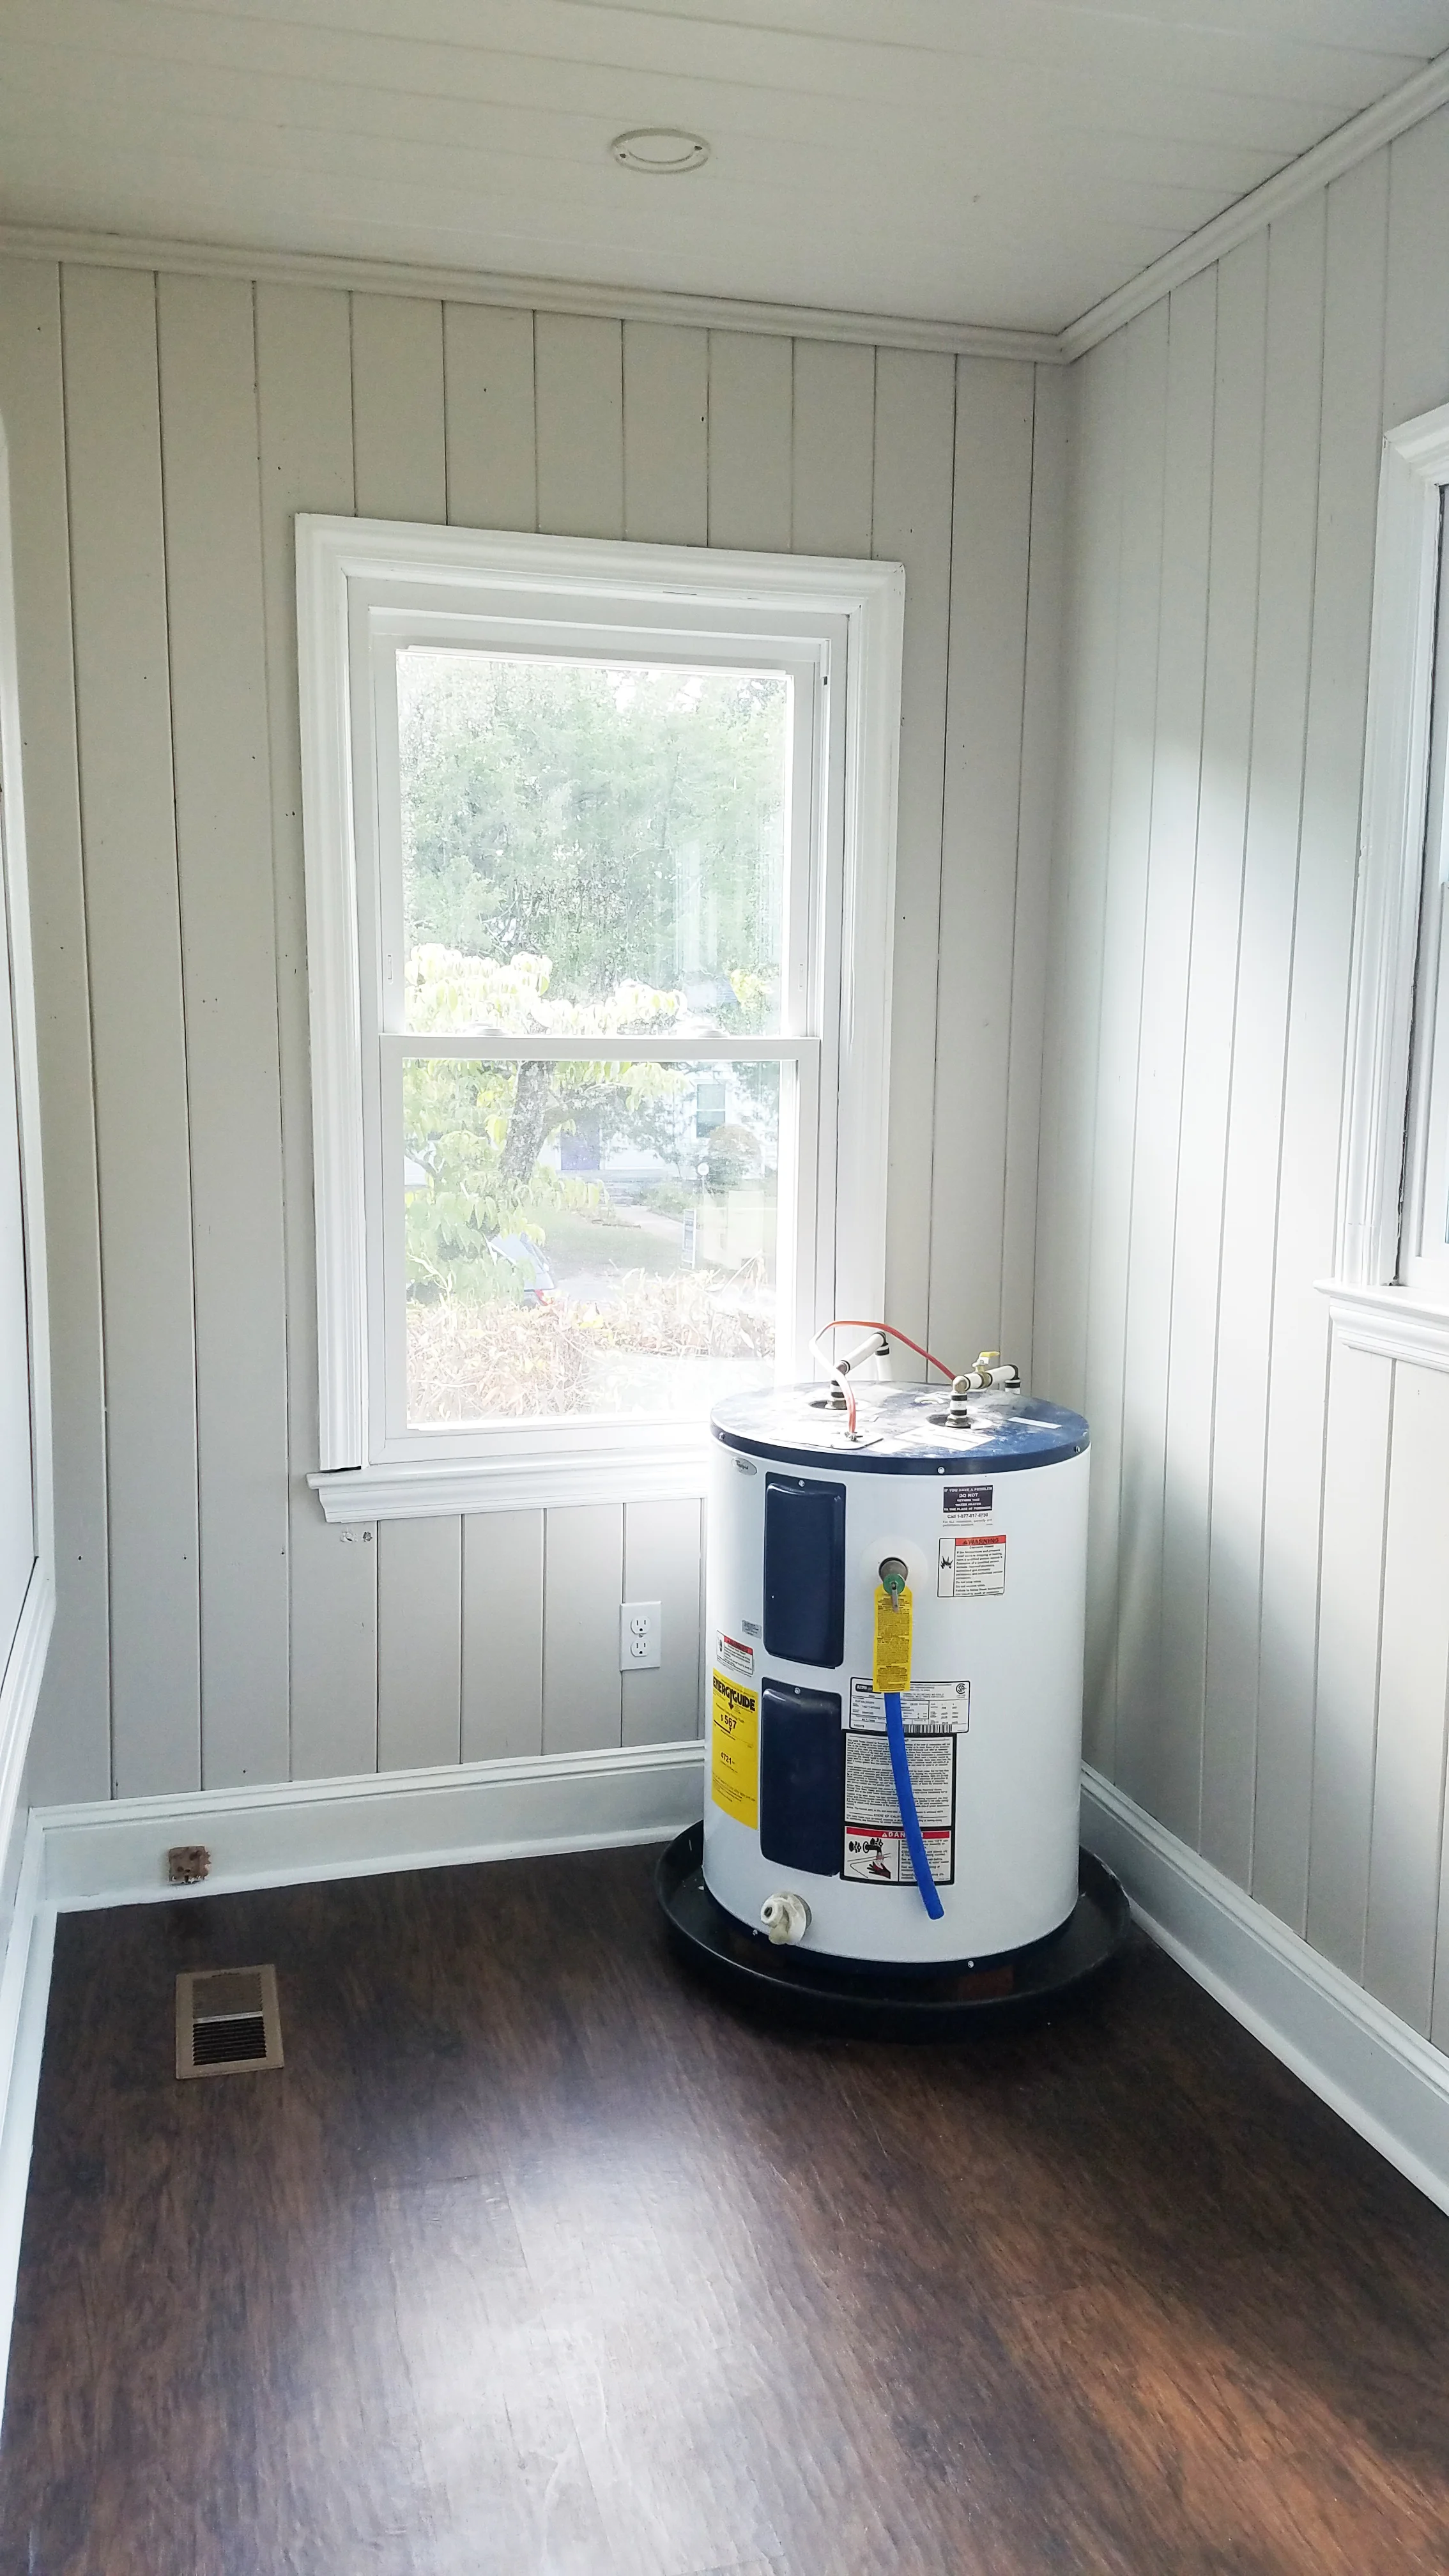
This kitchen was a pretty big mess. We had a fuse box from 1941 complete with cylindrical circuits that I had never seen before, a water heater in the corner (typical of this era of home to have the water heater in the kitchen because it is next to the plumbing), and plenty of outdated everything. This kitchen lacked appliances and the layout was awkward. The floor doesn’t look that bad in the photos, but it was sheet vinyl and it had holes throughout. Long story short, this kitchen needed help!
We also wanted to work to optimize the space, so we decided to move this layout to a galley style kitchen. Sometimes galley kitchens can feel tight, so we made decisions that would help reduce that feeling and still make the kitchen functional. More on that throughout the post.
The nuts and bolts to work on:
Trim and Wall Repair
Floor Replacement
Cabinets and Countertops
Door Fixing
Removal of debris
Appliances
Relocation of the Water Heater (it was in the kitchen - we moved it to open up space in the kitchen for cabinets; this is typical of the 1940’s homes)
Replaced all windows
Replaced sheet vinyl flooring in the laundry room with luxury vinyl tile
Ceiling repair and paint
Light Fixture replacement
New sink and faucet
Relocation of the sink for improved layout
Addition of a dishwasher
Gas conversion
Wiring Update and removal of outdated panel box
Paint, paint, and paint!
The final product was clean and simple. We used Sherwin Williams Extra White in eggshell which is one of my favorite crisp whites . It is pretty neutral white and doesn’t read as warm yellow or too cool. Also, it looked good against the subway tile from Home Depot. The trim is nearly Sherwin Williams Extra White in a semi-gloss. The kitchen flooring is by Shaw Matrix in Franklin Hickory.
There are a lot of repair work that had to happen first, as well as plenty of problems to solve. Once we got things removed it became a game of how to repair all the different holes in the wall. Our contractor had to get pretty creative with some of the repairs as old plaster walls are not as easy to work with as sheetrock!
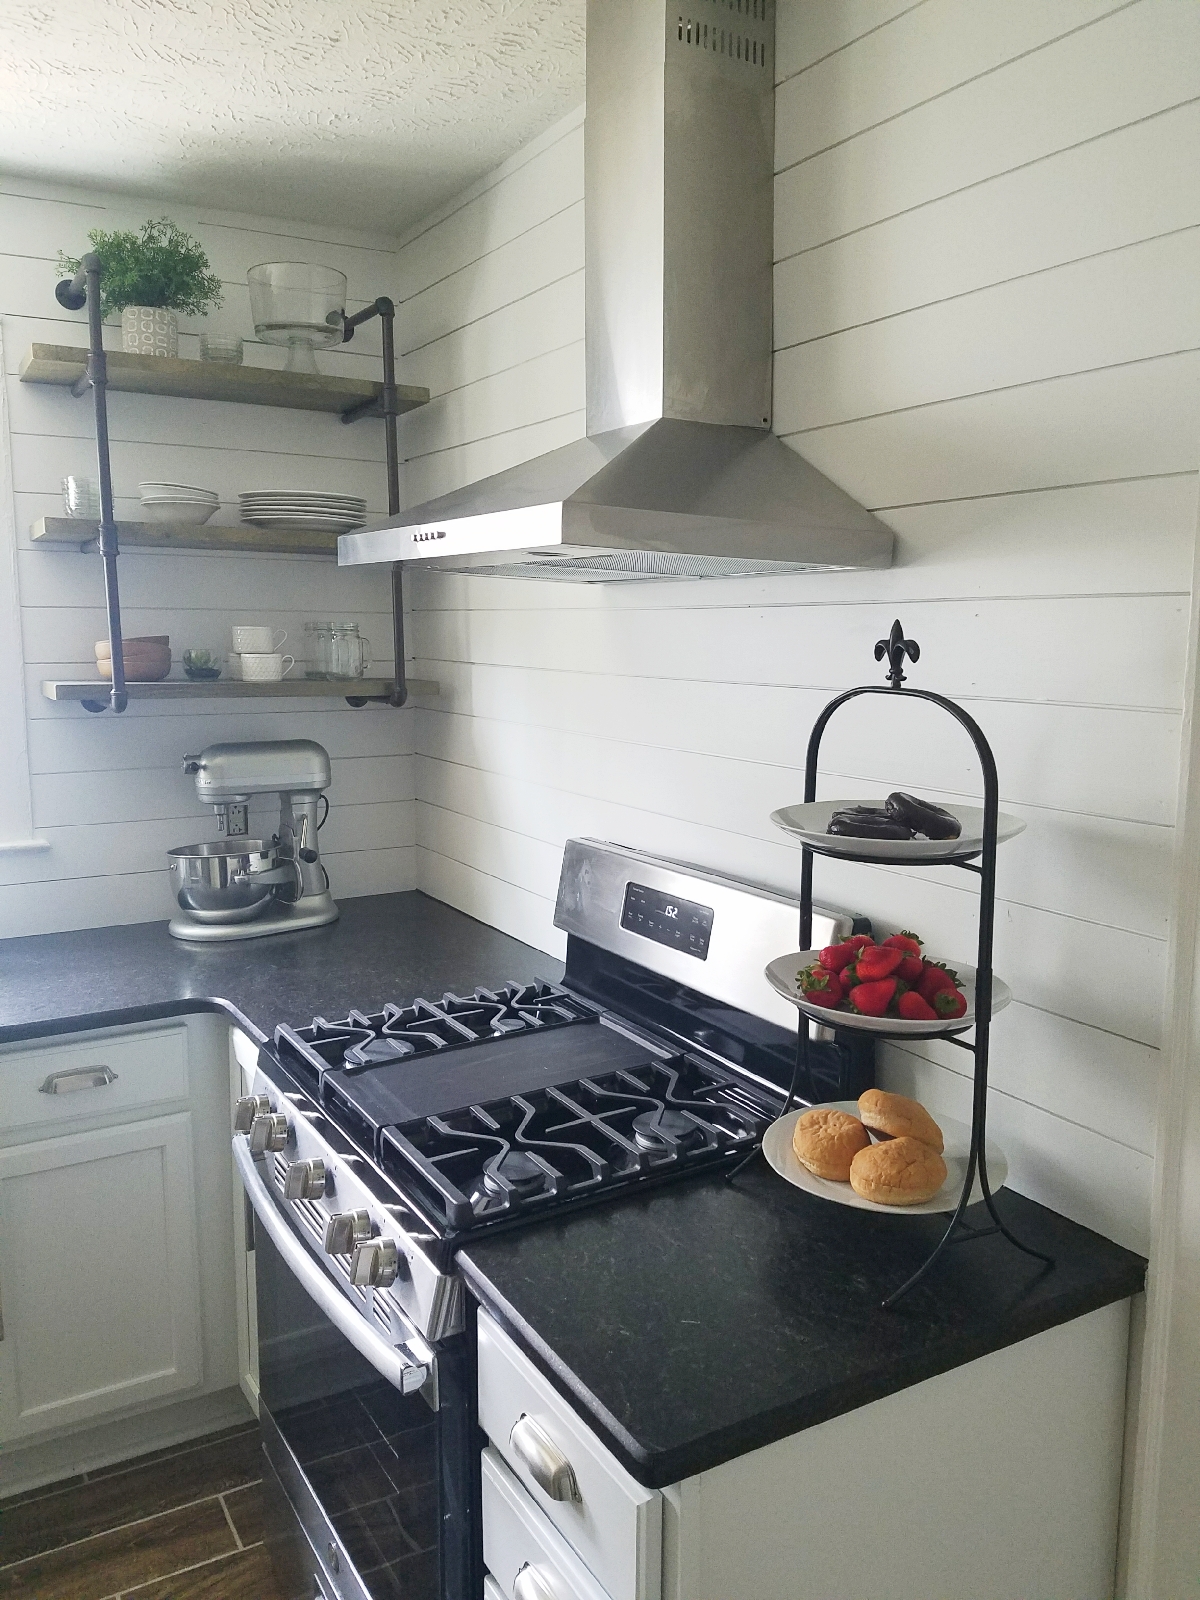
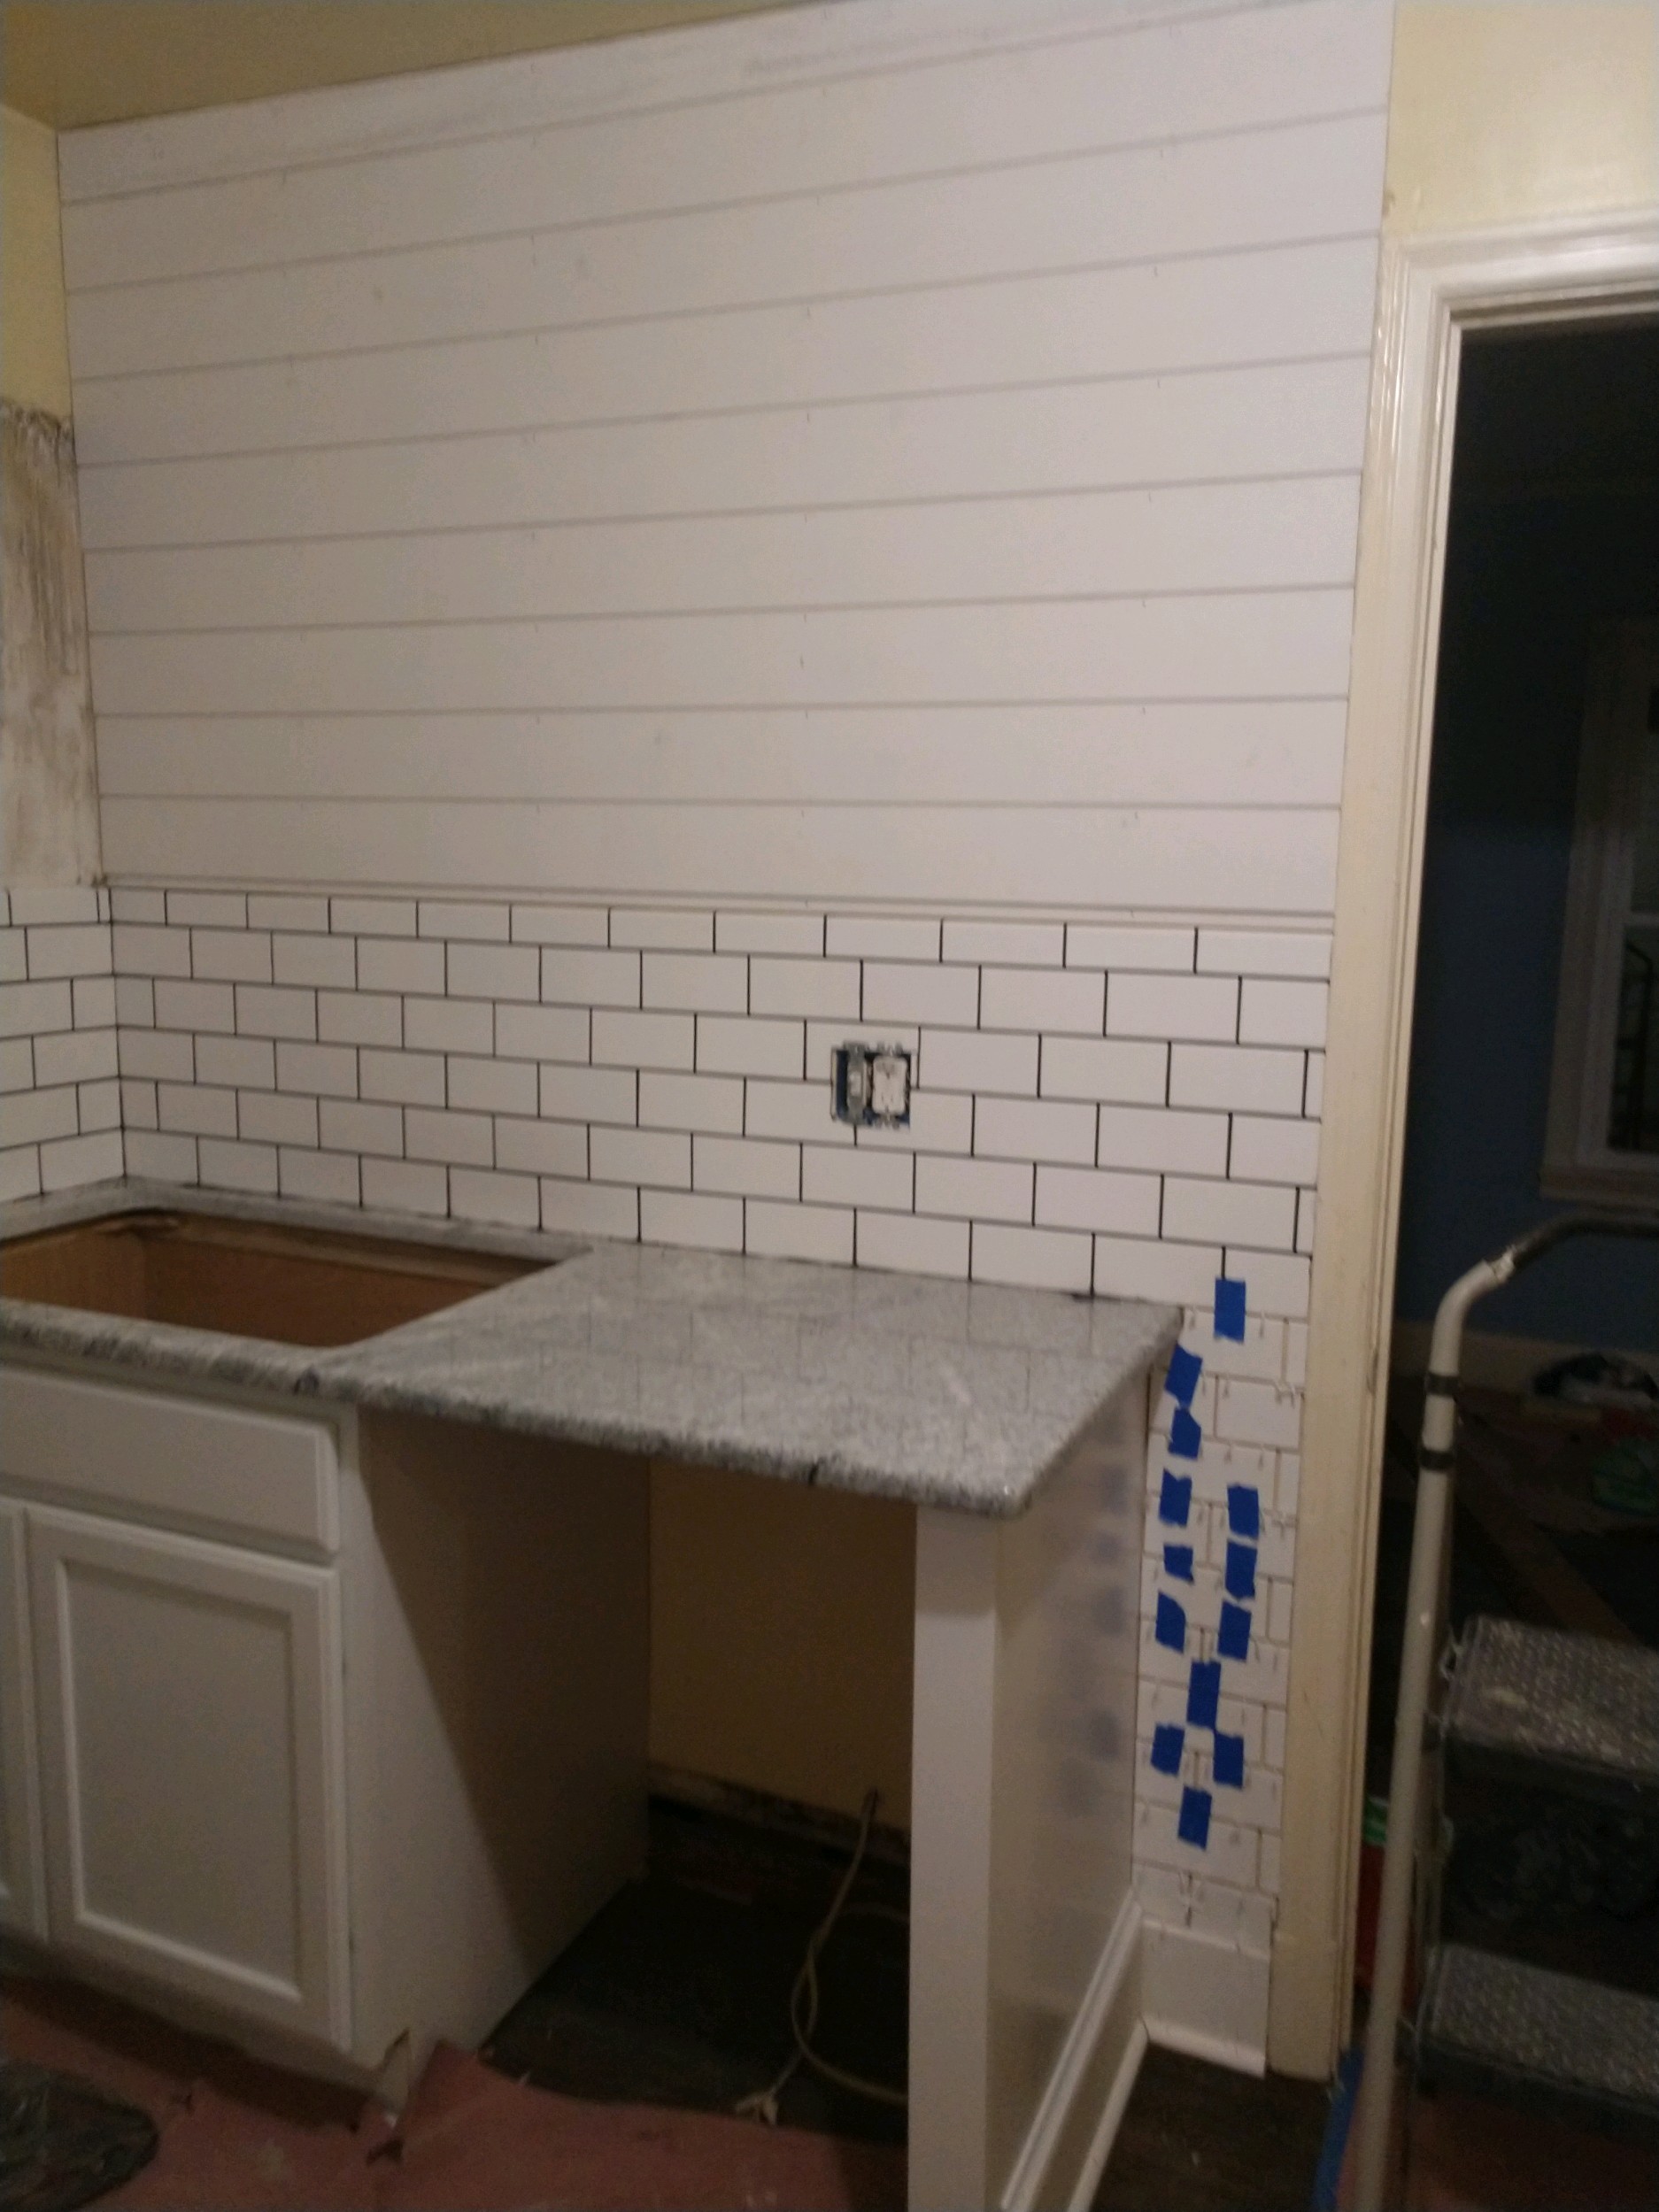
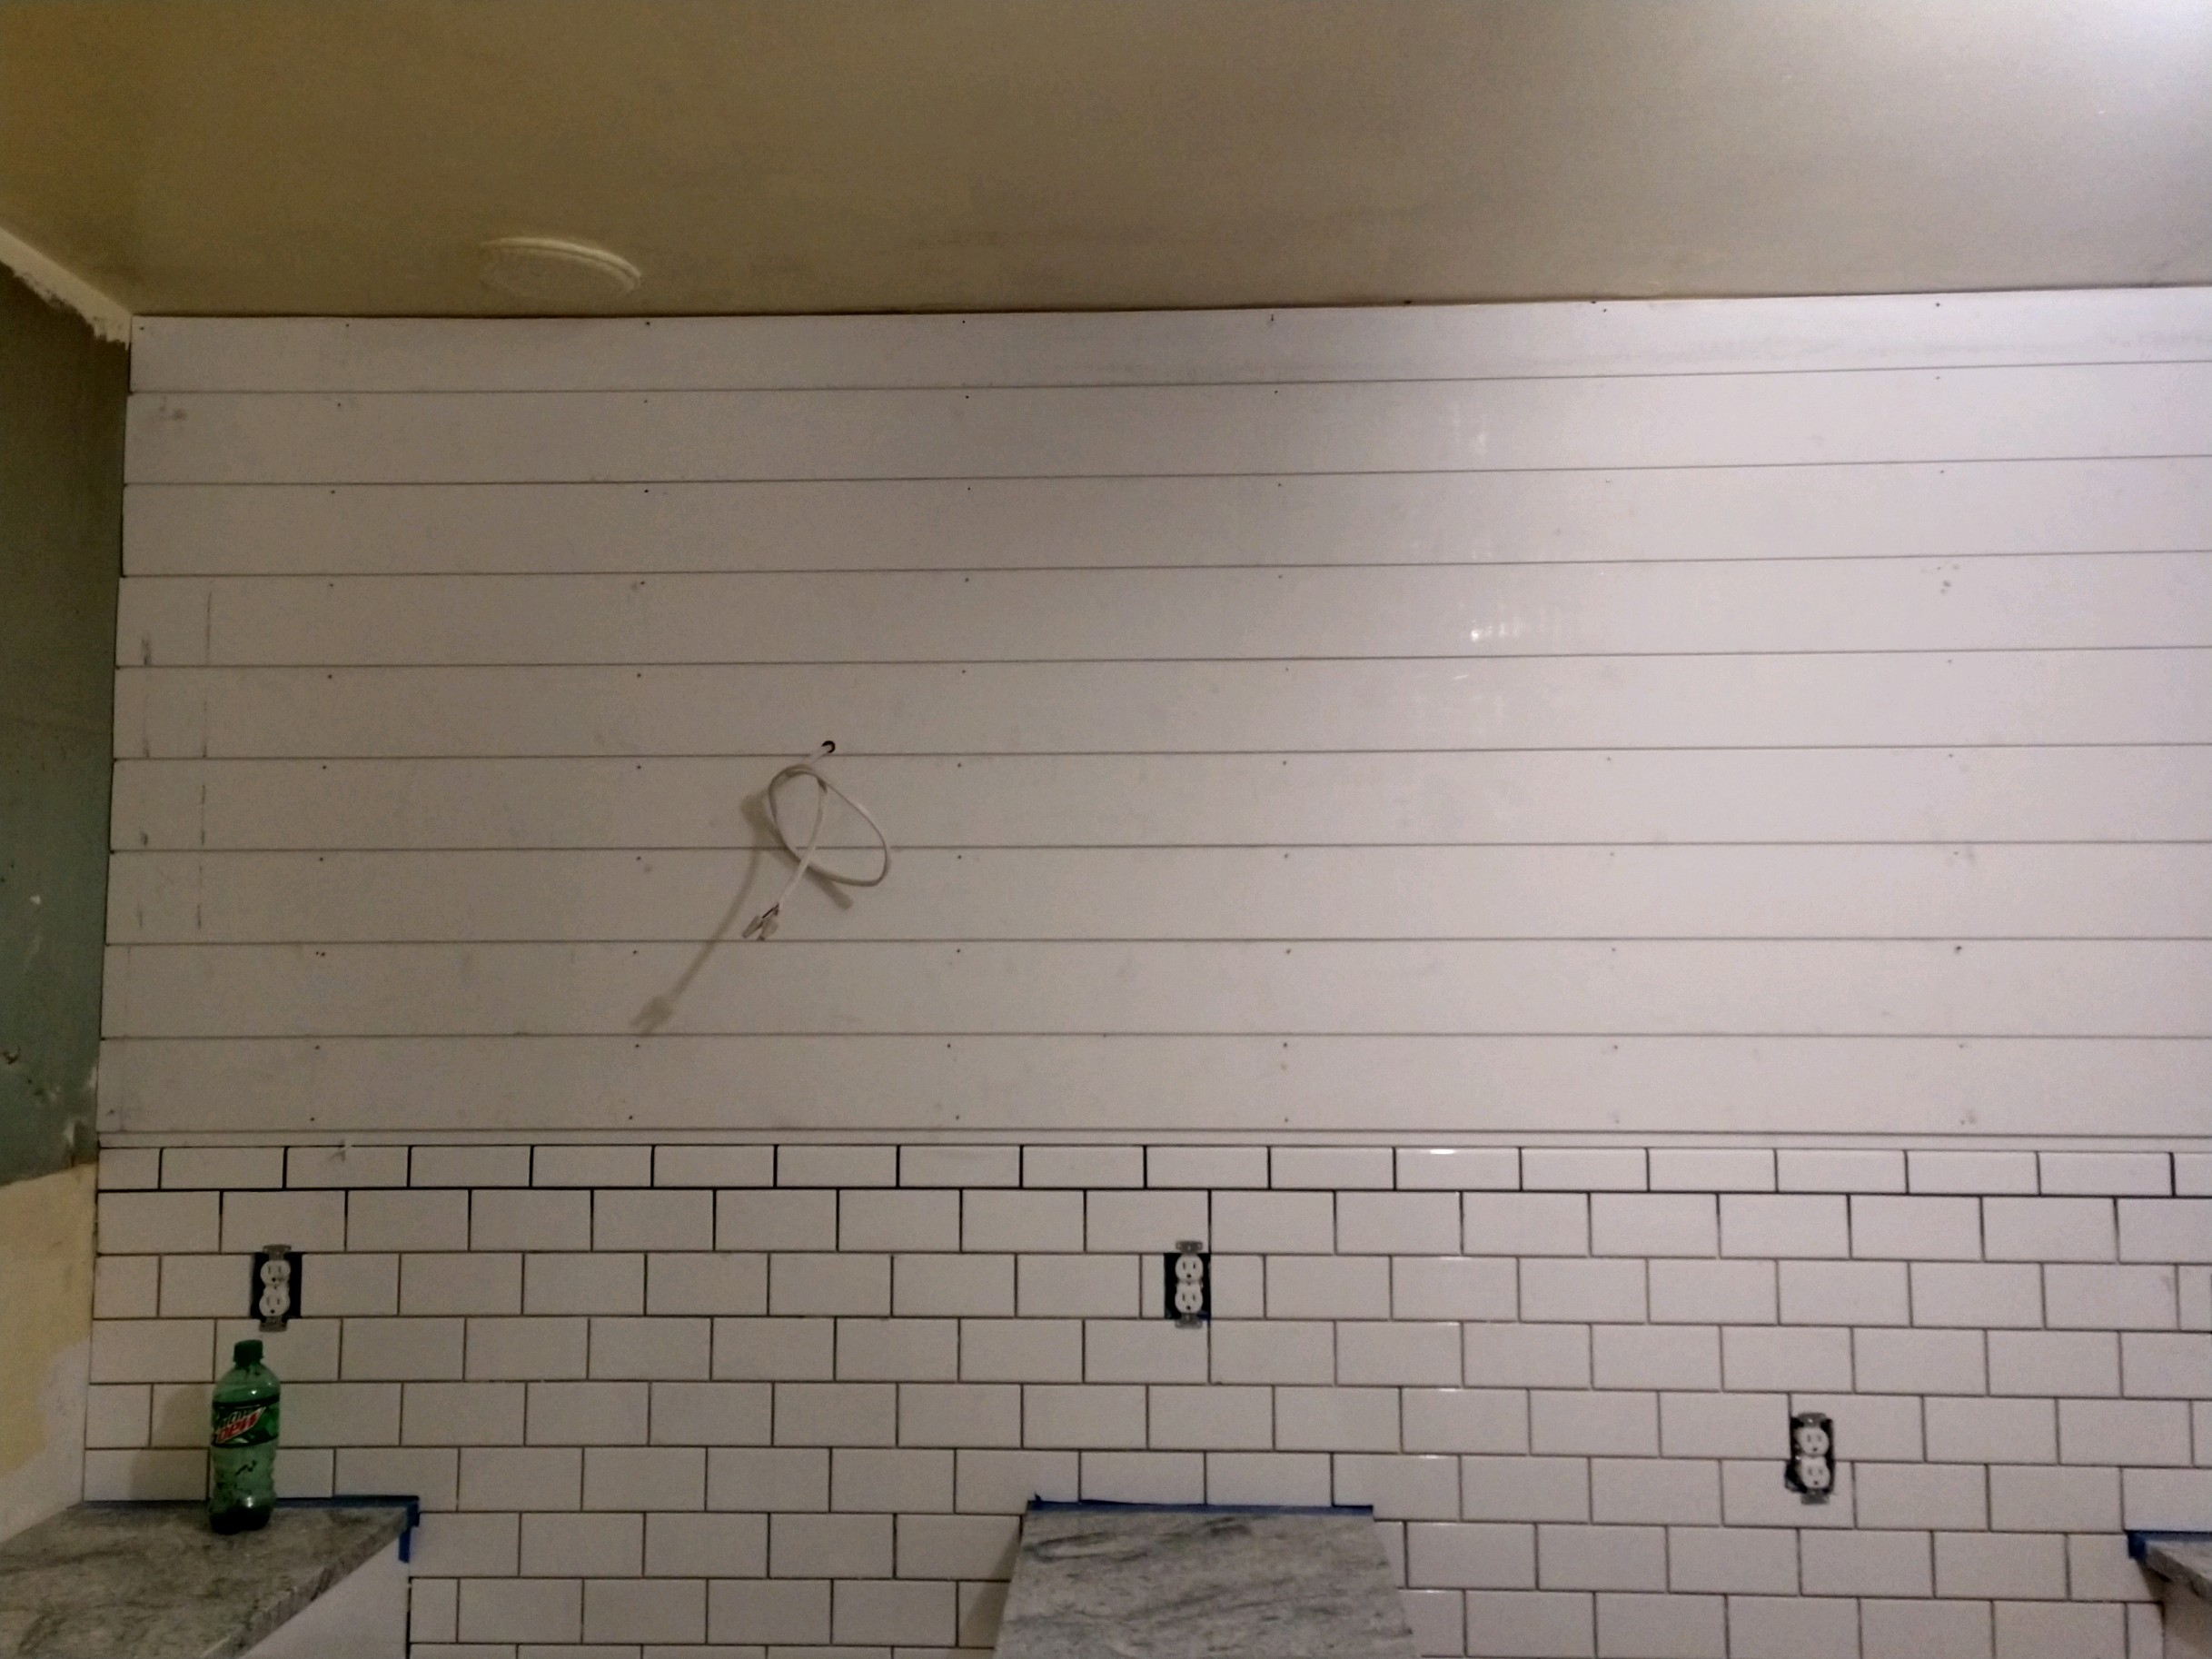
We debated doing a wall of subway tile as the backsplash, simply because we love the vintage look of that. However, we had already done so much tile in the bathroom, we felt that it might be time to add some visual and textural interest in the kitchen. Thus, we went with the shiplap and subway tile combination; we think that the end result was great. We chose Charcoal grout to really accentuate the subway tile and provide contrast to the shiplap. The shiplap was painted in Sherwin Williams Extra White and we used Primed Pine Nickel Gap Ship Lap Board from Home Depot. The subway tile we chose was also from Home Depot and it was by Daltile in Finesse Bright White.
The photo tour that follows does pretty much walk you through the process. If you have questions about anything specific, please ask!


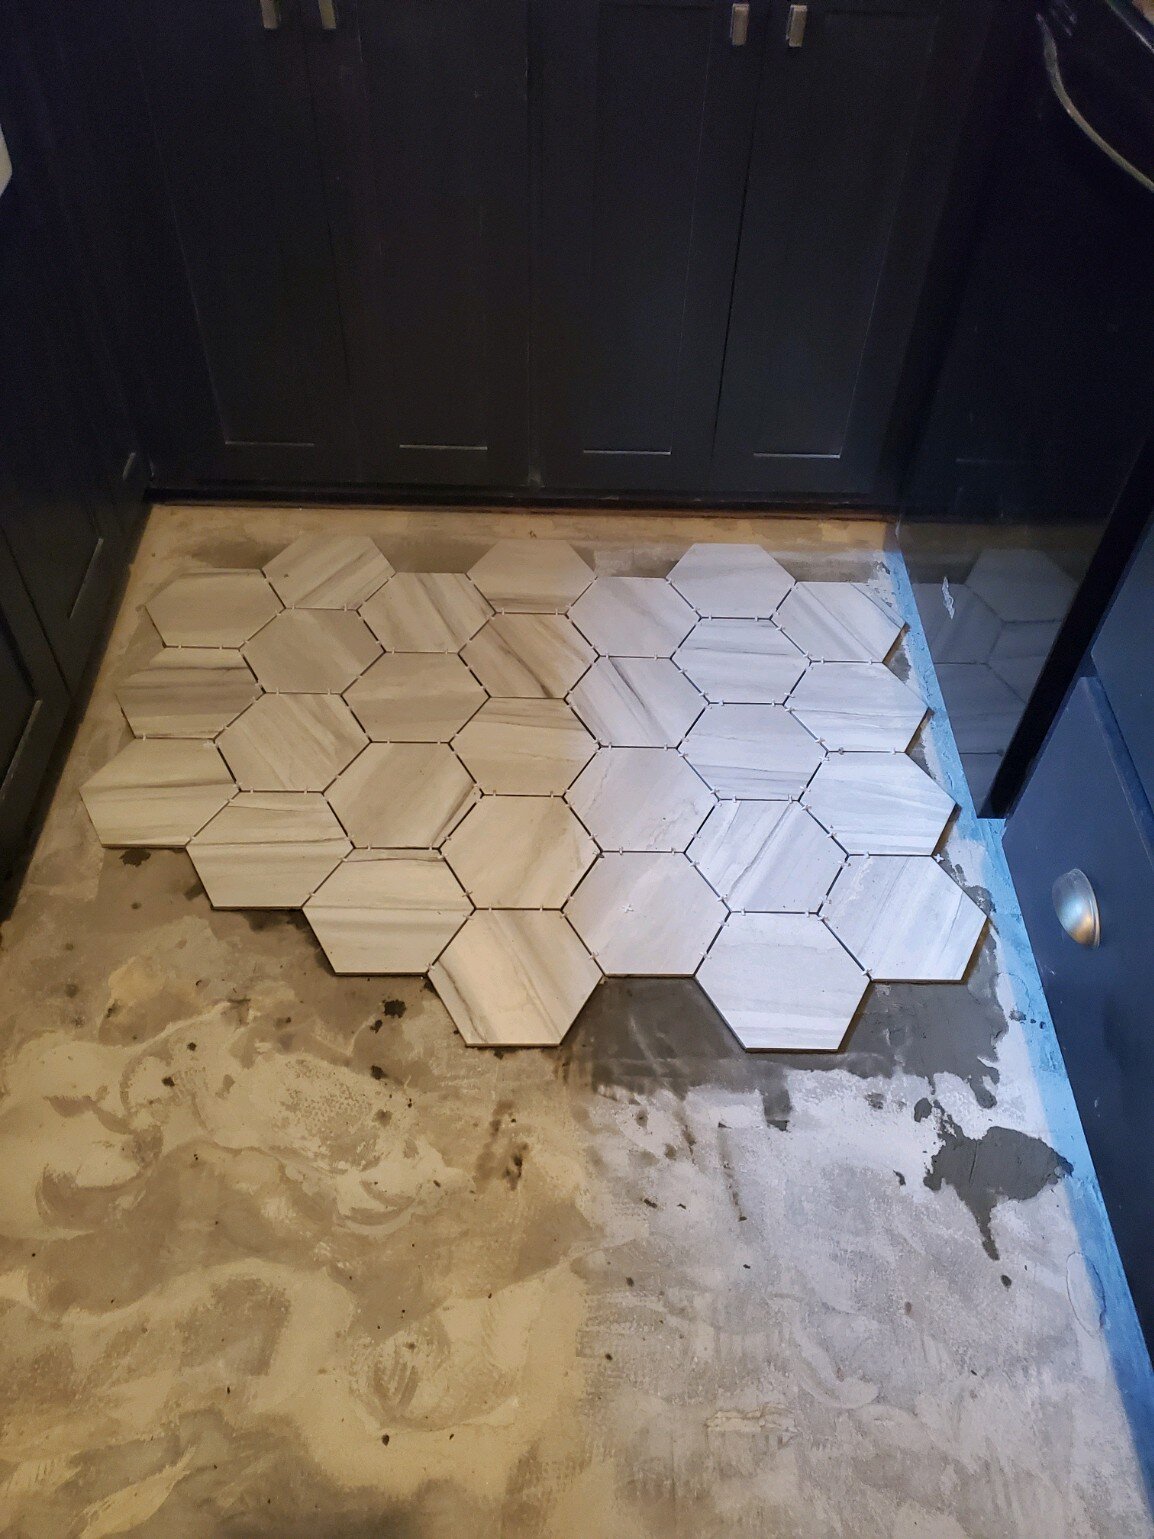
The new flooring has gone in and the sink and base cabinet were removed. That exposed a giant hole in the wall!

Once the backer board was removed from the other wall, we had a wall with scattered holes throughout! Surprise lol :(


An ancient fuse box was present and had to be shut off and removed.

Walls repaired and cabinets arrived!


Granite counters for beauty, texture, and durability.
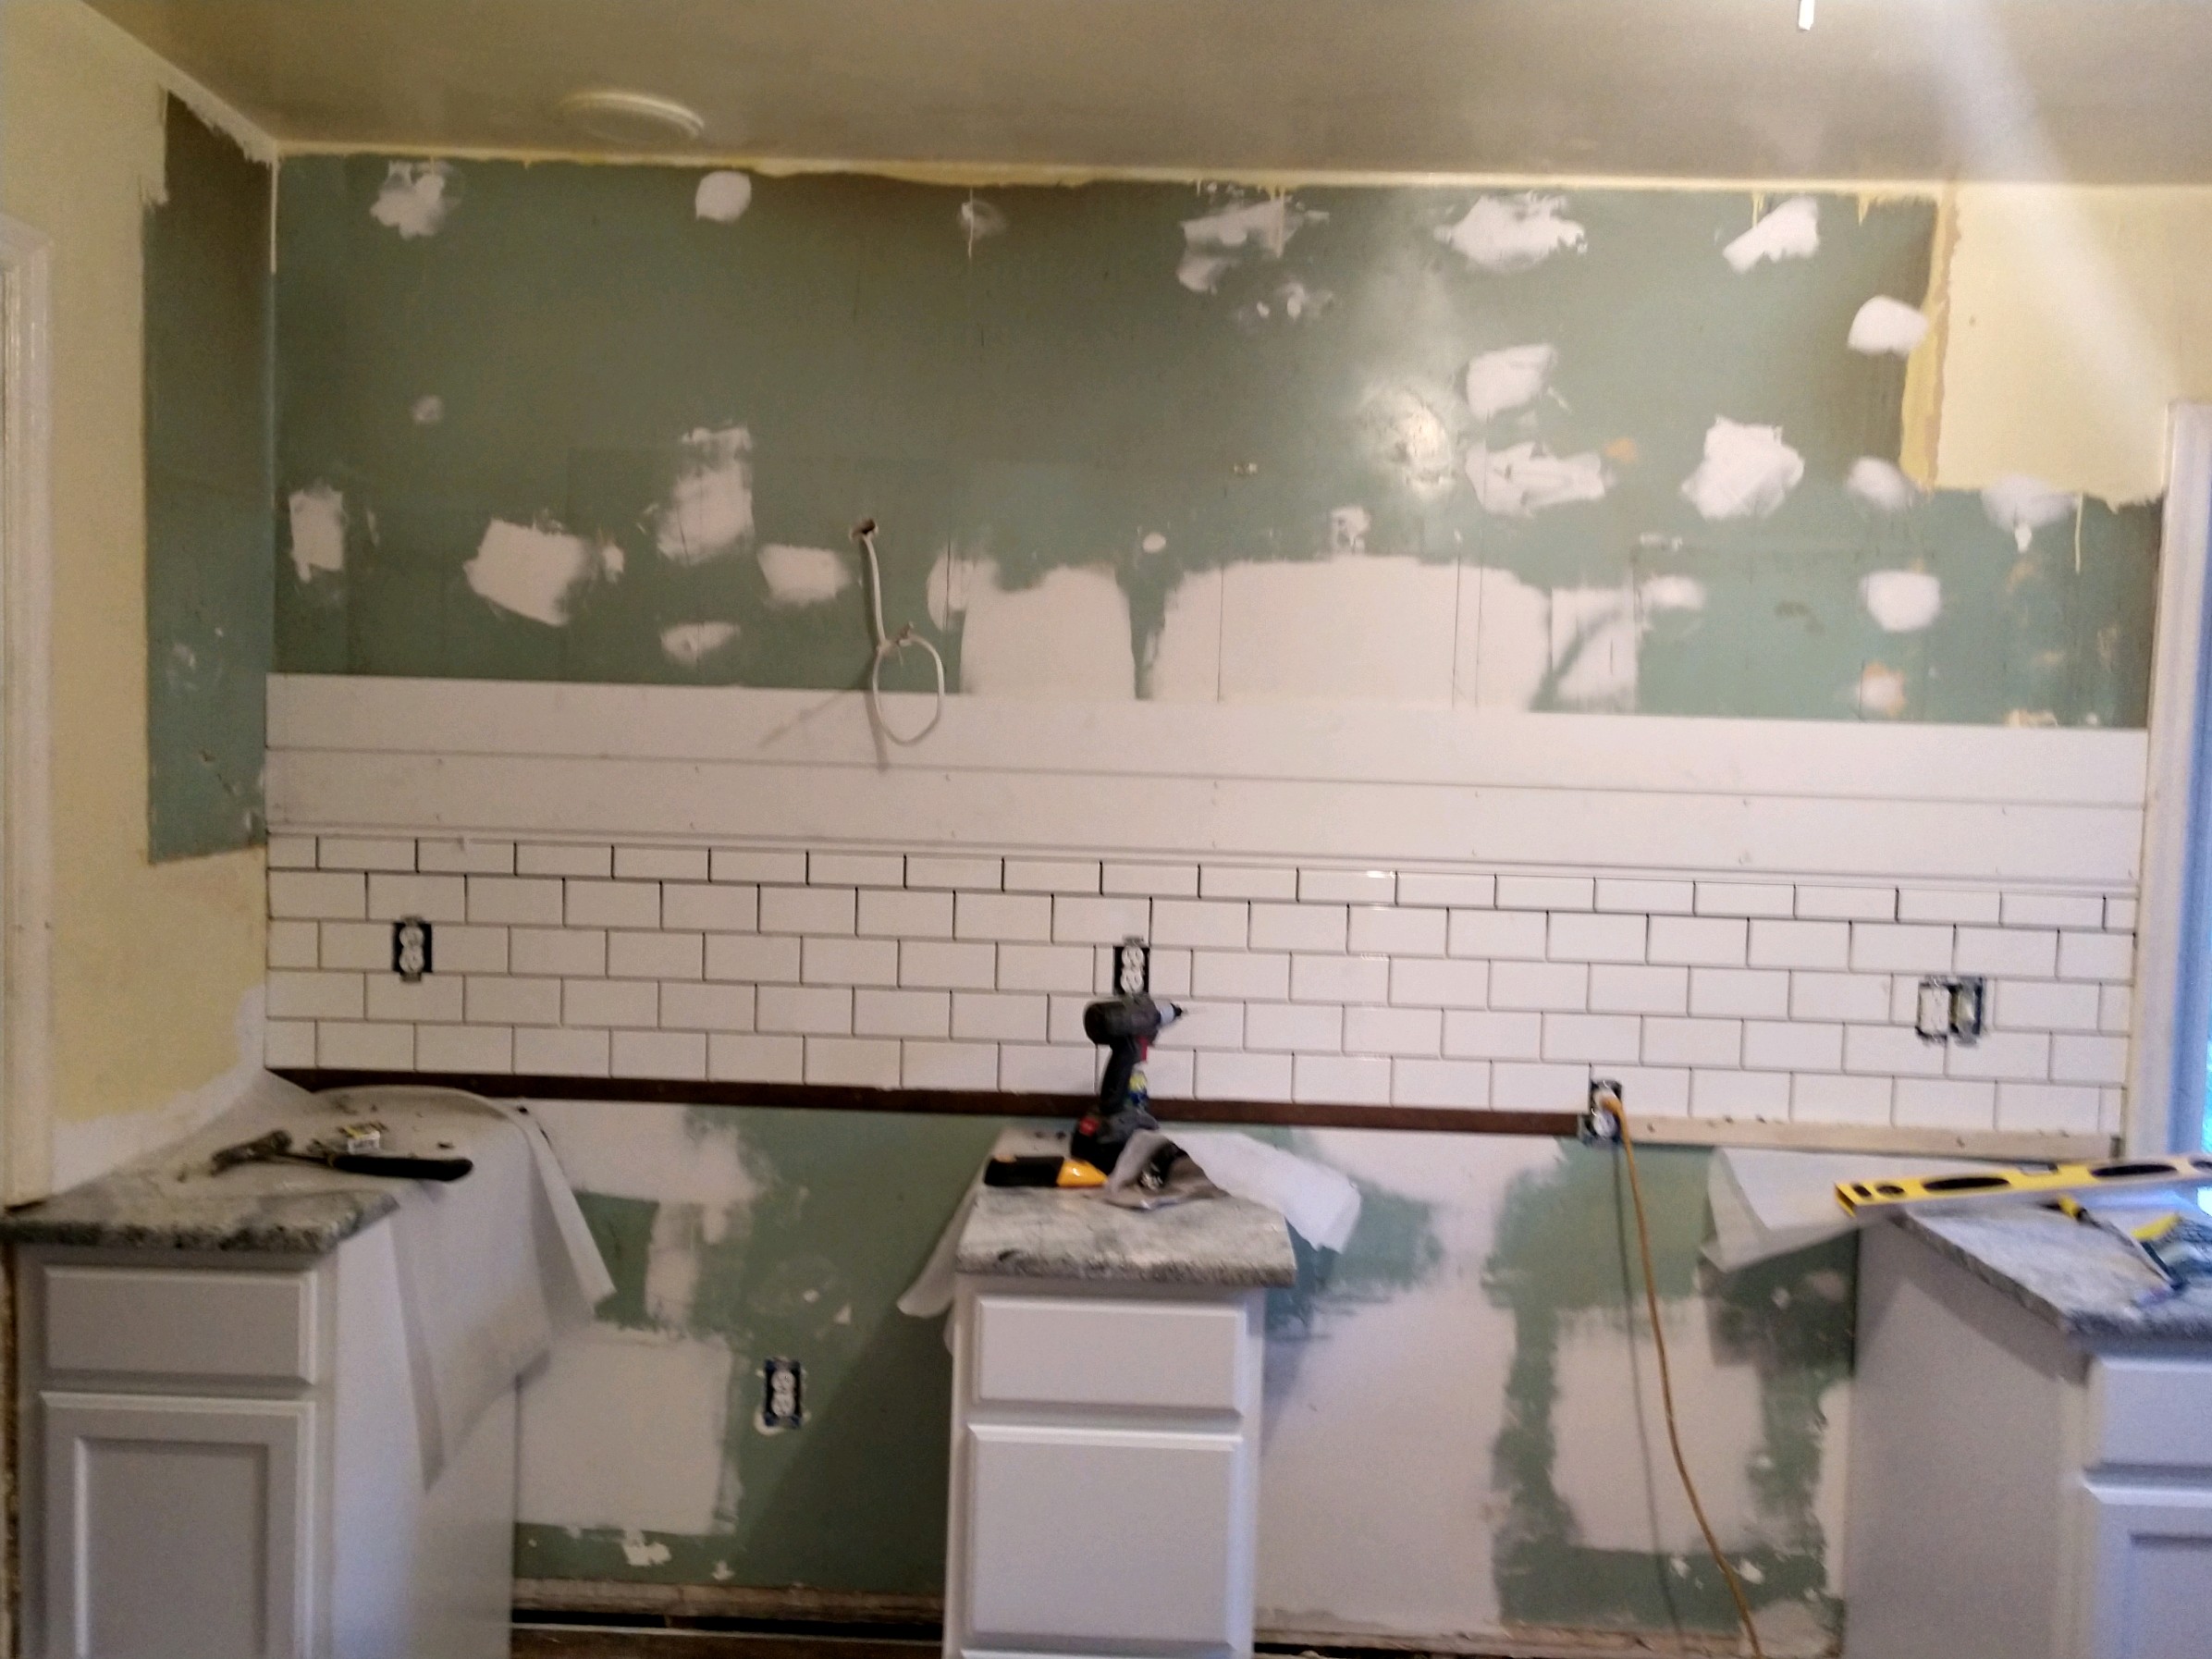

We ended up subway tiling to the floor simply because the finished product looks better and is more durable. This does cost more but the quality in the final product is worth the additional cost in our opinion.

To optimize space in a galley kitchen, we chose a counter depth refrigerator. Again, this typically does increase the cost of the appliance, but the end result is more floor space to work with and a more seamless presentation for the kitchen. In our opinion, money well spent.
The vent hood was a lovely addition to this kitchen. It brought it up a notch and also helped break up the shiplap wall behind it. Our electrician was pleased with the ease of install and it had a self venting option, meaning you did not have to vent it to the attic and out of the house. That is a win for time and money.
We chose the 30 in. Convertible Wall Mount Range Hood in Stainless Steel with Aluminum Mesh Filters LED lights, Push Button Control and the self venting filters: Range Hood Carbon/Charcoal Filters for Ductless/Ventless Recirculating Installation and Replacement

Another way we improved the functionality of the space is that we added overhang to the countertop granite. Giving the counter an extra 1.5” inch of space off the cabinet, gives just a bit more counter space in an already tight galley kitchen. Even better, it did not cost anything extra since you already buy the granite for the square footage of the project. It is a marginal change and doesn’t increase the cost.
This kitchen is small, and that allowed us additional savings on the granite. We were able to choose a remnant piece of stone since we did not have a great deal of counter space. This saved us on the cost per square foot. Finally, we also paid in cash, which gave us an additional discount. All we did was ask if they could discount it further for cash, and they were able to because it saved them the credit card processing fees. In a renovation, any little savings helps!
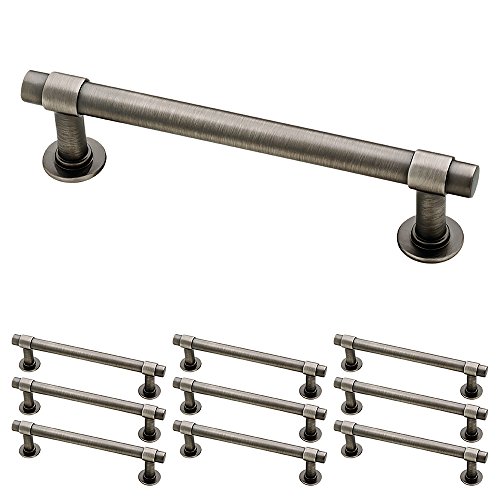
Speaking of savings, let’s talk hardware. We have found Amazon to be an excellent source for cabinet hardware. They offer great savings, even compared to Lowes or Home Depot. We chose Heirloom Silver Francisco Kitchen by Franklin Brass for hardware because we’d used it at the Pearl House and we loved the result.
You can find that here:

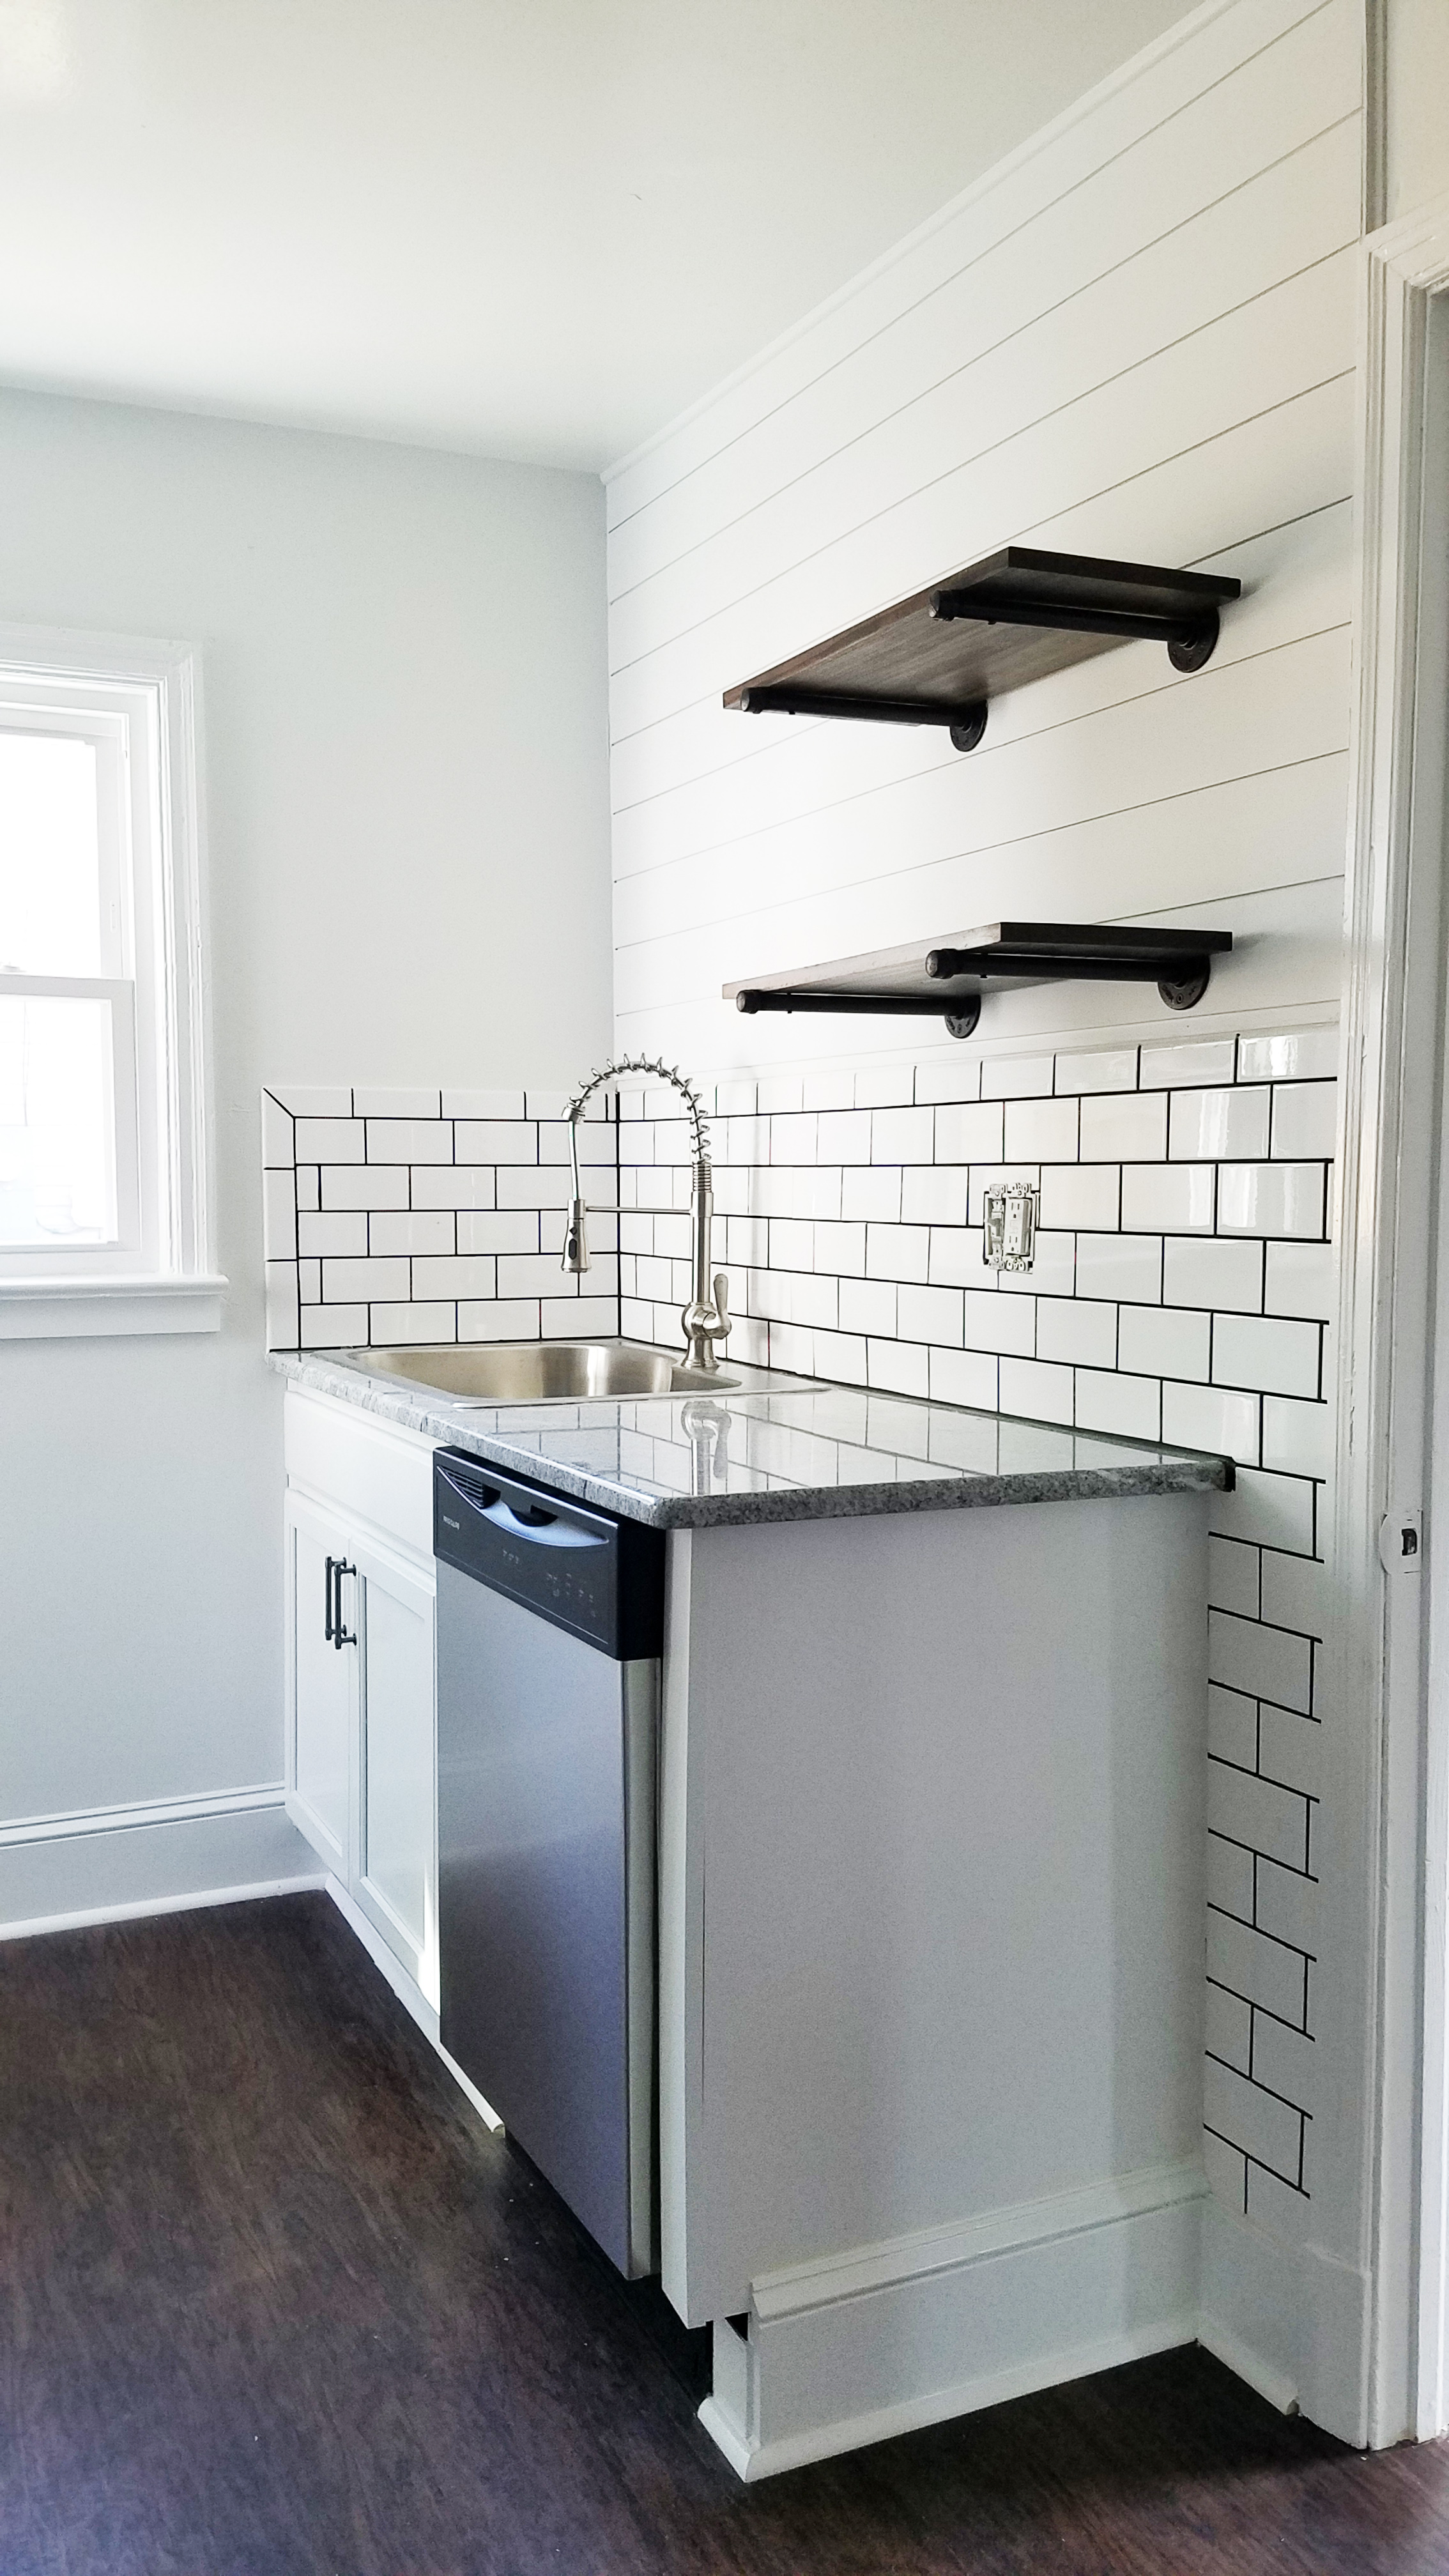
Like those open shelves? We did too. Another space saving idea in a galley kitchen is open shelving. When you block in every available surface with cabinets, the end result is very tight. Choosing open shelving does cause some level of sacrifice with space, but it is usually worth pairing down what we actually do use and need in a kitchen to have the space feel better. While you can fashion your own pipe brackets and have pieces cut at the store to save you some money over a premade it, the savings were very small and the additional time invested simply was not worth it. We recommend the kit as time is money! They even have different length pipe available.
You can find the shelf brackets here:


We used poplar wood to create the shelves and the brackets were another find on Amazon. They did not arrive with a protective coating and our contractor insisted we coat them to protect them from rust, as they were so close to the sink. We had liked the finish they arrived in, but we agreed long term wear was more important. He won that battle!

Another great area that Amazon can help is with fixture purchases. The faucet and sink were both Amazon purchases. It is a little risky to buy something without personally seeing it, but sometimes the payoff is worth it. The first faucet we bought, however, did not work and had to be returned. That was not a fun delay and our plumber was less than thrilled after installing a dud. The next one ended up being even better and the sink was amazing!
You can find the faucet here:
You can also find the sink here:

We chose simple lighting for the kitchen as there was a lot going on in a small space. This caged flush mount was a great little piece and is available at Lowes. You can find it here: allen + roth 8.4-in W Antique Nickel Metal Semi-Flush Mount Light
All in all, we think the kitchen turned out great! We love the functionality of it and the fact that we were able to optimize the space for a galley kitchen. We’d love to hear your thoughts. What did we get right? What should we have done instead?
Thanks for looking! More renovations to come!
Casey

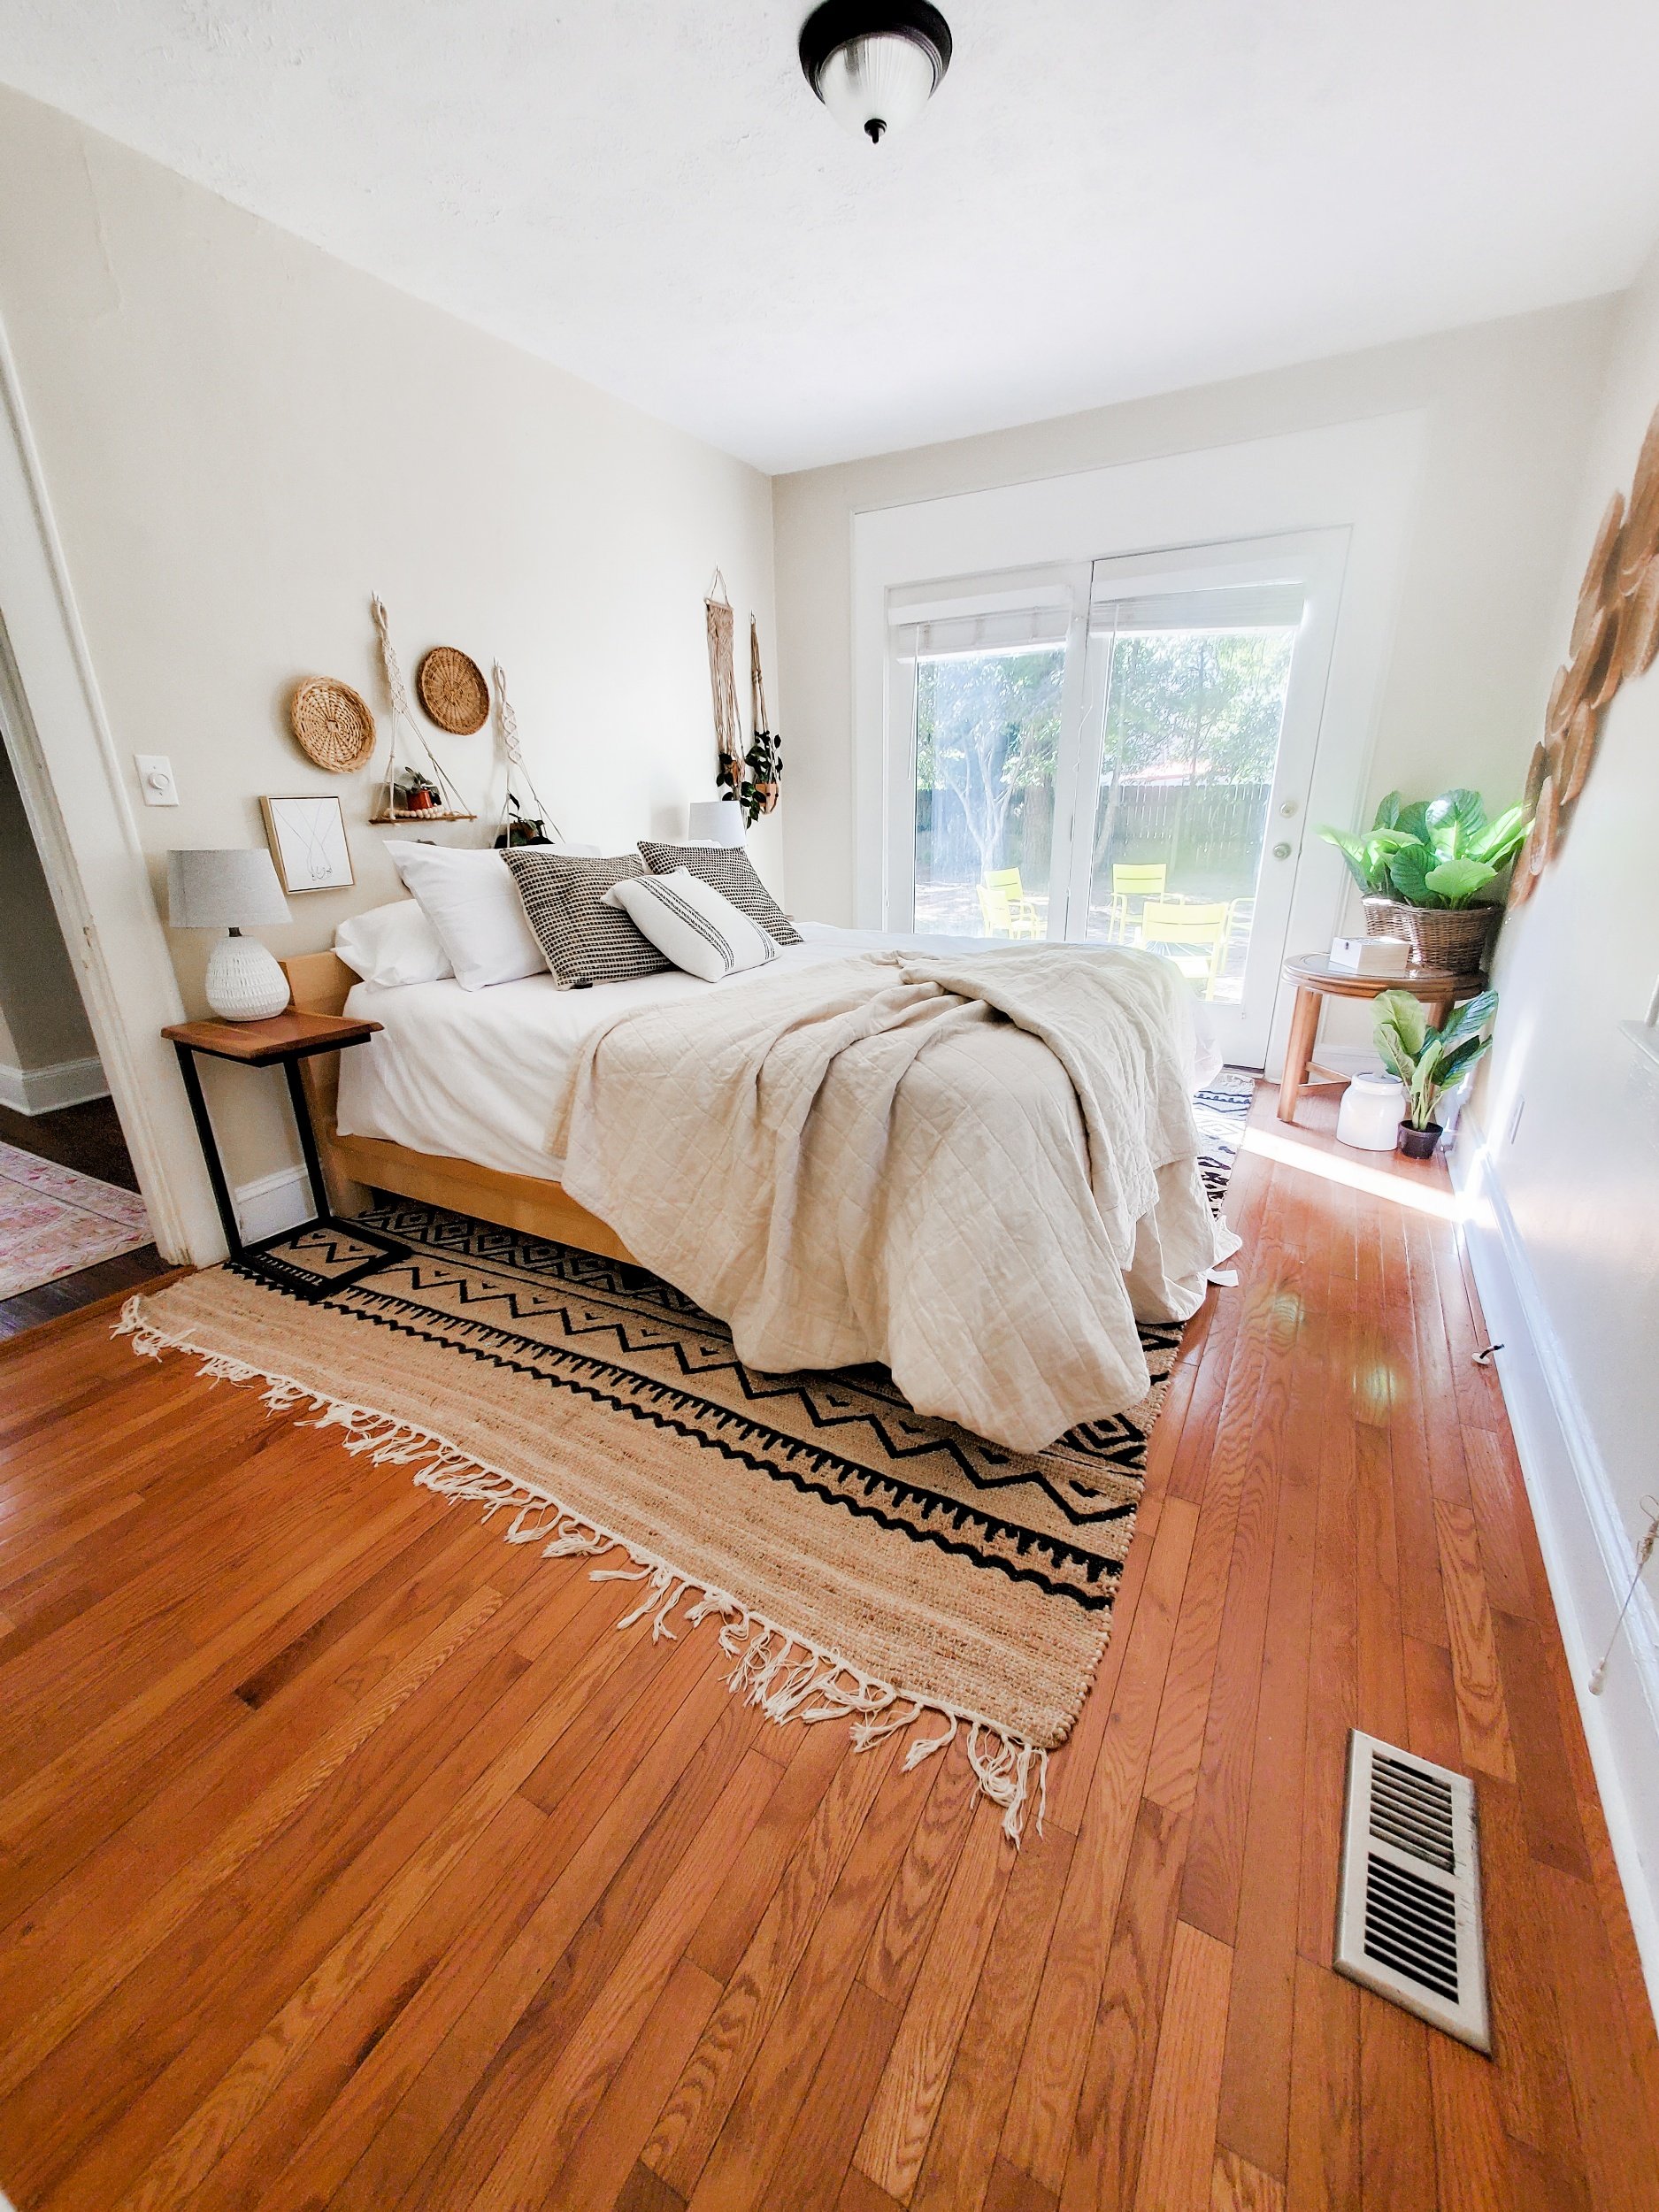
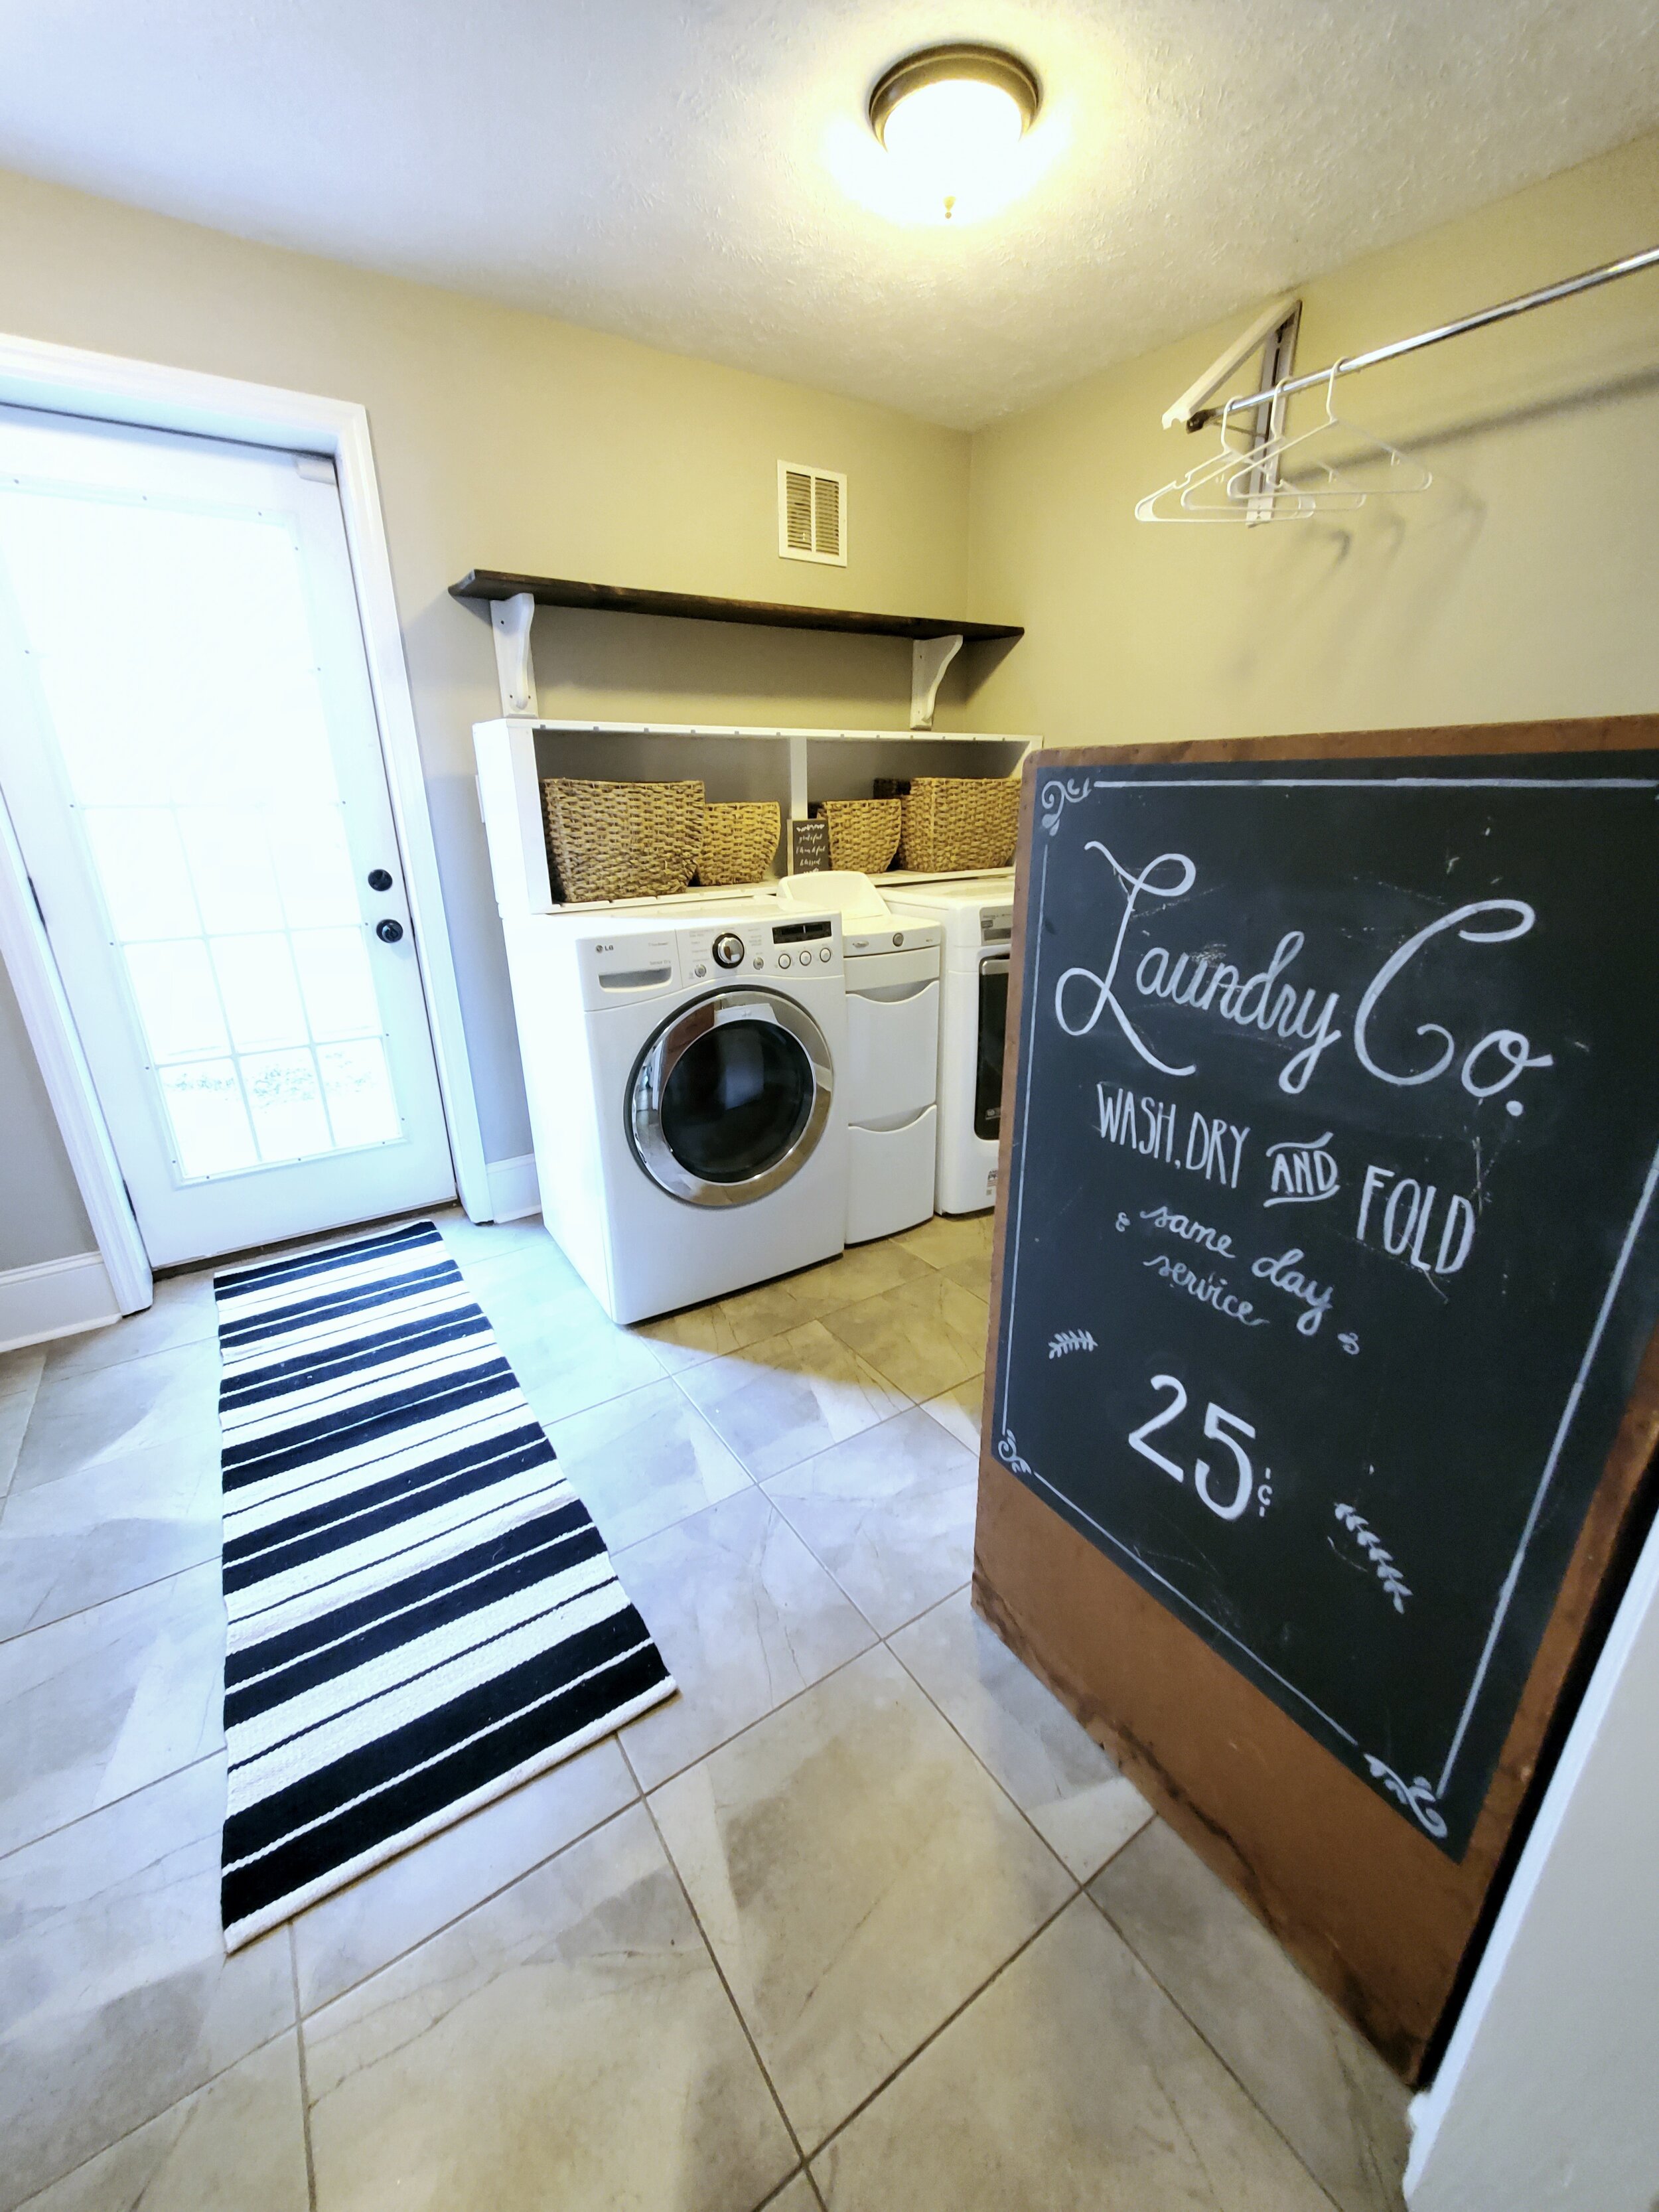
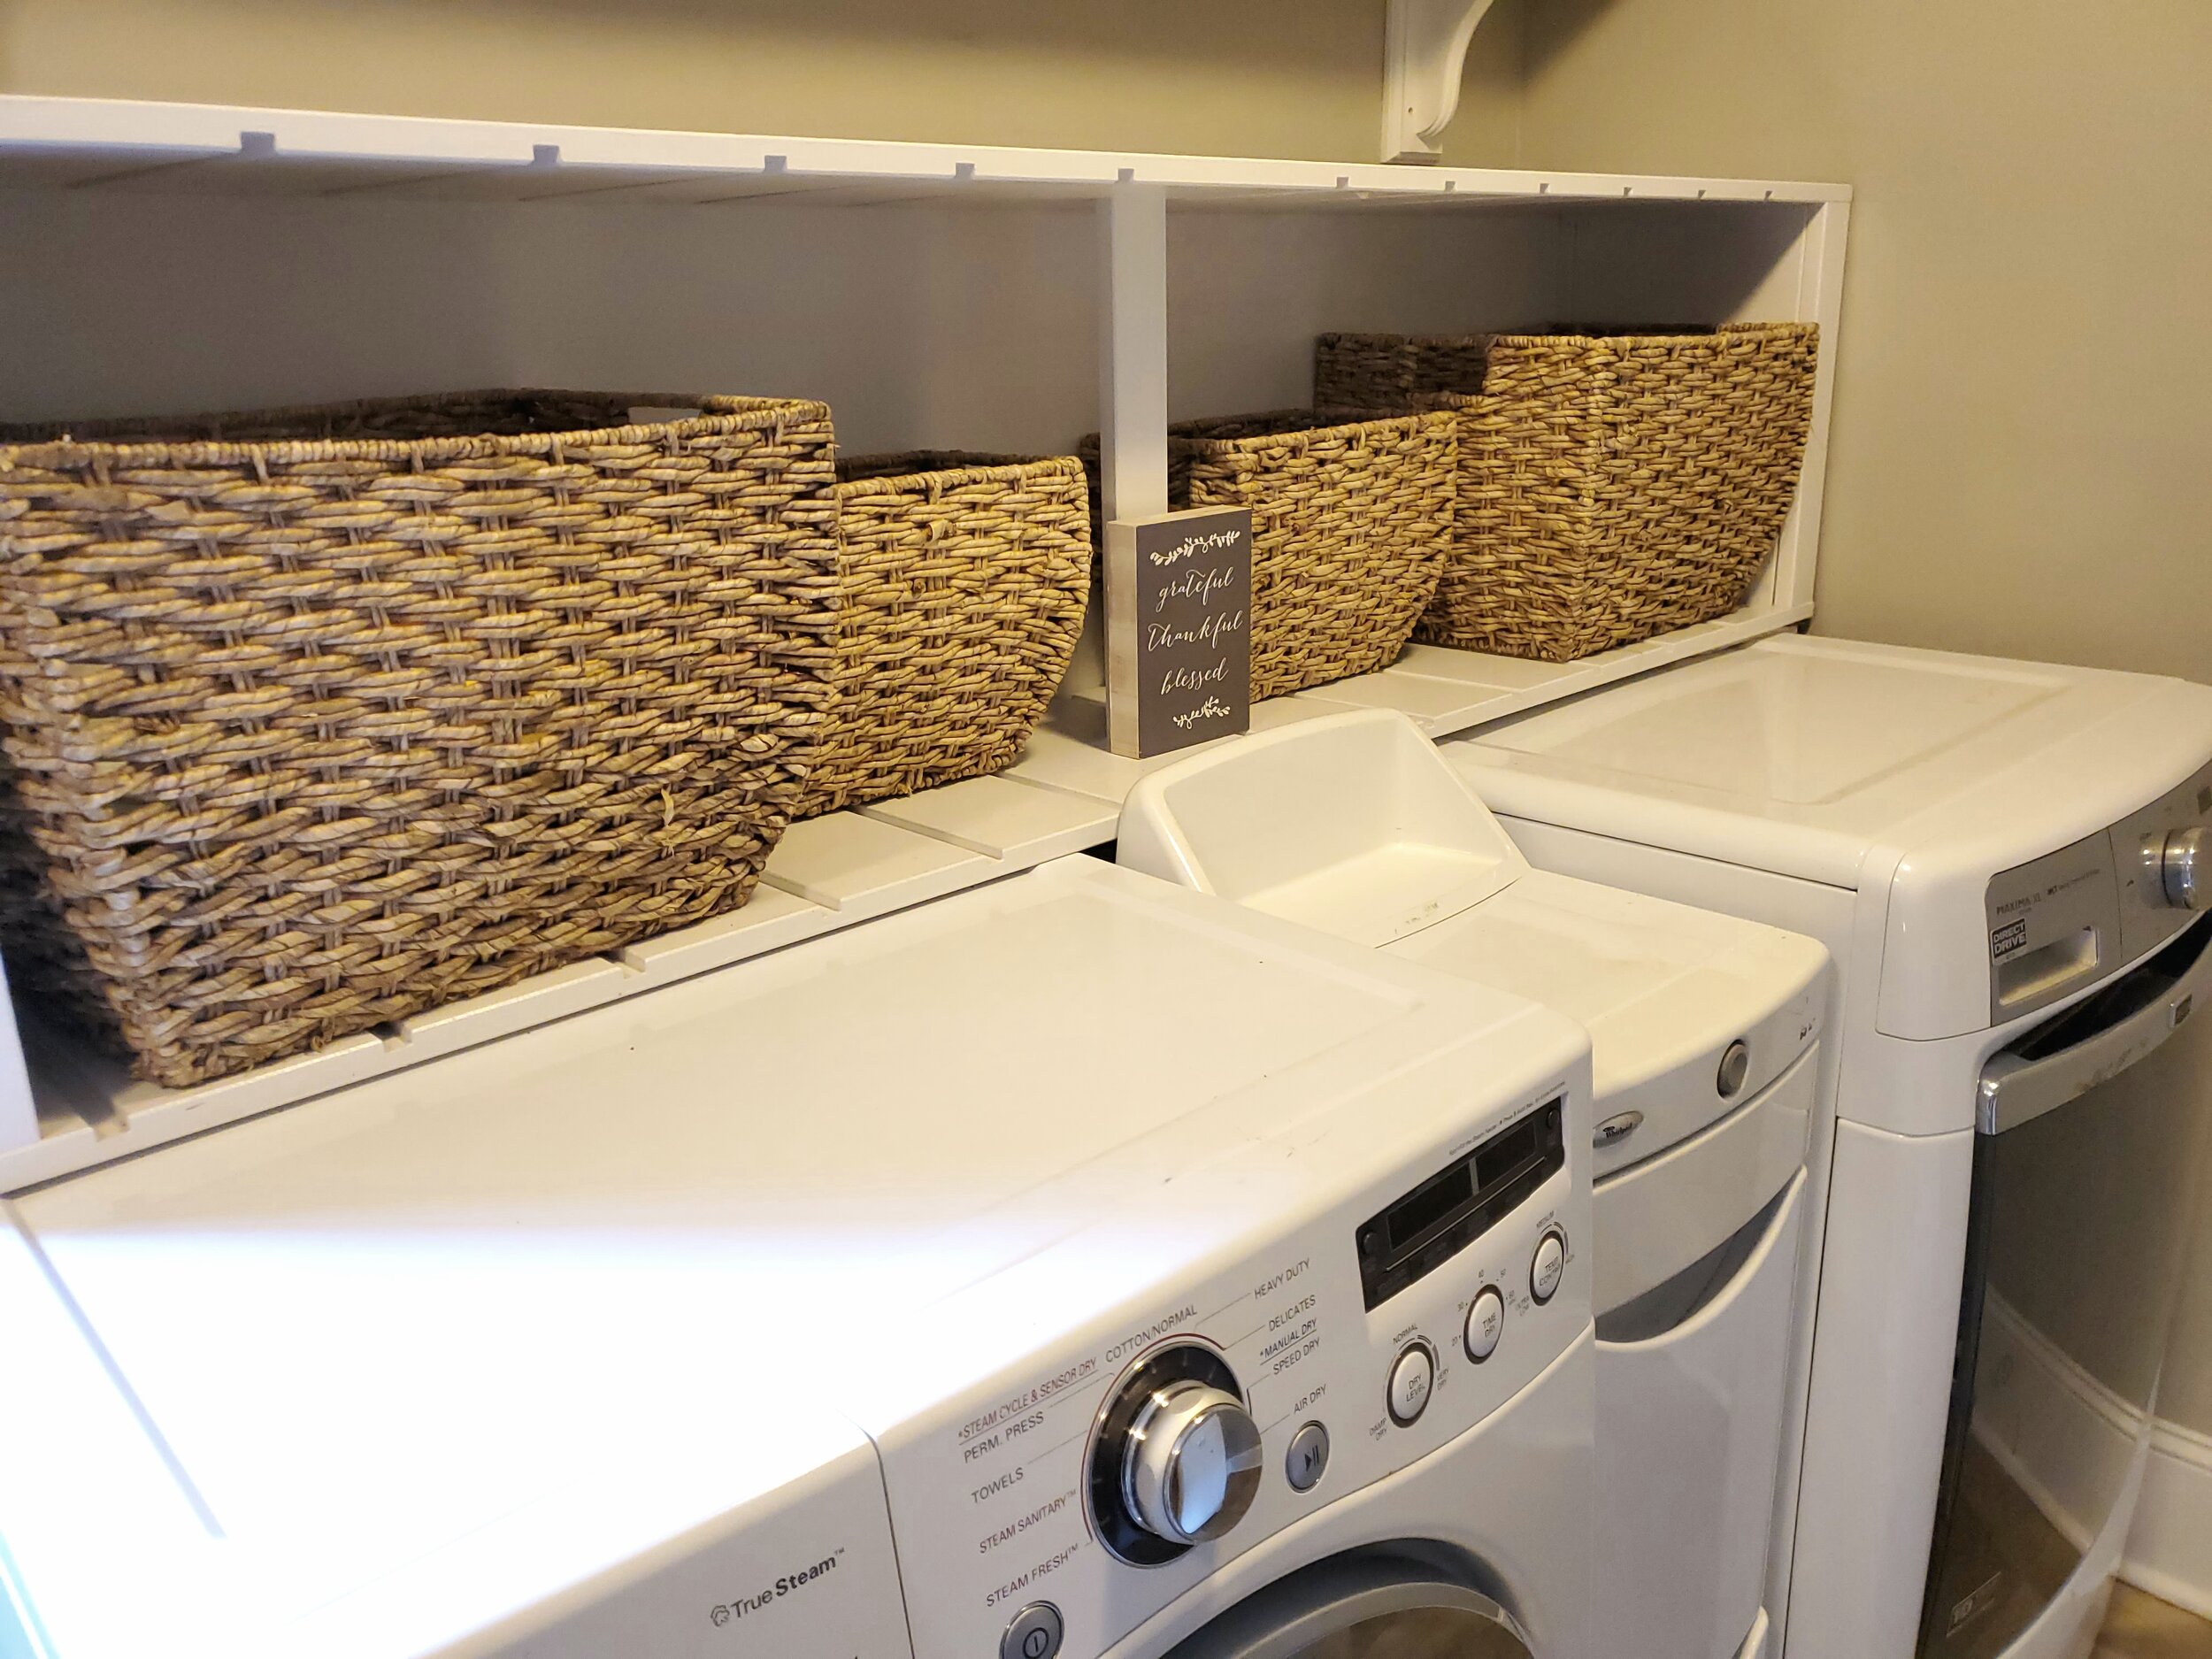
GLENVILLE RENOVATIONS - LIVING ROOM AND LAUNDRY
Before and after photos of the living room and laundry room

So with the approaching hurricane, I am looking for a distraction. I figured I would start highlighting some of the renovation before and after photos from our Glenville Ave Project. I never did complete that with Hull Rd (our last project), and I had regretted it. I did not want to make that mistake again!
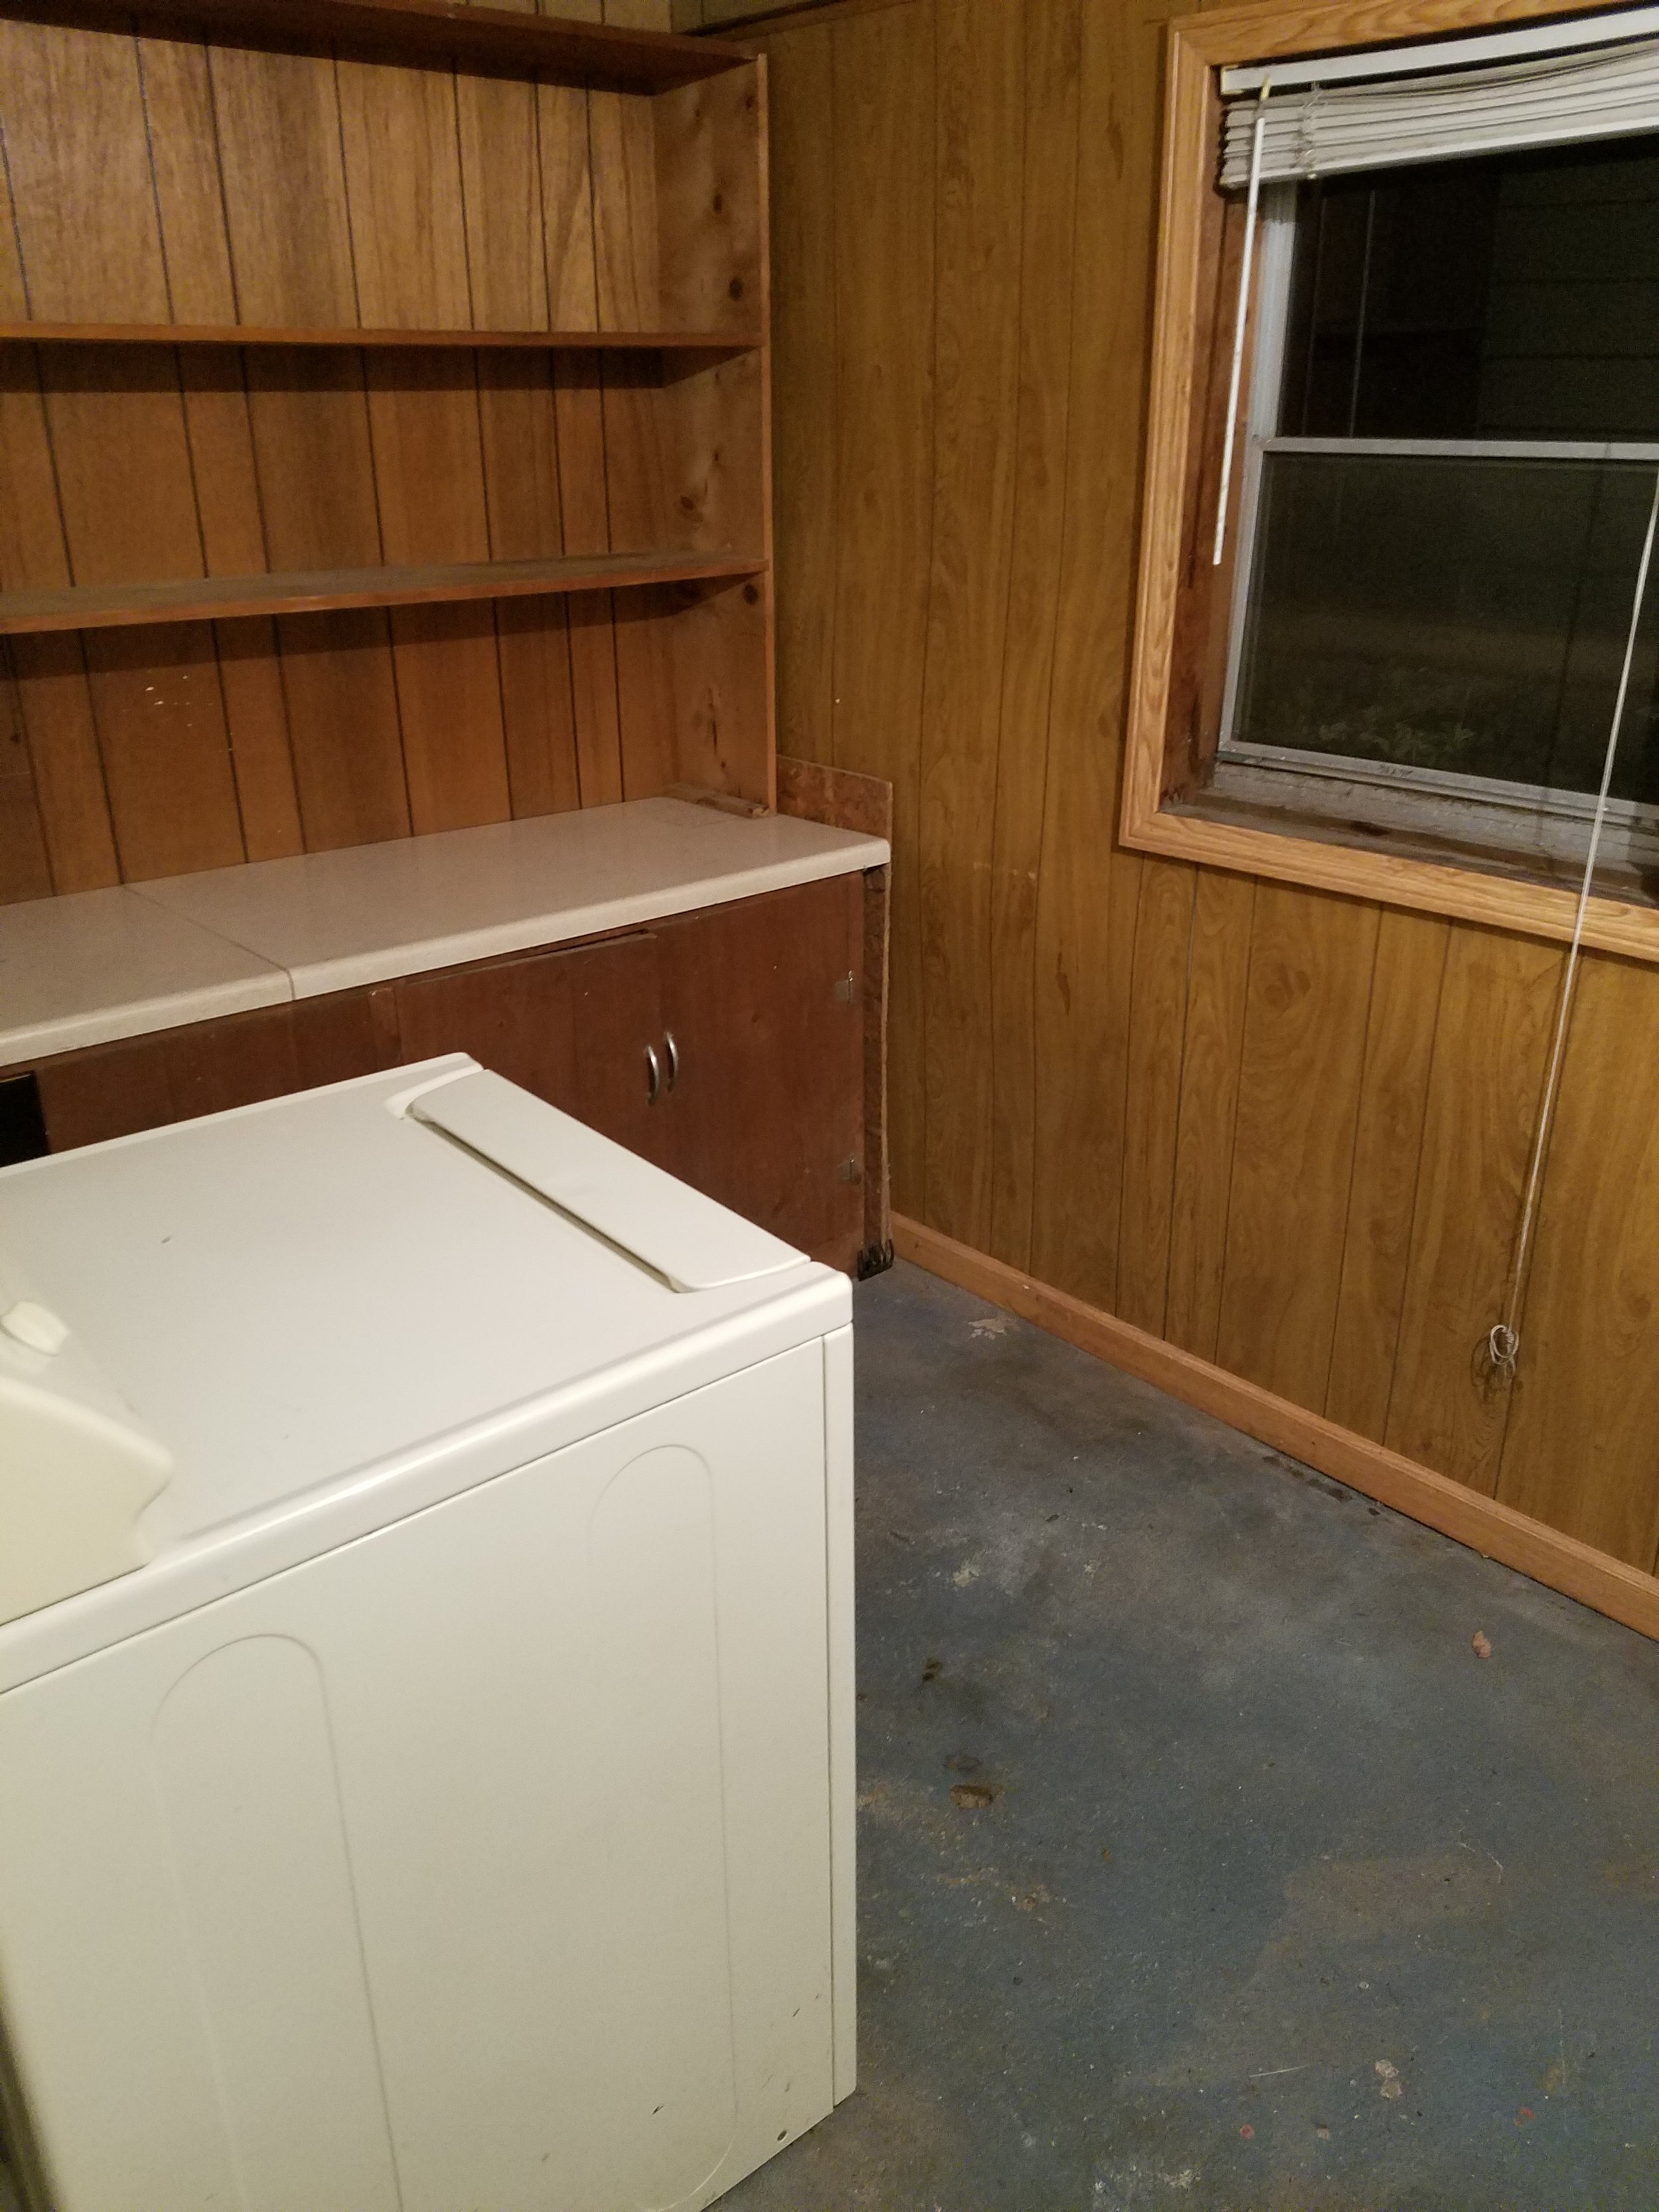
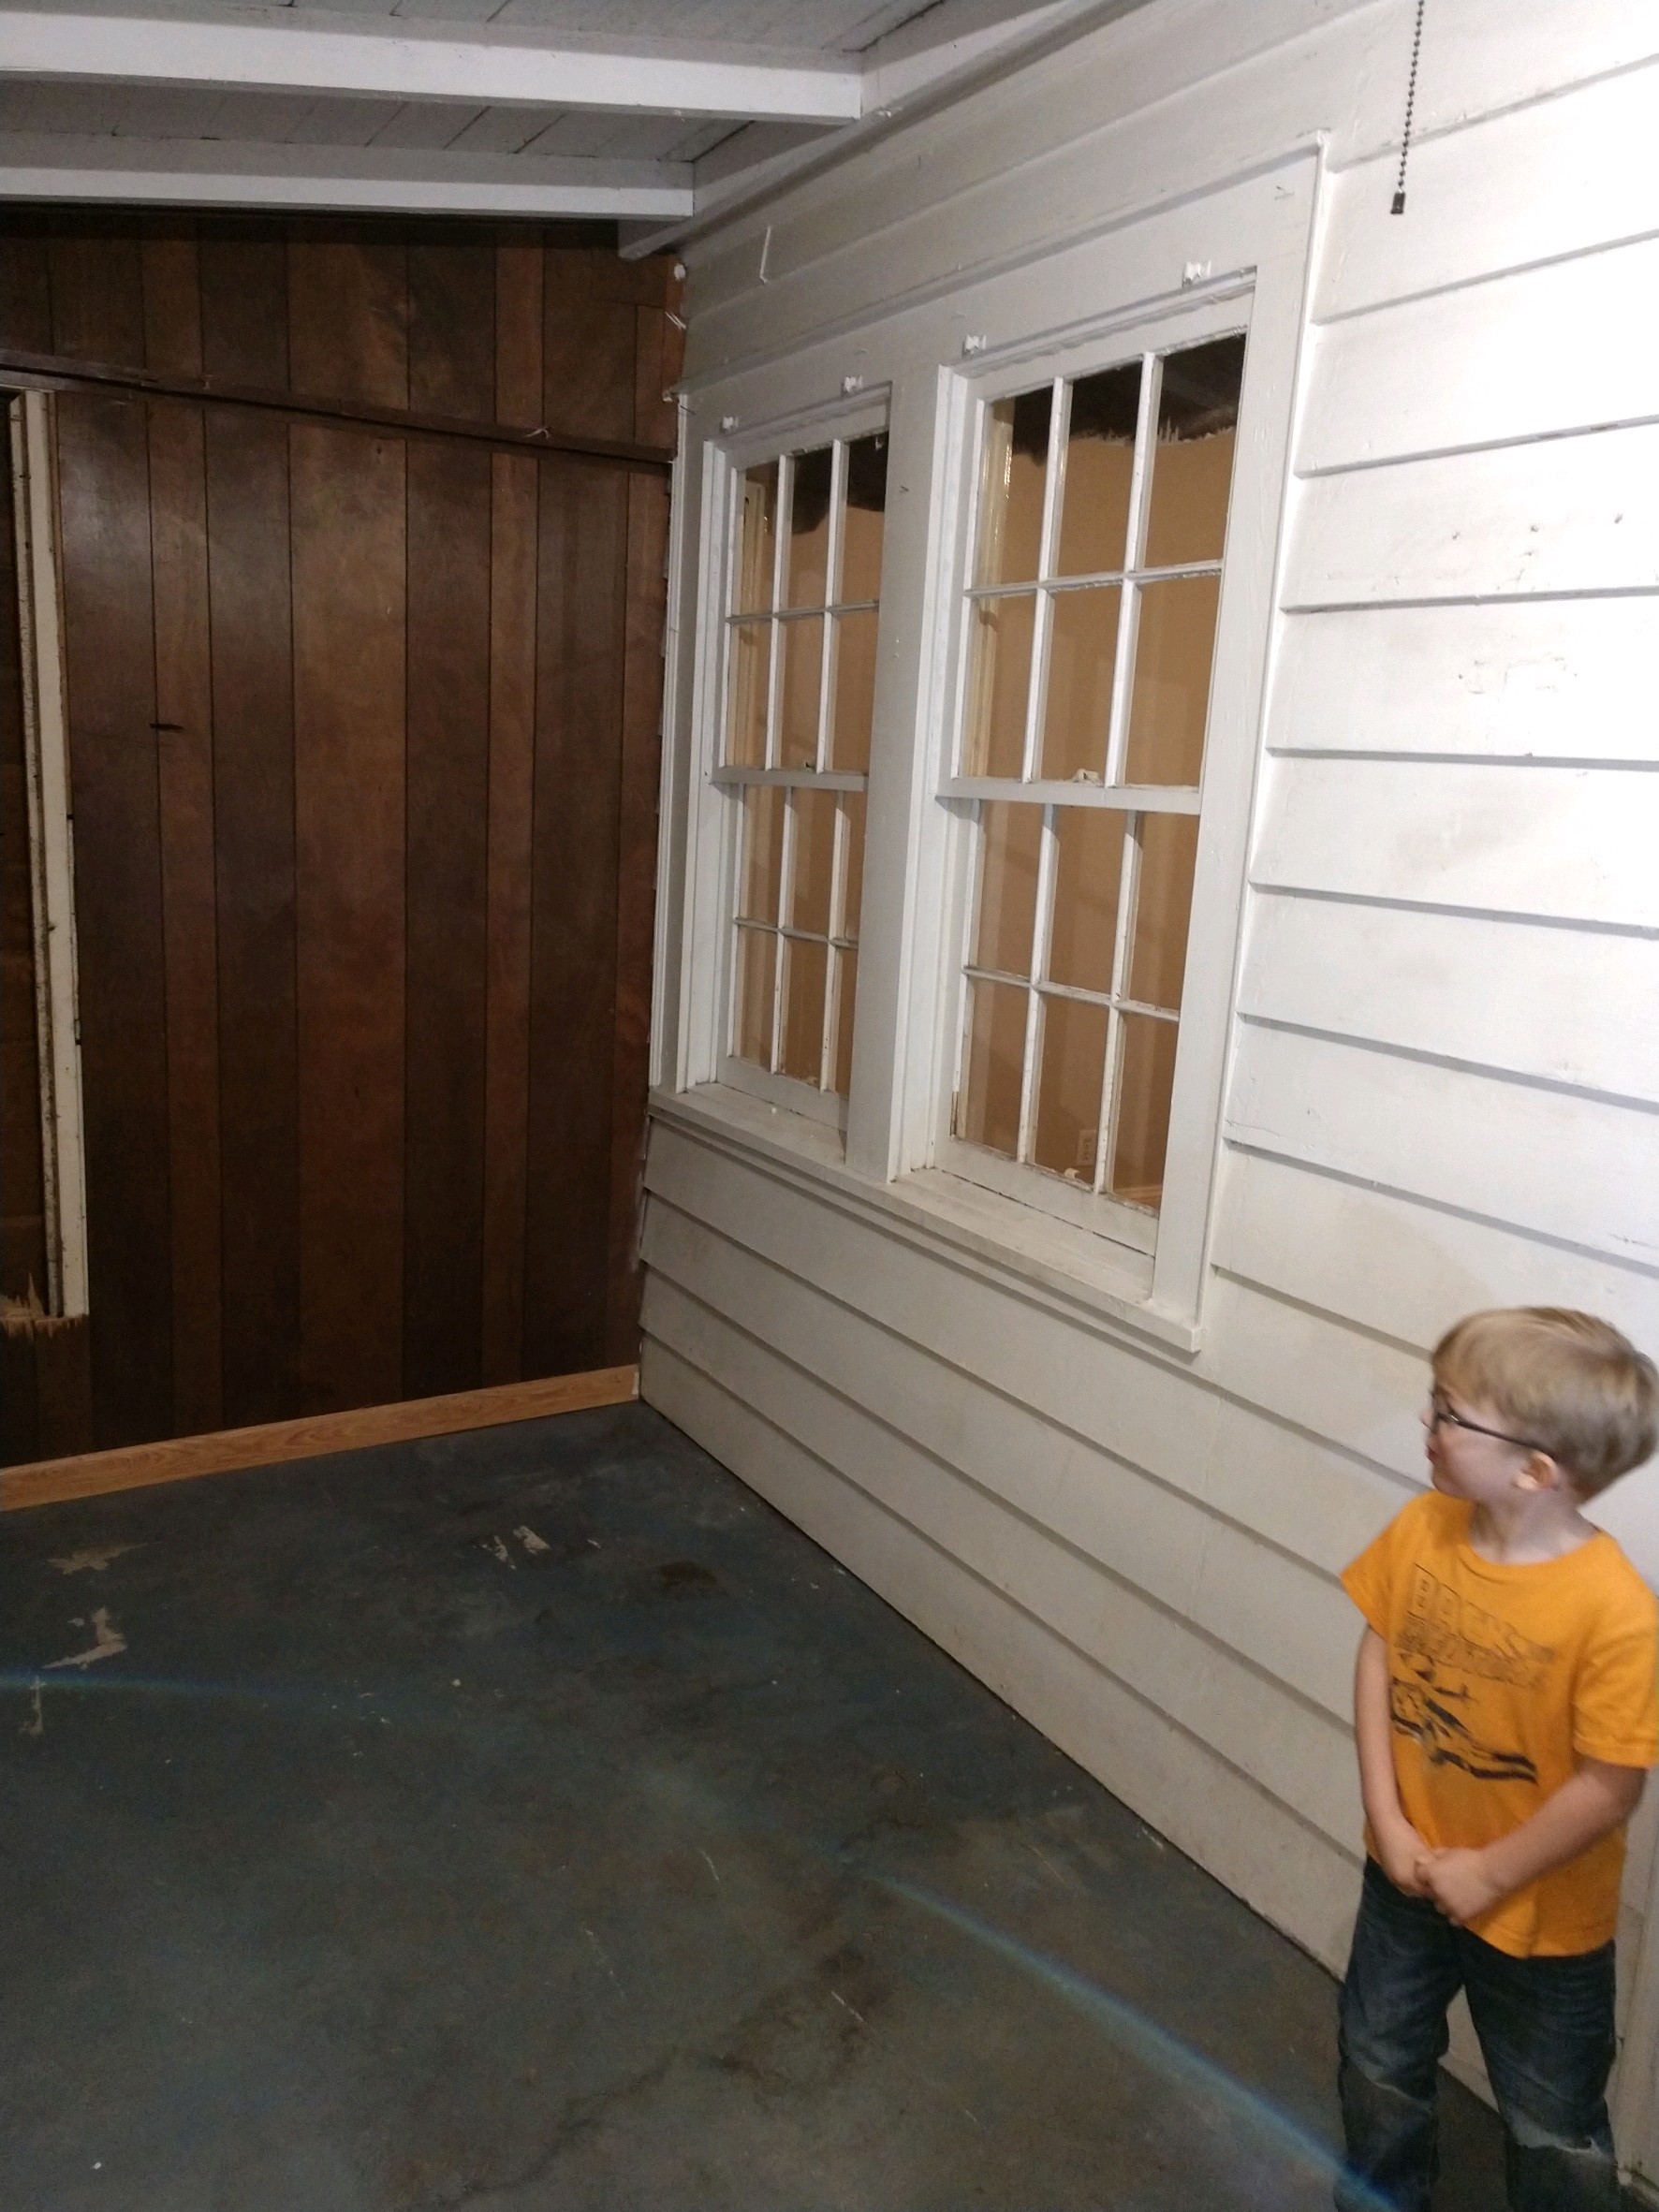
We had a lot to work on with Glenville. The house was built in 1941 and had gone through minimal updates. We began with the living room and laundry. There was a lot to do including:
Trim and Wall Repair
Floor Refinshing
Bookcase repair
Door Fixing
Removal of debris
Fireplace insert removal
Relocation of the Water Heater (it was in the kitchen - we moved it to open up space in the kitchen for cabinets; this is typical of the 1940’s homes)
Replaced all windows
Replaced sheet vinyl flooring in the laundry room with luxury vinyl tile
Ceiling repair and paint
Paint, paint, and paint!
The final product was clean and simple. We used Sherwin Williams Agreeable Gray in eggshell which is one of my favorite greiges/grays . it has enough warmth in it to be cozy, but not so much that it turns something beige. The trim is nearly Sherwin Williams Extra White in a semi-gloss. The laundry room flooring is by Shaw Matrix in Franklin Hickory.
I will talk about the floor staining in another post, so for now, enjoy the befores and afters!
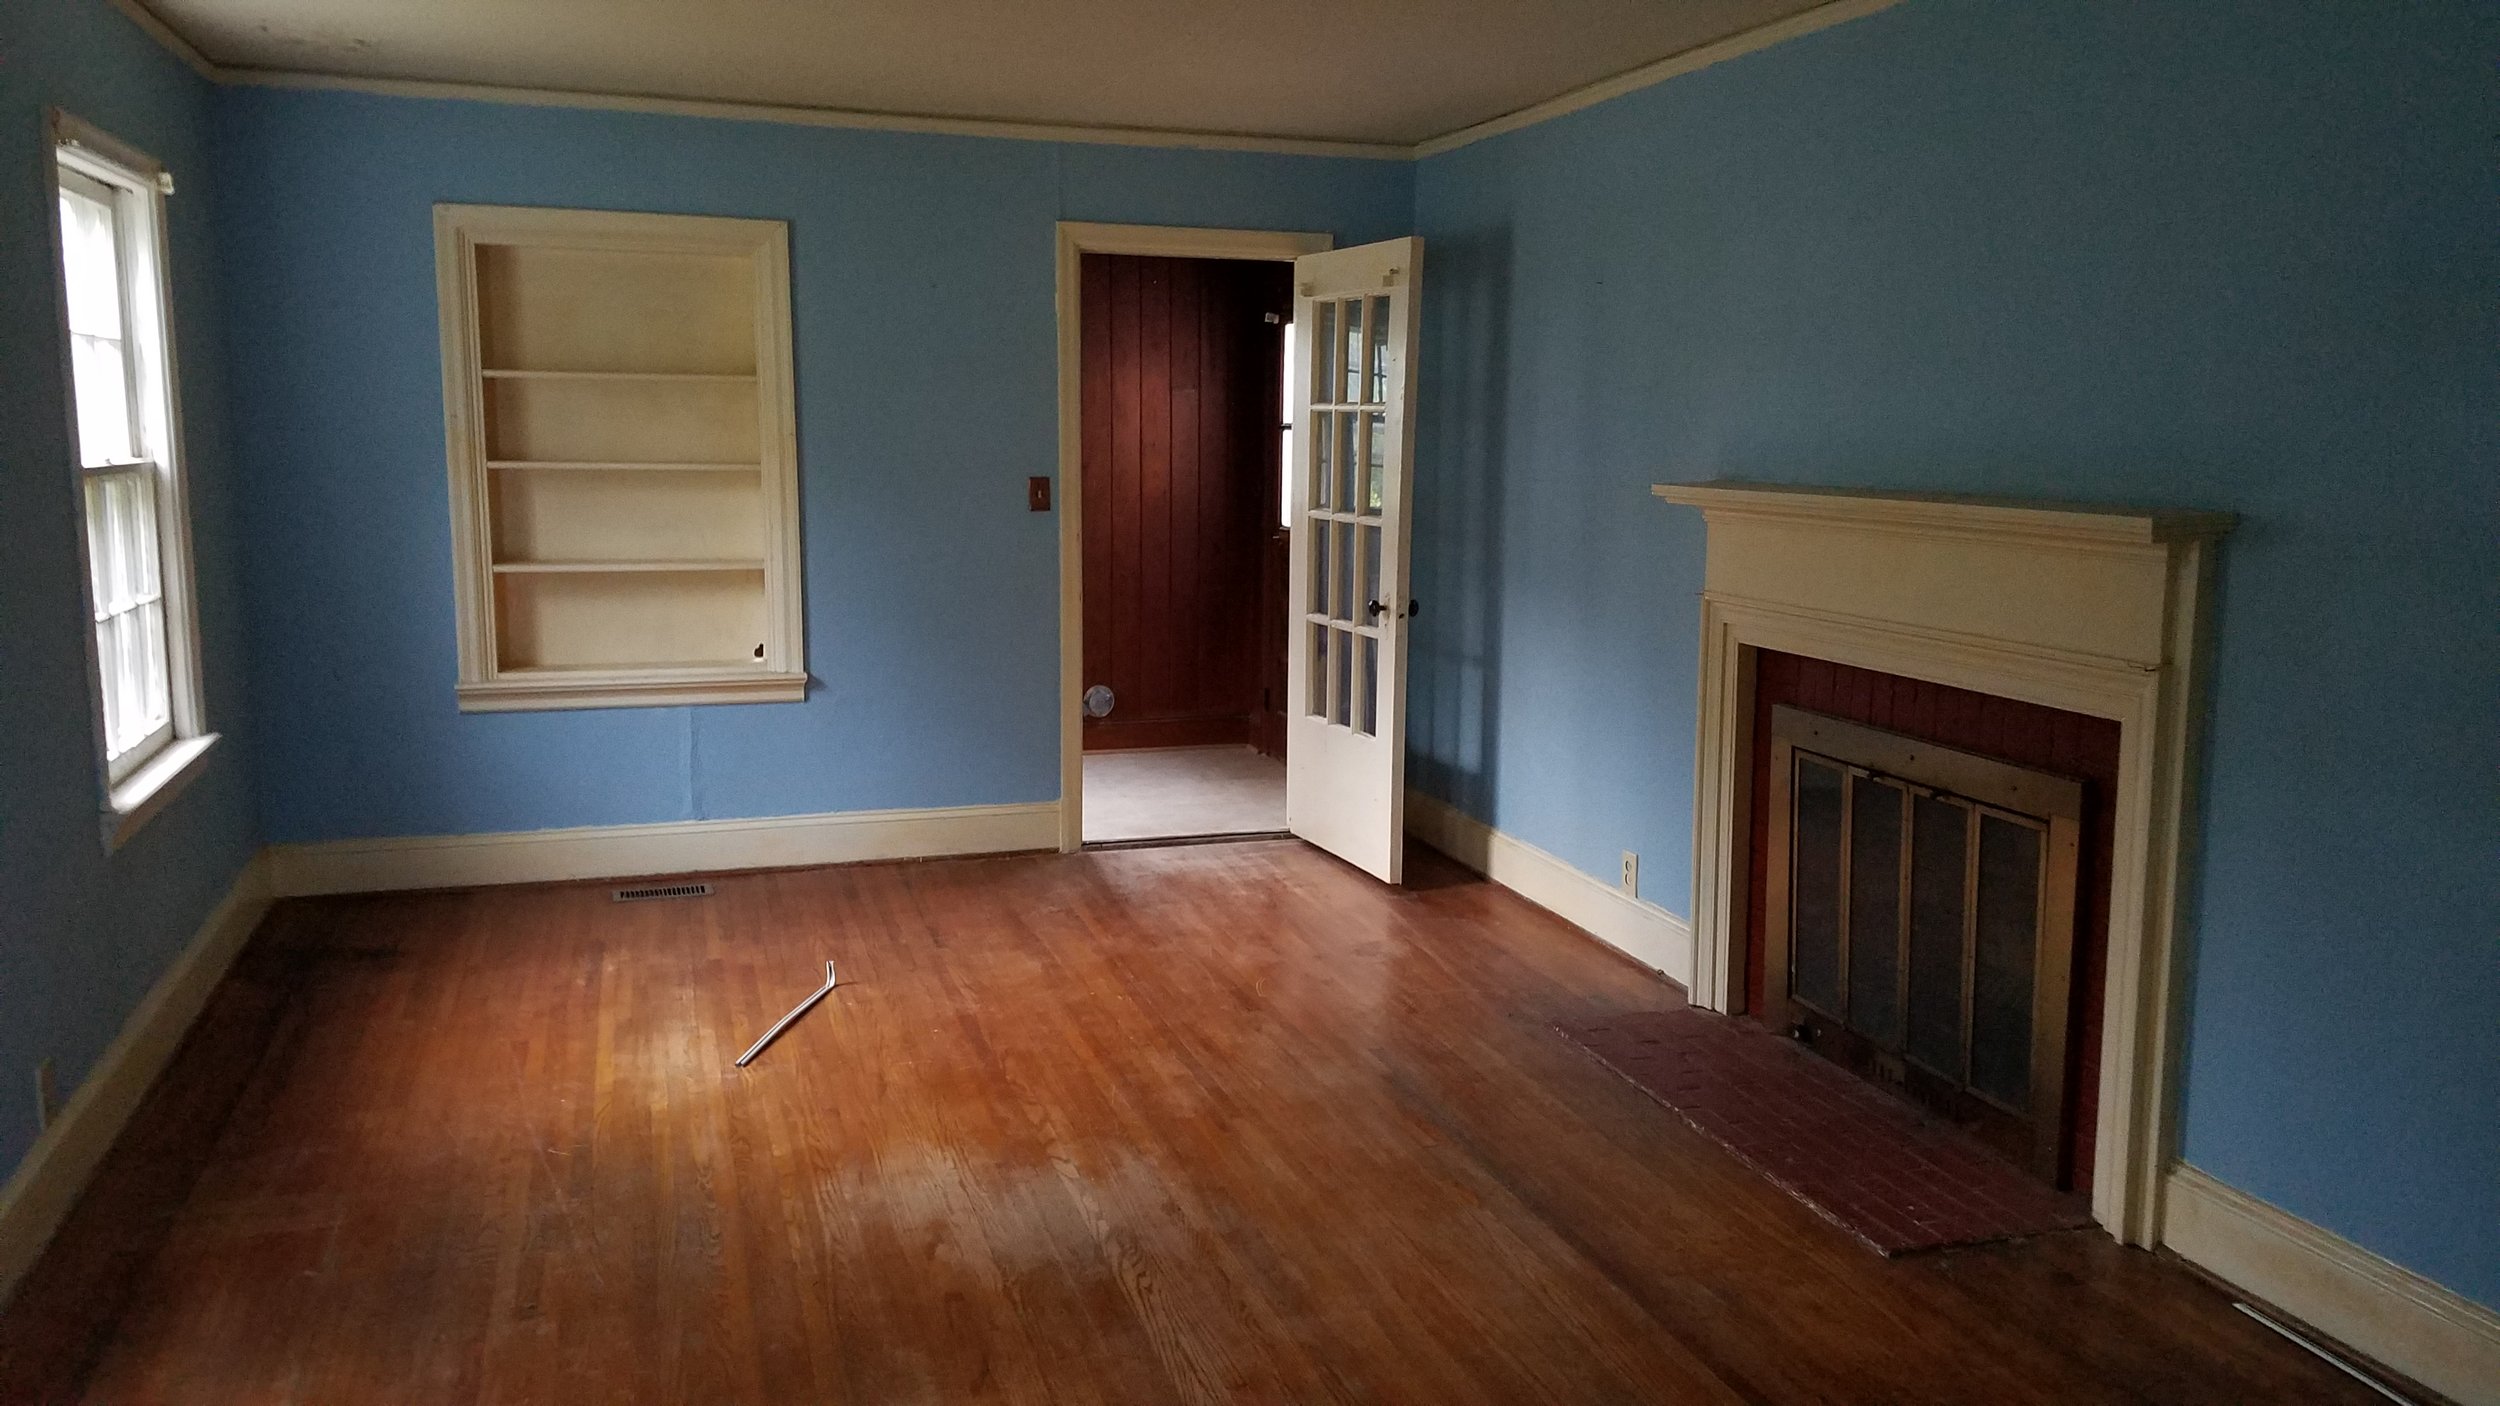


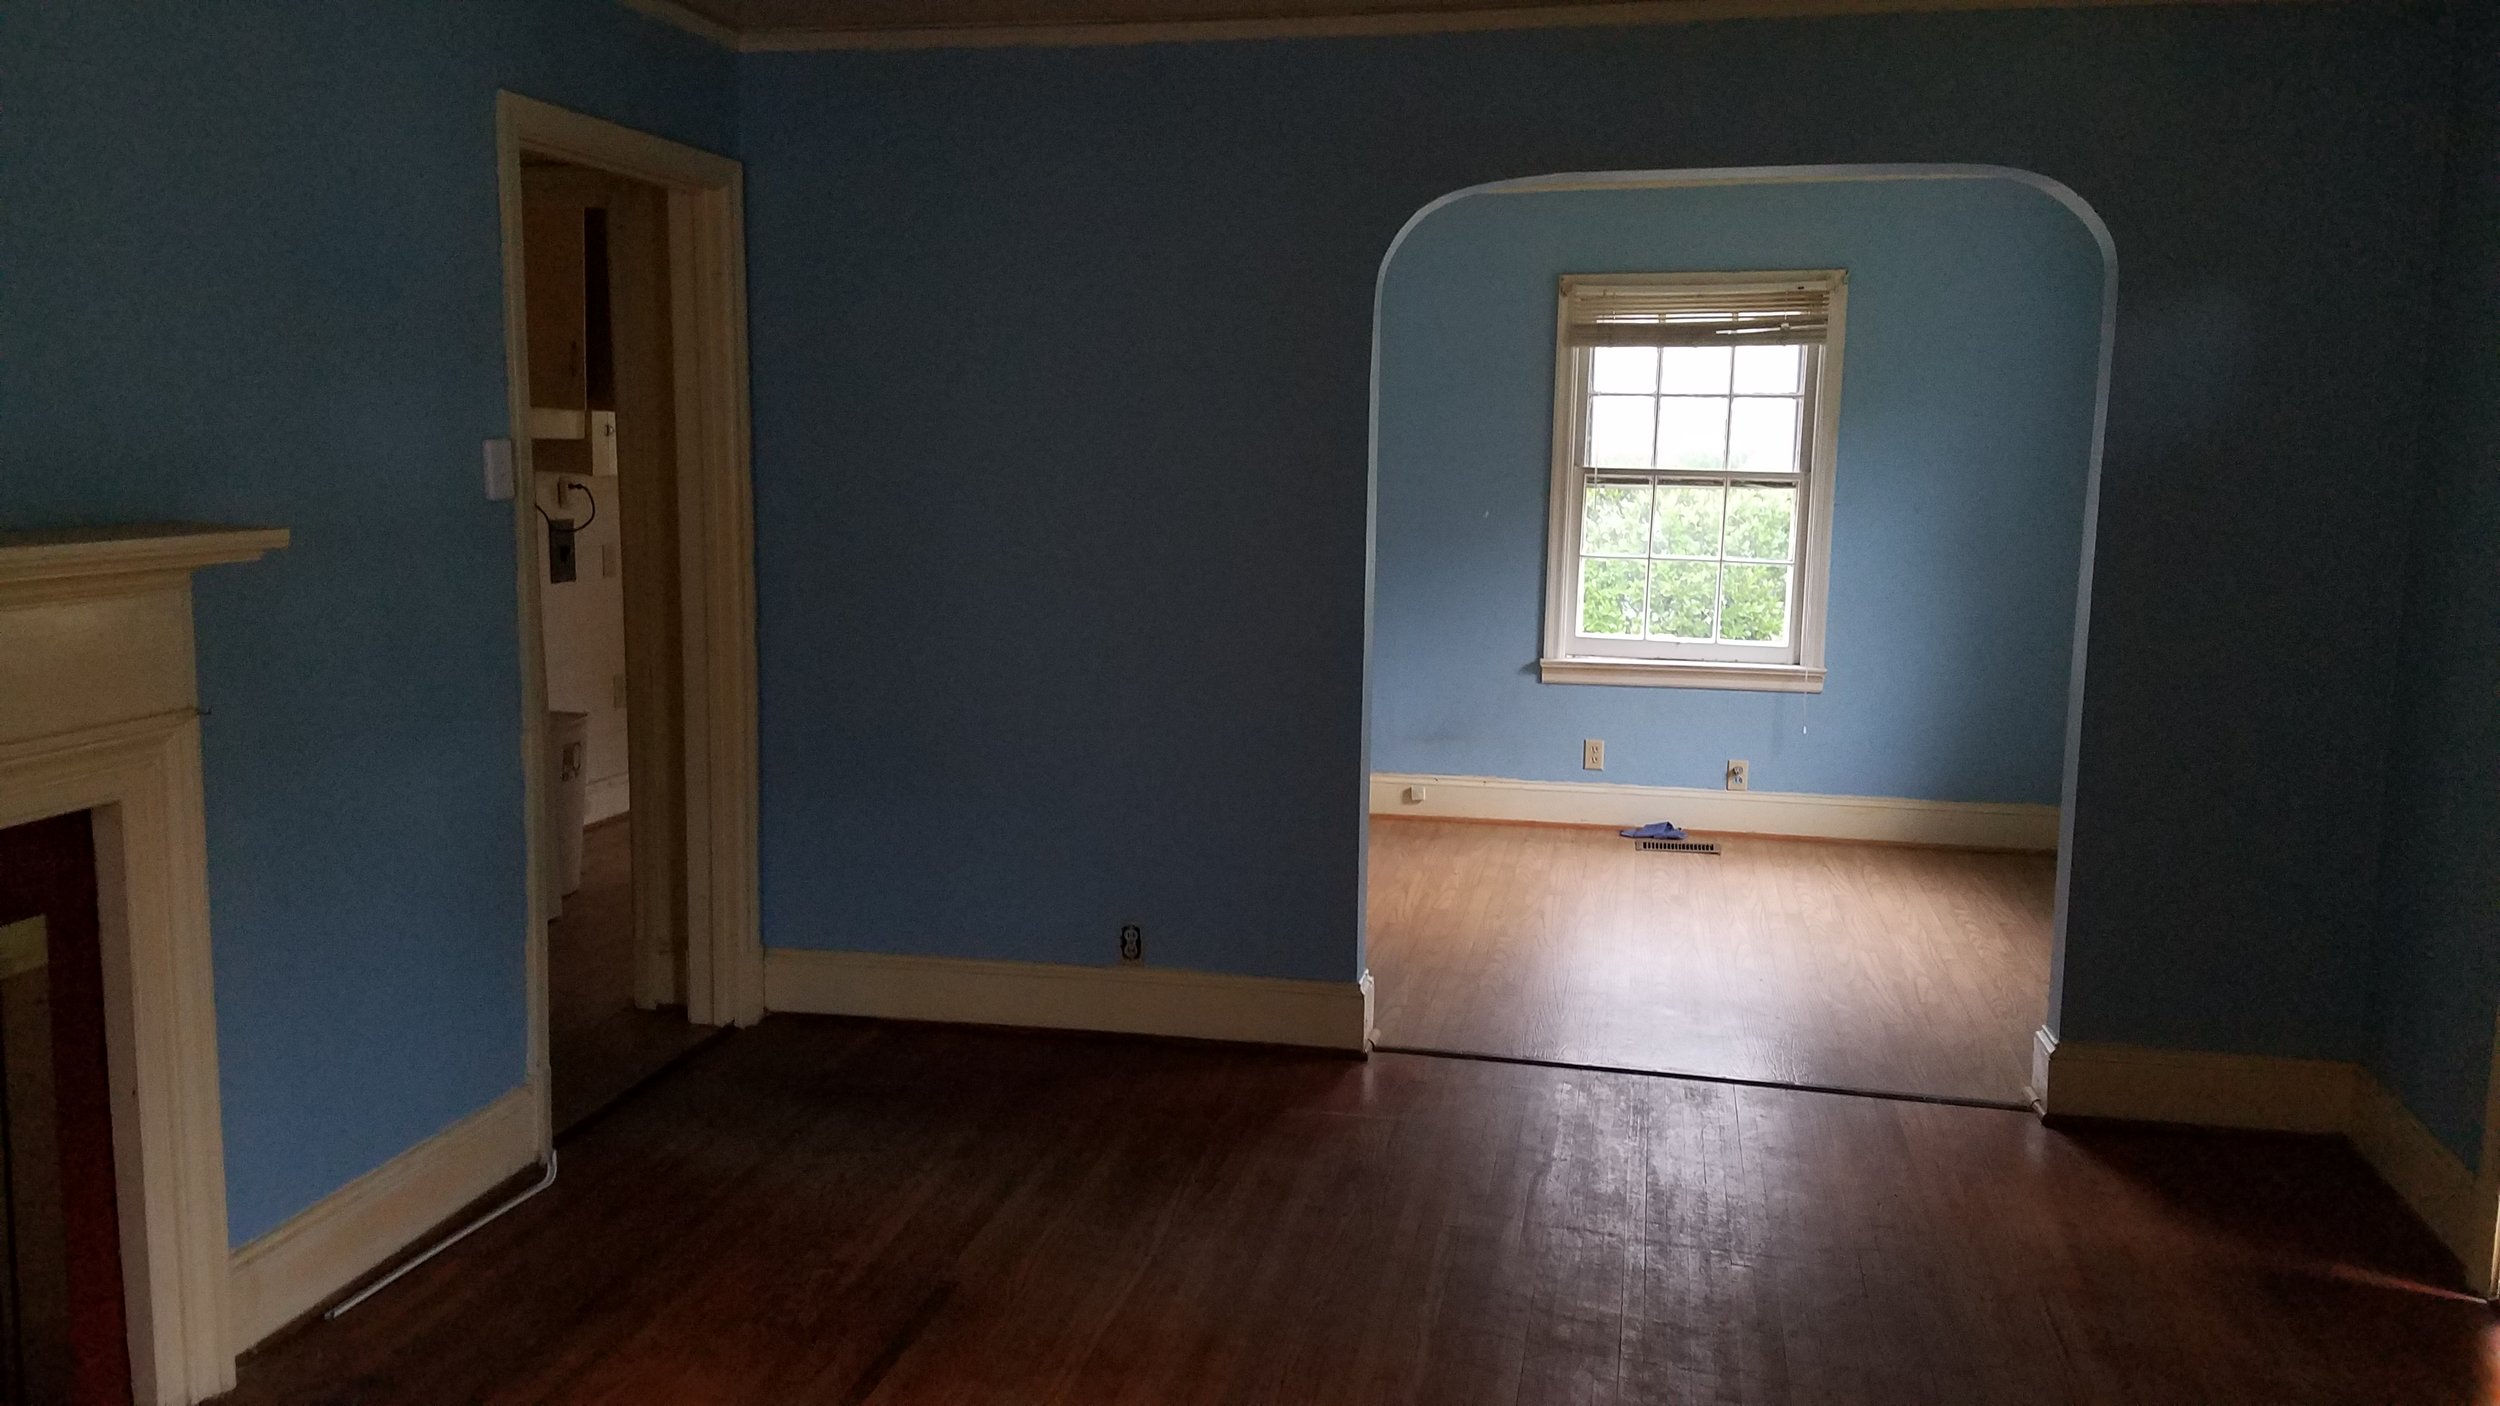


I hope you enjoyed the before and afters of the living room! Stay tuned for the rest of the series! Stay safe during the hurricane please!
Casey